16.3 Firefox Policy
The Firefox policy is used to configure the Mozilla Firefox Web browser.
The Firefox policy is supported only if the lockdown version of Firefox is available on the Novell Linux Desktop, SLED 10, and SLED 11 devices.
For more information on the lockdown version of the Firefox, see the Opensuse web site.
The Firefox policy is additionally supported on SLES 10 and SLES 11 devices if you apply ZENworks 7.3 Linux Management Hot Patch 1.
To configure the Firefox policy:
-
In the ZENworks Control Center, click the tab.
-
In the Policies list, click , then click to display the Create New Policy page.
-
In the Policy Type list, click , then click to display the Policy Name page.

-
Fill in the fields:
-
Policy name: (Required) Provide a unique name for the policy. The name you provide displays in the ZENworks Control Center interface, which is the administrative tool for ZENworks Linux Management.
For more information, see Section C.0, Naming Conventions in the ZENworks Control Center.
-
Folder: (Required) Type the name or browse to the folder that this policy will be created in. Folders display in the ZENworks Control Center.
-
Description: Provide a short description of the policy. This description displays on the policy's Summary page in the ZENworks Control Center interface.
-
-
Click to display the Firefox Lockdown Settings page.

-
Select the desired options (by default, all options are disabled):
Disable Javascript control of window chrome: Select this option to disable the JavaScript control and modification of the Firefox Web browser's window chrome.
The chrome is part of an application window that is positioned outside of the window's content area. A Web page can use JavaScript to control and modify the window chrome. Several elements such as the toolbar, menu bar, progress bar, and title bar are part of the chrome.
Disable URL bar: Select this option to prevent users from manually entering URLs in the address bar.
Disable web search: Select this option to prevent users from using the Web search bar to search the Web pages. If you select this option, the search bar and option are disabled.
Disable bookmark editing: Select this option to prevent users from editing a bookmark.
Hide bookmarks: Select this option to hide bookmarks, including all the bookmarks listed in the menu and bookmarks toolbar. Make sure that you select if you select the option.
Disable toolbar editing: Select this option to prevent users from editing the toolbar. A toolbar can contain buttons with images and menus, or a combination of both.
Disable history: Select this option to prevent users from accessing the History, which contains links to pages recently visited.
Disable saving of password: Select this option to prevent Firefox from saving users' passwords. Whenever a user enters a password in Firefox, it prompts the user and asks if the password should be saved. If the user clicks Yes, Firefox saves the password and fills it in automatically whenever the user visits that page again.
Disable updates to themes: Select this option to prevent users from updating a theme file.
The theme file contains the Control, Window Border, and Icons elements, which determine the appearance of user's browser. Themes are skins for Firefox, and they allow you to change the look and feel of the browser and personalize it to your taste. A theme can simply change the colors of Firefox or it can change the entire browser appearance.
Disable updates to extensions: Select this option to prevent users from updating the extensions to add a new functionality to Firefox.
Extensions are add-ons that add new functionality to Firefox. They can add anything from a toolbar button to a completely new feature. Extensions customize the browser to fit the personal needs of each user. For example, an extension can be used to add an IRC client to Firefox or to automatically copy highlighted content to the clipboard.
-
Click to display the Firefox Configuration Settings page.

-
Select the desired options (by default, all options are disabled).
For each option you enable, provide a value. When you enable an option, it is locked by default. You can unlock the option by clicking
 . The options that are not enabled are excluded from the policy and are not applied to the device.
Homepage URL: Specify the URL to automatically display when users launch the Firefox Web browser.
Allow popups: Select this option to allow or disallow pop-ups to be displayed in the Firefox Web browser.
Allow Java: Select this option to allow or disallow Java applications to run on the Firefox Web browser.
Allow JavaScript: Select this option to allow or disallow JavaScript applications to run on the Firefox Web browser.
Allow sites to set cookies: Select this option to configure how Firefox handles cookies.
A cookie is a piece of information given to a Web browser by a Web server. The browser stores this information in a file.
You can select a value in the Keep Cookies drop-down list to specify if a Web server should be allowed to set cookies.
If you select Yes, specify how long to store the cookies:
-
Until they expire: Firefox retains a cookie until it expires.
-
Ask me every time: Firefox asks the user about the action to be taken with each cookie. Users can select , , or .
-
Until I close Firefox: Firefox retains cookies while the browser is open. When the browser is closed, Firefox removes all cookies.
Allow loading of images: Lets you specify the source from where images are loaded.
The following options are available:
-
Anywhere: If you select this option, images are loaded regardless of their source.
-
From originating website only: If you select this option, images are loaded only if the source of the images is the current site.
-
Never: If you select this option, Firefox never loads images.
Disk space for temporary files: Specify the disk space allowed to store temporary files for the browser.
Download folder: Lets you specify the directory where you want users to save downloaded files.
The following options are available:
-
Ask the user where to save every file: If you select this option, Firefox asks the users where to save files every time files are downloaded.
-
Save all files to this folder: If you select this option, specify a location to save files.
The following options are available:
-
Desktop: Select Desktop to save downloaded files on the Desktop.
-
My Downloads: Select My Downloads to save downloaded files in the My Downloads folder.
-
Home: Select Home to save the downloaded files in a folder in the Home directory.
-
Other: Select Other to store the downloaded files in a location of your choice. Specify the complete path, including the directory where the downloaded files should be saved.
-
-
-
Click to display the Summary page.
-
Click to create the policy as configured according to the settings on the Summary page. If you click , the Firefox policy is created but it does not have devices assigned or a schedule specified. At some point in the future, you need to configure additional options for the policy by continuing with Section 17.4, Assigning Policies.
or
Click to display the Policy Assignment page to perform the following tasks:
-
Specify assignments for this policy
-
Specify the schedule for this policy
-
Specify groups for this policy

-
-
Assign the policy to the devices.
-
Click to browse for and select the appropriate Server or Workstation objects.
You can also select Folder or Group objects.
-
Click the down-arrow next to or to expand the list, then click the underlined link in the column to select the desired objects and display their names in the list box.
Assigning a policy to a Group object is the preferred method of assigning the policy. Assigning the policy to a large number of objects (for example, more than 250) might cause increased server utilization.
-
Click .
-
-
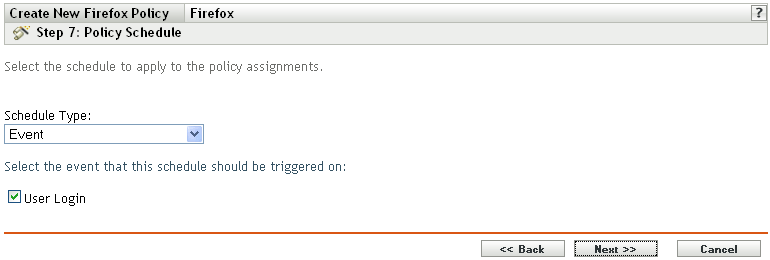
Click to display the Policy Schedule page.
-
Select the schedule to apply to the assignments from the drop-down list, then select the desired options, which vary, depending on the schedule type you select.
The settings you configure on this page determine when the policy is applied to devices.
See Section 15.3, Schedules for information about the available schedules and their options.
-
Click to display the Policy Groups page.

-
(Optional) Click to open the Select Groups dialog box, then click the underlined links in the Name column to select the desired policy groups and display their names in the Selected list box.
Using policy groups eases administration efforts by letting you group several policies so you can use common assignments, schedules, and so forth, rather than configuring these settings for each policy you create. For more information, see Section 17.3, Creating Policy Groups.
-
Click to display the Finish page.
-
Review the information on the Finish page, making any changes to the policy settings by using the button as necessary. Click to create the policy as configured according to the settings on the Finish page.