Novell iPrint Appliance 1.1 Quick Start
This guide is intended for users who want to evaluate Novell iPrint. It provides the basic instructions to set up the Novell iPrint Appliance and print your first job. This guide uses VMware vSphere as an example virtualization platform to deploy the Novell iPrint Appliance. However, the Novell iPrint Appliance can also be deployed on virtualization software that can run the .ovf, .vhd, or .xen file formats (such as Windows Hyper-V, Citrix XenServer, VMware ESX, or VMware Workstation).
Refer to the Novell iPrint Appliance 1.1 Administration Guide for additional information.
You can download an evaluation version of the Novell iPrint Appliance from the Novell Downloads page (https://download.novell.com/Download?buildid=MPaEAM3RuUE~).
1.0 iPrint Overview
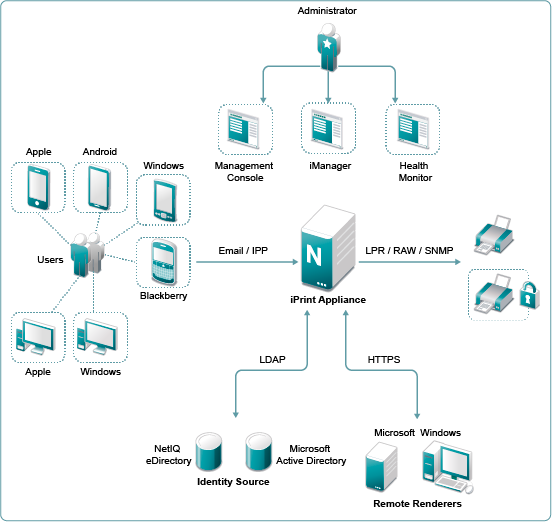
Novell iPrint provides secure enterprise print services for your desktops, laptops, and mobile devices. Novell iPrint solution integrates with any of your existing corporate printers, irrespective of the vendor of the printer or the brand, allowing you to deliver self-service printer provisioning to your device users. Some of the prominent features of Novell iPrint include:
Simplified enterprise printing: Novell iPrint connects all of your organization's workstations and mobile devices to your current printers.
Self-service printing: You can print from your desktops, laptops, or mobile devices without waiting for the helpdesk to set up a printer.
Mobile device printing: If you are using iOS, Android, Windows, or BlackBerry mobile devices, you can download the Novell iPrint app, which allows you to print from your mobile devices directly to any of your organization's printers.
Printing by scanning the QR Code: Scan a QR code to quickly connect your mobile device to a specific printer.
Printing through email: Any email-enabled device can print to any iPrint printer by sending the print job in the body of the email or as an attachment.
Leveraging your current directory service: Novell iPrint makes secure printing easy by integrating its data store with your identity directory. It works with lightweight directory access protocol (LDAP) directories such as Active Directory and NetIQ eDirectory.
The Novell iPrint components are illustrated in the figure below:
2.0 Deploying the Novell iPrint Appliance
-
Download and extract the iPrint Appliance software.
You can download an evaluation version of the Novell iPrint Appliance from the Novell Downloads page (https://download.novell.com/Download?buildid=MPaEAM3RuUE~).
-
In your vSphere Client, click > .
-
Follow the on-screen instructions.
-
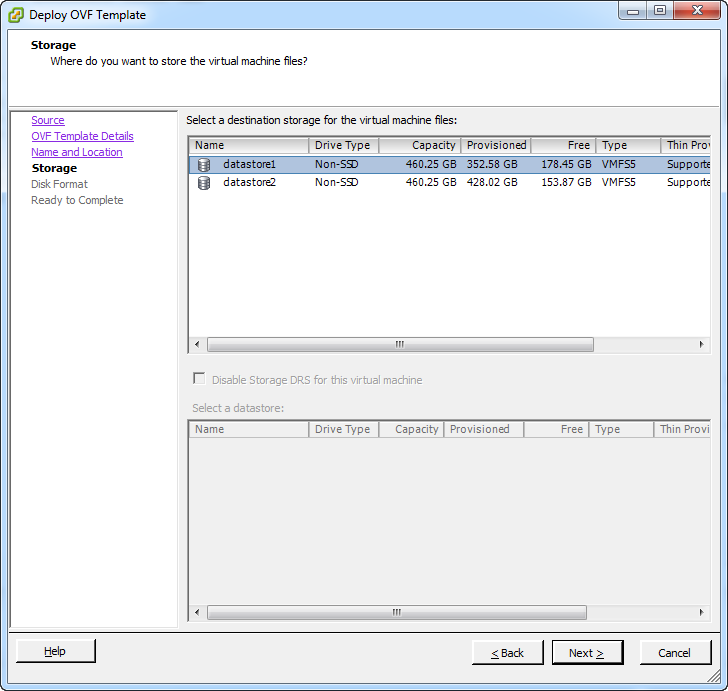
On the page, select a storage repository where the disk images for the imported VM will be placed, then click .
-
On the page, retain all default settings, then click .
-
Click to successfully deploy the iPrint Appliance.
-
Power on the virtual machine.
-
Right-click the newly created virtual machine, then select > .
The powering on process takes some time because the Novell iPrint is deployed only after powering on the virtual machine. You can navigate to the tab in your virtual machine to monitor the deployment process.
-
-
When the VM is powered on, navigate to the tab and accept the license agreement.
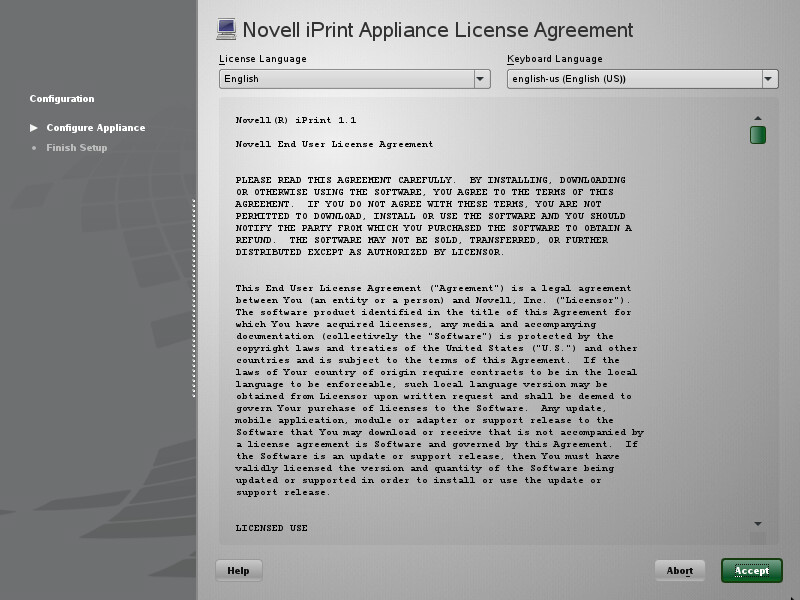
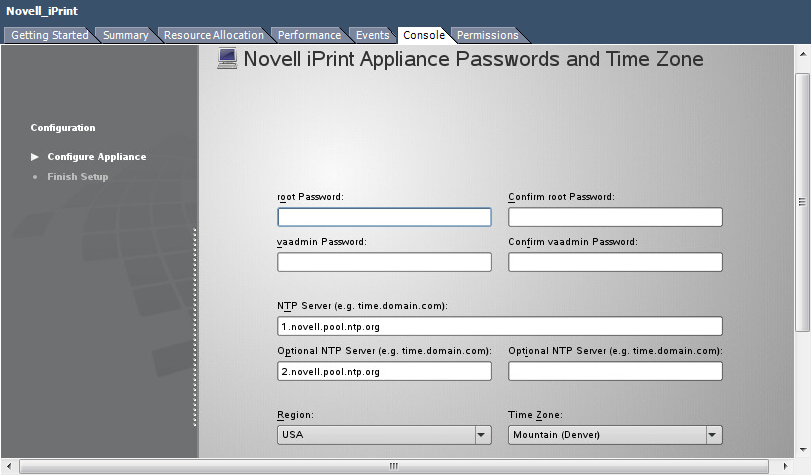
Once you accept the license agreement, the Novell iPrint Appliance Passwords and Time Zone page is displayed.
-
Specify all the required details, such as , , details, , and its corresponding .
-
Click .
The Novell iPrint Appliance Network Settings page is displayed.
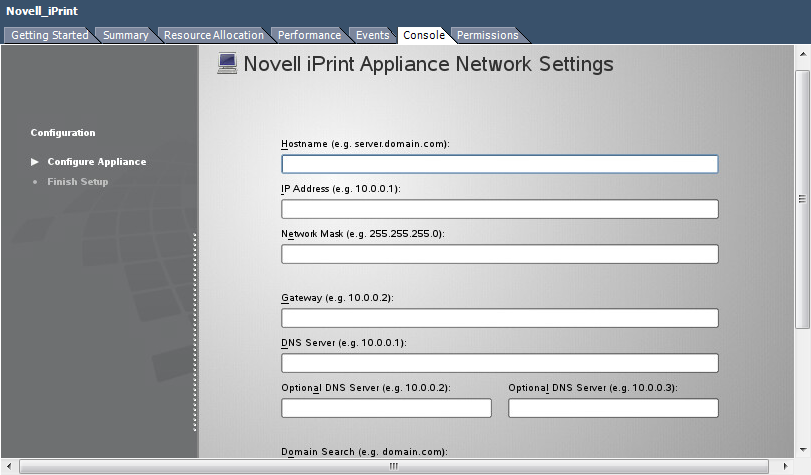
-
Specify all the required details, such as , , , details, and details.
Host name is a fully qualified DNS host name associated with the IP address of the iPrint appliance. You must register the host name in the DNS server before proceeding to the next step. After you have registered the host name in the DNS server, open the command prompt on Windows or a terminal session on Linux on the same network where the iPrint Appliance is located, and type nslookup <ipaddress> to get the host name. For example, nslookup 192.168.1.255.
-
Click .
The Novell iPrint Appliance Data Store Location page is displayed.
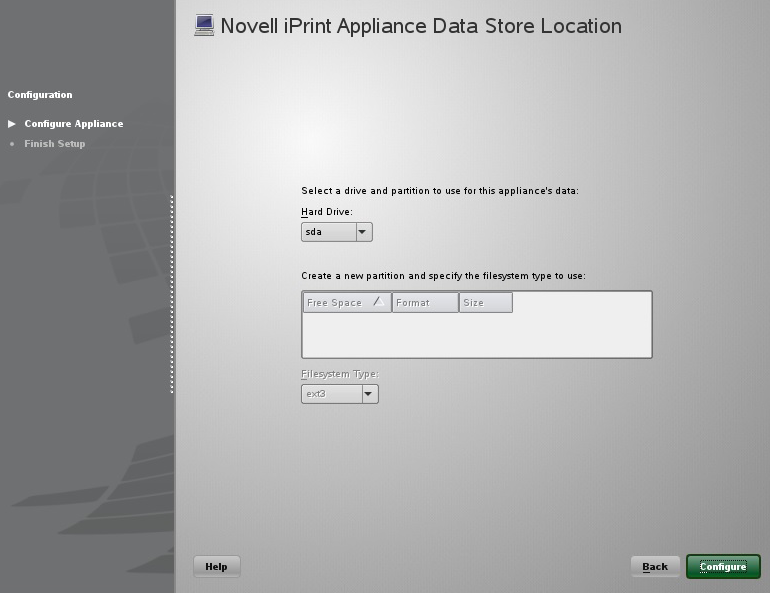
-
Click .
Because you have not added a secondary disk to the iPrint Appliance, the YaST2 warning page is displayed. You can ignore this message and click .
-
Upon successful installation, a message stating, “The system is ready for appliance configuration” is displayed. After the installation is complete, a URL and an IP address to access the iPrint Appliance Management Console is displayed. Using a web browser, you can navigate to the iPrint Appliance Management Console URL.
3.0 Configuring the Novell iPrint Appliance
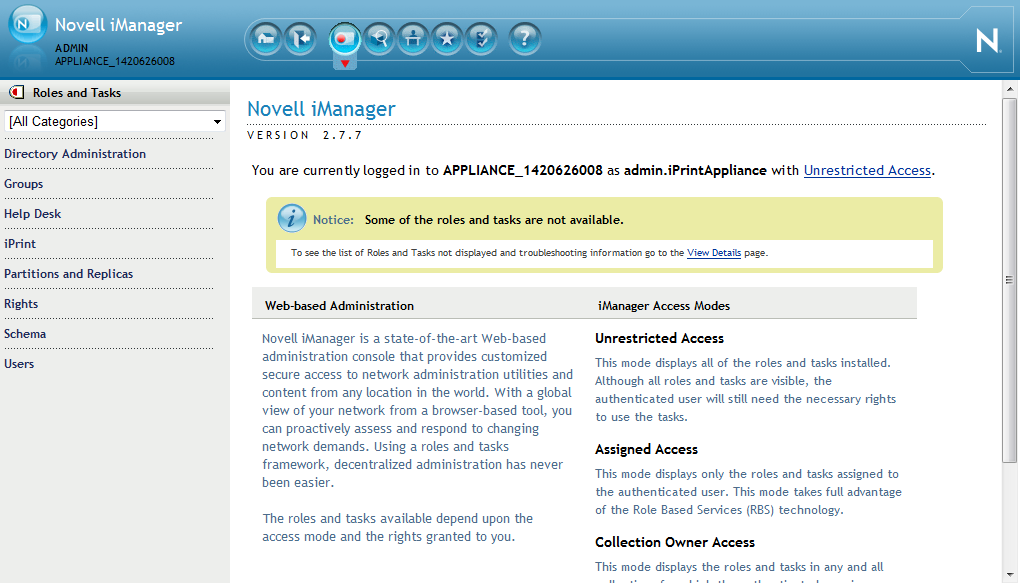
You can configure the Novell iPrint Appliance through the iPrint Appliance Management Console.
3.1 Initial Configuration Using the Management Console
-
On a web browser, use either the DNS name or the IP address to access the iPrint Appliance Management Console. For example, https://10.0.0.1:9443 or http://iprint.example.com/admin.
Ignore the security certificate warning, and continue to the iPrint Appliance ManagementConsole.
-
Specify the same password that you provided in Step 9, then click .
The iPrint Appliance Management Console is displayed.
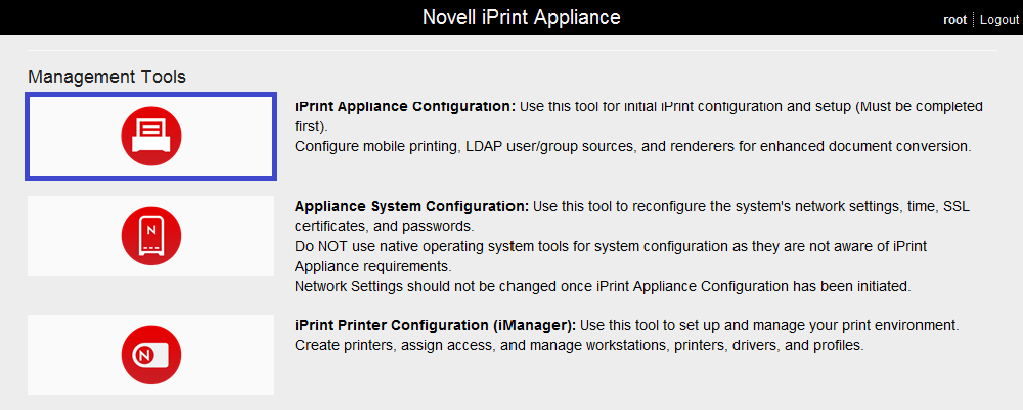
-
Click the icon.
-
Select , then click .
The iPrint Initial Configuration Wizard is displayed.
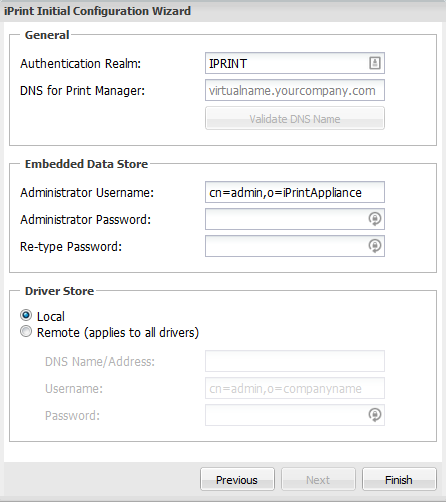
-
In the section, specify the following information:
Authentication Realm: Continue with the default value IPRINT.
DNS for Print Manager: Specify the DNS name of the iPrint Appliance. The specified DNS name must resolve to the IP address of the Appliance. You must validate that the DNS address is correct and functional before continuing, because a wrong DNS address can result in errors.
In the section, specify the following information:
Administrator Username: The administrator user name is pre-populated and is not editable.
Administrator Password: Specify the administrator password and confirm it again. Thispassword is used to log in to iManager.
In the section, specify the following information:
Local: By default, Local is selected. Continue with the selection.
-
Click .
The configuration process might take some time to complete. Upon successful configuration, the Print Manager and Driver Store are created under the container.
3.2 Configuring Printers Using Novell iManager
Novell iManager is a web-based tool that allows you to set up and manage your print environment. It allows you to create printer objects, upload printer drivers, assign printer drivers to printer objects, and so forth.
Uploading Drivers
On Linux:
-
You can upload the printer drivers using Mozilla Firefox. The standard file format of the driver is a PPD (Postscript Printer Description) file.
On Windows:
-
You must upload only the printer driver through Microsoft Internet Explorer. Ensure that you are running Microsoft Internet Explorer as an Administrator by right-clicking Microsoft Internet Explorer and selecting the option.
-
You can download the printer drivers from the web. While downloading the printer driver, you must either select the.inf file provided by the printer manufacturer or select a printer driver that was shipped with your Windows operating system. Depending on what you choose, the printer driver is installed on the Windows workstation during the driver upload process to the Driver Store.
The following procedure is an example of uploading a printer driver on a Windows 7 64-bit workstation.
-
Click on the Novell iPrint Appliance web page.
-
Click the icon.
Accept the security certificate if prompted, and login by providing the administrator password that you specified in Step 5.
The Novell iManager page is displayed.
-
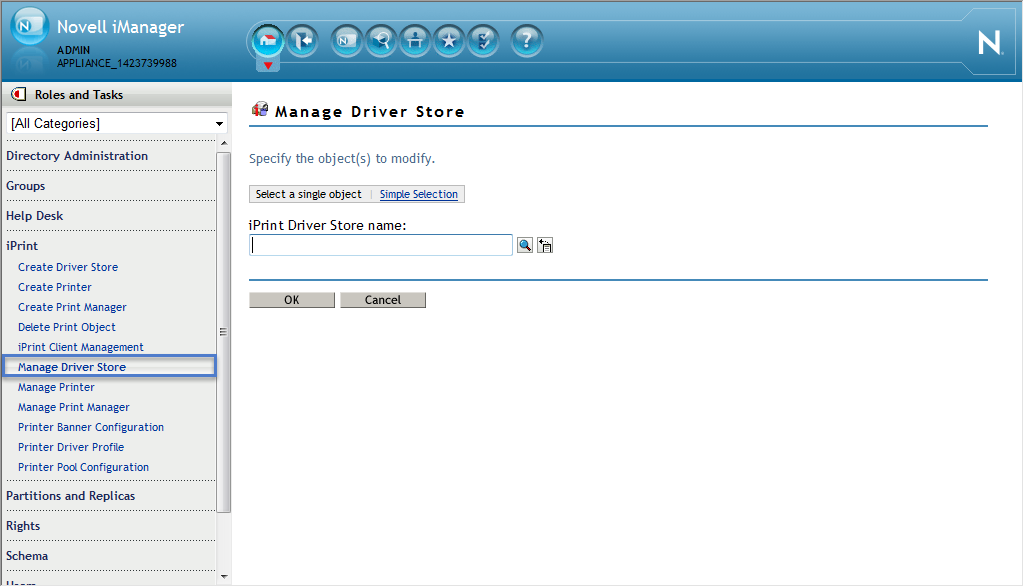
Click > .
-
On the tab, click the icon and select the iPrint Driver Store from the displayed list.
-
Click .
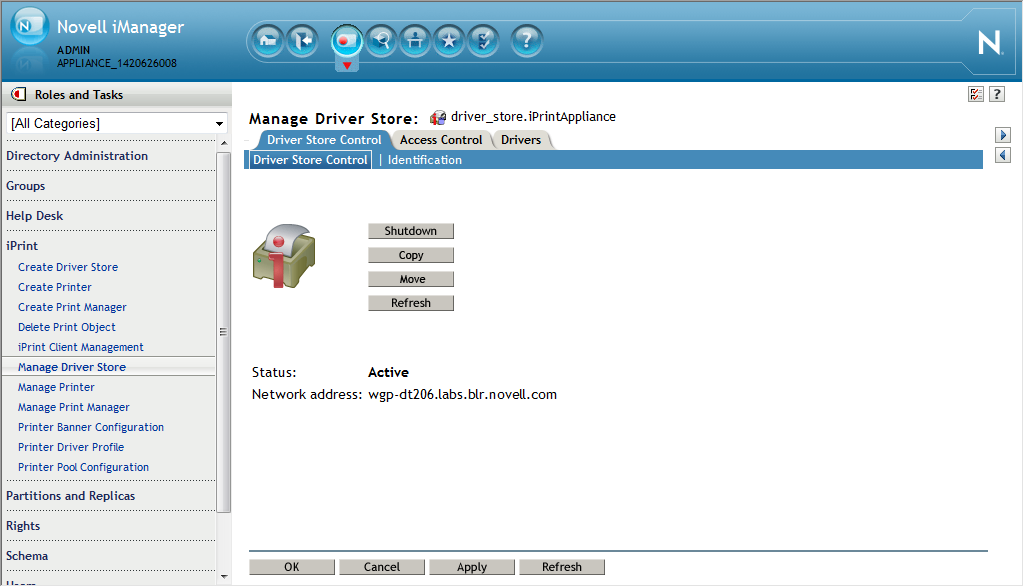
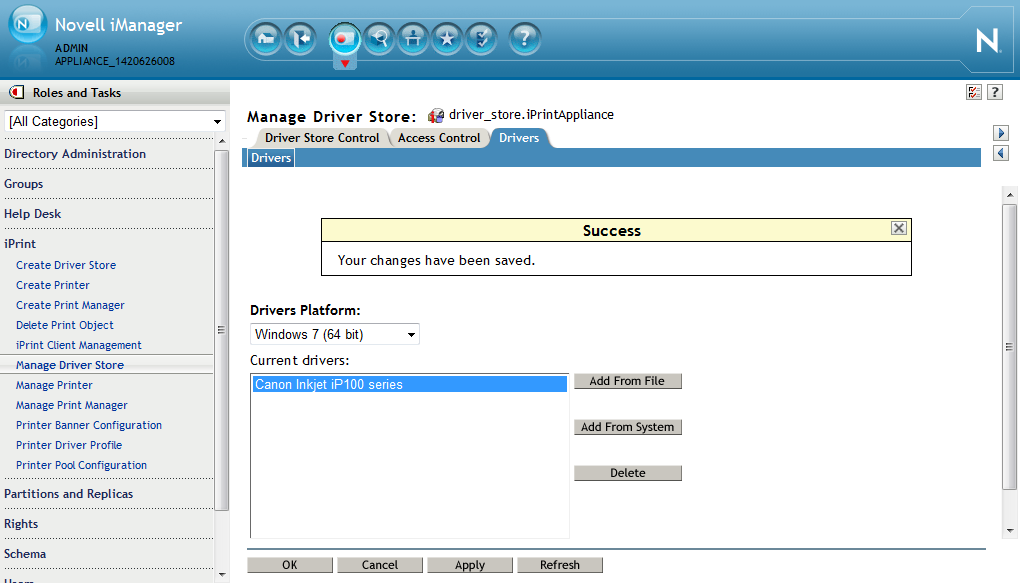
The Manage Driver Store page is displayed.
-
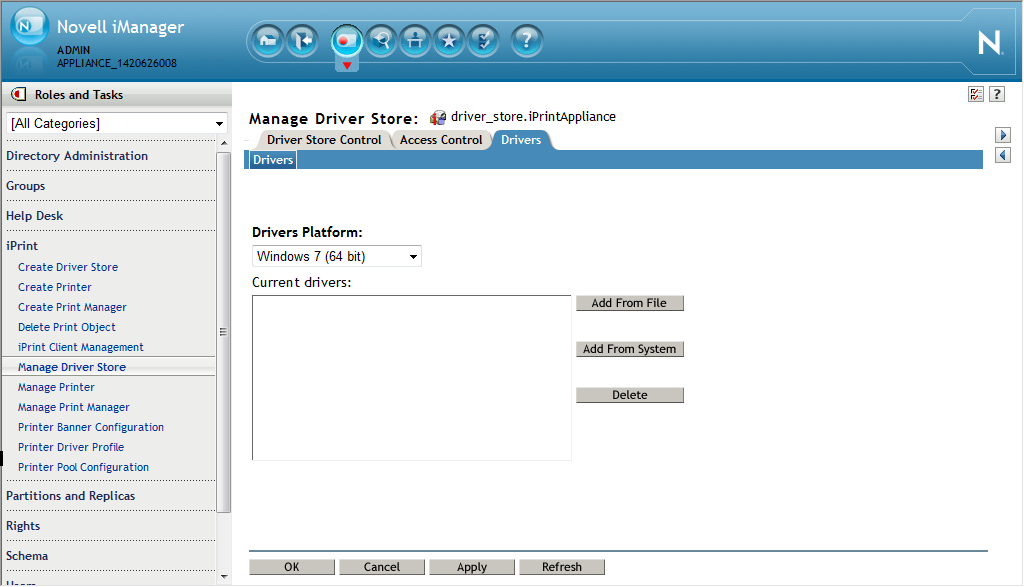
Navigate to the tab, and depending on the operating system you are using, select the operating system from the drop-down list.
IMPORTANT:As a prerequisite, you must install the iPrint Client before uploading the driver. For instructions, see Section 4.0, Installing the iPrint Client.
-
Click .
The dialog box is displayed.
-
From the dialog box, select the printer manufacturer and the corresponding printer.
-
-
Click .
The selected operating system driver platform and the corresponding printer driver is displayed on your Novell iManager page.
-
Click and .
-
Click > .
The Create Printer page is displayed.
-
Specify all the required details:
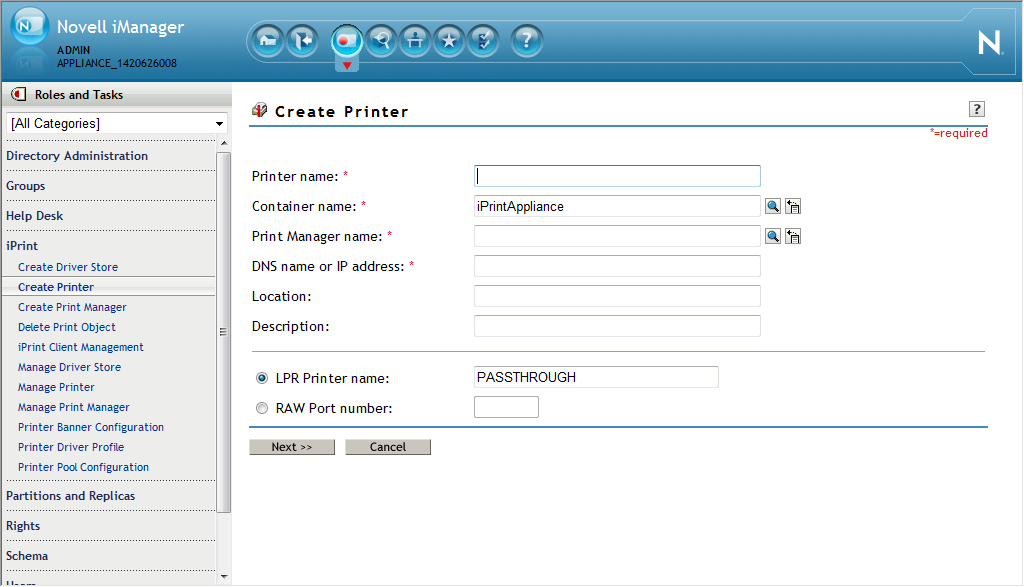
Printer name: Specify the name of the printer. This name will be used to advertise the printer as an iPrint printer.
Container name: Continue with the default value .
Print Manager name: Click the icon and select the print manager under the container.
DNS name or IP address: Specify the host name or IP address of the printer.
Location: Specify the location of the printer.
Description: Specify a brief description.
LPR Printer name: Continue with the default value .
If the RAW protocol is selected, a port number is required. Most printers are configured, by default, to use port 9100 for RAW protocol communications.
-
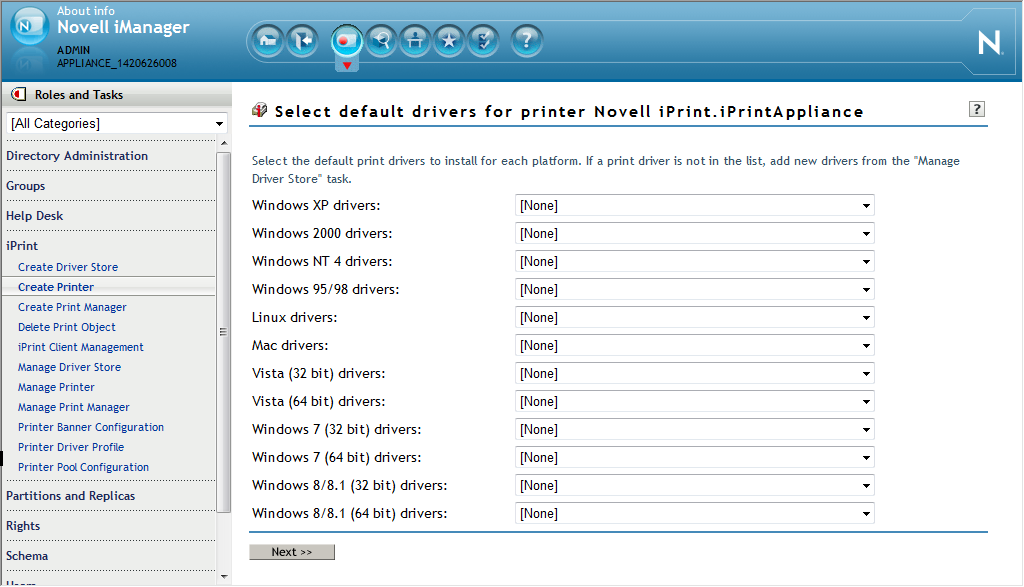
Click to select the default printer drivers to install for each of your operating systems. If a printer driver is not in the list, click to proceed to the next step.
If a printer driver is not in the list, depending on the operating system you are using, you should upload the appropriate printer driver.
-
Click .
-
Click .
-
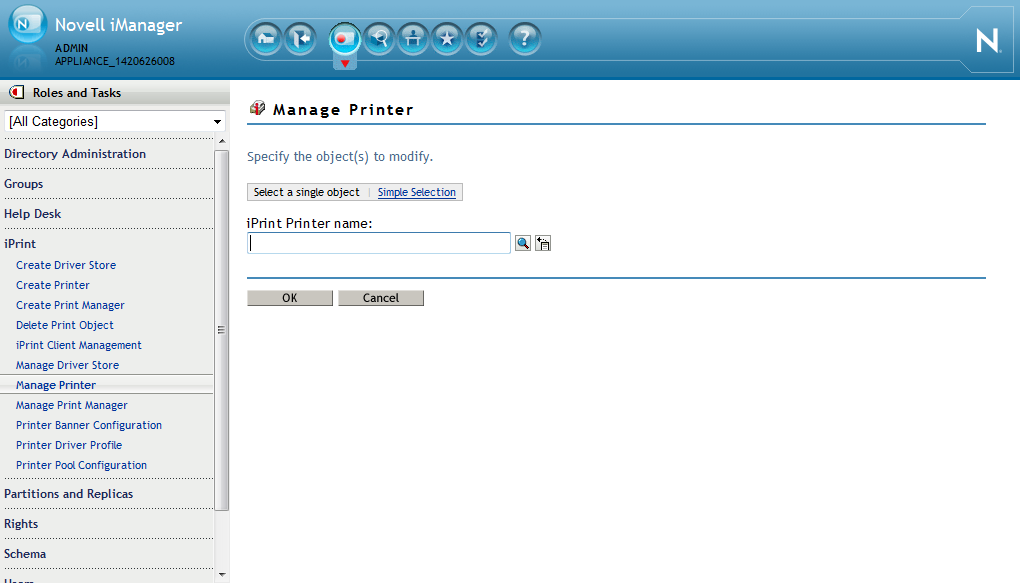
Click .
-
Click the icon and select the printer from the displayed list.
-
Click .
-
Navigate to the tab and select the applicable operating system from the list.
Depending on the operating system you selected, the corresponding printer driver is selected and displayed under the Available Drivers menu.
-
Select the printer driver from the menu, then click .
4.0 Installing the iPrint Client
-
On a web browser, use either the DNS name or the IP address to access the IPP Page. For example, https://192.168.1.255/ipp.
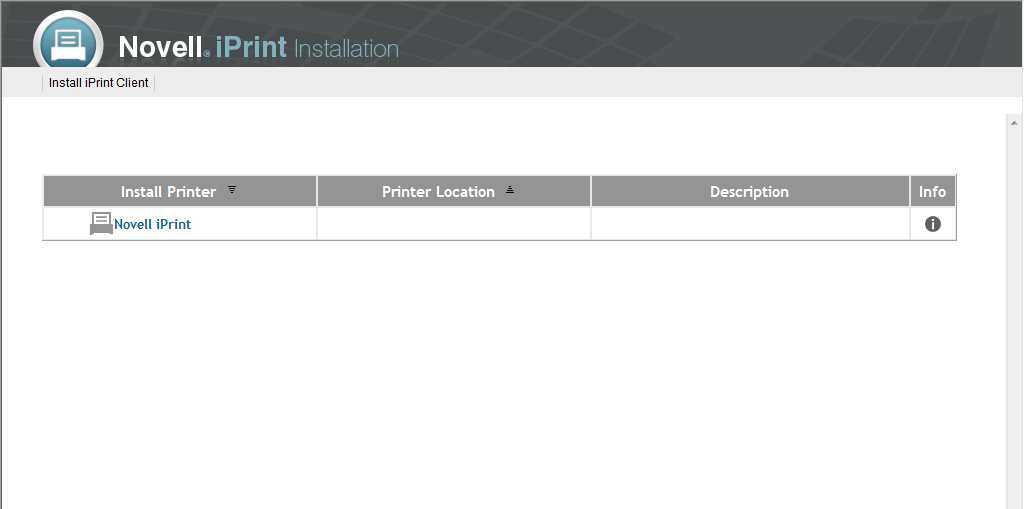
-
Click to download and install the iPrint Client.
After you install the iPrint Client, you must restart your browser.
6.0 Enabling Novell iPrint for Mobile Printing
After the Novell iPrint Appliance is deployed, you can enable it for mobile printing. If you enable the Novell iPrint Appliance for mobile printing, users or employees in your organization can download the Novell iPrint Mobile App from the Windows App Store, Google PlayStore, BlackBerry World App store, or the Apple App Store and start printing to any printer in your organization’s network, from any location using their mobile devices.
-
On a web browser, use either the DNS name or the IP address to access the iPrint Appliance Management Console. For example, https://10.0.0.1:9443.
-
Click icon. The Printers page with a list of available printers is displayed.
-
Under , click .
-
Select the printers that you want to enable for mobile printing.
The selected printers get highlighted.
-
Click > .

-
On iOS devices, you can enable AirPrint by clicking > .
After the Novell iPrint is enabled for mobile printing, you might want to print a test page to ensure that it is working properly.
NOTE:You can print to an AirPrint enabled printer from any iOS device only if the iPrint Appliance and the mobile device share the same network. If your current network configuration does not meet this requirement, see TID 7012895.
-
If a printer is not associated with a Linux driver, then the default Linux driver is used for mobile printing. If this driver is not compatible with your printer model, the printer might reject the print job, the printed copy might show some unrecognizable characters, or the quality of the printed copy might be different from what you expected. To avoid this, you need to upload the correct Linux driver and associate it with the printer, or make it the default driver.
HINT:For desktop quality printing for Microsoft Office and PDF documents, it is recommended that you install a remote renderer. The remote renderer has some minimum requirements in order to be successfully installed. For information, see Installing and Configuring a Remote Renderer
in the Novell iPrint Appliance 1.1 Administration Guide.
7.0 Enabling Novell iPrint for Email Printing
Using email printing, you can print documents from any device capable of sending emails. When you enable email printing, the email address you provide becomes the global print email address. You can also configure a printer for private email printing by providing a specific email address to each printer.
For more information, see Enabling Email Printing
in the Novell iPrint Appliance 1.1 Administration Guide.
7.1 Enabling Global Email Printing
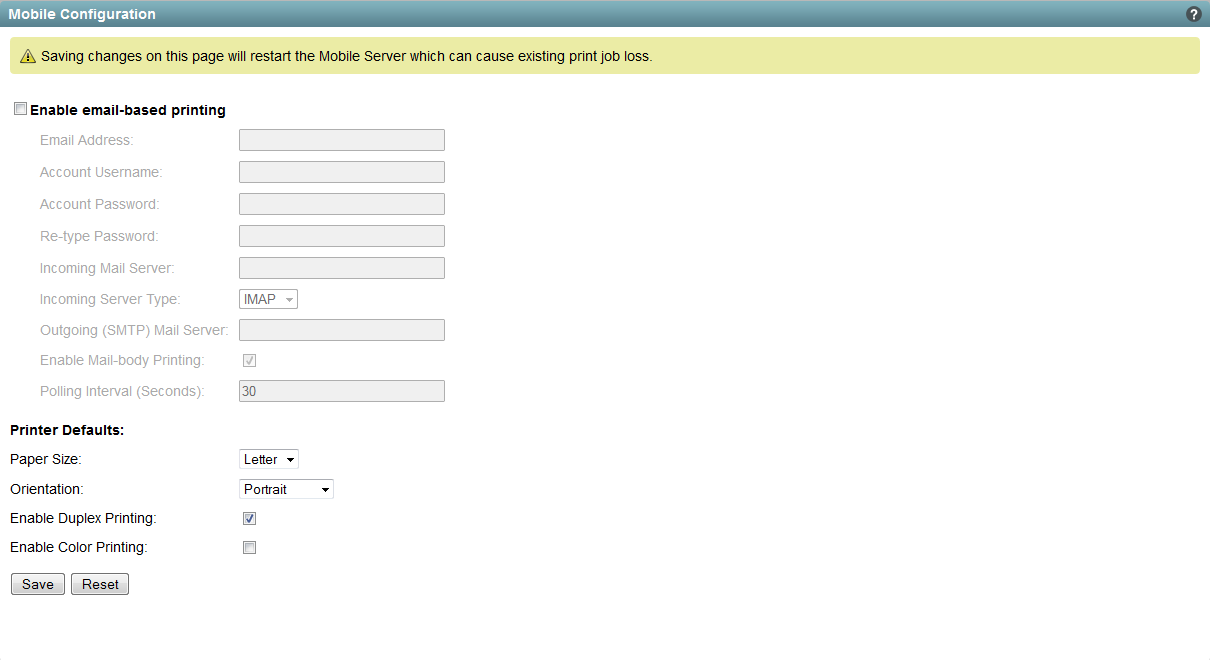
When you enable email printing, you are prompted to specify an email address. This email address is the global print email address. When configured for email printing, iPrint Appliance becomes a client to an email server. The global email account inbox is polled for incoming print jobs, which are then routed to the intended printer.
-
On a web browser, use either the DNS name or the IP address of iPrint Appliance to access the iPrint Appliance Management Console. For example, https://10.0.0.1:9443 or https://iprint.example.com:9443.
-
Specify the user name and password, then click .
-
Click .
-
Under , click .
-
Choose .
This email address is the global print email address.
-
Specify the required information.
-
Click .
7.2 Enabling Private Email Printing
With private email printing, you can assign a specific email address to each printer. When a user sends an email printing request, the print job is sent directly to the printer. Users need not specify any print commands in the subject line of the email.
To enable private email printing, a global email printing account must be configured.
-
On a web browser, use either the DNS name or the IP address to access the Management Console. For example, https://10.0.0.1:9443 or https://iprint.example.com:9443.
-
Click the icon.
-
Under , click .
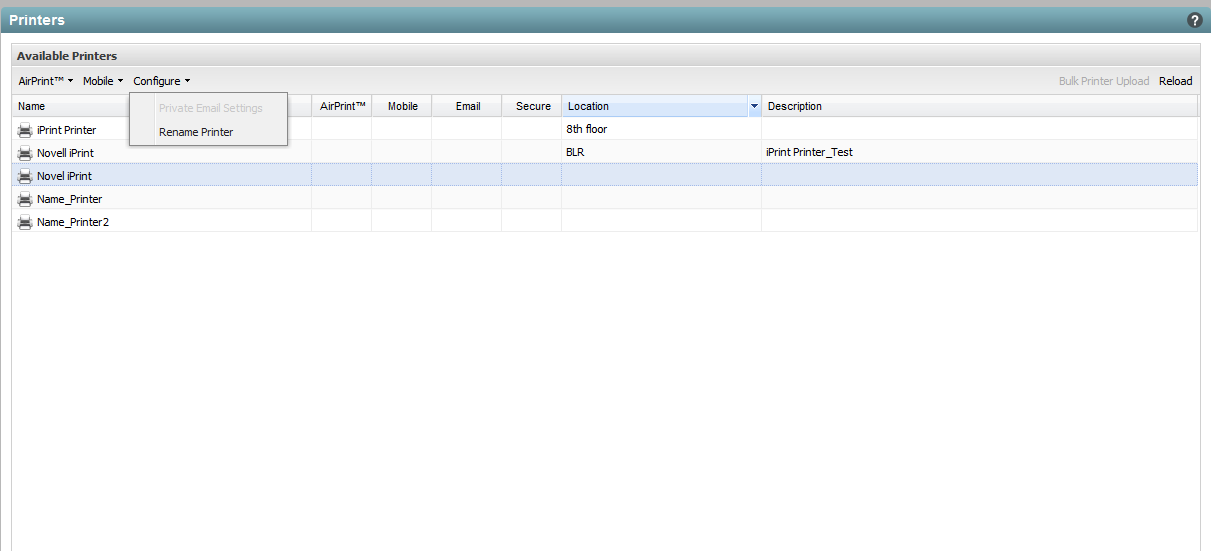
-
Select a printer, click the drop-down menu, then click .
-
Specify the required information, then click .