Database Migration from Microsoft SQL to PostgreSQL

February 2020

The Database Migration tool can be used to migrate the ZENworks zone with Microsoft (MS) SQL Server to a zone that uses PostgreSQL. Using the tool, you can either migrate to an Embedded PostgreSQL database or an External PostgreSQL database. The migration tool can be downloaded from the Micro Focus Software Licenses and Downloads.

NOTE:

  • Before migrating your zone to use PostgreSQL, ensure that you go through ZENworks Database Scalability.

  • Ensure that you use db-migration-tool-3.1.zip to migrate the database.

During the database migration, then following actions are performed:

  • If you have more than one Primary Server in the zone, then a check is performed to identify if the ZENworks services are running on the other Primary Servers.

    If the services are running on the other Primary Servers, then the migration is terminated. Ensure that the services are stopped on the other Primary Servers by running the novell-zenworks-configure -c Start command.

  • ZENworks Diagnostic Center (ZDC) check is performed on both ZENworks and Audit databases.

    If any mismatches are found, then the migration is terminated. Ensure that all the reported issues are resolved, and then re-initiate with the migration.

  • Data will be migrated from MS SQL Server to PostgreSQL.

  • After successful migration, ZENworks points to the PostgreSQL database.

Until the migration is successfully completed, ZENworks continues to use the MS SQL Server database. At any point, if the migration is terminated, you have an option to resume the migration from the point where it was halted, or you can restart the migration. For more information see, Resuming or Restarting the Database Migration. In any case, if the database migration fails, the zone is automatically rolled back to use the MS SQL Server database.

Depending on your requirements, refer to any of the following section:

1.0 Optimizing the Database Migration

Before starting the database migration, if required, you can improve the performance of the database migration either by specifying the heap space while initiating the migration or by using the dbmigration-input.properties file.

1.1 Optimizing using the dbmigration-input.properties file

Depending on the size of the source database, you can customize the database migration to improve the time taken to migrate. The migration can be customized by creating and copying the dbmigration-input.properties file in the following location. However, it is recommended that you contact Micro Focus customer support before customizing the migration.

  • On Windows: %ZENWORKS_HOME%\bin

  • On Linux/Appliance: /opt/novell/zenworks/bin

Add the following fields to customize the database migration:

  • threadcount: This parameter represents the number of threads that should be created while migrating data from source to destination database. Each thread is responsible for copying the data from one source table to destination table. By increasing the number of threads, more number of tables will be copied at a time (parallelly). Hence reduces the total time taken for the database migration.

    By increasing the threadcount, memory consumed by the migration tool also increases, as more number of threads are allocated to the migration. If the total memory consumed by database migration tool is greater than the heapspace then it will result in database migration failure due to OutOfMemoryError. To avoid OutOfMemoryError, whenever you increase the threadcount, ensure that you either decrease the maximum memory (memorythreshold) consumed by each thread or increase the total memory consumed by the tool (heapspace). For more information, see Modifying the Heap Space During the Migration.

    By default, the database migration tool uses a threadcount of 10. In this scenario, 10 threads are created and at a time a maximum of 10 tables data will be migrated.

    Based on requirements and available memory, you can modify the number of threads that should be used while migrating the data.

    threadCount = <count in number>

  • memorythreshold: This parameter represents the maximum memory that a thread should use while copying the data from source to destination database. The memorythreshold and size of the row determines the number of rows that should be copied from source to the destination table.

    By default, the database migration tool uses memorythreshold of 300 MB. If required, based on your memory availability, you can increase the memorythreshold.

    memorythreshold = <memory in KBs>

  • batchsize: This parameter represents number of rows that should be copied at a time by each thread while migrating the data from the source table to the destination table. By increasing the batchsize, more number of rows will be copied by each thread in each iteration from the source table to the destination table. Hence, database migration will take less time to migrate the data.

    Since the memory consumed by each thread is increasing, this might result in database migration failure due to OutOfMemoryError. To avoid the OutOfMemoryError, you can either increase the maximum memory consumed by each thread (memorythreshold) or increase the total memory consumed by the tool (heapspace).

    Note: If threshold is increased then correspondingly heapspace needs to be increased to avoid OutOfMemoryError.

    By default, the database migration tool uses a batchsize of 10000. If required, based on your memory availability, you can increase the batchsize.

    batchsize = <batchsize in number>

    NOTE:Whenever the data size retrieved from a table based on the batchsize is more than memorythreshold, then memorythreshold size takes precedence. In such cases, data size less than or equal to the memorythreshold size will be copied from the source table to the destination table. Following example illustrates this scenario.

Migration Memory Consumption Scenarios

The following cases explain various scenarios that impact the overall memory consumption during the database migration.

Let us consider a scenario, where batchsize is 10,000, memorythreshold is 100 MB and each row is of size 20 KB. In this scenario, 200 MB of memory is required to copy the entire batchsize(10,000 rows) from the table in one iteration. Since the memorythreshold is 100 MB, then around 5000 rows (whose size is less than or equals to 100 MB) are copied and then the remaining 5000 rows are copied in the next cycle to the destination table. Instead, if the memorythreshold is set to 300 MB, then all the batchsize number of rows (10,000) will be copied at a time. Hence, by increasing memorythreshold, the time taken by the migration can be reduced.

Since memorythreshold is for each thread, increasing the threshold implies that the maximum limit for total data being copied by all threads is also increased. Ensure that the total memory upper limit never crosses the maximum available heapspace. Increasing the batchsize and threadcount can immediately result in increased memory usage, whereas increasing memorythreshold only increases the upper limit for each thread. If all threads start consuming the memory based on the upper memory limit and total consumed memory is greater than the heapspace, then the migration will result in OutOfMemoryError.

Let us consider a scenario, where threadcount is 10, batchsize is 10,000, memorythreshold is 100 MB and heapspace is 1 GB.

Assume that each size of a row in a table is 5 KB, then for a batchsize of 10,000 rows, a thread will consume 50 MB (5 KB * 10,000 = 50MB). Even though the threshold is set to 100 MB, which is the upper limit to copy the data, each thread will copy a maximum of 50 MB data for each iteration. The database migration tool will consume a total memory of 500 MB (10 * 50 MB = 500 MB) from the heapspace.

Case 1: Increasing threadcount

threadcount=15, batchsize=10,000, memorythreshold=100 MB, heapspace=1 GB

Each thread still copies a 50 MB of data in each iteration (5 KB * 10,000=50MB), but the total memory consumed by the tool is 750 MB (15*50 MB=750 MB). Hence, increasing the number of threads results in immediate increase in total memory consumption by database migration tool.

Case 2: Increasing threadcount

threadcount=25, batchsize=10,000, memorythreshold=100 MB, heapspace=1 GB

Each thread still copies 50 MB data in each iteration (5 KB*10,000=50 MB), but the total memory consumed by the tool is 1.25 GB (25*50 MB = 1250 MB). The defined maximum heapspace is 1 GB. Hence, the migration might fail with OutOfMemoryError.

Case 3: Increasing batchsize

threadcount=10, batchsize=15000, memorythreshold=100 MB, heapspace=1 GB

Each thread copies a data size of 75 MB (5 KB*15000=75 MB, which is less than thresholdmemory). The total memory consumed by the tool is 750 MB (10*75 MB = 750 MB). Hence, increased batchsize immediately results in increased memory consumption.

Case 4: Increasing batchsize

threadcount=10, batchsize=25000, memorythreshold=100 MB, heapspace=1 GB

Each thread copies a data of 100 MB (5KB * 25000 = 125 MB, which is greater than thresholdmemory). So, a maximum of 100 MB will be copied per iteration. Hence, the total memory consumed by the tool is 1 GB (10 * 100 MB = 1 GB).

Case 5: Increasing memorythreshold

threadcount=10, batchsize=10000, memorythreshold=200 MB, heapspace =1 GB

Each thread copies a data of 50 MB (5KB * 10000 = 50 MB), the total memory consumption is 500 MB (10*50 MB=500 MB). Increase in threshold results in increased upper limit for memory consumption for each thread. Hence, this might not result in any change in total memory consumed by the migration tool.

1.2 Modifying the Heap Space During the Migration

Heap space is the memory that is used while migrating the data from source to destination database. By default, the database migration tool uses 6 GB of heap space to migrate the database. However, depending on the available memory, you can increase the heap space and initiate the database migration. Ensure that the heap space never exceeds the maximum available physical memory.

To modify the heap space used during migration, use the following command while initiating the database migration:

  • %ZENWORKS_HOME%/share/java/bin/java.exe -Dzen.mig.maxMemory=<value> -jar <location-of db-migration-tool-<version>.jar

    Where <value> is the heap space size in MB.

NOTE:Depending on memorythreshold, batchsize and threadcount that you have specified, ensure that you assign optimum heapspace to avoid OutOfMemoryError.

2.0 Migrating to an Embedded PostgreSQL Database

2.1 Prerequisites

If you are migrating to an Embedded PostgreSQL database, then ensure that the following prerequisites are met:

  • Ensure that you initiate the migration on the server in which you want to host the Embedded PostgreSQL database.

  • The Management Zone should be at the ZENworks 2017, ZENworks 2017 Update x, ZENworks 2020, or ZENworks 2020 Update 1 version .

  • Important: If your zone is in ZENworks 2020 , then ensure that you perform the following:

    • Ensure that you comment out (prefix #) the following parameters in the novell-zenworks-configure.properties file. By default, the parameter might be commented out:

      zenworks.configure.debug.silent=false

      DBMigrateConfigureAction.DB_Migrate_Type=true,false,false,false

      The novell-zenworks-configure.properties file is available in the following location:

      • On Windows: %ZENWORKS_HOME%\conf

      • On Linux/Appliance: /etc/opt/novell/zenworks

  • The Migration tool can be executed by users with following access:

    • Administrator (Windows) or root (Linux/Appliance)

    • ZENworks Super Administrator

  • The database and ZENworks services should be running on the server in which you initiate the database migration.

  • Ensure that the Primary Server on which the migration is initiated has enough disk space to migrate the database.

    To view the size of the database, log into ZCC, and then click Diagnostics.

2.2 Pre-migration Tasks

Before running the Migration tool, ensure that you perform the following tasks:

  • Ensure that you take a backup of the database.

  • Ensure that you take a backup of the configuration files (zdm.xml, zenaudit.xml, dmaccounts.properties, dmmappings.properties and zenaudit_dmaccounts.properties) that are available in the following location:

    • On Windows: %ZENWORKS_HOME%\conf\datamodel

    • On Linux/Appliance: /etc/opt/novell/zenworks/datamodel

  • If you have more than one Primary Server in your zone, then ensure that the zenserver and zenloader services are manually stopped on all the other Primary Servers in the zone.

    (conditional) If ZENworks monitor service exists and running, then ensure that the service is also stopped on all the other Primary Servers.

    The services can be stopped on each Primary Server by using the novell-zenworks-configure -c Start command.

    IMPORTANT:If the services are not stopped on all the other Primary Servers in the zone, then database migration is terminated.

2.3 Procedure

To migrate the database to an Embedded PostgreSQL database, perform the following steps:

  1. Extract the db-migration-tool-<version>.zip file to a temporary location in the server on which you will initiate the database migration.

  2. Open the command prompt as an Administrator or a root user, and then run the database migration tool as shown below:

    Before initiating the migration, ensure that you optimize the migration. For more information, see Optimizing the Database Migration.

    • On Windows: %ZENWORKS_HOME%/share/java/bin/java.exe -jar <location of db-migration-tool-<version>.jar>

    • On Linux/Appliance: /opt/novell/zenworks/ZeUS/jre/bin/java -jar <location of db-migration-tool-<version>.jar>

  3. Ensure that you read the displayed instructions, and then proceed with the migration.

  4. Enter the ZENworks Administrator user name and password.

    If you have more than one Primary Server in the zone, then a check is performed to identify if ZENworks services are stopped on the other Primary Servers.

    If the services are running on the other Primary Servers, then the migration is terminated and displays list of servers on which services are still running. Ensure that the services are stopped by running the novell-zenworks-configure -c Start command on the reported servers.

    ZDC is automatically launched and validates the database schema, if any errors are identified, then the database migration is terminated. Ensure that you resolve the issues and then restart the migration. For more information, see Troubleshooting the ZDC Error.

  5. Select the target database type for the ZENworks database. In this scenario, select the Embedded PostgreSQL for the ZENworks database.

  6. Select the target database type for Audit database. In this scenario, select the Embedded PostgreSQL for the Audit database.

  7. To start the database migration, press Enter. The database will be migrated from the MS SQL Server database to PostgreSQL.

    NOTE:Until the migration is successfully completed, ZENworks continues to use the MS SQL Server database. At any point, if the migration is terminated, you have an option to resume the migration from the point where it was halted, or you can restart the migration. For more information see, Resuming or Restarting the Database Migration. In any case, if the database migration fails, the zone is automatically rolled back to use the MS SQL Server database.

  8. After the migration is completed, the migration details are displayed. For more information, see Verifying the Database Migration.

  9. After successfully migrating the data, before starting ZENworks services on the other Primary Servers, ensure that you perform the steps specified in the Post-migration Tasks section.

2.4 Post-migration Tasks

If you have more than one Primary Server in your zone, then after successfully migration, ensure that you perform the following steps on the other Primary Servers:

  1. Before starting services on the other Primary Servers and to use the newly configured PostgreSQL database, copy the zdm.xml, zenaudit.xml, dmaccounts.properties, dmmappings.properties, and zenaudit_dmaccounts.properties files to the other Primary Servers.

    These files should be copied from the following location in the Primary Server on which migration was successful, to the same location on the other Primary Servers:

    • On Windows: %ZENWORKS_HOME%\conf\datamodel

    • On Linux/Appliance: /etc/opt/novell/zenworks/datamodel

  2. Change the IP address from 127.0.0.1 to the IP address of the Embedded PostgreSQL server in the copied zdm.xml and zenaudit.xml files on the other Primary Servers.

    The zdm.xml and zenaudit.xml files have the database servers address as the DNS name. Hence, it has to be modified to 127.0.0.1 after moving the files to other servers.

  3. Copy the SearchConfig.xml file available in the following location to the same location on the other Primary Servers:

    • On Windows: %ZENWORKS_HOME%\conf\datamodel\search

    • On Linux/Appliance: /etc/opt/novell/zenworks/datamodel/search

      The SearchConfig.xml file should be copied to ensure that the ZCC login credentials are case insensitive.

    IMPORTANT:Ensure that you DO NOT MODIFY the zdm.xml and zenaudit.xml files on the Primary Server in which the migration was initiated.

  4. Start the services on the other Primary Servers by running the following command:

    novell-zenworks-configure -c Start

    NOTE:If the PostgreSQL services are not listed, then Start or Stop the PostgreSQL service manually.

    • On Linux: To start or stop the service, run the systemctl start postgresql-<version>.service or systemctl stop postgresql-<version>.service command.

    • On Appliance: To start or stop the service run, the systemctl start zenpostgresql or systemctl stop zenpostgresql command.

3.0 Migrating to an External PostgreSQL database

If you are planning to migrate to an external database, then you need to prepare the external PostgreSQL database, and then initiate the migration.

3.1 Preparing the External PostgreSQL Database

Before migrating to an external PostgreSQL database, ensure that you prepare the external database and then migrate the database.

Ensure that you perform the following steps for the ZENworks database and then on Audit database, so that the external database communicates with ZENworks:

  1. Install the PostgreSQL database.

    For more information on installing PostgreSQL, see Installing PostgreSQL.

  2. After installing the database, start the PostgreSQL service.

    To start the PostgreSQL service:

    • On Windows: To start the service, perform the following:

      1. Press Windows + R keys.

      2. Type services.msc.

      3. Search for the PostgreSQL service based on the installed version.

      4. Click Start the service.

    • On Linux/Appliance: To start the service, run the systemctl start postgresql-<version>.service command.

  3. After starting the service, perform the following steps:

    In the PostgreSQL database install location, perform the following steps:

    1. In the pg_hba.conf file, add the following text at the end:

      host all all 0.0.0.0/0 md5

    2. In the postgresql.conf file, add the following text at the end:

      port=54327

      listen_addresses='*'

      max_locks_per_transaction=128

      max_pred_locks_per_transaction=128

      max_connections = Number of Primary Servers * 300

      By default, max_connections = 500 for Embedded PostgreSQL.

      The pg_hba.conf and postgresql.conf are available in the following location:

      • On Windows: <install_directory>\PostgreSQL\<version>\data

      • On Linux: /var/lib/pgsql/<version>/data

      Along with above mentioned steps, based on the zone requirements, you can increase the number of database connections. For more information on configuring the number of connections, see Configuring PostgreSQL.

      NOTE:By default, PostgreSQL uses the port 5432. However, in ZENworks 54327 is used as the default port for PostgreSQL. You can change the default port number if there is a conflict. However, you must ensure that the PostgreSQL port is opened in Firewall, so that the Primary Servers can talk to the database.

    3. Restart the PostgreSQL service.

      After restarting the services, you can proceed with the database migration.

    NOTE:Ensure that the port is opened in Firewall, so that all the Primary Servers can talk to the database.

3.2 Prerequisites

If you are migrating to an External PostgreSQL database, then ensure that the following prerequisites are met:

  • The Management Zone should be at the ZENworks 2017, ZENworks 2017 Update x, or ZENworks 2020 version.

  • IMPORTANT: If your zone is in ZENworks 2020 , then ensure that you perform the following steps on a Windows server in which you will initiate the database migration:

  • The Migration Tool can be executed by users with following access:

    • Administrator (Windows) or root (Linux/Appliance)

    • ZENworks Super Administrator

  • The database migration can be initiated on any Primary Server.

  • External PostgreSQL database should be setup and ready for the migration. For more information and steps to setup the PostgreSQL database, see Preparing the External PostgreSQL Database section.

  • If you have more than one Primary Server in your zone, then ensure that the zenserver and zenloader services are manually stopped on all the other Primary Servers in the zone.

    (conditional) If ZENworks monitor service exists and running, then ensure that the service is also stopped on all the other Primary Servers.

    The services can be stopped on each Primary Server by using the following command:

    novell-zenworks-configure -c Start

    IMPORTANT:If the services are not stopped on all the other Primary Servers in the zone, then database migration is terminated.

3.3 Pre-migration Tasks

For External PostgreSQL database migration, ensure that you perform the following pre-migration tasks:

  • Ensure that you take a backup of the database.

  • Ensure that you take a backup of the configuration files (zdm.xml, zenaudit.xml, dmaccounts.properties, dmmappings.properties and zenaudit_dmaccounts.properties) that are available in the following location:

    • On Windows: %ZENWORKS_HOME%\conf\datamodel

    • On Linux/Appliance: /etc/opt/novell/zenworks/datamodel

3.4 Procedure

To migrate the data to an External PostgreSQL database, perform the following steps:

  1. Extract the db-migration-tool-<version>.zip file to a temporary location in the server on which you will initiate the database migration.

  2. Open the command prompt as an Administrator or a root user, and then run the database migration tool as shown below:

    Before initiating the migration, ensure that you optimize the migration. For more information, see Optimizing the Database Migration.

    • On Windows: %ZENWORKS_HOME%/share/java/bin/java.exe -jar <location of db-migration-tool-<version>.jar>

    • On Linux/Appliance: /opt/novell/zenworks/share/java/bin/java -jar <location of db-migration-tool-<version>.jar>

  3. Ensure that you read the displayed instructions, and then proceed with the migration.

  4. Enter the ZENworks administrator user name and password.

    If you have more than one Primary Server in the zone, then a check is performed to identify if ZENworks services are stopped on the other Primary Servers.

    If the services are running on the other Primary Servers, then the migration is terminated and displays list of servers on which services are still running. Ensure that the services are stopped by running the novell-zenworks-configure -c Start command on the reported servers.

    ZDC is automatically launched and validates the MS SQL Server database schema, if any errors are identified, then the database migration is terminated. Ensure that you resolve the issues and then restart the migration.

    For more information on accessing the ZDC Report, see Viewing the ZDC Error Report

  5. Select the target database type for ZENworks database. In this scenario, select External PostgreSQL for the ZENworks database, and then perform the following steps:

    1. Enter the IP address or host name of the PostgreSQL database server.

    2. Enter the port used by the PostgreSQL database server.

      NOTE:By default, PostgreSQL uses the port 5432. However, in ZENworks 54327 is used as the default port for PostgreSQL. You can change the default port number if there is a conflict. However, you must ensure that the PostgreSQL port is opened in Firewall, so that the Primary Servers can talk to the database.

    3. Specify whether you want to create a new database or use an existing database.

      To create a new database, continue to step d.

      To use an existing database, skip to step e.

    4. To migrate to a new database, perform the following steps:

      1. Enter the ZENworks database (PostgreSQL) server administrator user name.

      2. Enter the ZENworks database (PostgreSQL) server administrator password.

      3. Enter the ZENworks database user name for PostgreSQL.

      4. Enter the ZENworks database password for PostgreSQL.

      5. Enter a name for the ZENworks database. For more information, see PostgreSQL Naming Convention.

      NOTE:After entering all the details, the tool verifies the PostgreSQL administrator credentials to connect to the database.

    5. To migrate to an existing database, perform the following:

      1. Enter the database user name.

      2. Enter the ZENworks database password.

      3. Enter the ZENworks database name.

      NOTE:After entering all the details, the tool verifies the ZENworks database user credentials to connect to the database

  6. Select the target database type for the Audit database. In this scenario, select External PostgreSQL for the Audit database.

    For External PostgreSQL as the target Audit database, perform the following steps:

    1. Enter the IP address or host name of the PostgreSQL Audit database server.

    2. Enter the port used by the PostgreSQL Audit database server.

    3. Specify whether you want to create a new database or use an existing database.

      To create a new database, continue to step d.

      To use an existing database, skip to step e.

    4. To migrate to a new database, perform the following steps:

      1. Enter the Audit database (PostgreSQL) server administrator user name.

      2. Enter the Audit database (PostgreSQL) server administrator password.

      3. Enter the Audit database user name for PostgreSQL.

      4. Enter the Audit database password for PostgreSQL.

      5. Enter a name for the Audit database. For more information, see PostgreSQL Naming Convention.

      NOTE:After entering all the details, the tool verifies the PostgreSQL administrator credentials to connect to the database.

    5. To migrate to an existing database, perform the following:

      1. Enter the Audit database user name.

      2. Enter the Audit database password.

      3. Enter the Audit database name.

      NOTE:After specifying all the credentials, the tool verifies the audit database user credentials to connect to the database.

  7. To start the migration, press Enter. The data will be migrated to the PostgreSQL database.

    At any point, if the migration is terminated, you have an option to resume the migration from the point where it was halted, or you can restart the migration. For more information see, Resuming or Restarting the Database Migration. In any case, if the database migration fails, the zone is rolled back to use the MS SQL Server database.

  8. After the migration is completed, the migration details are displayed: For more information, see Verifying the Database Migration.

  9. After successfully migrating the data, ensure that you perform the steps specified in the Post-migration Tasks section.

3.5 Post-migration Tasks

If you have more than one Primary Server in your zone, then after successfully migration, ensure that you perform the following steps on the other Primary Servers:

  1. Before starting services on the other Primary Servers and to use the newly configured PostgreSQL database, copy the zdm.xml, zenaudit.xml, dmaccounts.properties, dmmappings.properties, and zenaudit_dmaccounts.properties files to the other Primary Servers.

    These files should be copied from the following location in the Primary Server on which migration was successful, to the same location on the other Primary Servers:

    • On Windows: %ZENWORKS_HOME%\conf\datamodel

    • On Linux/Appliance: /etc/opt/novell/zenworks/datamodel

  2. Copy the SearchConfig.xml file available in the following location to the same location on the other Primary Servers:

    • On Windows: %ZENWORKS_HOME%\conf\datamodel\search

    • On Linux/Appliance: /etc/opt/novell/zenworks/datamodel/search

      The SearchConfig.xml file should be copied to ensure that the ZCC login credentials are case insensitive.

  3. Start the services on the other Primary Servers by running the following command:

    novell-zenworks-configure -c Start

    NOTE:If the PostgreSQL services are not listed, then Start or Stop the PostgreSQL service manually.

    • On Windows: To Start or Stop the service, perform the following:

      1. Press Windows + R keys.

      2. Type services.msc.

      3. Search for the PostgreSQL service based on the installed version.

      4. Click Start or Stop the service.

    • On Linux: To start or stop the service, run the systemctl start postgresql-<version>.service or systemctl stop postgresql-<version>.service command.

    • On Appliance: To start or stop the service run, the systemctl start zenpostgresql or systemctl stop zenpostgresql command.

4.0 Performing Database Migration using the Silent Migration Feature

Using the silent database migration, you can migrate the database with zero administration and you will not be prompted for any inputs. The silent database migration, can be performed by using a configuration (novell-zenworks-configure.properties) file. Based on requirements, you can use the configuration file to migrate to an embedded or an external database. The input details specified in the configuration file will be considered during the database migration to PostgreSQL.

NOTE:Whenever you are performing the silent migration, ensure that you create a new configuration file.

4.1 Preparing and Performing the Silent Migration

Depending on your target database, refer to any of the following sections to prepare the configuration file:

Preparing the Configuration File for Embedded Database Migration

If you are migrating to an embedded PostgreSQL database, then perform the following steps to prepare the configuration file:

IMPORTANT:If any of the specified parameter is invalid or incorrect, then the database migration fails and the database cannot be reverted to the previous version.

  1. Create a novell-zenworks-configure.properties file and add the following parameters:

    • zenworks.configure.debug.silent: To enable the silent database migration, set this parameter to true.

    • DBMigrateConfigureAction.DB_MIGRATE_TYPE: Specify if you want to migrate the ZENworks database to an embedded or an external database

      To migrate to an embedded database, specify true,false.

      To migrate to an external database, specify false,true.

    • DBMigrateConfigureAction.AUDIT_DB_MIGRATE_TYPE: Specify if you want to migrate the Audit database to an embedded or an external database.

      To migrate to an embedded database, specify true,false.

      To migrate to an external database, specify false,true.

    For additional information, see Embedded PostgreSQL Database Migration

  2. After updating the file, ensure that you copy the file to the following location:

    • On Windows: %ZENWORKS_HOME%\conf

    • On Linux/Appliance: /etc/opt/novell/zenworks

  3. Initiate the database migration. For more information, see Migrating to an Embedded PostgreSQL Database.

At any point, if the migration is terminated, you have an option to resume the migration from the point where it was halted, or you can restart the migration. For more information see, Restart or Resume the Silent Database Migration

Preparing the Configuration File for External Database Migration

If you are migrating to an external PostgreSQL database (ZENworks and Audit), then perform the following steps to prepare the configuration file:

IMPORTANT:If any of the specified parameter is invalid or incorrect, then the database migration fails and the database cannot be reverted to the previous version.

  1. Create a novell-zenworks-configure.properties file and add the following parameters:

    For ZENworks Database: For ZENworks database, add the following parameters:

    • zenworks.configure.debug.silent Set this parameter to true to enable the silent database migration.

    • DBMigrateConfigureAction.DB_MIGRATE_TYPE: Specify if you want to migrate the ZENworks database to an embedded or an external database

      To migrate to an external database, specify false,true.

      To migrate to an embedded database, specify true,false.

    • DBMigrateConfigureAction.DB_MIGRATE_SERVER_ADDRESS: Specify the IP address of the external database server.

    • DBMigrateConfigureAction.DB_MIGRATE_SERVER_PORT: Specify the port number used by the external database server.

    • DBMigrateConfigureAction.DB_MIGRATE_ADMIN_USER: Specify the ZENworks database server administrator user name.

    • DBMigrateConfigureAction.DB_MIGRATE_ADMIN_PASSWORD: Specify the ZENworks database server administrator password.

    • DBMigrateConfigureAction.DB_MIGRATE_ACCESS_USER: Specify the ZENworks database user name.

    • DBMigrateConfigureAction.DB_MIGRATE_ACCESS_PASSWORD: Specify the ZENworks database password.

    • DBMigrateConfigureAction.DB_MIGRATE_DB_NAME: Specify the name of the database.

    • DBMigrateConfigureAction.CREATE_NEW_EXTERNAL_DATABASE: Specify true you want to create a new database, else specify false.

    For Audit Database: For audit database, add the following parameters:

    • DBMigrateConfigureAction.AUDIT_DB_MIGRATE_TYPE: Specify if you want to migrate the Audit database to an embedded or an external database

      To migrate to an external database, specify false,true.

      To migrate to an embedded database, specify true,false.

    • DBMigrateConfigureAction.AUDIT_DB_MIGRATE_SERVER_ADDRESS: Specify the IP address of the external database server.

    • DBMigrateConfigureAction.AUDIT_DB_MIGRATE_SERVER_PORT: Specify the port number used by the external database server.

    • DBMigrateConfigureAction.AUDIT_DB_MIGRATE_ADMIN_USER: Specify the ZENworks Audit database server administrator user name.

    • DBMigrateConfigureAction.AUDIT_DB_MIGRATE_ADMIN_PASSWORD: Specify the ZENworks Audit database server administrator password.

    • DBMigrateConfigureAction.AUDIT_DB_MIGRATE_ACCESS_USER: Specify the ZENworks Audit database user name.

    • DBMigrateConfigureAction.AUDIT_DB_MIGRATE_ACCESS_PASSWORD: Specify the ZENworks Audit database password.

    • DBMigrateConfigureAction.AUDIT_DB_MIGRATE_DB_NAME: Specify the name of the database.

    • DBMigrateConfigureAction.CREATE_NEW_EXTERNAL_AUDIT_DATABASE: Specify true if you want to create a new database, else specify false.

    For additional information, see External PostgreSQL Database Migration

  2. After updating the file, ensure that you copy the file to the following location:

    • On Windows: %ZENWORKS_HOME%\conf

    • On Linux/Appliance: /etc/opt/novell/zenworks

  3. Initiate the database migration. For more information, see Migrating to an External PostgreSQL database.

At any point, if the migration is terminated, you have an option to resume the migration from the point where it was halted, or you can restart the migration. For more information see, Restart or Resume the Silent Database Migration

Restart or Resume the Silent Database Migration

To restart or resume the database migration, add the DBMigrateConfigureAction.DB_MIGRATE_RESTART_OR_RESUME parameter along with the other parameters mentioned in above sections, and then re-initiate the migration.

  • To restart the migration, specify DBMigrateConfigureAction.DB_MIGRATE_RESTART_OR_RESUME=true,false

  • To resume the migration, specify DBMigrateConfigureAction.DB_MIGRATE_RESTART_OR_RESUME=false,true

For additional information, see Examples for Silent Database Migration

4.2 Examples for Silent Database Migration

Embedded PostgreSQL Database Migration

In this example, both ZENworks and Audit databases are migrated to an embedded PostgreSQL database.

  • zenworks.configure.debug.silent= true

  • DBMigrateConfigureAction.DB_MIGRATE_TYPE= true,false

  • DBMigrateConfigureAction.AUDIT_DB_MIGRATE_TYPE= true,false

External PostgreSQL Database Migration

In this example, both ZENworks and Audit databases are migrated to an external PostgreSQL database.

For ZENworks Database:

  • zenworks.configure.debug.silent= true

  • DBMigrateConfigureAction.DB_MIGRATE_TYPE= false,true

  • DBMigrateConfigureAction.DB_MIGRATE_SERVER_ADDRESS= 10.71.68.129

  • DBMigrateConfigureAction.DB_MIGRATE_SERVER_PORT= 54327

  • DBMigrateConfigureAction.DB_MIGRATE_ADMIN_USER= postgres

  • DBMigrateConfigureAction.DB_MIGRATE_ADMIN_PASSWORD= password123

  • DBMigrateConfigureAction.DB_MIGRATE_ACCESS_USER= zuser

  • DBMigrateConfigureAction.DB_MIGRATE_ACCESS_PASSWORD= password123

  • DBMigrateConfigureAction.DB_MIGRATE_DB_NAME= zendb

  • DBMigrateConfigureAction.CREATE_NEW_EXTERNAL_DATABASE= true

For Audit database:

  • DBMigrateConfigureAction.AUDIT_DB_MIGRATE_TYPE= false,true

  • DBMigrateConfigureAction.AUDIT_DB_MIGRATE_SERVER_ADDRESS= 10.71.68.129

  • DBMigrateConfigureAction.AUDIT_DB_MIGRATE_SERVER_PORT= 54327

  • DBMigrateConfigureAction.AUDIT_DB_MIGRATE_ADMIN_USER= postgres

  • DBMigrateConfigureAction.AUDIT_DB_MIGRATE_ADMIN_PASSWORD= password123

  • DBMigrateConfigureAction.AUDIT_DB_MIGRATE_ACCESS_USER= audituser

  • DBMigrateConfigureAction.AUDIT_DB_MIGRATE_ACCESS_PASSWORD= password123

  • DBMigrateConfigureAction.AUDIT_DB_MIGRATE_DB_NAME= zenauditdb

  • DBMigrateConfigureAction.CREATE_NEW_EXTERNAL_AUDIT_DATABASE: true

Restarting the PostgreSQL Database

To restart the database migration, the configuration file should include the following parameter along with the other parameters: DBMigrateConfigureAction.DB_MIGRATE_RESTART_OR_RESUME=true,false

Resuming the PostgreSQL Database Migration

If the database migration was terminated, then to resume the database migration, the configuration file should include the following parameter:

To resume the migration, specify DBMigrateConfigureAction.DB_MIGRATE_RESTART_OR_RESUME=false,true

5.0 Installing PostgreSQL

5.1 Installing PostgreSQL on Windows

Download and install the required version of PostgreSQL.

The PostgreSQL can be downloaded from PostgreSQL for Windows.

NOTE:The link redirects to an external site that is subject to change without prior notice.

Depending on the ZENworks version, download and install the supported version of PostgreSQL. For more information on supported versions, see the following table:

ZENworks Version

Supported PostgreSQL Version

ZENworks 2020 Update 2

PostgreSQL 12.x as an Embedded Database and PostgreSQL 11.x, 12.x and 13.x as an External database.

2020, Update 1

PostgreSQL 11.x (Except 11.2)

11.4 is the recommended version

2017 Update 4

PostgreSQL 9.x, 10.x or 11.x

11.4 is the recommended version

2017 Update 3

PostgreSQL 9.x or 10.x

2017 Update 2

PostgreSQL 9.x

2017 Update 1

PostgreSQL 9.x

2017

PostgreSQL 9.x

For more information, see System Requirements in ZENworks 2017 or ZENworks 2020 documentation page.

After installing PostgreSQL, continue with the steps specified in the Preparing the External PostgreSQL Database section.

Example: Installing PostgreSQL 9.6 on Windows

To install PostgreSQL 9.6 on a Windows device, perform the following steps:

  1. After downloading the PostgreSQL 9.6 binary package, double click the downloaded installer file (PostgreSQL 9.6). An installation wizard is displayed, which guides you through multiple steps involved in installing the PostgreSQL database.

  2. Click Next.

  3. Specify the installation directory where the PostgreSQL should be installed, and then click Next.

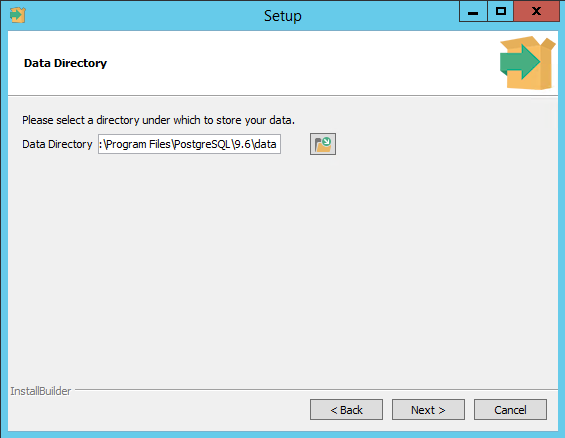
  4. Select a directory in which the PostgreSQL data should be stored.

    It is recommended to use the default directory.

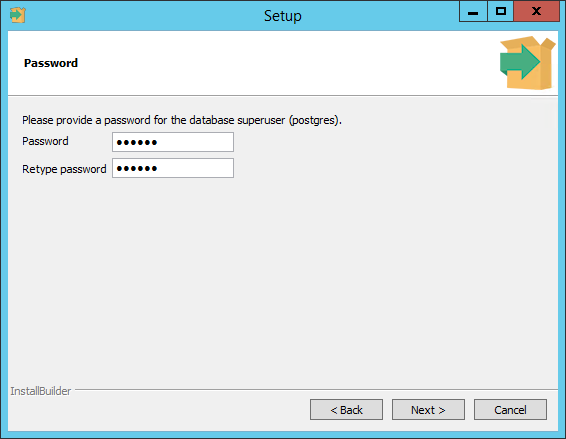
  5. Specify the password for the database superuser (postgres), and then click Next.

  6. Specify the port for PostgreSQL. By default ZENworks uses 54327 as the post. If required, you can use a different port number.

    NOTE:By default, PostgreSQL uses the port 5432. However, in ZENworks 54327 is used as the default port for PostgreSQL. You can change the default port number if there is a conflict. However, you must ensure that the PostgreSQL port is opened in Firewall, so that the Primary Servers can talk to the database.

  7. Select the default locale used by the database, and then click Next.

  8. Click Next to start PostgreSQL installation.

  9. Click Finish to complete the installation.

    If required, you can install Stack Builder by selecting the check box.

  10. Continue with the steps specified in the Preparing the External PostgreSQL Database section.

5.2 Installing PostgreSQL on Linux

Download and install the required version of PostgreSQL.

The PostgreSQL can be downloaded from PostgreSQL for Linux.

NOTE:The link redirects to an external site that is subject to change without prior notice.

Before installing PostgreSQL on a SLES device, ensure that the PostgreSQL version is supported on the SLES version installed on the device.

NOTE:At the time when this document was updated, we were unable to install the latest version of PostgreSQL (11.6) on SLES 12 SP3 devices.

Depending on the ZENworks version, download and install the supported version of PostgreSQL. For more information on supported versions, see the following table:

ZENworks Version

Supported PostgreSQL Version

ZENworks 2020 Update 2

PostgreSQL 12.x as an Embedded Database and PostgreSQL 11.x, 12.x and 13.x as an External database.

2020, Update 1

PostgreSQL 11.x (Except 11.2)

11.4 is the recommended version

2017 Update 4

PostgreSQL 9.x, 10.x or 11.x

11.4 is the recommended version

2017 Update 3

PostgreSQL 9.x or 10.x

2017 Update 2

PostgreSQL 9.x

2017 Update 1

PostgreSQL 9.x

2017

PostgreSQL 9.x

For more information, see System Requirements in ZENworks 2017 or ZENworks 2020 documentation page.

After installing PostgreSQL, continue with the steps specified in the Preparing the External PostgreSQL Database section.

Example: Installing PostgreSQL 11 on a SLES 12 SP4 Device

Following is an example to install PostgreSQL 11.6 on a SLES 12 SP4 device.

NOTE:At the time when this document was updated, the following installation steps were tested and documented. However, depending on PostgreSQL, the following steps might change without prior notice. Hence, it is recommended that you go through the PostgreSQL documentation before installing PostgreSQL on any supported platform.

  1. Open the Terminal as a root user.

  2. Add the PostgreSQL 11 repository by running the following command:

    zypper addrepo https://download.postgresql.org/pub/repos/zypp/repo/pgdg-sles-11.repo

    NOTE:The repo location is from an external site that is subject to change without prior notice.

  3. To refresh the repositories, run zypper refresh.

  4. After repo refresh, install the PostgreSQL database by running the zypper install postgresql11-server command.

    Ensure that you install all the dependent packages.

  5. Initialize the database by running the following command:

    /usr/pgsql-11/bin/postgresql-11-setup initdb

    If database is not initialized, then folders required to store the data are not created.

  6. After initializing the database, enable the PostgreSQL database by running the systemctl enable postgresql-11.service command.

  7. Start the PostgreSQL service by running the systemctl start postgresql-11.service command.

  8. Continue with the steps specified in the Preparing the External PostgreSQL Database section.

5.3 Preparing the External PostgreSQL Database

If you are planning to using an external database, then ensure that you perform the following steps for the ZENworks database and then on Audit database, so that the external database communicates with ZENworks:

  1. Install the PostgreSQL database.

    For more information on installing PostgreSQL, see Preparing the External PostgreSQL Database.

  2. After installing the database, start the PostgreSQL service.

    To start the PostgreSQL service:

    • On Windows: To start the service, perform the following:

      1. Press Windows + R keys.

      2. Type services.msc.

      3. Search for the PostgreSQL service based on the installed version.

      4. Click Start the service.

    • On Linux: To start the service, run the systemctl start postgresql-<version>.service command.

  3. After starting the service, perform the following steps:

    In the PostgreSQL database install location, perform the following steps:

    1. In the pg_hba.conf file, add the following text at the end:

      host all all 0.0.0.0/0 md5

    2. In the postgresql.conf file, add the following text at the end:

      port=54327

      listen_addresses='*'

      max_locks_per_transaction=128

      max_pred_locks_per_transaction=128

      max_connections = Number of Primary Servers * 300

      By default, max_connections = 500 for Embedded PostgreSQL.

      The pg_hba.conf and postgresql.conf are available in the following location:

      • On Windows: <install_directory>\PostgreSQL\<version>\data

      • On Linux/Appliance: /var/lib/pgsql/<version>/data

      Along with above mentioned steps, based on the zone requirements, you can increase the number of database connections. For more information on configuring the number of connections, see Configuring PostgreSQL.

      NOTE:By default, PostgreSQL uses the port 5432. However, in ZENworks 54327 is used as the default port for PostgreSQL. You can change the default port number if there is a conflict. However, you must ensure that the PostgreSQL port is opened in Firewall, so that the Primary Servers can talk to the database.

    3. Restart the PostgreSQL service.

      Now, you can proceed with the database migration.

    NOTE:Ensure that the port is opened in Firewall, so that all the Primary Servers can talk to the database.

6.0 Verifying the Database Migration

To verify whether the database migration was successful or not, perform any of the following:

  • Log into ZCC, check the ZENworks Database Type in the Diagnostics page. If the type is PostgreSQL, then the migration is successful. If the type is other than PostgreSQL (ZENworks or Audit), then the migration has failed.

  • Check the novell-zenworks-migration.log file available in the following location:

    • On Windows: %ZENWORKS_HOME%\logs\migration\logviewer\index.html

    • On Linux/Appliance: /var/opt/novell/log/zenworks/migration/logviewer/index.html

  • The log files available in the following location:

    This is a consolidated file that includes ZDC, migration and data validation logs. Click Download All to download the log files in the ZIP format.

    • On Windows: %ZENWORKS_HOME%\logs\migration\logviewer\index.html

    • On Linux/Appliance: /var/opt/novell/log/zenworks/migration/logviewer/index.html

7.0 Reverting to the Source Database

During the database migration, all the MS SQL database configuration files are backed-up and while reverting the database, the PostgreSQL database configuration files will be replaced with the MS SQL database configuration files.

IMPORTANT:Before reverting to the MS SQL database, ensure that the MS SQL database server is retained in the same state when the database migration was initiated, and the MS SQL database server is up and running.

If this instruction is not met, then after reverting the database, ZENworks fails to connect to the MS SQL database and the Management Zone might not work.

The PostgreSQL database can be reverted to the MS SQL database using the following command:

novell-zenworks-configure -c RevertDBMigrationConfigureAction

After successfully reverting, the ZENworks zone will point to the MS SQL database.

This configure action takes a backup of the PostgreSQL data in the following location:

  • On Windows: %ZENWORKS_HOME%\database\pgsql\data.bkp

  • On Linux/Appliance: /var/opt/novell/pgsql/data.bkp

To revert to the MS SQL database, perform the following steps:

  1. Stop zenserver and zenloader services on all the other Primary Servers in your Management Zone.

    (conditional) If ZENworks monitor service exists and running, then ensure that the service is also stopped on all the other Primary Servers.

    The services can be stopped by using the following command:

    novell-zenworks-configure -c Start

  2. Run the following command on the device in which the migration was successful.

    novell-zenworks-configure -c RevertDBMigrationConfigureAction

  3. After completing the revert action, copy the zdm.xml, zenaudit.xml, dmaccounts.properties, dmmappings.properties and zenaudit_dmaccounts.properties files to other Primary Servers in the zone, so that the zone uses the MS SQL database.

    These files should be copied from the following location in the Primary Server on which migration was successful, to the same location on the other Primary Servers:

    • On Windows: %ZENWORKS_HOME%\conf\datamodel

    • On Linux/Appliance: /etc/opt/novell/zenworks/datamodel

  4. Start the ZENworks services on all the other Primary Servers.

    NOTE:After successfully reverting the database, the zone rolls back to the state where the migration was initially started. Hence, after successfully reverting to the MS SQL database, the data that was captured post-migration is lost.

8.0 Troubleshooting

This section provides information on issues that you might encounter while using this Migration tool and it also provides information about the ZDC log files that can be accessed to identify if there are any issues with the ZENworks and Audit databases.

8.1 ZDC Related Issues

The ZDC related issues are logged in the ZDC Reports and ZDC_results.json.

The ZDC Reports are available in the following location:

  • Windows: %ZENWORKS_HOME%\logs\migration\zdc\reports

  • Linux/Appliance: /var/opt/novell/log/zenworks/migration/zdc/reports

The ZDC_results.json file is available in the following location:

  • Windows: %ZENWORKS_HOME%\logs\migration

  • Linux/Appliance: /var/opt/novell/log/zenworks/migration

Viewing the ZDC Error Report

When you run the Migration tool, ZDC is launched automatically by the tool. The ZDC verifies the health of the database and if any errors are identified, two folders containing the error reports are created, one for the ZENworks database and another for the Audit database. The folders can be identified by the timestamp of when the Migration tool was run. The folder with latest timestamp is for audit database and the other folder is for ZENworks database.

To view the reports, open the index.html from the timestamp folder available in the following location:

  • Windows: %ZENWORKS_HOME%\logs\migration\zdc\reports

  • Linux/Appliance: /var/opt/novell/log/zenworks/migration/zdc/reports

For troubleshooting the ZDC errors, see Troubleshooting the ZDC Error.

Troubleshooting the ZDC Error

When you run the Migration tool, ZDC is launched automatically by the tool. The ZDC verifies the health of the database, and if any errors are identified, the migration is terminated. This might be due to missing tables, columns and constraints in the database.

IMPORTANT:Ensure that you analyze and rectify the reported errors, if any, on the source database and contact Micro Focus Customer Support before performing the following troubleshooting steps.

Troubleshooting:

To skip the missing objects, perform the following steps:

NOTE:The following steps should be performed only if you are sure that the missing objects can be skipper, else contact the Micro Focus Customer Support.

  1. Modify the zdc.conf file available in the following location:

    • Windows: %ZENWORKS_HOME%\logs\migration

    • Linux/Appliance: /var/opt/novell/log/zenworks/migration

    In the zdc.conf file, based on requirement, specify the objects in the respective parameters as shown below table:

    Parameter

    Description

    tables.to.skip=

    Skips the specified tables.

    columns.to.skip=

    Skips the specified columns.

    NOTE:The column names should be specified along with the table name, as shown in the below example.

    Example: StorageDevicePolicy.portableaccessid

    Here, StorageDevicePolicy is the table name and portableaccessid is the column name.

    constraints.to.skip=

    Skips the specified constraints.

    NOTE:Multiple values can be specified by using a comma.

  2. After modifying the zdc.conf file, restart the database migration.

Issues with Indexes, Triggers, Procedures and Views

Problem: The ZDC reports any errors with Indexes, Triggers, Procedures and Views in the existing database.

Solution:

  • If the ZDC check is performed during migration, then the ZDC has an intelligence to skip such errors.

The expected column length is more than the actual column length

Problem: The ZDC reports that the expected column length is more than the actual column length.

Solution:

  • If the ZDC check is performed during migration, then the ZDC has an intelligence to skip such errors.

For example, in the following image, zAppAssignment the expected size is 255 and actual size is 65. Hence, this inconsistency can be ignored.

IMPORTANT:When the actual column length is more than the expected column length, then such inconsistencies SHOULD NOT be ignored.

For example, in the following image, for the ZESM_CertInformation column, the expected length is 255 and actual column length is 2147483647. In such scenarios, the column length parameter should not be ignored.

If the data in such tables are empty, then those entries can be ignored, or please contact Micro Focus Customer Support before starting the database migration.

The nullability in the actual column is false and the expected column is true

Problem: The ZDC reports that the nullability of actual column is false (i.e. only non-null values can be inserted) and expected nullability for the column is true (i.e. null entries can be inserted).

Solution:

  • If the ZDC check is performed manually, then this inconsistency can be ignored.

  • If the ZDC check is performed during migration, then the ZDC has an intelligence to skip such errors.

For example, in the following image, for the zZENObjectDelete_log column, the expected nullability of the column is true and actual nullability of the column is false. Hence, this inconsistency can be ignored.

IMPORTANT:If the nullability of the expected column is false and actual column is true, then such inconsistency SHOULD NOT be ignored.

For example, in the following image, the zRestrictionEnforcementState column, the actual column nullability is true and expected column nullablity is false. In such scenarios, the null values cannot be inserted into the columns where nullability is false. Hence, such inconsistency cannot be ignored.

If the data in such tables are empty, then those entries can be ignored, or please contact Micro Focus Customer Support before starting the database migration.

8.2 Migration Related Issues

When you are migrating to PostgreSQL, an error or a warning message might be displayed in the migration summary window. Depending on the message, refer to the following relevant sections:

Migration Failed with Errors

If the database migration has failed, then check the following applicable log files:

Upgrade Log

The Upgrade log (ZENworks_Upgrade_<date/time>.log.xml) is available in the following location:

  • On Windows: %ZENWORKS_HOME%\logs\migration

  • On Linux/Appliance: /var/opt/novell/log/zenworks/migration

  1. “We were unable to open and test the requested Windows service” error message is logged.

    Solution: In this scenario, ignore the error log and verify if the database migration is successfully completed. To verify whether the database migration is successful or not, see the Verifying the Database Migration.

Migration Log

The novell-zenworks-migration.log is available in the following location:

  • On Windows: %ZENWORKS_HOME%\logs\migration\novell-zenworks-migration.log

  • On Linux/Appliance: /var/opt/novell/log/zenworks/migration/novell-zenworks-migration.log

  1. “NullPointerException at Flexeraac4.appendError(Unknown Source) error message is logged.

    Solution: In this scenario, restart or resume the database migration. For more information, see the Resuming or Restarting the Database Migration.

  2. Out Of Memory Error exception is logged.

    Solution: In this scenario, ensure that you have assigned enough heap space for the database migration.

    To modify the heap space used during migration, perform the following:

    • By default, the database migration tool uses 6 GB of heap space to migrate the database. However, if required, you can initiate the database migration with increased heap space using the following command:

      %ZENWORKS_HOME%/share/java/bin/java.exe -Dzen.mig.maxMemory=<value> -jar <location-of db-migration-tool-<version>.jar

      Where <value> is the heap space size in MB.

    NOTE:Even after increasing the heap space to the maximum available memory limit (approximately 75% of the total memory of Primary Server), if you are still facing the out of memory issue, then see the Optimizing the Database Migration section.

  3. Row count validation Failed

    If the database migration failed, the zone is reverted to use the MS SQL Server database. If you make any changes in the zone, and re-initiate the database migration by selecting the Resume option, then the tables that were already migrated to the PostgreSQL will be ignored. Hence, the data captured in the MS SQL Server database tables that were already migrated to the PostgreSQL database will not be migrated. In this scenario, the row count validation fails.

    Solution: Select the Restart option when you re-initiate the database migration.

Migration Completed with Warning

If the database migration is completed with warnings, then check the following applicable log files:

Migration Log
  • On Windows: %ZENWORKS_HOME%\logs\migration\novell-zenworks-migration.log

  • On Linux/Appliance: /var/opt/novell/log/zenworks/migration/novell-zenworks-migration.log

  1. “ZENworks services could not be started” message is logged.

    Solution: Ignore the warning and wait for a couple of minutes till the services are started automatically, or start the ZENworks services manually.

  2. Data validation error

    Solution: If migration is completed with data validation error, then see the Data Validation Issues for more information.

Post Migration Issues

After successfully completing the database migration and you might face several issues while using ZENworks with PostgreSQL. This section provides information on issues that you might face while using the PostgreSQL database:

Some Hints, statements and errors are logged in the Postmaster logs.

Hints, Statements and errors might be logged in the Postmaster logs. These messages are logged after completing the database migration:

  • HINT: No operator matches the given name and argument type(s). You might need to add explicit type casts.

  • STATEMENT: select subscribed0_.ZUID as ZUID434_, subscribed0_.ZoneUID as ZoneUID434_, subscribed0_.ZoneName as ZoneName434_, subscribed0_.LastSuccessServer as LastSucc4_434_ from zSubscribedZone subscribed0_ where subscribed0_.ZoneUID=$1 and subscribed0_.ZoneName=$2 limit $3

  • ERROR: current transaction is aborted, commands ignored until end of transaction block

  • STATEMENT: select 1 from zZone

Solution: If you are using multi-zone with the zone sharing settings, only then the hints, statements and error are logged.

These messages can be ignored.

After migrating the database to PostgreSQL, the PostgreSQL service is not listed in the novell-zenworks-configure -c Start action

If you are using ZENworks 2017 or ZENworks 2017 Update 1 Appliance and migrated to the PostgreSQL database, then when you try to Start or Stop the ZENworks services using the novell-zenworks-configure -c Start command, the PostgreSQL service might not be listed.

Solution: Manually Start or Stop the PostgreSQL service.

To Start or Stop the PostgreSQL service manually:

  • On Windows: To Start or Stop the service, perform the following:

    1. Press Windows + R keys.

    2. Type services.msc.

    3. Search for the PostgreSQL service based on the installed version.

    4. Click Start or Stop the service.

  • On Linux: To start or stop the service, run the systemctl start postgresql-<version>.service or systemctl stop postgresql-<version>.service command.

  • On Appliance: To start or stop the service run, the systemctl start zenpostgresql or systemctl stop zenpostgresql command

The patch policy might not rebuild and fails to create a sandbox or published version

While creating a patch policy, the policy might not rebuild. Hence, it fails to create a sandbox or published version, and in the services-messages.log, the following message is displayed:

ERROR: duplicate key value violates unique constraint "zpatchpolicysignaturemap_pkey"

This error might be displayed due to the newly added sequences in the database.

Workaround: Perform the following steps to correct the sequences in the database:

  1. Download the latest version of the Database Migration tool.

  2. Unzip the Database Migration tool, and then copy the db-migration-utility.jar file to the following location:

    • On Linux: /opt/novell/zenworks/java/lib/

    • On Windows: %ZENworks_HOME%\lib\java\common

  3. After copying the file, run the following configure action:

    novell-zenworks-configure -c FixSequencesConfigureAction

8.3 Data Validation Issues

During the database migration, the data validation might have failed, even if the migration was successful. Following are some of the scenarios, where the table content validation has failed, even if the migration was successful:

Validation Failed Because of Invalid or Unknown Characters

Problem: During the database migration, if null ASCII characters are detected in the MS SQL Server database, then the invalid characters are omitted and the remaining characters are migrated to the PostgreSQL database. Hence, the content validation fails even if the database migration is successful.

In the following scenarios, invalid characters are detected in the MS SQL Server, which were omitted while migrating to PostgreSQL.

Scenario 1: In this scenario, an invalid character is detected as shown in the following image.

The invalid character is omitted after migrating as shown in the following image.

Scenario 2: In this scenario, array of invalid characters are detected as shown in the following image.

The invalid characters are omitted after migrating as shown in the following image.

Solution: This validation error scenario can be ignored, as the error is logged due to mismatches in the characters. However, the database is successfully migrated.

8.4 Resuming or Restarting the Database Migration

If the database migration had failed, then ensure that you re-initiate the migration on the same server on which you initiated the migration for the first time.

If you re-initiate the database migration on the same server, then you will get the Restart or Resume options.

  • Resume: If you resume the database migration, then the migration resumes from the point at which the migration was terminated.

    Let us assume that the database has 400 tables and the migration was terminated while migrating the 48th table (47 tables are successfully migrated). When you resume the migration, the migration starts by migrating the 48th table and then continues migrating other tables.

  • Restart: If you restart the database migration, then a fresh migration is initiated. While restarting the migration, you have to specify all the required details.

Following are the various Resume and Restart scenarios for the database migration:

  • The migration can be resumed only after the stage where the database tables are created in the PostgreSQL database. If you are unable to resume the migration, then you need to restart the migration.

  • The database migration can be resumed only from the device on which the migration was initiated.

IMPORTANT:If the database migration failed, the zone is reverted to use the MS SQL Server database. If you make any changes in the zone, and re-initiate the database migration by selecting the Resume option, then the tables that were already migrated to the PostgreSQL will be ignored. Hence, the data captured in the MS SQL Server database tables that were already migrated to the PostgreSQL database will not be migrated. Hence, it is recommended that you select the Restart option.

9.0 Additional Information

This section provides some additional information on the database migration:

9.1 Huge data in the zBinaryData table

Problem: While creating a bundle, if you have added an icon, then the relevant data is updated in the zBinaryData table in the database. Due to a random issue, the icon that was uploaded within a bundle might be converted to a huge unwanted data (approximately 900 MB) in the table.

Solution: During the database migration, the tool checks the data row by row and then migrates the data to the PostgreSQL database. If the tool detects that the icon size is more than 10 MB, then in the PostgreSQL, a null value is inserted. Hence, ignore the issue.

9.2 PostgreSQL Naming Convention

While creating the PostgreSQL database, ensure that the PostgreSQL database name must start with a letter or an underscore, the rest of the string should contain letters, digits, and underscores only.