Novell Vibe Add-In 1.0.1
The Novell Vibe Add-in for Microsoft Office enables you to work with documents on the Vibe site without leaving Microsoft Office. You can easily browse to a document that is located on the Vibe site, open the document, edit it, then save it back to the Vibe site, directly from Microsoft Office.
You can work directly from Microsoft Word, Excel, or PowerPoint documents running in a Windows environment.
1.0 Getting Started
1.1 System Requirements
To use the Vibe Add-in, ensure that your software meets the following prerequisites:
-
Windows XP, Vista, 7, or 8
The Vibe Add-in is not currently available for Mac
-
Microsoft Office 2007, 2010, or 2013 (Word, Excel, and PowerPoint documents are supported)
When using Office 2013, you should run the Vibe add-in version 1.0.1 or later to ensure that all features specific to Office 2013 are available to you.
-
Novell Vibe 3.3 or later configured with HTTPS
1.2 Installing the Vibe Add-In
-
On your personal workstation, download the Vibe Add-in from the Novell Downloads Web site.
-
Run the VibeAddinSetup.exe file to install the Vibe Add-in and run the installation wizard.
-
Click .
-
Accept the license agreement, then click .
-
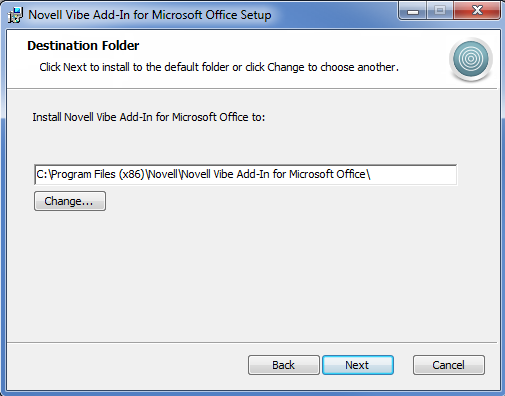
Browse to the location where you want to install the Vibe Add-in, or accept the default location, then click .
-
Click to begin the installation.
-
After the installation is complete, click .
-
Continue with Setting Up the Integration.
1.3 Setting Up the Integration
After you download and install the Vibe Add-in as described in Installing the Vibe Add-In, you need to point the Vibe Add-in to a Vibe system as a repository.
You can configure the Vibe Add-in to connect to multiple Vibe sites. Simply repeat the process described in this section to configure multiple accounts.
-
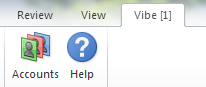
In Microsoft Office, click the tab, then click .
The Accounts dialog box is displayed.
-
Click , then specify the following information:
URL: Specify the URL of your Vibe site. For example, https://vibesite.com:8443
Username: Specify your Vibe username.
Password: Specify your Vibe password.
Use system proxy configuration: Select this option if you are accessing the Vibe site through a proxy server.
If selected, the Vibe Add-in uses the proxy settings defined in the Internet Options dialog box (accessed either through the Windows Control Panel or through Internet Explorer).
Contact your Vibe administrator if you are unsure whether you are accessing the Vibe site through a proxy server.
-
Click .
It might take a few seconds to validate your information. If the Vibe server you are connecting to does not have a valid certificate, you are prompted to accept it.
2.0 Creating a New Document
You can create a new document in Microsoft Office and save it directly to the Vibe site.
-
In Microsoft Office, create a new document.
-
Continue saving the document as described in Saving a Document to the Vibe Site.
3.0 Opening a Document
You can open a Vibe document by browsing to it directly from Microsoft Office, or you can open a Vibe document from the Vibe site, and configure the Vibe site to always launch the document in Microsoft Office.
3.1 Opening a Vibe Document from Microsoft Office
Opening a Document You Recently Opened
-
Click the tab, then click the arrow beneath the icon to display a list of recently opened documents.
-
Click the document that you want to open.
In Microsoft Office 2013, you can open recent documents also from the Backstage view:
-
Click from the Backstage view.
The Open dialog box is displayed.
-
Click in the left-hand column.
Recent documents are displayed in the column.
-
Double-click the document that you want to open.
Opening a Document You Have Not Recently Opened
-
In Microsoft Office, click the tab, then click .
You see your personal workspace, your favorite places, and your teams.
-
(Conditional) If you are using Microsoft Office 2013, you can open documents also from the Backstage view:
-
Click from the Backstage view.
The Open dialog box is displayed.
-
Click in the left-hand column.
Recent documents are displayed in the column.
-
In the column, double-click .
-
-
(Conditional) If you have configured multiple Vibe sites, click the drop-down in the upper left corner of the dialog box to select the site that contains the document that you want to open.
-
Navigate to the document that you want to open by using one of the following methods:
-
Expand the appropriate workspaces, then select the workspace or folder that contains the document that you want to open.
When you select a workspace, all documents that are contained in any sub-folder or sub-workspace in the workspace hierarchy are displayed.
-
In the field, specify the name of the document that you want to locate on the Vibe site, then press Enter.
This searches entries as well as documents in all workspaces and folders where you have rights to view entries. It does not search for folder names.
-
Select the folder in the section if you are opening a Vibe document that you have recently opened or saved from Microsoft Office.
-
-
Select the document, then click .
3.2 Opening a Vibe Document from the Vibe Site
You can open a Vibe document in Microsoft Office directly from the Vibe site:
-
Navigate to and open the entry that contains the file that you want to edit.
-
(Conditional) If the file that you want to edit is an attachment, click the tab.
Only Files folders can contain files that are not attachments.
-
Next to the file that you want to edit, click .
The file is launched in Microsoft Office.
4.0 Editing an Existing Vibe Document
You can use Microsoft Office to directly edit documents that are located in your personal workspace, one of your team workspaces, or one of your favorite places on the Vibe site. Users can open the same document, edit it, and merge changes in near real time.
4.1 Editing Vibe Documents
-
Open the document as described in Opening a Document.
-
Make the desired changes to the document.
-
Click .
A new version of this document is created in Vibe.
For information about how to save the document to a location on the Vibe site that is different from the location where the document currently resides, see Saving a Document to the Vibe Site.
4.2 Co-Editing a Vibe Document
Before you can co-edit documents as described in this section, the Vibe administrator must enable document co-editing, as described in Enabling Users to Edit Vibe Documents with Microsoft Office
in the Novell Vibe 3.3 Administration Guide.
To co-edit a document, multiple people open the same document and edit it simultaneously. If you want to restrict others from editing a document at the same time as you, you can lock the document, as described in Locking a Document.
To co-edit a Vibe document with the Vibe Add-in:
-
Open the same Vibe document that other collaborators have opened, then make your changes.
For information on how to open a Vibe document in Microsoft Office directly from Microsoft Office or from the Vibe site, see Opening a Document.
-
Click .
If the changes you made conflict with the changes of a collaborator, you are prompted to choose one of the following actions:
-
Merge: Combines your edits with the edits from your collaborators.
This feature is supported in Word (2007 and 2010) and PowerPoint 2010 by default. It is supported in Excel 2007 and 2010 only when the workbook is configured for shared mode. It is not supported in PowerPoint 2007.
-
Merge and Review: Combines your edits with the edits from your collaborators and highlights any changes that have been made.
-
Cancel: Temporarily hides the prompt to merge your changes so that you can continue making edits and combine them with edits from your collaborators later.
Click to reveal additional options:
-
Update: Discards your changes and opens the collaborator’s version of the document.
-
Overwrite: Overwrites the collaborator’s version of the document with the version that you are now creating.
Collaborators who are also working on the document see a notification informing them that changes have been made to the document. Collaborators can then choose an action from the same options, which are Merge Changes, Merge and Review, Cancel, Update, and Overwrite.
-
4.3 Editing a Read-Only Document
When you open a document, it appears as Read-Only if it is locked by another user or if you don’t have rights to modify the document. You can still edit the document. However, when you save the document by pressing Ctrl+S or by clicking in Office, you are prompted to save a copy of the document to your local file system.
To save the document back to the Vibe site:
-
In Microsoft Office, click the tab, click or , then choose a location to save the document on the Vibe site where you have rights to create a file.
4.4 Editing a Document After Losing Connection to the Vibe Site
If you lose your connection to the Vibe site while editing a Vibe document in Microsoft Office, the Vibe Add-in for Microsoft Office saves your document. You can continue editing the document offline, then re-save the document to Vibe after you reestablish a connection to the Vibe site.
Losing Your Connection to the Vibe Site
You might lose your connection to the Vibe site if the Vibe server is unavailable, or if you lose your Internet connection.
If you lose your connection to the Vibe site while you are editing a Vibe document and then try to save the document to Vibe site, the following items indicate that you are working offline:
-
 is displayed next to the document name in the Dashboard.
-
The button is displayed on the ribbon in the tab. Clicking this button displays the documents that are waiting to be uploaded to the Vibe site.
-
A numeral indicating the number of documents waiting to be uploaded to the Vibe site is displayed on the tab.
You can continue editing documents after you lose the connection to your Vibe site, then save them after you regain your connection, as described in Saving Documents to Vibe after You Regain Your Connection to the Vibe Site. If you close the document, you can open it again, as described in Opening a Document after You Lose Your Connection to the Vibe Site.
Opening a Document after You Lose Your Connection to the Vibe Site
If you lose your connection to the Vibe site while editing a Vibe document in Microsoft Office, you can close the document, then re-open the document and continue editing it.
-
In Microsoft Office, click the tab, click , then click the file that you want to open.
or
In Microsoft Office, click the tab, click the arrow beneath the open icon to display a list of recently opened documents, then click the file that you want to open.
In Microsoft Office 2013, you can open pending documents also from the Backstage view:
-
Click from the Backstage view.
The Open dialog box is displayed.
-
Click in the left-hand column.
Pending documents are displayed in the column.
-
Double-click the document that you want to open.
After you regain your connection to the Vibe site, you can save the document as described in Saving Documents to Vibe after You Regain Your Connection to the Vibe Site.
Saving Documents to Vibe after You Regain Your Connection to the Vibe Site
After you regain your connection to Vibe, you can save the documents to Vibe. If you were working on multiple documents when you lost your connection to Vibe, you can view all the documents that you were working on, then decide whether you want to save the documents to Vibe or delete them.
-
If the document you were editing is still open in Microsoft Office, simply click to save the document to the Vibe site.
or
If the document you were editing is no longer open, click the tab in Microsoft Office, then click > .
The Manage Pending Uploads dialog box is displayed.
-
Select the document that you want to manage, then click one of the following options:
-
View File: Opens the Upload folder where the document is located on your local file system. You can then open the document to view its contents.
-
Upload: Uploads the document to the Vibe site. If there were other changes made to the document since you last uploaded it to the Vibe site, you are prompted with the options discussed in Co-Editing a Vibe Document.
-
Delete: Deletes the document from your local file system. The document is not uploaded to the Vibe site.
-
5.0 Locking a Document
You can lock a document while you are editing it to prevent others from editing it at the same time. If you do not lock the document, you might be co-editing the document, as described in Co-Editing a Vibe Document.
-
With the document open in Microsoft Office, click the tab, then click .
A icon
 is displayed next to the document name in the Dashboard, indicating that the document cannot be edited by other users.
To see which user is locking the document:
-
Mouse over the icon
next to the document name in the Dashboard.
6.0 Saving a Document to the Vibe Site
After you create a document in Microsoft Office, you can save the document directly to your personal workspace, one of your team workspaces, or one of your favorite places on the Vibe site.
-
With the document open in Microsoft Office, click the tab, then click .
-
Specify a name for the file, then use the drop-down list to select the type of extension that you want to use for the file, such as .docx.
-
(Conditional) If you have configured multiple Vibe sites, click the drop-down list in the lower right corner of the dialog box to select the site that you want to save the file to.
-
To save the file to a Files folder, click the drop-down list, then click the Files folder in your personal workspace, team workspaces, or favorites where you want to save the file.
or
To save the file to any type of folder, click the drop-down list, then click to browse to the folder in your personal workspace, team workspace, or favorites where you want to save the file.
When files are saved to folders other than Files folders, the files are created as entry attachments.
You can save a document only in workspaces and folders where you have rights to create a Vibe entry. If you do not have rights in a folder to save a document, the workspace or folder is not displayed in the Vibe folder structure.
-
(Optional) Click to specify a title or description for the document.
-
Click .
The document is added to the folder as a folder entry. For more information about how to work with folder entries when you access Vibe from your browser, see
Working with Folder Entries
in the Novell Vibe 3.3 User Guide.If a document with the same name already exists in the folder, select from the following options:
-
Save As New Version: Saves the document as a new version of the existing document.
-
Overwrite: Overwrites the existing document with the document you are saving.
-
Rename: Allows you to rename the document or save the document to a new location.
-
7.0 Viewing Information about a Document
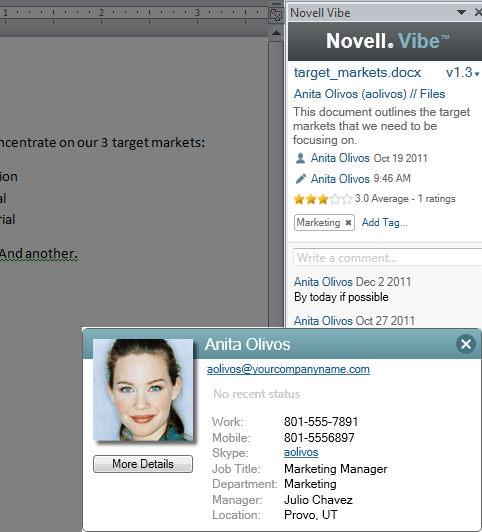
Vibe documents reside in entries that contain additional information about the document, such as who created the document, who last edited it, a document description, comments, and more. You can view this information within Microsoft Office.
-
With the document open in Microsoft Office, click the tab, then click the button if the dashboard is not already displayed on the right side of the page.
-
View the following information about the document:
Title: Title of the document.
Click the document title to launch a browser and display the entry that contains the document in Vibe.
Version: Version of the document.
Click the version number to see a list of versions and perform various actions on the versions, as described in Working with Previous Versions of a Document.
Location: Location of the document on the Vibe site.
Click the location to launch the Open Document dialog box, as described in Viewing Other Files in the Same Vibe Folder.
Description: Description of the document.
Mouse over the description and click the icon
 to edit the description in an HTML editor.
Created By: User who created the document.
Click the user’s name to display details about the user. Click to launch a browser and view the user’s profile information in Vibe.
Last Edited By: User who most recently edited the document.
Click the user’s name to display details about the user. Click to launch a browser and view the user’s profile information in Vibe.
Average Rating: Average number of stars the document has received. This is based on a five-star rating system.
Click a star to provide a rating, as described in Rating a Document.
Tags: Tags that are assigned to the document.
Click to add a tag, as described in Tagging a Document.
Comments: Comments that have been made on the document.
Click in the field to provide a comment, as described in Commenting on a Document.
8.0 Rating a Document
You can use Microsoft Office to rate a document that is on the Vibe site in your personal workspace, team workspaces, or favorite places.
-
With the document open in Microsoft Office, click the tab, then click the button if the dashboard is not already displayed on the right side of the page.
-
Click the star that represents your evaluation.
For example, to give an entry a rating of three stars, click the third star from the left.
For information about how to rate a document in the regular Vibe interface, see Rating a Folder Entry
in the Novell Vibe 3.3 User Guide.
9.0 Tagging a Document
You can use Microsoft Office to tag a document that is on the Vibe site in your personal workspace, team workspaces, or favorite places.
-
With the document open in Microsoft Office, click the tab, then click the button if the dashboard is not already displayed on the right side of the page.
-
Click .
-
Select or , depending on whether you want to create a personal or global tag.
For more information about personal and global tags, see
Choosing Between Personal Tags and Global Tags
in the Novell Vibe 3.3 User Guide. -
Specify the name of the tag that you want to add, then click .
For general information about using tags in Vibe, see Using Tags
in the Novell Vibe 3.3 User Guide.
10.0 Providing a Description for a Document
You can provide a description from Microsoft Office for a document that is on the Vibe site in your personal workspace, team workspaces, or favorite places.
-
With the document open in Microsoft Office, click the tab, then click the button if the dashboard is not already displayed on the right side of the page.
-
Click .
-
Specify the description for the document, then click .
To edit an existing description:
-
Mouse over the description in the Dashboard, then click the icon
.
11.0 Commenting on a Document
You can comment on a Vibe document directly from Microsoft Office.
-
With the document open in Microsoft Office, click the tab, then click the button if the dashboard is not already displayed on the right side of the page.
-
In the field, specify your comment, then press Enter.
For more information about making comments in Vibe, see
Commenting on a Folder Entry
in the Novell Vibe 3.3 User Guide.
12.0 Working with Previous Versions of a Document
12.1 Viewing a Previous Version of a Document
You can view a previous version of a document directly from Microsoft Office.
-
With the document open in Microsoft Office, click the tab, then click the button if the dashboard is not already displayed on the right side of the page.
-
Next to the document title, click the current version number to display a list of previous versions.
-
Right-click the version that you want to open, then click .
or
Double-click the version that you want to open.
For more information about managing versions of documents in Vibe, see Using Version Control with Files
in the Novell Vibe 3.3 User Guide.
12.2 Comparing Previous Versions of a Document
This functionality is available only in Microsoft Word.
-
With the document open in Microsoft Office, click the tab, then click the button if the dashboard is not already displayed on the right side of the page.
-
Next to the document title, click the current version number to display a list of previous versions.
-
Right-click the version that you want to compare with the current version, then click .
Differences between the two versions are displayed with underlined red text.
12.3 Incrementing the Major Version Number of a Document
By default, when you create new versions of a file, Vibe tracks the versions with minor version numbers. For example, 1.0, 1.1, 1.2, and so forth. You can increment the major version number of the most recent version of a file. For example, version 1.2 becomes version 2.0.
You can increment the major version number of a file directly from Microsoft Office:
-
With the document open in Microsoft Office, click the tab, then click the button if the dashboard is not already displayed on the right side of the page.
-
Next to the document title, click the current version number to display a list of previous versions.
-
Click .
For more information about incrementing the major version number in Vibe, see Incrementing the Major Version Number of a File
in Working with Files in a Folder Entry
in the Novell Vibe 3.3 User Guide.
12.4 Viewing and Editing a Note for a Previous Version
To view a note that has already been added to a file version:
-
With the document open in Microsoft Office, click the tab, then click the button if the dashboard is not already displayed on the right side of the page.
-
Next to the document title, click the current version number to display a list of previous versions.
-
Mouse over the version that contains the note that you want to read.
The note is displayed as a ToolTip.
You can add and edit notes for previous versions of files:
-
With the document open in Microsoft Office, click the tab, then click the button if the dashboard is not already displayed on the right side of the page.
-
Next to the document title, click the current version number to display a list of previous versions.
-
Right-click the version that has the note you want to edit, then click .
-
Specify the note for the version, then click .
For more information about file version notes, see Adding a Note about a File or File Version
in the Novell Vibe 3.3 User Guide.
12.5 Promoting a Previous Version to Be the Current Version
-
With the document open in Microsoft Office, click the tab, then click the button if the dashboard is not already displayed on the right side of the page.
-
Next to the document title, click the current version number to display a list of previous versions.
-
Right-click the version that you want to promote to be the current version, then click .
12.6 Deleting a Previous Version of a File
-
With the document open in Microsoft Office, click the tab, then click the button if the dashboard is not already displayed on the right side of the page.
-
Next to the document title, click the current version number to display a list of previous versions.
-
Right-click the version that you want to delete, then click .
12.7 Changing the Status of a Previous Version of a File
If you have multiple versions of a file, you might want to set a status for each version to help keep track of the official version, the draft versions, and so forth. Files can have the status of , , or .
-
With the document open in Microsoft Office, click the tab, then click the button if the dashboard is not already displayed on the right side of the page.
-
Next to the document title, click the current version number to display a list of previous versions.
-
Right-click the version where you want to change the status, then click > , , , or .
13.0 Viewing Other Files in the Same Vibe Folder
You can quickly view other files that are located in the same Vibe folder as the document that you are currently viewing.
-
With the document open in Microsoft Office, click the tab, then click the button if the dashboard is not already displayed on the right side of the page.
-
Click the folder that contains the document.
All the documents contained in the folder are displayed in the Open Document dialog box.
14.0 Checking for Updates to a Document
When you are using Microsoft Office to edit a document, you can check to see if there have been any updates to the document since you began working on it.
-
With the document open in Microsoft Office, click the tab, then click .
If there have been changes to the document, you can take any of the following actions:
-
Merge: Combines your edits with the edits from your collaborators.
-
Merge and Review: Combines your edits with the edits from your collaborators and highlights any changes that have been made.
-
Cancel: Temporarily hides the prompt to merge your changes so that you can continue making edits and combine them with edits from your collaborators later.
If you select this option, the document version is displayed in red, indicating that you are working on a non-current version.
Click to reveal additional options:
-
Update: Discards your changes and opens the newer version of the document.
-
Overwrite: Overwrites the new version of the document with the version that you are now creating.
15.0 Viewing the Entry in Vibe
Vibe folder entries contain documents as either main documents in File entries, or as attachments in any type of entry (such as a Blog entry). When you view an entry in Vibe, you can perform various actions on the entry that you can’t perform from Microsoft Office, such as sharing the entry with another Vibe user, modifying access controls to the entry, and more. For more information about folder entries in Vibe, see Working with Folder Entries
in the Novell Vibe 3.3 User Guide.
When you edit a document in Microsoft Office, you can quickly view the entry that contains the document in Vibe.
-
With the document open in Microsoft Office, click the tab, then click .
-
Log in to the Vibe site.
The Vibe entry that contains the document is displayed.
16.0 Providing a Link to the Document
You can copy the link to the document that you are currently working on, then use instant messaging or e-mail to send it to other users who might be interested in the document.
-
With the document open in Microsoft Office, click the tab, then click .
You can now paste the link into an instant message or e-mail message.
17.0 Known Issues
For a list of known issues, see the Novell Vibe Add-In Readme.
18.0 Legal Notices:
Copyright © 2011-2013 Novell, Inc. All rights reserved. No part of this publication may be reproduced, photocopied, stored on a retrieval system, or transmitted without the express written consent of the publisher. For Novell trademarks, see the Novell Trademark and Service Mark list. All third-party trademarks are the property of their respective owners.