5.1 Pacemaker GUI—Overview
To start the Pacemaker GUI, enter crm_gui at the command line. To access the configuration and administration options, you need to log in to a cluster.
5.1.1 Connecting to a Cluster
NOTE: User Authentication
To log in to the cluster from the Pacemaker GUI, the respective user must be a member of the haclient group. The installation creates a linux user named hacluster which is member of the haclient group.
Before using the Pacemaker GUI, either set a password for the hacluster user or create a new user which is member of the haclient group.
Do this on every node you will connect to with the Pacemaker GUI.
To connect to the cluster, select . By default, the field shows the localhost's IP address and hacluster as . Enter the user's password to continue.
Figure 5-1 Connecting to the Cluster
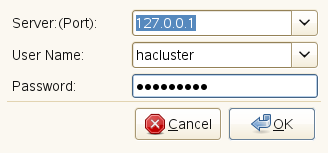
If you are running the Pacemaker GUI remotely, enter the IP address of a cluster node as . As , you can also use any other user belonging to the haclient group to connect to the cluster.
5.1.2 Main Window
After being connected, the main window opens:
Figure 5-2 Pacemaker GUI - Main Window

To view or modify cluster components like the CRM, resources, nodes or constraints, select the respective subentry of the category in the left pane and use the options that become available in the right pane. Additionally, the Pacemaker GUI lets you easily view, edit, import and export XML fragments of the CIB for the following subitems: , , , , and . Select any of the subitems and select in the upper right corner of the window.
If you have already configured your resources, click the category in the left pane to show the status of your cluster and its resources. This view also allows you to set nodes to standby and to modify the management status of nodes (if they are currently managed by the cluster or not). To access the main functions for resources (starting, stopping, cleaning up or migrating resources), select the resource in the right pane and use the icons in the toolbar. Alternatively, right-click the resource and select the respective menu item from the context menu.
The Pacemaker GUI also allows you to switch between different view modes, influencing the behavior of the software and hiding or showing certain aspects:
- Simple Mode
-
Lets you add resources in a wizard-like mode. When creating and modifying resources, shows the frequently-used tabs for sub-objects, allowing you to directly add objects of that type via the tab.
Allows you to view and change all available global cluster options by selecting the entry in the left pane. The right pane then shows the values that are currently set. If no specific value is set for an option, it shows the default values instead.
- Expert Mode
-
Lets you add resources in either a wizard-like mode or via dialog windows. When creating and modifying resources, only shows the corresponding tab if a particular type of sub-object already exists in CIB. When adding a new sub-object, you will prompted to select the object type, thus allowing you to add all supported types of sub-objects.
When selecting the entry in the left pane, only shows the values of global cluster options that have been actually set. Hides all cluster options that will automatically use the defaults (because no values have been set). In this mode, the global cluster options can only be modified by using the individual configuration dialogs.
- Hack Mode
-
Has the same functions as the expert mode. Allows you to add additional attribute sets that include specific rules to make your configuration more dynamic. For example, you can make a resource have different instance attributes depending on the node it is hosted on. Furthermore, you can add a time-based rule for a meta attribute set to determine when the attributes take effect.
The window's status bar also shows the currently active mode.
The following sections guide you through the main tasks you need to execute when configuring cluster options and resources and show you how to administer the resources with the Pacemaker GUI. Where not stated otherwise, the step-by-step instructions reflect the procedure as executed in the simple mode.