Environment
Novell SUSE Linux Enterprise Desktop 10
Novell SUSE Linux Enterprise Server 10
Novell Open Enterprise Server (Linux based)
Novell SUSE Linux Enterprise Server 10
Novell Open Enterprise Server (Linux based)
Situation
This document identifies the process of setting up a RAID 1 file system when installing SUSE Linux Enterprise Desktop 10.
Resolution
The steps for installing SUSE Linux Enterprise 10 to a RAID1 (mirrored) device is fairly simple. NOTE: Once a system is set up, though, the only way to convert an existing file system to a RAID system is to copy the data off, delete the partitions that will become RAID, set up the new RAID partitions, and then copy the data back onto them. The procedure for installation is as follows:
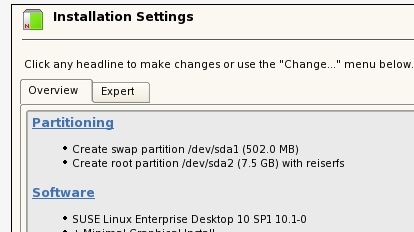
- Start the installation. When the system arrives to the point of setting the partition information:
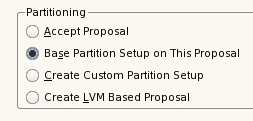
- Click on the partitioning link. This will open a new window asking how you want to customize the partitioning. Select "Base Partition Setup on This Proposal", and continue with the wizard :
- The next window will include the current file systems :
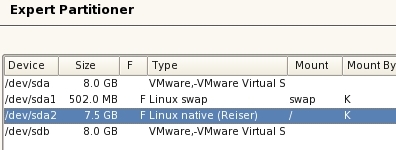
- Select the root partition (or whichever partition is desired to be set as a RAID partition), and select "Delete" at the bottom.
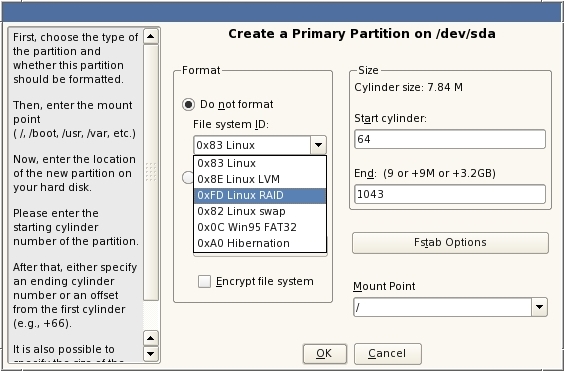
- Create a new partition from the first disk on which the new RAID partition will exist. This should use a Primary partition type when prompted. Set it to "Do not format", with a File System ID of "0xFD Linux RAID" in the drop down. Click on "OK". Repeat this last process for a partition on each drive to be used in the RAID, making sure that the partitions are the same size.
- When complete, at the bottom of the expert partitioner is a button called "RAID" - click this, and select "Create RAID". This will prompt for the type of RAID.
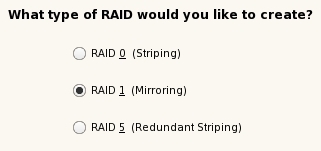
- Select "RAID 1 (Mirroring)", and click "Next". In the next window, each RAID partition will be listed. Highlight each one, clicking on "Add" to set the raid device to "md0" (or appropriate device). Once all have been added, click on "Next".
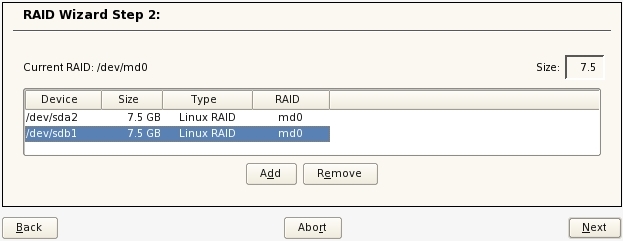
- When prompted for the formatting options of the RAID device, just ensure that the mount point is set properly, and a good format is selected (e.g. ext3), and then click "Finish".
- The Expert Partitioner window should be restored, this time with the RAID device listed.
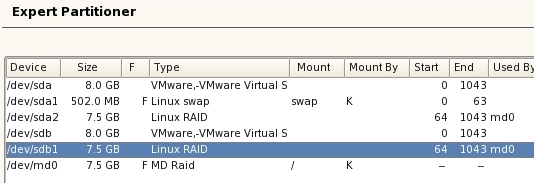
- Click "Finish", and continue with the installation normally. Once complete, the hard drives should be mirrored.
