8.6 Managing Sent Items
IMPORTANT:You can manage your sent items for GroupWise e-mail only if the recipient is located on the same GroupWise system as you.
8.6.1 Confirming Delivery of Items You have Sent
Evolution provides several ways for you to confirm that your item was delivered. You can easily track message status of any message you have sent. For example, you can see when an e-mail was delivered and when the recipient opened or deleted the e-mail.
Track an Item You Sent: You can check the status in the Message Status window of an e-mail You have sent.
Receive Notification When the Item is Opened or Deleted: You can receive notification when the recipient opens or deletes a message. For information, see Requesting a Reply for Items Send.
Request a Reply: You can inform the recipient that you need a reply to an e-mail. Evolution adds a sentence to the item stating that a reply is requested and changes the icon in the recipient's Mailbox to a double arrow. For information, see Requesting a Reply for Items Send.
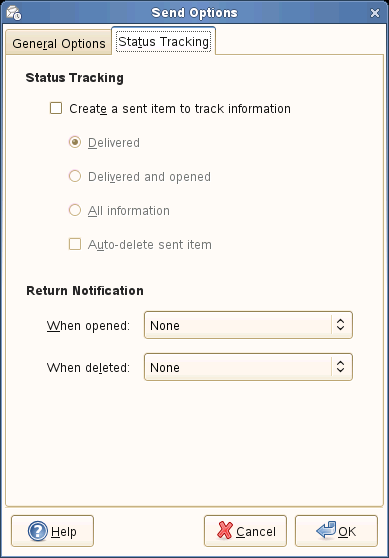
Status Tracking
You can enable Status Tracking before you send any messages.
To track the status of the message you are sending,
-
In the Compose Message window, click Insert > Send Options > Status Tracking
-
Select the check box next to Create a sent item to track information.
-
Select any of the options given (Delivered, Delivered and opened, All information)
Based on this selection, you can view the status of the send message in the Sent Items folder.
For more information, see Checking the Status of an Item You Have Sent.
-
Select the check box next to Auto-delete sent item to delete the sent item automatically from the Sent folder.
-
Return Notification: In the Return Notification, specify the type of return receipt you want.
-
Click OK.
Checking the Status of an Item You Have Sent
-
Right-click an e-mail in your Sent folder, then click Track Message Status.
With Message Tracking, you will know when the item reached the recipients or read by them. You will also know exactly who received your message, who read your message, who deleted and when.
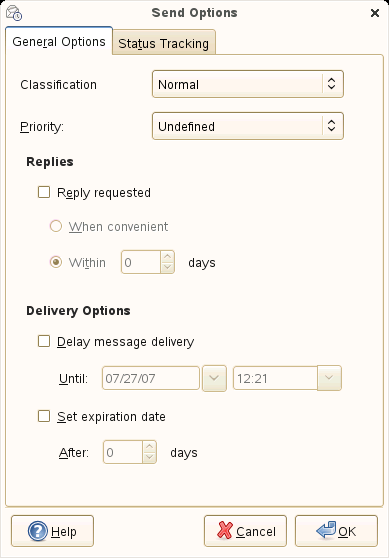
8.6.2 Changing the Priority of an E-Mail
-
In the Compose Message window, click Insert > Send Options.
-
Select High Priority, Standard Priority, Low Priority, or Undefined.
The small icon next to an item in the Mailbox is red when the priority is high.
-
Click OK.
8.6.3 Requesting a Reply for Items Send
-
In the Compose Message window, click Insert > Send Options.
-
Click Reply Requested, then specify when you want to receive the reply.
When convenient: Select this option to allow the recipients to reply at their convenience. If you select this option, Reply Requested: When Convenient appears at the top of the message.
Within days: Specify the number of days by when you need a reply.
-
Click Set expiration date, and specify the number of date for the message to get expired.
Until the specified count of days have passed, your message remains in the recipient's Inbox.
-
Click OK.
8.6.4 Setting Message Delivery Options
You can delay the delivery of an individual message by having them held in the Outbox for a specified time after clicking Send.
-
Click Delay message delivery.
-
Set the Date and Time until you want the message to be held in the Outbox.
-
Click OK.
8.6.5 Displaying Sent Items
You might want to display items you previously sent. For example, you can read a sent e-mail.
-
Click the Sent Items folder in the Folder List.
All sent items reside in this folder unless you select a different folder for sent e-mail in the account editor default settings. For more information refer Changing Default Folder for Sent and Draft Items under Section 3.2.13, Default Settings.
8.6.6 Delegating an Item
-
In the Calendar, right-click the meeting or appointment you want to delegate.
-
Select Delegate Meeting, then select the contacts you want to delegate the meeting/appointment for.
-
Click OK.
Each contact gets a copy of the appointment or meeting.
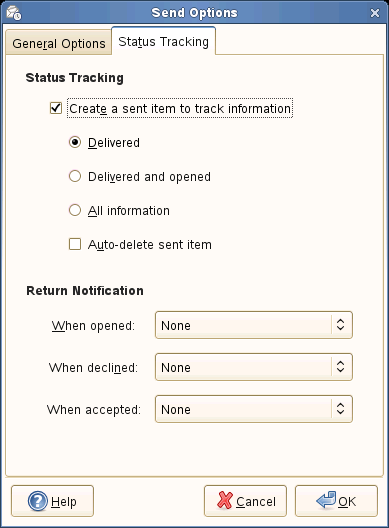
Status Tracking
To track the status of the message you have sent,
-
In the Compose Meeting window, click Insert > Send Options > Status Tracking
-
Select the check box next to Create a sent item to track information.
-
Select any of the options given (Delivered, Delivered and opened, All information)
Based on this selection, you can view the status of the send message in the Sent Items folder.
-
Select the check box next to Auto-delete sent item to delete the sent item automatically from the Sent folder.
-
Return Notification: In the Return Notification, specify the type of return receipt you want.
-
Click OK.