1.4 Creating the Migration Proxy Account
The Engine running in Active Directory uses a migration proxy account to log in to the eDirectory tree. Any time you perform a migration from the eDirectory tree to the Active Directory domain, the Admin Client uses the migration proxy account that you establish in this procedure.
IMPORTANT:This process creates a new User object in eDirectory with a 32-character password that is generated automatically by File Dynamics. If your Universal Password policy does not accommodate 32-character passwords, you must modify or create a new Universal Password policy before proceeding. For more information, refer to Section 3.4, “Creating Password Policies,” in the Novell Password Management 3.3.1 Administration Guide, especially the information in Figure 3.3, “Advanced Password Rules Continued.”
-
Launch the Admin Client.
-
From the tab, click .
-
From the drop-down menu, select .
-
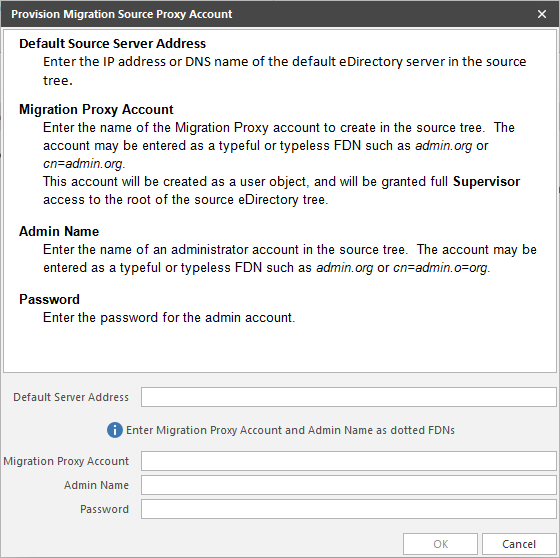
Fill in the following fields:
Default Server Address: Specify the IP address or DNS name of a server in the eDirectory tree where the files you want to migrate are located. The Engine in the Active Directory environment must be able to communicate with this server when performing data migrations.
Migration Proxy Account: Provision a migration proxy account by specifying the typeless fully distinguished name (FDN) of the proxy account that you want to provision.
The Engine running in Active Directory uses the migration proxy account to log in to the eDirectory tree. Any time you perform a migration from the eDirectory tree to the Active Directory domain, the Engine uses the migration proxy account that you establish in this step.
Admin Name: Specify the typeless FDN of an account in the source eDirectory tree that has the appropriate right to provision the Migration Proxy Account (MPA).
Password: Specify the password for the typeless FDN provided above.
-
Click
-
When the confirmation dialog box appears, click .
The information entered in the Provision Migration Source Proxy Account dialog box is now displayed in the fields of the region of the page.
The Engine logs in as the Admin account provided and provisions the MPA as a User object in the source eDirectory tree. It also grants the MPA object full rights to the root of the source tree, which allows File Dynamics to pull eDirectory and file system information during the course of migration operations.