3.3 Install SQL Server Express
-
Launch the SQL Server Express installation file.
-
Choose a directory for the extracted files and click .
-
Select .
-
In the License Terms page, accept the license terms and click .
-
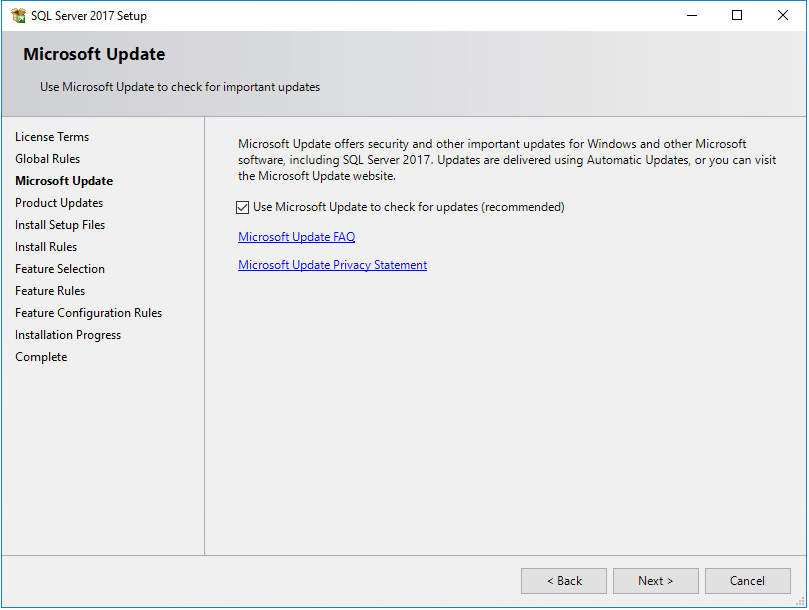
In the Product Updates page, click .
-
Select , then click .
-
In the Install Rules page, click .
-
Click .
-
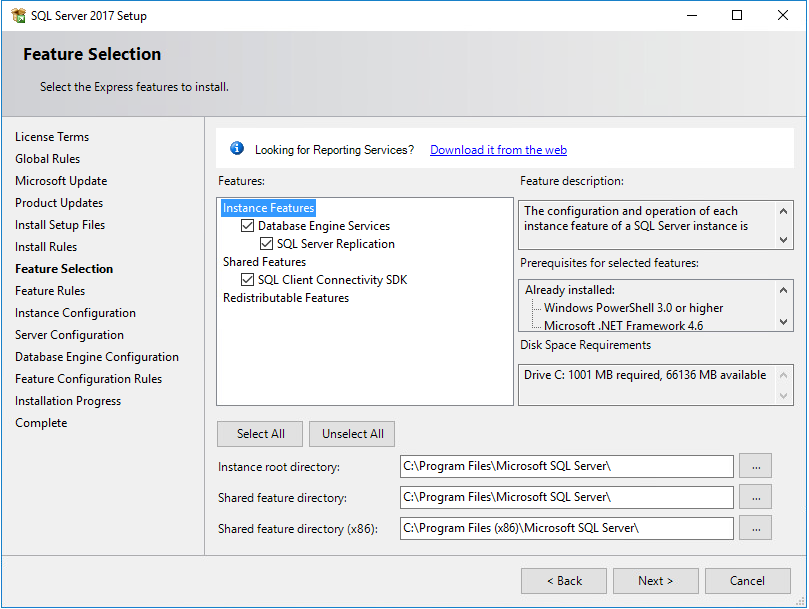
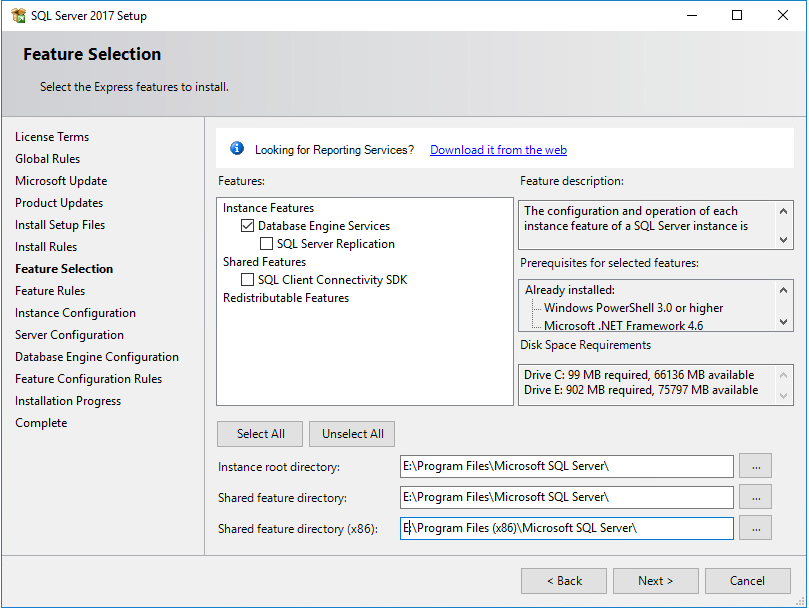
Select the check box.
-
In the , , and fields, specify the path where you want to SQL instance to reside.
-
Click .
-
In the Feature Rules page, click .
-
In the Instance Configuration page, click the option and specify a descriptive name for the instance such as FSFDB and click .
-
In the Server Configuration page, click the tab and then click .
-
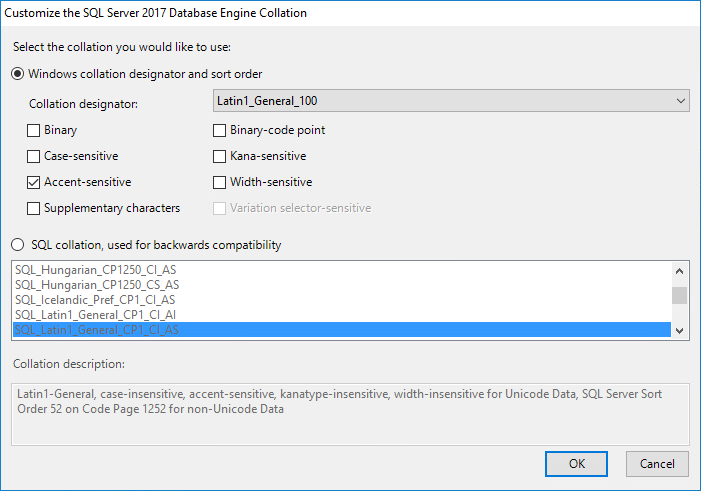
Click the option.
-
From the drop-down menu, select an acceptable collation and settings for your locale.
For example, in North America, an acceptable collation would be with the check box selected.
We recommend that you select a collation that aligns with the Windows locale of the server where the Engine is installed.For more information on collation and locales, refer to this Microsoft document.
-
Click .
-
Click .
-
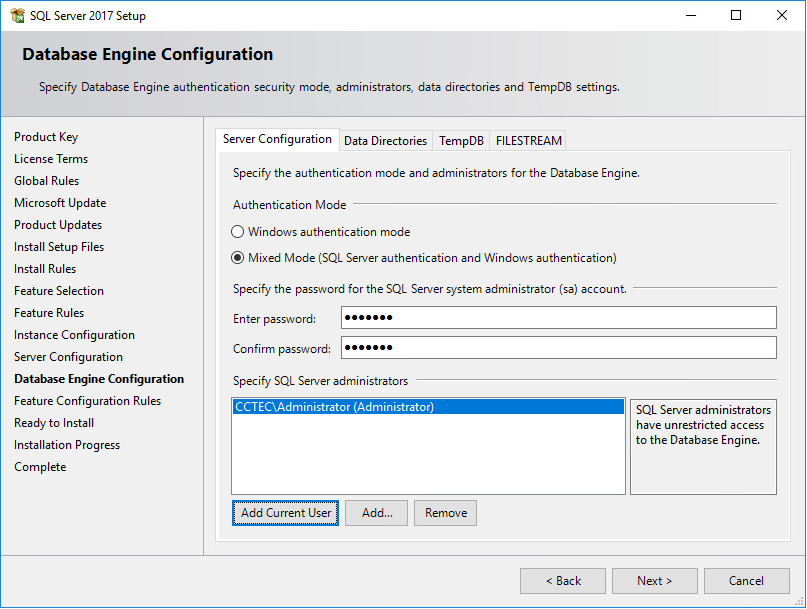
Select the option, enter and confirm an SQL Server administrator password, and then click .
-
Click .
-
In the Complete page, click .
-
Launch SQL Server Configuration Manager.
-
In the left pane, expand .
-
Click (or the name of the database instance you chose earlier).
-
In the right pane, right-click and select .
-
In the warning dialog box, click .
-
Right-click again and select .
-
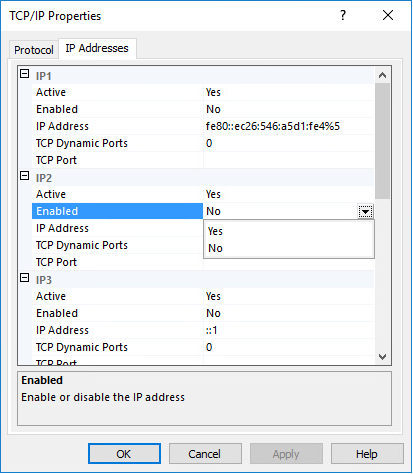
Under the heading, for the field, right-click to select the drop-down men and change the setting to .
-
Select and clear the field so there is no number associated to it.
-
Scroll down to the heading and for the field, and enter 1433.
-
Click .
-
When the warning dialog box appears, click .
-
Click to close the TCP/IP Properties page.
-
In the SQL Server Configuration Manager, click .
-
Right-click and select .
-
Close the SQL Server Configuration Manager.
-
Launch Windows Firewall with Advanced Security.
-
From the left column, click .
-
From the column, click .
-
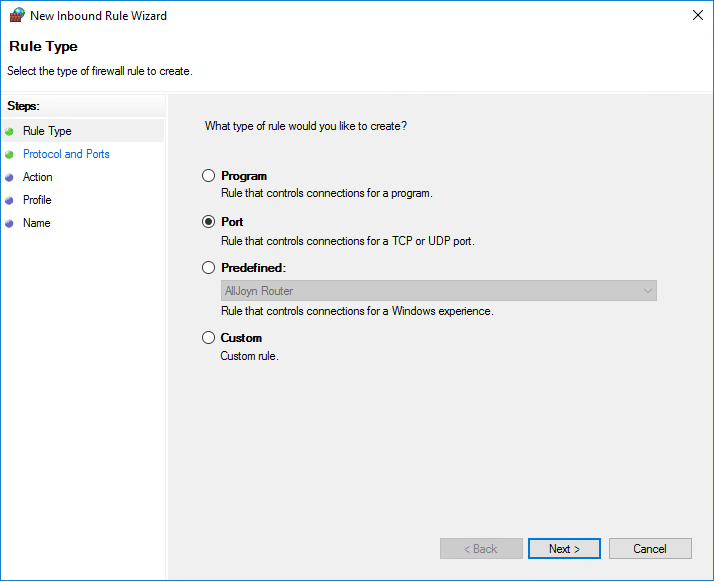
In the Rule Type page, select .
-
Click .
-
In the Protocol and Ports page, enter 1433 in the field, then click .
-
In the Action page, accept the default setting by clicking .
-
In the Profile page, accept the default settings by clicking .
-
In the Name page, specify a name for the new inbound rule in the field.
For example SQL Server Express.
-
Click .