6.7 Configure the Epoch File Viewer
The Epoch File Viewer is what the Data Owner Client (needed for Epoch Data Protection) uses to see a rendering of a file before it is recovered. This procedure sets up Microsoft IIS and ASP.NET.
Configuring the Epoch File Viewer is required only if you will be establishing Epoch Data Protection policies.
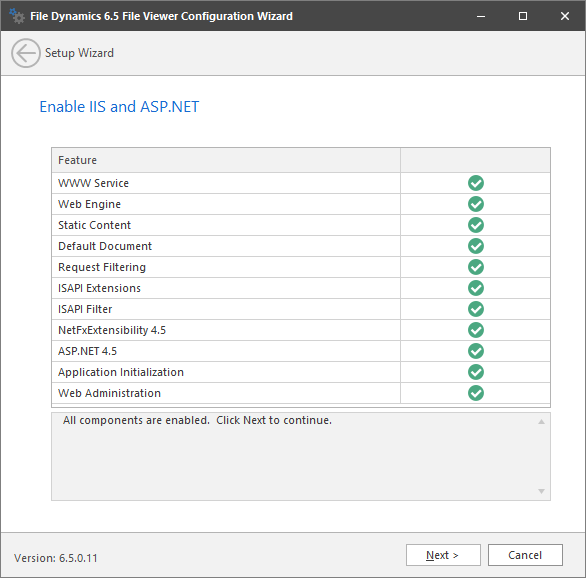
Configuring the Epoch File Viewer will, in the process, install and configure Microsoft IIS.
-
Click .
-
When the confirmation prompt to stop the Engine appears, click .
-
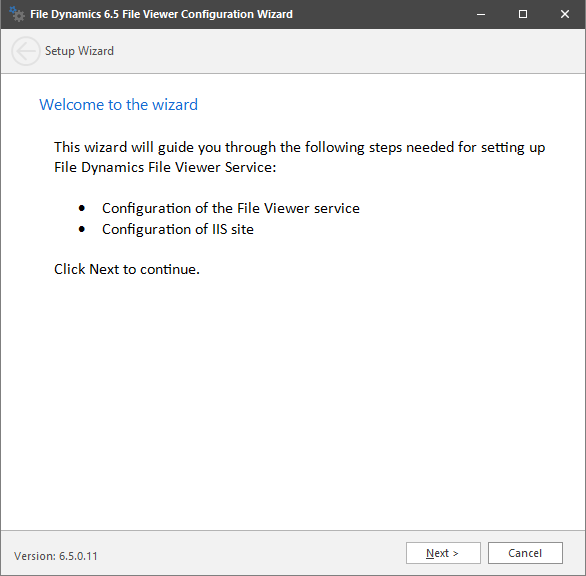
From the wizard page, read the overview of what will be configured and click .

-
Click .
-
Click .
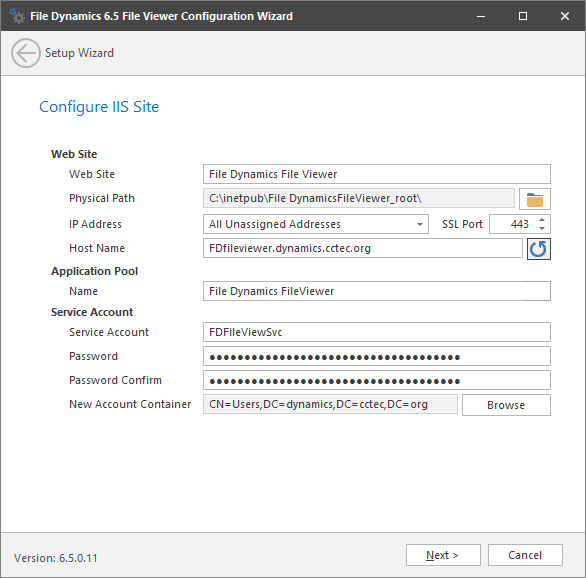
This page lets you review or edit settings applicable to the Microsoft IIS configuration. Unless there is a need to change a setting, we recommend that you leave the settings as they are currently established.
Web Site: Settings for the Microsoft IIS website.
Web Site: The default name for the File Dynamics file viewer web site. If the default name does not conform to your organization’s naming standards, you can edit it.
Physical Path: This path was specified during the installation of the Engine and is the location where files on the website are served up.
IP Address: By default, this field indicates that web requests will be responded to from any IP address available on the server. If the server has multiple IP addresses, you can specify which one you want to use.
SSL Port: The default port is 443. If there is a conflict, you can select another port.
Host Name: The host name as defined in DNS that you specified in Section 1.0, Prerequisites of this manual.
If a warning sign appears next to the Host Name entry, the host name is not fully resolved. Verify that there is a DNS entry for the File Dynamics Epoch File Viewer and that the resolved IP address or addresses are located on the host machine.
Application Pool: Settings pertaining to the File Dynamics application pool in Microsoft IIS.
Name: The default name for the application pool. If the default name does not conform to your organization’s naming standards, you can edit it.
Service Account: Authentication settings that the application pool will be using with Active Directory.
Service Account: The default name of the service account. If the default name does not conform to your organization’s naming standards, you can edit it.
Password: A randomly-generated password for the service account. You do not need to know or remember this password.
Confirm Password: The randomly-generated password is duplicated in this field.
New Account Container: A default LDAP path is displayed where the service account will be created. If you do not have rights to the displayed container, you can use the button to change the path.
-
Modify any settings you need to, then click .
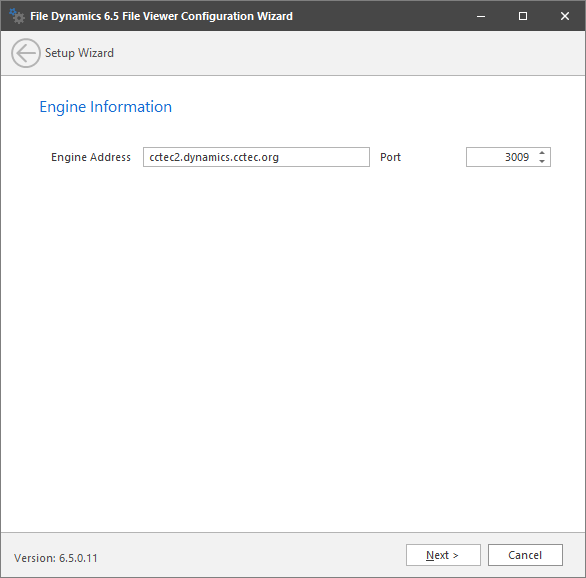
This page displays the Engine address and port number. The name be either in FQDN format or as an IP address.
-
Click .
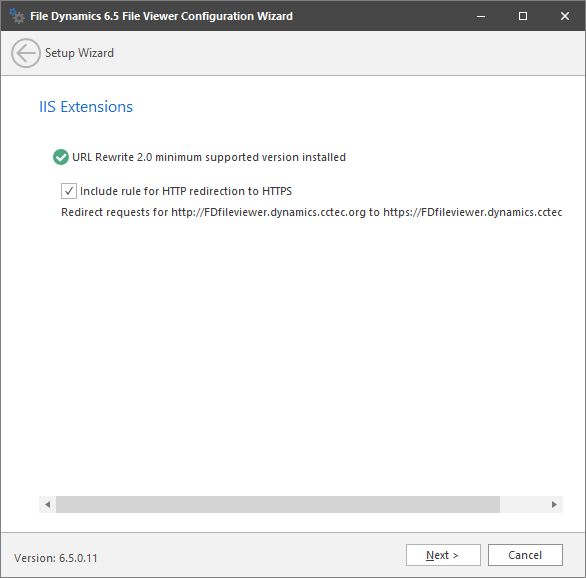
This page lets you install Microsoft IIS URL Rewrite Module 2.0, which will redirect the File Dynamics login page from an entered HTTP protocol, to HTTPS.
-
Click .
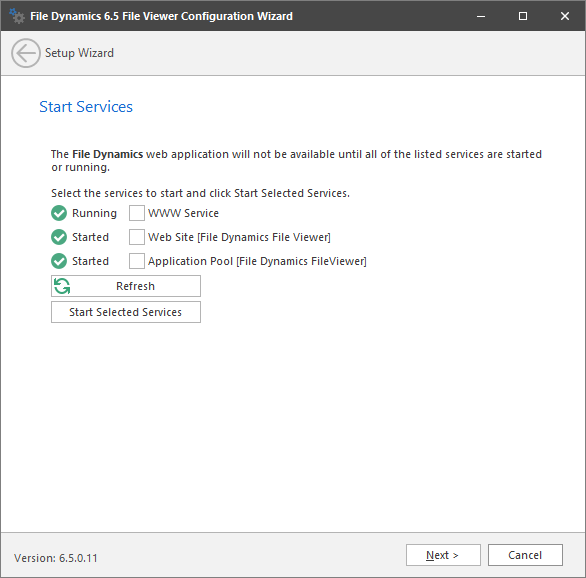
In most cases, all three listed services should be running. If a service is not running and you need to start one manually, you can do so.
-
Click .
-
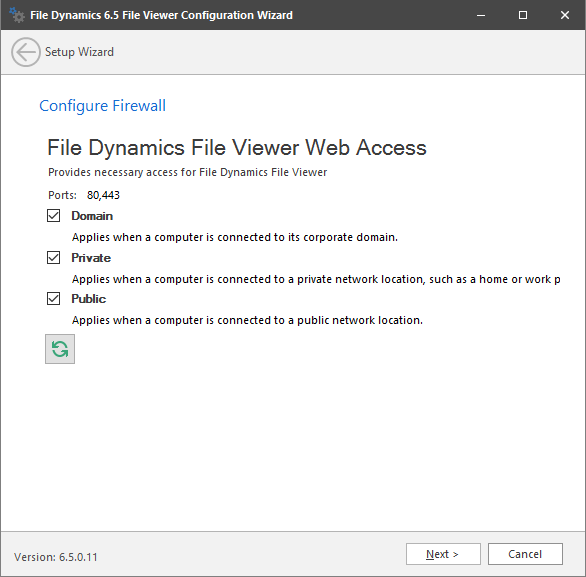
Set the network profiles according to your organization’s security policies and click .
-
When you are notified that the initial setup for the Web Application is complete, click .
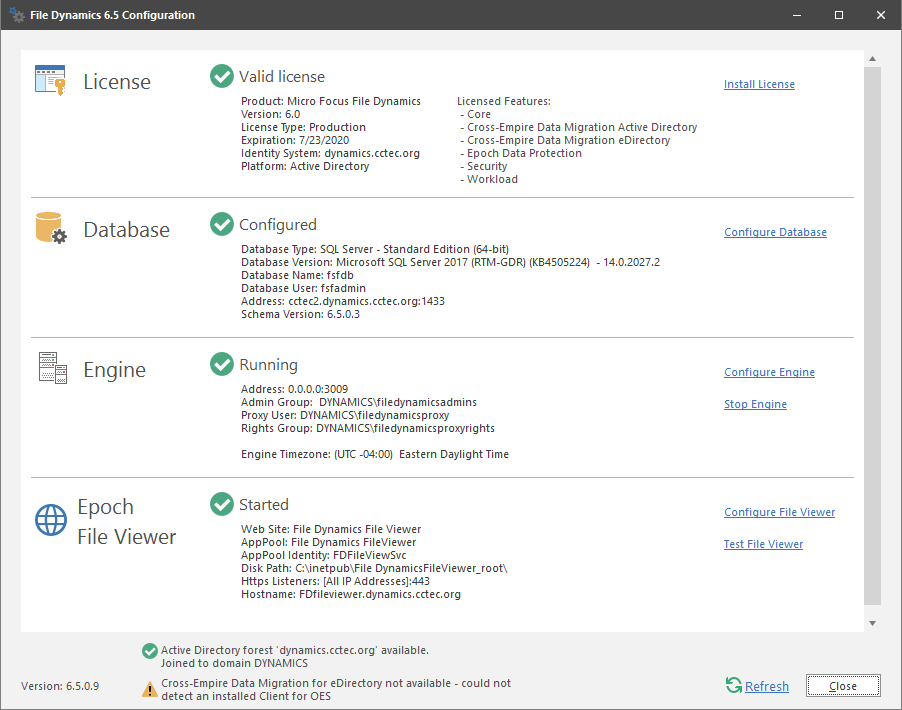
The database, Engine, and Epoch File Viewer are now configured.
-
Click .
-
Do one of the following:
-
If you are notified through the File Viewer Test page that “It worked!”, the communication between the IIS Server and the Engine is working.
-
If you are prompted for a security exception, accept it and follow the procedures for establishing https://fdfileviewer.domain as a trusted website.
-