C.1 Creating an SCCM Application for Distribution
SCCM deploys software from a shared folder on the network. This shared folder is probably already defined by the SCCM administrator.
-
Copy the NFR Agent installation executable file to the already defined software distribution folder.
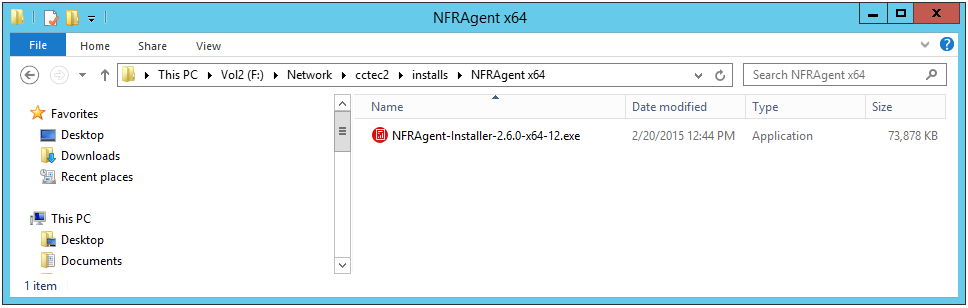
In this example, the shared folder is named installs and is located on a server named CCTEC2. An NFRAgent x64 subfolder contains the NFRAgent-Installer package.
-
From System Center Configuration Manager, select > , then right-click and select .
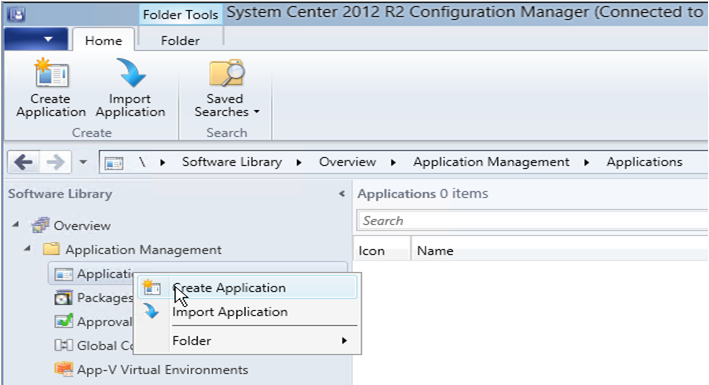
The Create Application wizard is launched.

-
In the field, specify a descriptive name.
For example, NFR 2.6 Agent x64.
Completing the other fields is optional.
-
Click .
-
(Optional) In the Specify the Configuration Manager Application Catalog entry page, browse to display the Novell File Reporter Agent icon.

-
Click .
-
Select

Because SCCM does not have an option for automatically detecting bootstrapped executable installation packages (such as the NFR Agent installation executable), you will need to manually specify the file.
-
Click .
-
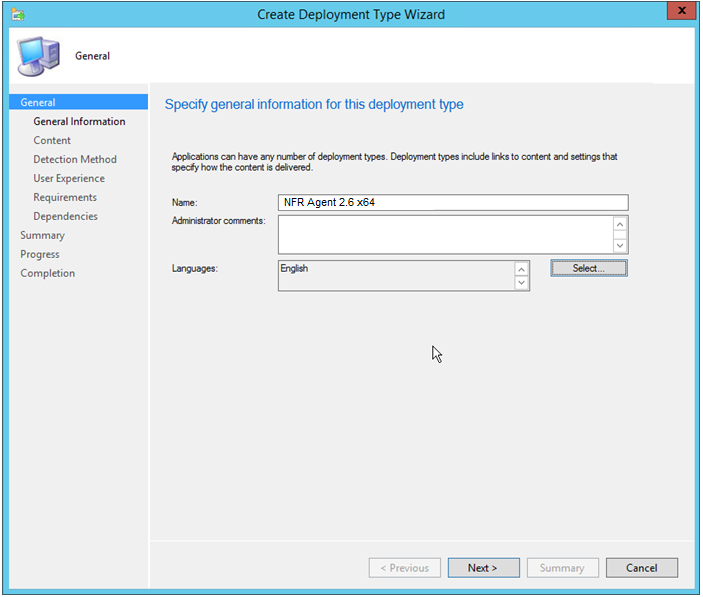
In the field, give the deployment type a name.
For example, NFR Agent 2.6 x64.
-
Click .

-
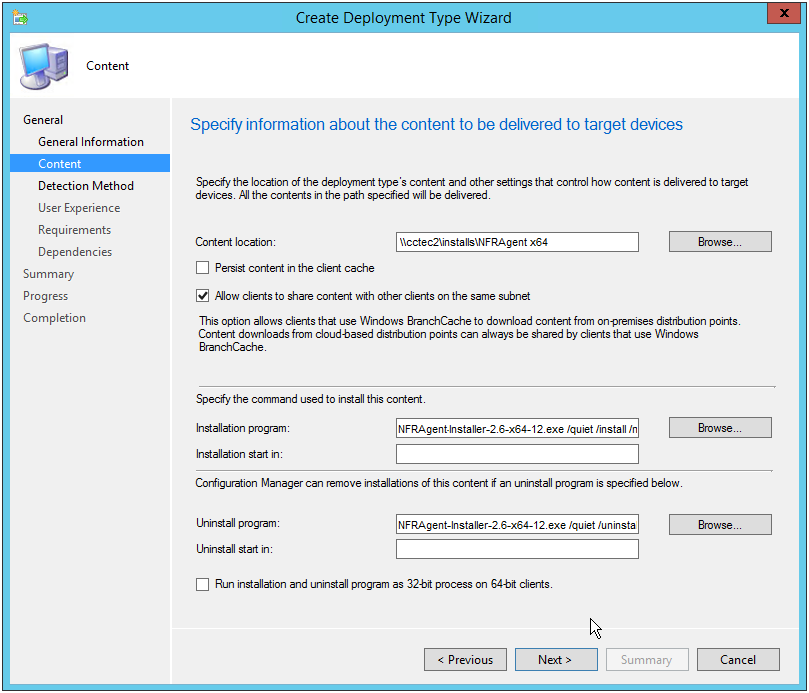
In the field, browse to the parent folder where the NFR Agent is located.
For example: \\cctec\installs\NFRAgent x64
-
In the field, browse for the installation file.
Because the dialog box is limited to displaying MSI files only, you will need to start typing the name of the installation executable in the field and then click the button.
The Installation program field displays the executable file in quotes, preceded by msiexec/i text.
-
In the field, remove the msiexec /i portion and the quotes.
-
Review the parameters and configuration options below before further modifying the parameters in the field.
Installation Program
NFRAgent-Installer-2.6-x64.x.exe
Standard Built-In Options
/quiet /install /norestart
Non-Standard Option:
Added Alternate Installation Path Option
INSTALL_FOLDER="full path to install to alternate install path"
(Available with a new installation only, overridden by what is in the Registry.)
The bootstrap technology sends these options on to the wrapped MSI after installing any dependencies such as a particular version of the DOTNET FRAMEWORK, the Visual Studio runtime, or some other prerequisite that you don’t want to address. Other options are passed through the MSI all the way to the configuration utility.
Command Line Option
Parameter
Notes
ENGINE_ADDRESS=
<DNS or IP Address>
ENGINE_ADDRESS is required for any of the configuration options.
ENGINE_PORT=
3035
DATA_PATH=
"full path to where the data path is configured”
This option could abandon an existing DATA_PATH, if used to upgrade, and a new path is chosen.
The configuration utility is responsible for creating the configuration file and SSL certificate needed by the Agent to communicate with the Engine. The configuration file contains information such as the Engine’s IP Address or DNS Name, the IP port needed to communicate with the Engine, and where to place the DATA_PATH. The only required option is the ENGINE_ADDRESS; the other options have defaults.
Example C-1 Example of combined options:
NFRAgent-Installer-2.6-x64-29.exe
/quiet
/install
/norestart
*INSTALL_FOLDER="C:\Program Files\Novell\File Reporter\Agent"
ENGINE_ADDRESS=10.1.1.10
*ENGINE_PORT=3035
*DATA_PATH="C:\ProgramData\Condrey Corporation\File Reporter\Agent\data"
* These options can be omitted if the default options are preferred.
Example C-2 Example of Installation program field entry:
NFRAgent-Installer-2.6-x64-12.exe /quiet /install /norestart ENGINE_ADDRESS=10.1.1.10
-
In the field, enter the specific combined parameters and commands necessary for remotely installing Agents.
-
(Optional) In the field, use the specific combined parameters and commands necessary for remotely uninstalling earlier versions of Agents.
Only the /quiet and /uninstall arguments are needed for uninstalling Agents.
-
Click .
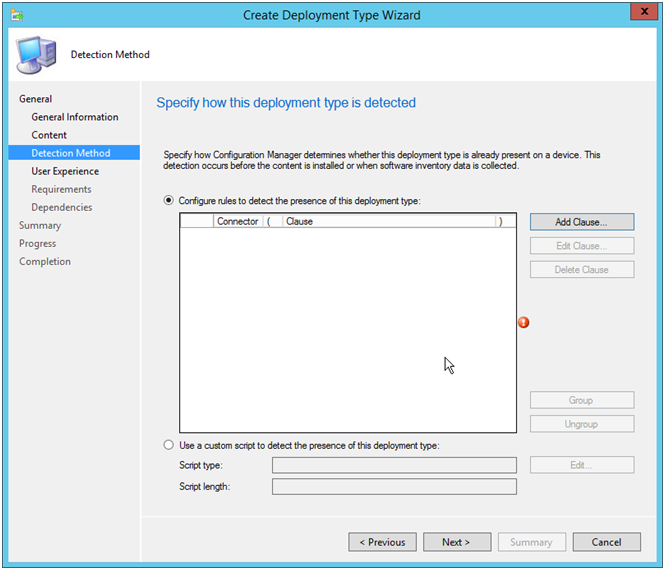
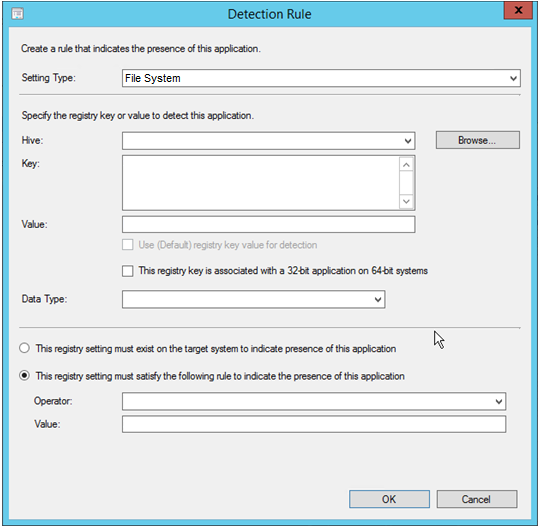
This page lets you specify how SCCM will determine if a package has already been installed.
-
Click .
-
From the drop-down menu, select .
This populates other fields in the dialog box.
-
Verify that HKEY_LOCAL_MACHINE is displayed in the field.
-
In the field enter:
SOFTWARE\Novell\File Reporter\Agent
-
From the drop-down menu, select .
-
Verify that the option is selected.
-
From the drop-down menu, select .
-
In the field, enter an Agent version such as 2.6-12.
In this example, you are specifying that you want this package to be detected and not installed if the value is greater than or equal to 2.6.12. This value can be found by right-clicking the Agent in Programs and Features and then selecting either the or menu options.

-
Click .
-
In the Specify user experience settings for the application page, make the following recommended settings:

-
Click .
-
Click .
-
Click .
-
Confirm the settings that are displayed.

-
Click .
-
When notified that the Create Deployment Type Wizard completed successfully, click .