6.7 Configuring the Web Application
-
Click .
-
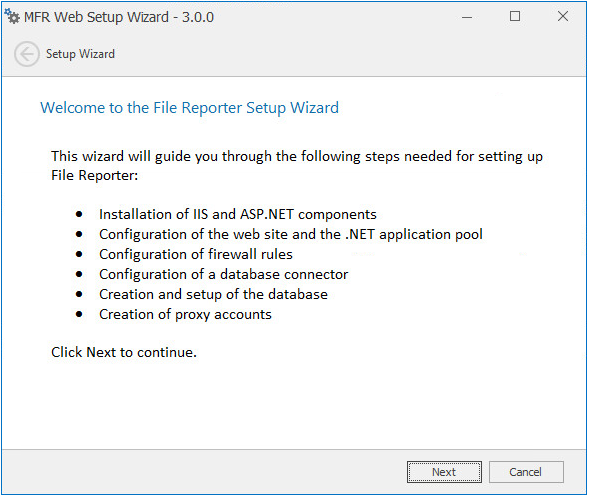
From the wizard page, read the overview of what will be configured and click .
-
Click .
-
Click .
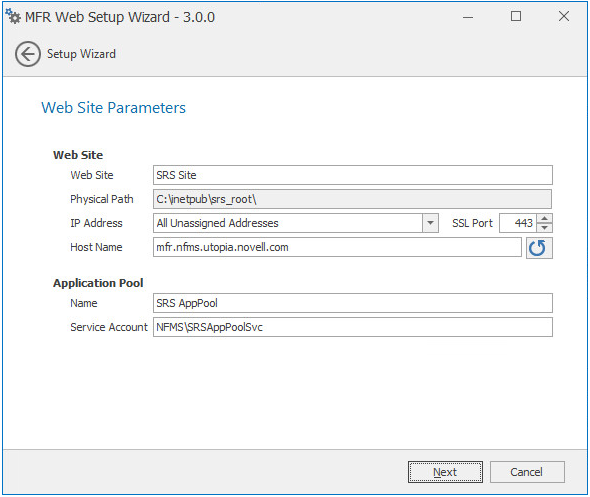
This page lets you review or edit settings applicable to the File Reporter Web application. Unless there is a need to change a setting, we recommend that you leave the settings as they are currently established.
Web Site: Settings for the Microsoft IIS Web site.
Web Site: The default name for the File Reporter Web site. If the default name does not conform to your organization’s naming standards, you can edit it.
Physical Path: This path was specified in Step 6 and is the location where files on the Web site are served up. You cannot edit this path.
IP Address: By default, this field indicates that Web requests will be responded to from any IP address available on the server. If the server has multiple IP addresses, you can specify which one you want to use.
SSL Port: The default port is 443. If there is a conflict, you can select another port.
Host Name: The host name as defined in DNS that you specified in Section 6.2, Prerequisites.
If a warning sign appears next to the Host Name entry, the host name is not fully resolved. Verify that there is a DNS entry for the File Reporter Web application and that the resolved IP address or addresses are located on the host machine.
Application Pool: Settings pertaining to the File Reporter application pool in Microsoft IIS.
Name: The default name for the application pool. If the default name does not conform to your organization’s naming standards, you can edit it.
Service Account: This field specifies the service account name used by the application pool.
-
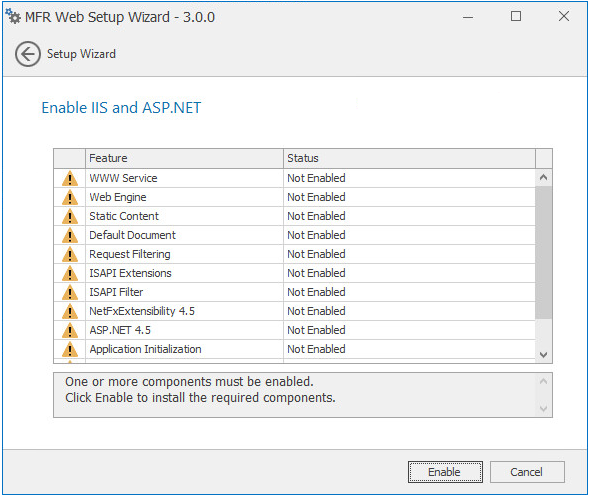
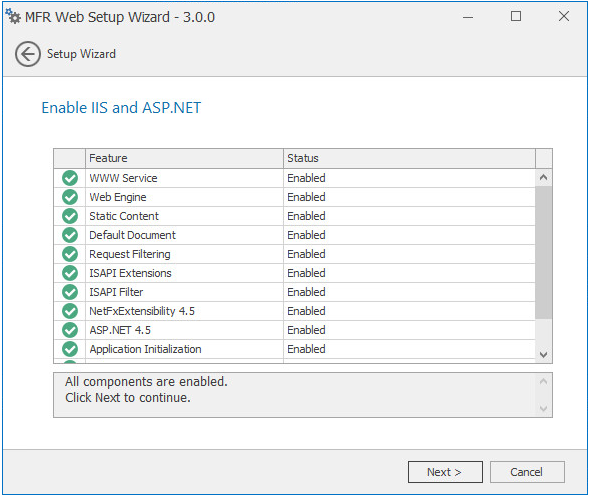
(Conditional) If the components are not enabled, click .
-
Edit the fields as needed and click .
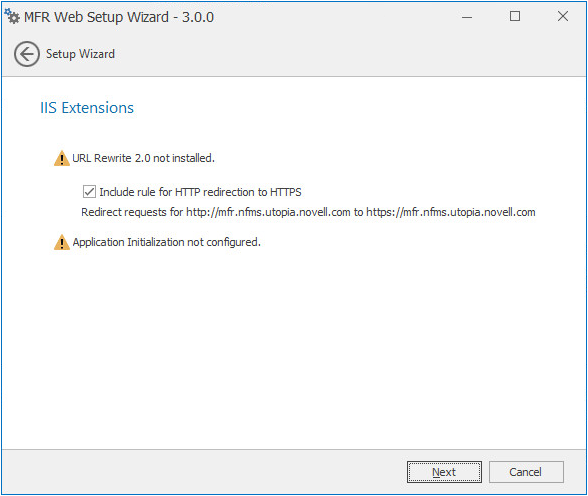
This page lets you install Microsoft IIS URL Rewrite Module 2.0, which will redirect the File Reporter login page from an entered HTTP protocol, to HTTPS. For example, if you enter http://mfr.nvb.local, you would be redirected to the secure login page at https://mfr.nvb.local.
-
Unless your organization has a policy against redirects, leave the check box selected and click .
-
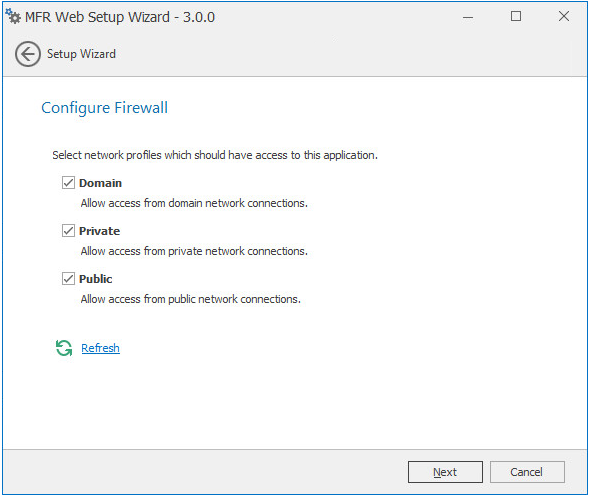
Set the network profiles according to your organization’s security policies and click .
-
When you are notified that the initial setup for the Web Application is complete, click .
The database, Engine, and Web Application are now configured.

-
(Optional) Click the hyperlink to launch the Web-based administrative interface.
The hyperlink is located below the listed Web Application details.
-
Install the Agents by referring to the following chapters:
-
To install Agents on Windows servers, refer to Section 8.0, Installing and Configuring the Windows Agent.
-
To install Agents on Linux servers, refer to Section 9.0, Installing and Configuring the Linux Agent.
-