12.2 Install and Configure the Agent for OES Linux
-
At the Open Enterprise Server machine, launch a terminal session.
-
At the terminal console, install or upgrade the Linux Agent for OES by typing:
rpm –Uvh microfocus-filereporter-agent-3.6.0-xx.x86_64.rpm
-
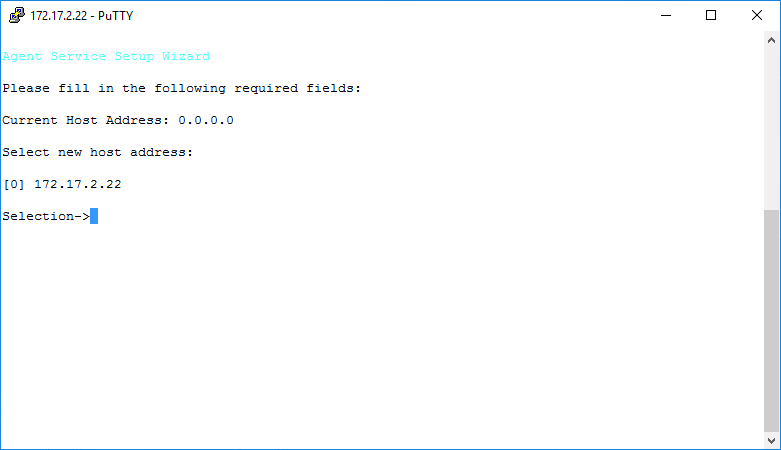
Type srsagent-config and press Enter.
The console is updated and appears similar to the one below.
-
Specify the IP address option you want (such as 0 in the example above) and press Enter.
-
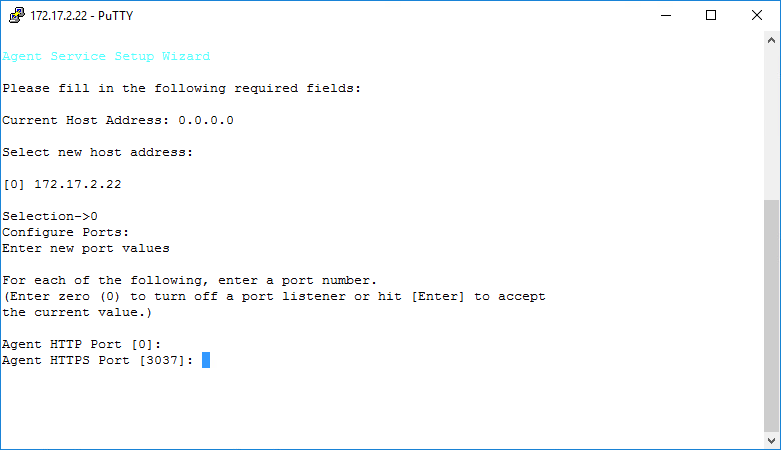
When the HTTP Port [0] option appears, type 0 and press Enter.
The console is updated and looks similar to the one below:
-
Unless there is a conflict, accept the default HTTPS port number of 3037 by pressing Enter. If you need to use another port number, provide the new port number.
-
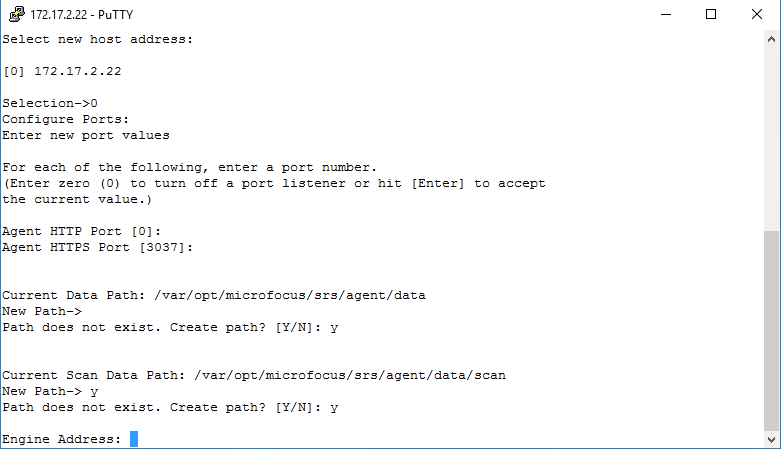
Accept the specified data path by pressing Enter.
-
When you are prompted to create the path, type Y and then press Enter.
-
Accept the specified scan data path by pressing Enter.
-
When you are prompted to create the path, type Y and then press Enter.
The console is updated and looks similar to the one below:
-
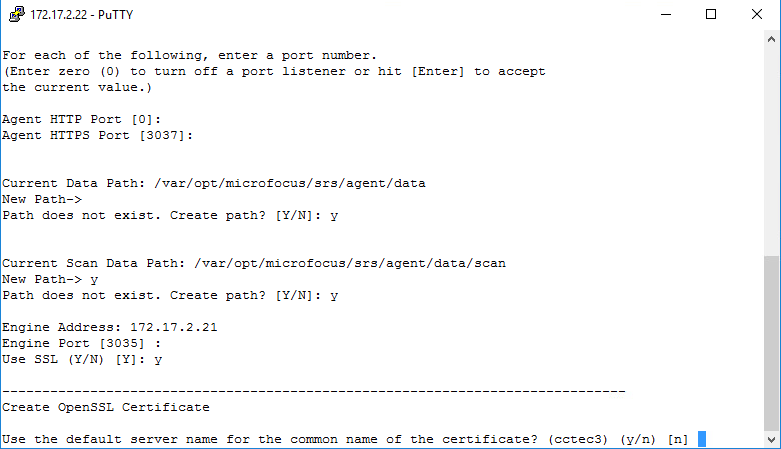
Type the IP address of the server hosting the Engine and press Enter.
-
Press Enter to accept the specified port number.
-
When prompted to use SSL, type Y and then press Enter.
The console is updated and looks similar to the one below:
-
Do one of the following:
-
Type Y and then press Enter to select oeslinux as the name for the SSL certificate.
-
Type N, type a certificate name, and press Enter.
-
-
After the private key has been created, press Enter to continue.
-
After the certificate has been created, press Enter to continue.
-
When you are prompted to start the service, type Y and then press Enter.
The Agent Service Config screen appears.
-
Type Q and then press Enter to close the Agent Service Config screen.
The Agent for OES Linux is now installed, configured, and running on the server.