7.5 Example Application
The hypothetical company below has several issues with the mail that need to be corrected:
-
First, the new users that have been added need to have their rules and proxy rights added to their accounts.
-
Next, we need to perform the routine check to make sure that the users have not created rules that go against company policy, or that they are receiving the mail that they requested.
-
Finally, we are also going to set limits to the mailbox sizes and generate reports as to which accounts have come close to the size limit in the mail system.
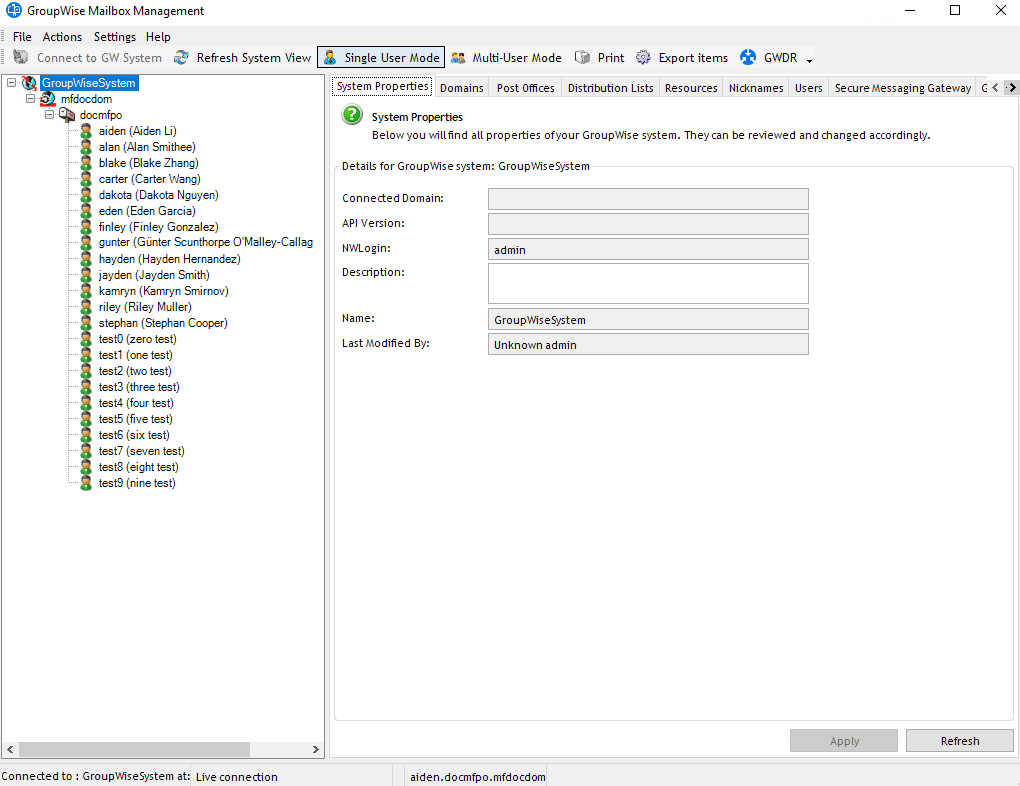
To show distribution lists, resources, or other entities, select them from the Settings menu. Here you can edit your GroupWise system tree view options.

7.5.1 Checking and Granting Proxy Rights
After selecting Multi-User Mode, mark the post office to select all the users in the system, click on Reports and Proxy Access List and finally click the Generate button to create the report on who has access rights to who’s account.
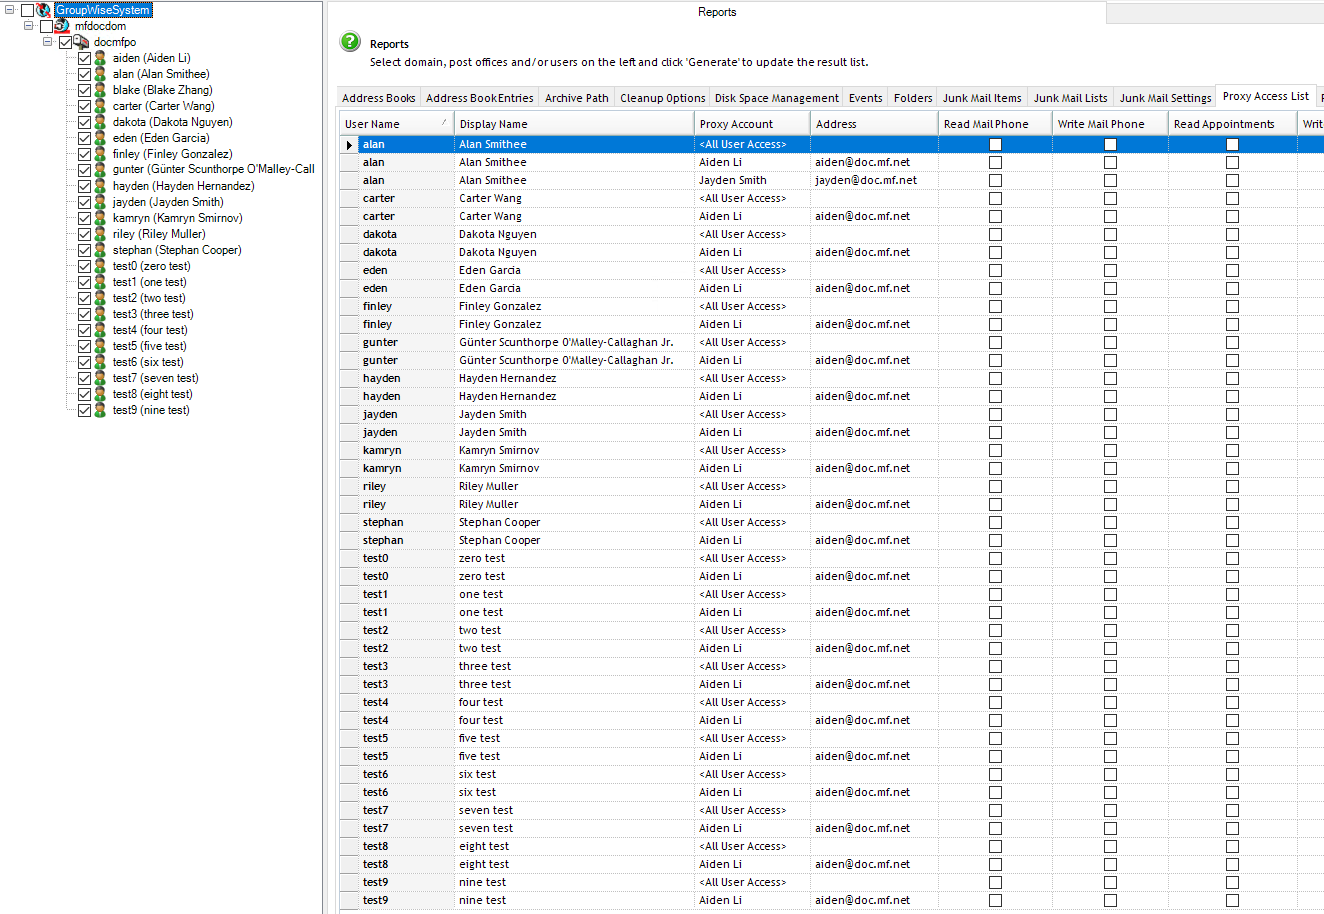
This report shows us first the user name, their GroupWise ID, who has proxy rights to their account (and their address), and finally what proxy rights they have been granted.
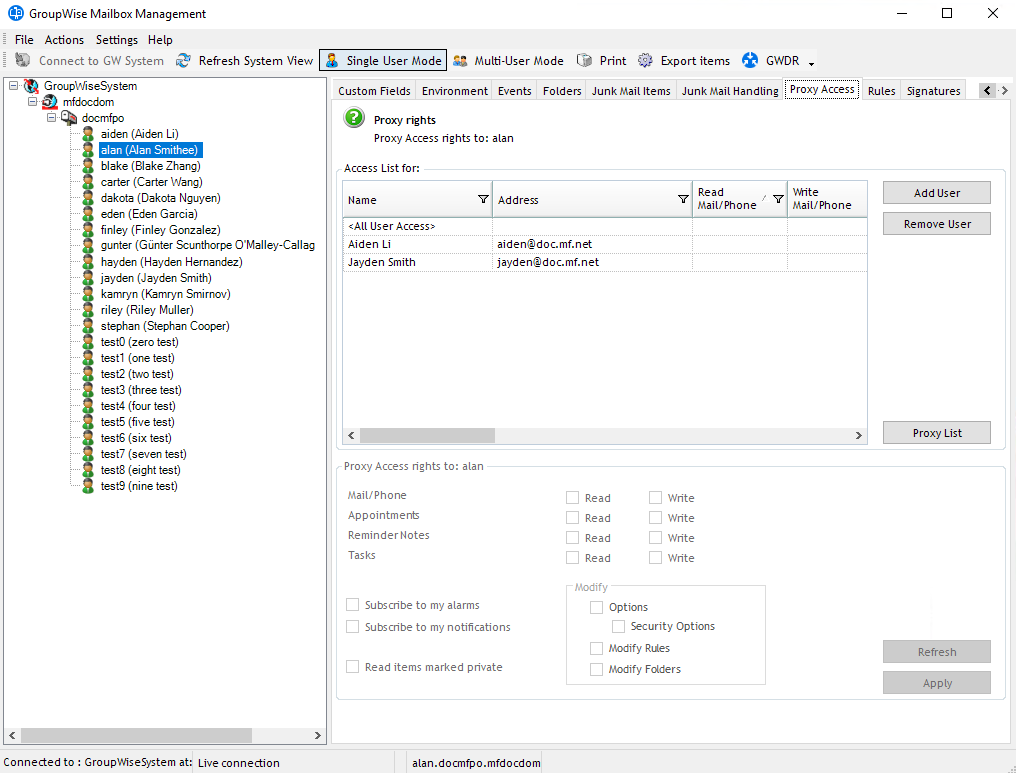
The immediately alarming thing is that Jayden Smith has access to Alan Smithee’s account. The next thing we notice is that Aiden the Administrator does not have proxy access to Blakes Zhang’s account, as is company policy. We can fix both these problems.
-
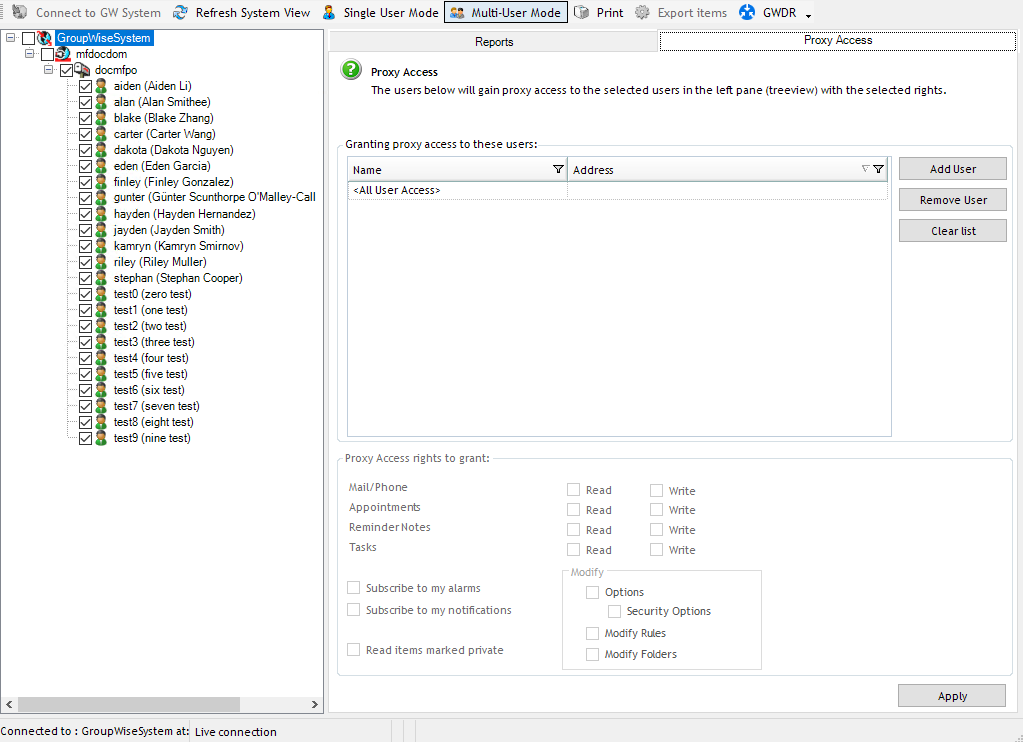
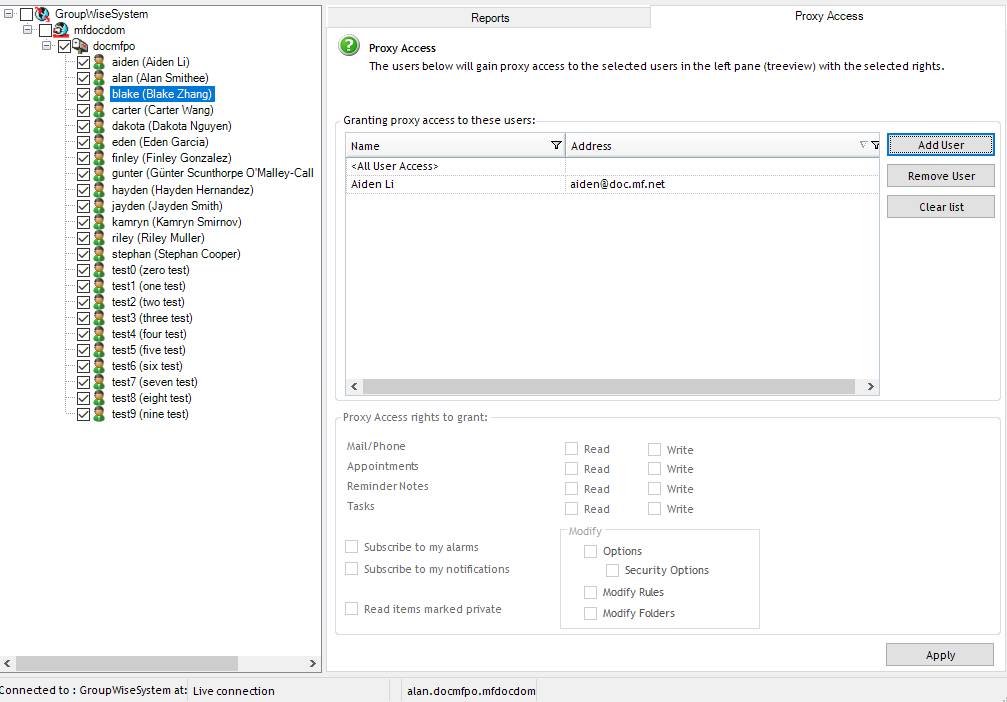
First, while still in Multi-User Mode, click on Proxy Access. This screen allows us to add proxy rights for the Administrator for all the accounts at the same time. When the screen comes up, it shows a blank Access list.
-
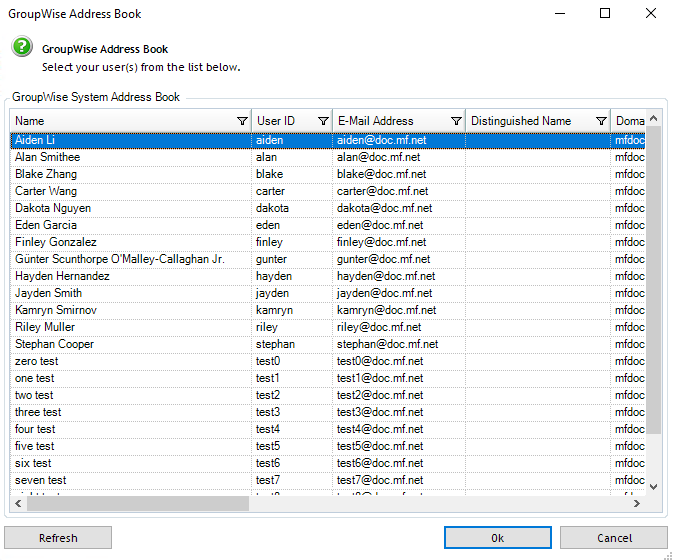
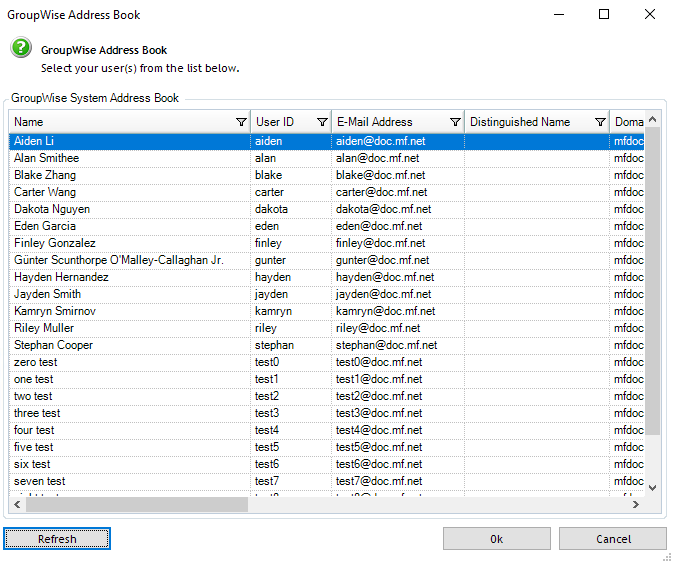
Select the Add User button and then select the Administrator from the user list that is generated.
-
Click OK.
-
Now select the administrator user in the access list and select the desired boxes to grant Proxy Access Rights to the Admin user.
-
Click Apply to make the changes permanent before moving on.The administrator now has full proxy rights to every user in the system.
-
Re-select the Apply button in order to finish affecting the change in your system.
To remove Frank’s access rights to Craig’s account:
-
Enter Single User Mode and select Alan Smithee from the GroupWise system tree.
-
Select the Proxy Access tab to bring up the proxy rights configuration.
-
Select the offending user, Jayden Smith in this case.
-
Select Remove User.
-
Click Ok to confirm proxy rights removal.
-
Click Refresh to verify that the proxy rights have been removed.
If you attempt to add duplicate users to the proxy access list, you will be notified and the double entry will not be added to the system.
7.5.2 Generating Reports
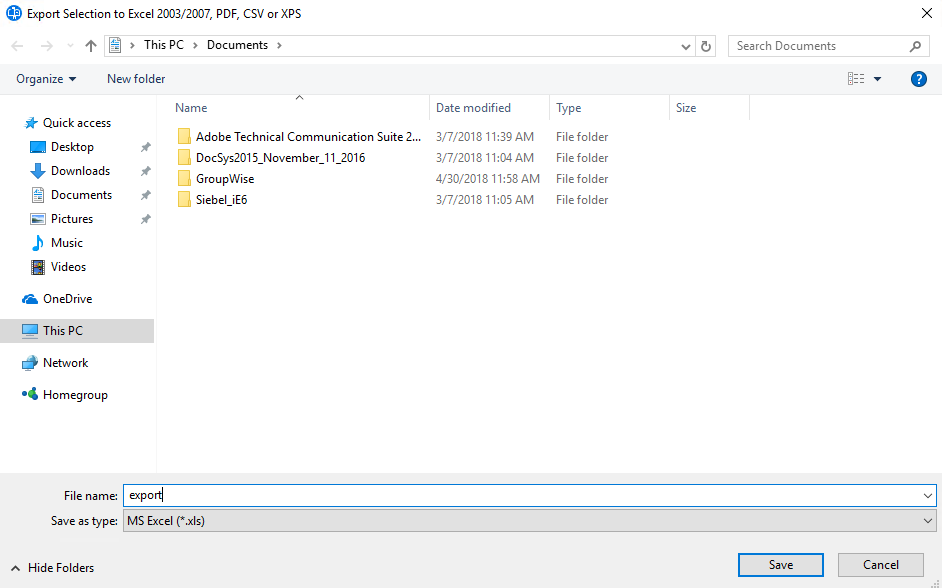
Legal departments often require regular reports on the access abilities of the different users in the company. You can export the Proxy Access List.
Or for example, you need a report on Mailbox size limits for each user.
-
To export or print a report that you have generated in GroupWise Mailbox Management, format the different columns by dragging the desired organizational criteria to the column header.
-
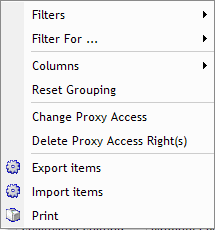
Right-click in the middle of the organized information and select Export Items or select Export from the program menu at the top of the window.
-
Select the save location and desired format to continue exporting the information for further formatting or for archive purposes.
-
You can also select Print from the Right Click menu or the top menu bar and select the desired printer and formatting.
7.5.3 Rule Propagation
Now we move to our second task, making sure that the rules in the system are appropriate for the system and propagating the rule-set for the different departments to the new users.
The user in which holds the rules for three of the organizations (Marketing, Complaints, Public Relations) is the general user the admin has created to hold rules. (This can be any user; admin, or a dummy user.
-
Rules must be created from the GroupWise client before GroupWise Mailbox Management can copy them to other users in the system.)
-
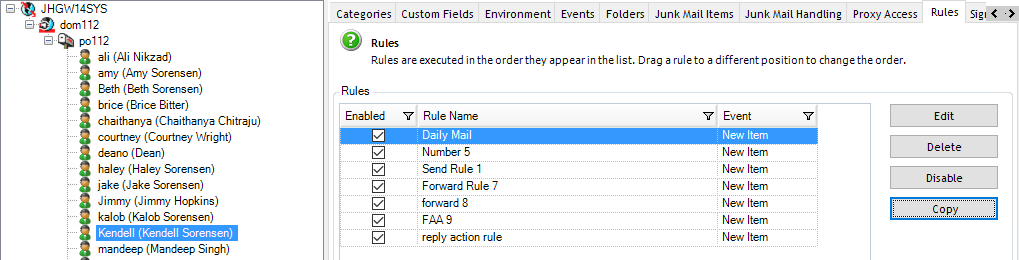
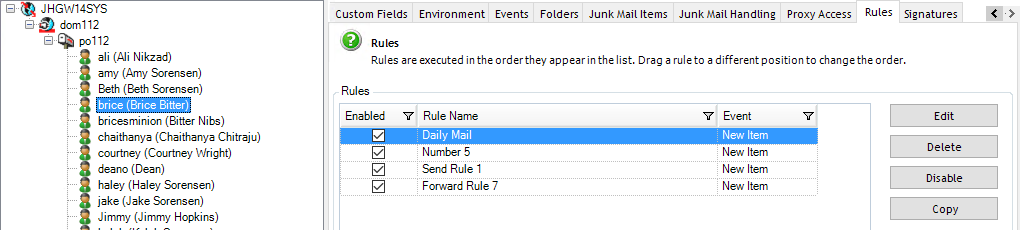
In Singe User Mode select the user which holds your rule set and then select the Rules tab. (You may need to scroll the function tabs using the scroll arrows at the top right.)
-
Here we have selected the desired rules to be copied. Select Copy. (Tip: In the tree view, open the distribution list containing the users who need these rules to keep track of who to copy the rules to.)
-
Now we can select the appropriate users to copy the marketing rules to.
-
Select Ok.
-
Your rule has been copied to the other users. Select the other users and Rules tab to verify that the rules have been copied over correctly.
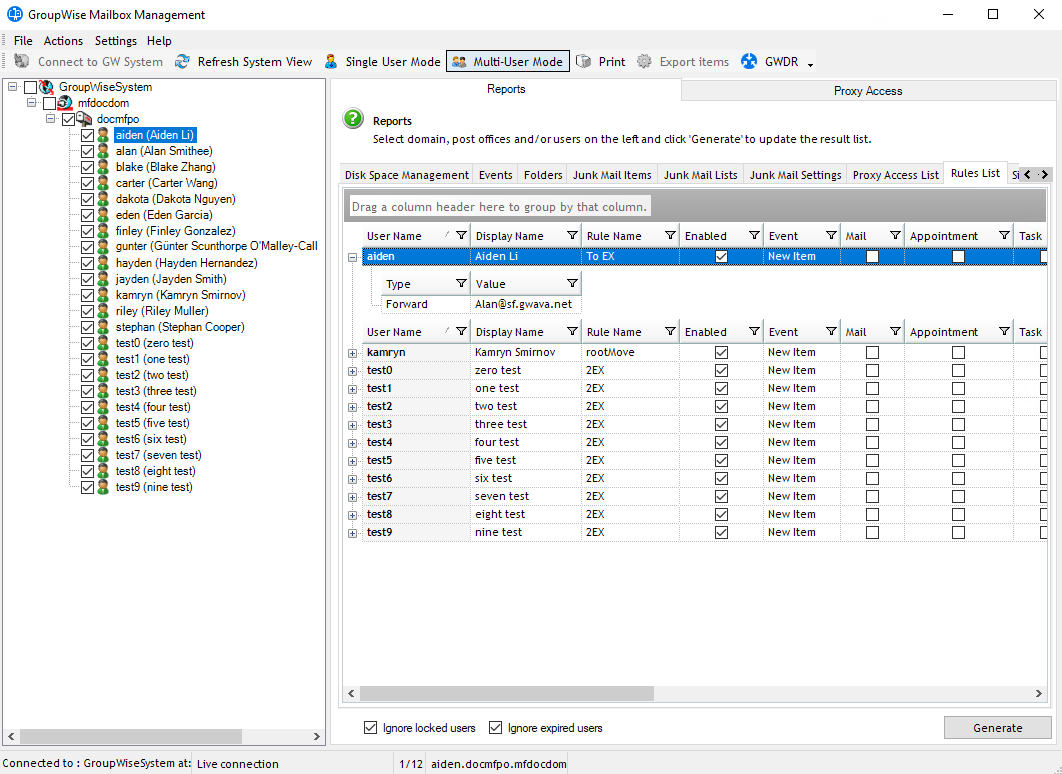
We also want to check the rules that are active in the system.
-
Select Multi-User Mode, Reports, and the Rules tab.
-
Make sure you have all the desired users selected. (Selecting the post office will automatically select everything in that post office.)
-
Click Generate.
If any user has rules which need to be removed or disabled, we can edit those properties from the Single User Mode.
-
Select the user in question, and the Rules tab.
-
We can see that the rule is enabled. Select the rule and then the Delete or Disable button.
-
Highlight all the entries that we want to remove and click delete.
-
You can also move, edit, and create domains and entries from this configuration page by selecting those options.
We are finished with the configuration changes we needed to complete.