3.10 Novell Messenger Archive Agent
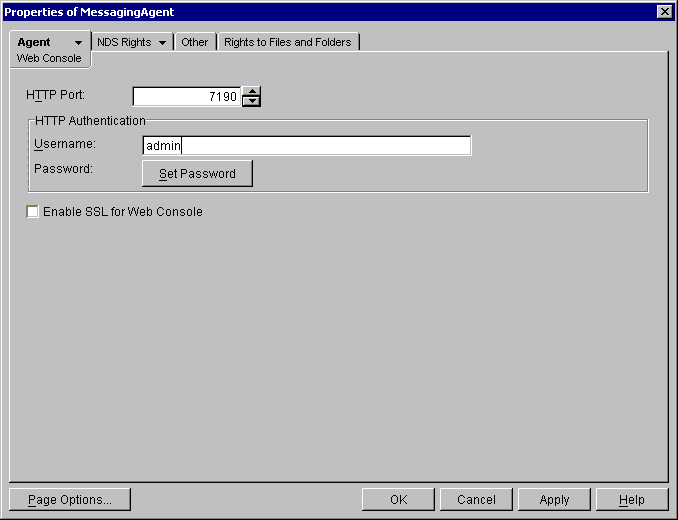
The Messenger Archiving Agent is configured almost identically – Open the Archiving Agent object in Console One, and go to the Agent/Web Console tab.
Assign a HTTP username and password. This should not be the same as a valid eDirectory account. Write down this information in the work sheet as well.
Ensure SSL is disabled and that the HTTP port is assigned (the default is 8313). Note this port in the work sheet.
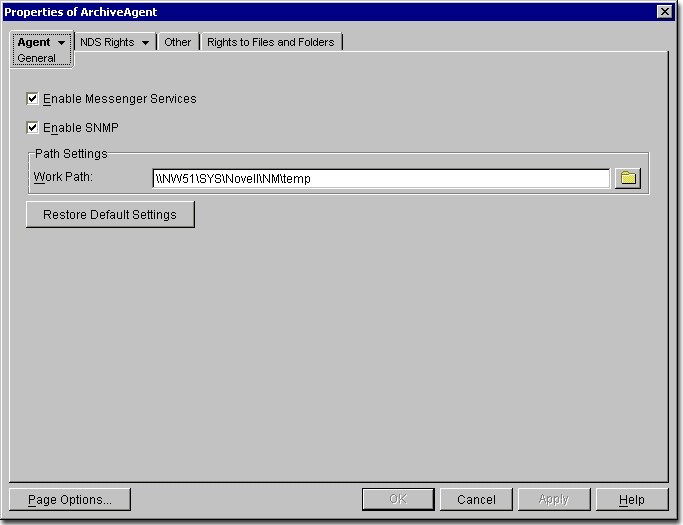
Next, select the Agent/General tab. Ensure SNMP is enabled.
Click OK to save your settings. Wait one minute for the GroupWise configuration to propagate.
Test it in a web browser by typing http://ipaddress:httpPort
For example, if the Archiving agent were running on a server with an IP address of 192.168.2.3 and an HTTP port of 8313: http://192.168.2.3:8313
You should be prompted for the username and password just assigned. If you are not, recheck your settings in ConsoleOne, and open the agent’s startup file to verify that no startup switches override this configuration. Also, try restarting the agent.
-
Do not proceed until this is working
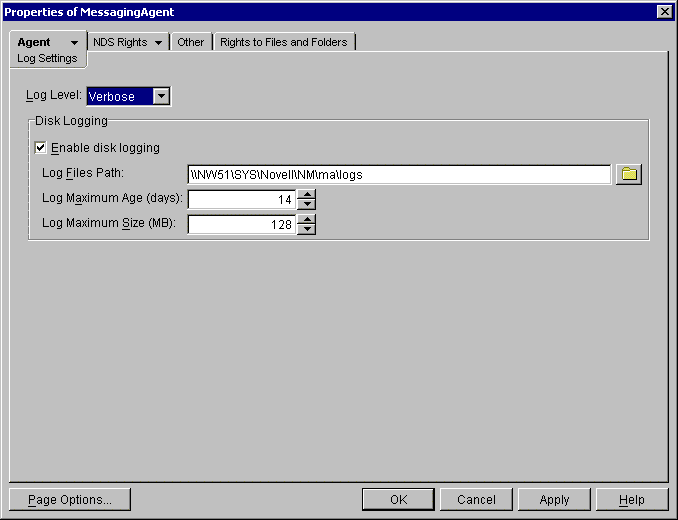
Return to ConsoleOne and reopen each of the agents. Go to the Agent/Log Settings tab to verify logging to disk is on and set to verbose.
From the Redline Control Center, go to the System View and pick the Redline Agent which will monitor the Messenger Archive Agent. Specify the IP Address, Port, Username and Password.
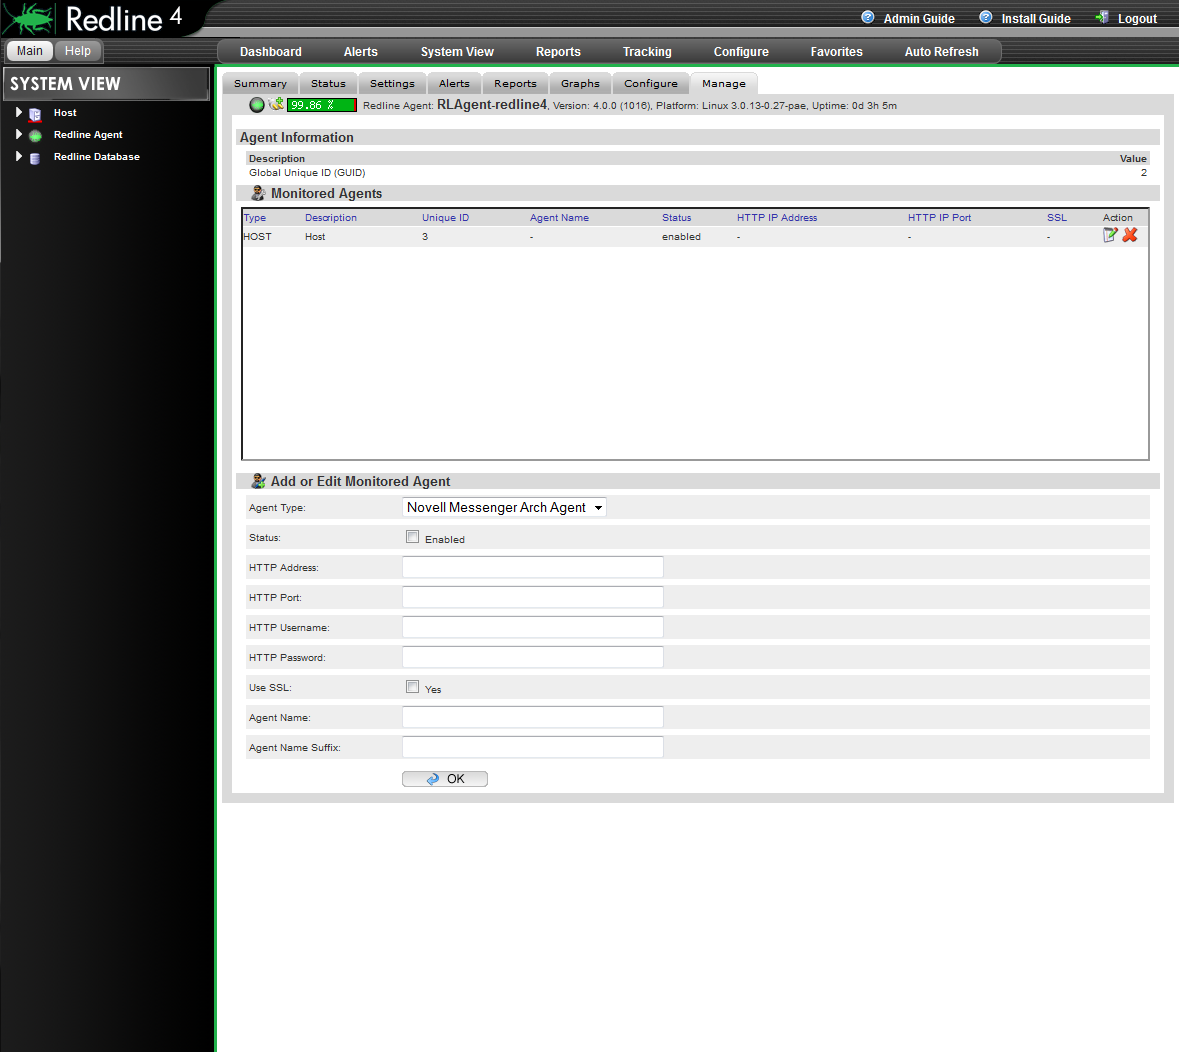
After 2-3 minutes, a message should appear on the Redline Agent that the Messenger Archive Agent has been registered to the Control Center and shows up in the Control Center.