4.6 Installing Identity Manager on UNIX/Linux Platforms
Before you begin, make sure your system meets the requirements listed in Section 4.2, Identity Manager Components and System Requirements.
-
Download and extract the tar file to a location of your choice.
You can download the Identity Manager installation file from Novell's Download site
-
On the host computer, log in as root.
-
Execute the .bin file from the setup directory.
Change the current working directory to the setup directory, where the install is located. Then enter one of the following commands to run the install.
Platform
Example Path
Installation File
Linux
linux/setup/
dirxml_linux.bin
Solaris
solaris/setup/
dirxml_solaris.bin
AIX
aix/setup/
dirxml_aix.bin
These paths are relative to the root of the install image, which could be anywhere you expanded it or mounted the CD.
The installation program can't find the packages to install unless the current working directory is the directory where the installation program is located.
-
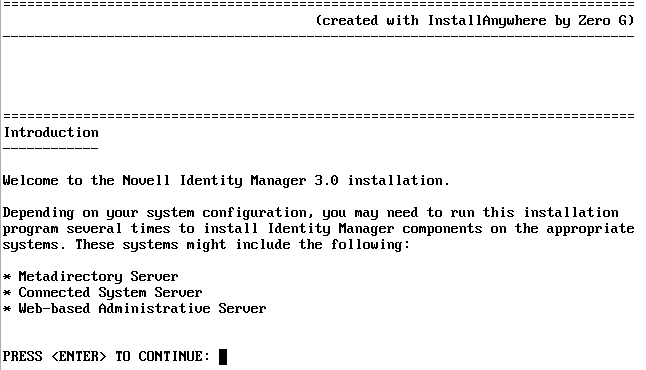
Review the Welcome information, the press Enter to continue the installation.
Figure 4-19 The Welcome Screen
-
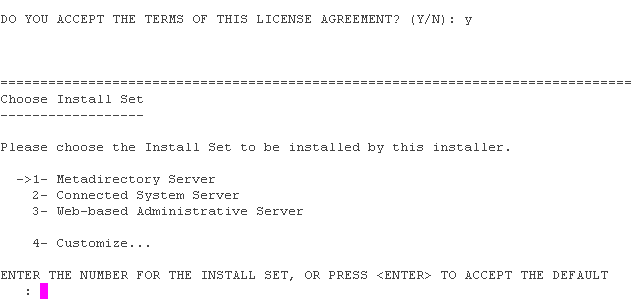
Press Enter to progress through the license agreement, then enter Y if you agree to the usage terms. If you do not agree, enter N to exit the installation program.
Figure 4-20 Choosing an Install Set
-
Specify the appropriate number (1-4) for the install set you want to install. The install sets contain the following components:
-
Metadirectory Server: Installs the Metadirectory engine and service drivers, Identity Manager drivers, Novell Audit agent, and extends the eDirectory schema.
Novell eDirectory must be installed before you can install this option.
-
Connected System Server: Installs the Remote Loader and the following drivers: LDAP, JDBC, eDirectory, SAP, Delimited Text, GroupWise, Composer, Remedy, Avaya, Soap, and Lotus Notes. You can choose the Connected System Server option when you don't want to put the overhead of eDirectory services and the Metadirectory engine on your application server.
-
Web-based Administrative Server: Installs the Identity Manager plug-ins and Identity Manager driver policies.
Novell iManager must be installed before you can install this option.
-
Customize: Installs the specific components you select from a list of all components.
Figure 4-21 Product Features
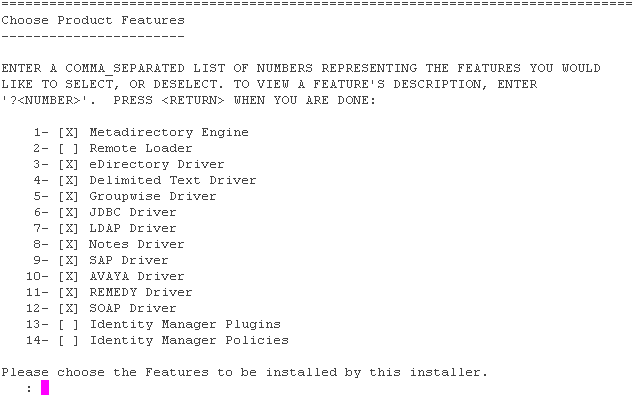
NOTE:Enter prev to return to previous menus and modify your installation options.
-
-
(Optional) Depending on the option you chose (such as the Metadirectory Server), you will be prompted to set the LD_LIBRARY_PATH environment variable. To do this, execute the /opt/novell/eDirectory/bin/ndspath script by typing . /opt/novell/eDirectory/bin/ndspath and then re-run the installation.
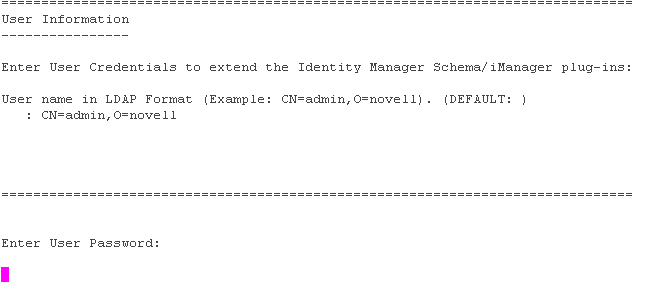
If you select to install the Metadirectory Server, you are prompted for the LDAP user name and password (CN=admin,O=novell). Select a user (such as Admin) who has enough rights to extend the eDirectory schema.
Figure 4-22 Specifying User Name and Password in LDAP Format
IMPORTANT:(Solaris installations only) If you are installing your Web-based Administration Server on the same server where eDirectory resides, when prompted for the Web Server Secure port, change the default value to some free port, such as 8443.
-
Verify that the information contained in the summary is correct and press Enter to start installing the packages.
Figure 4-23 Installation Screen for Metadirectory Server
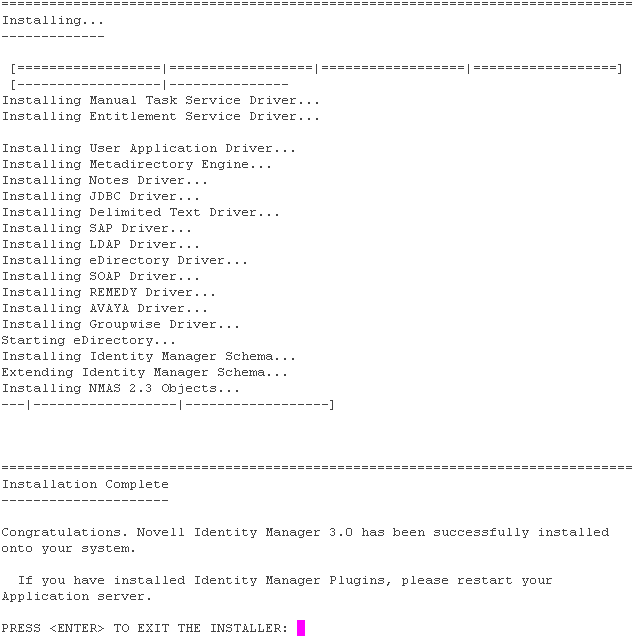
eDirectory temporarily shuts down when installing the Metadirectory Engine and schema files. By default, all available drivers are installed so you won't need to run the installation program later if you want another driver. The driver files are not used until a driver is configured through iManager or through Designer and then deployed.
-
When you see the Installation Complete screen, press Enter to close the installation program.