11.2 Managing your team’s tasks
When a task is in a workflow queue, you can perform the following actions, as your role permits:
-
View the task.
-
Claim an unclaimed task and begin working on it.
-
Reassign the task to another user or group.
-
Release the task. It can then be reassigned or claimed by another team member.
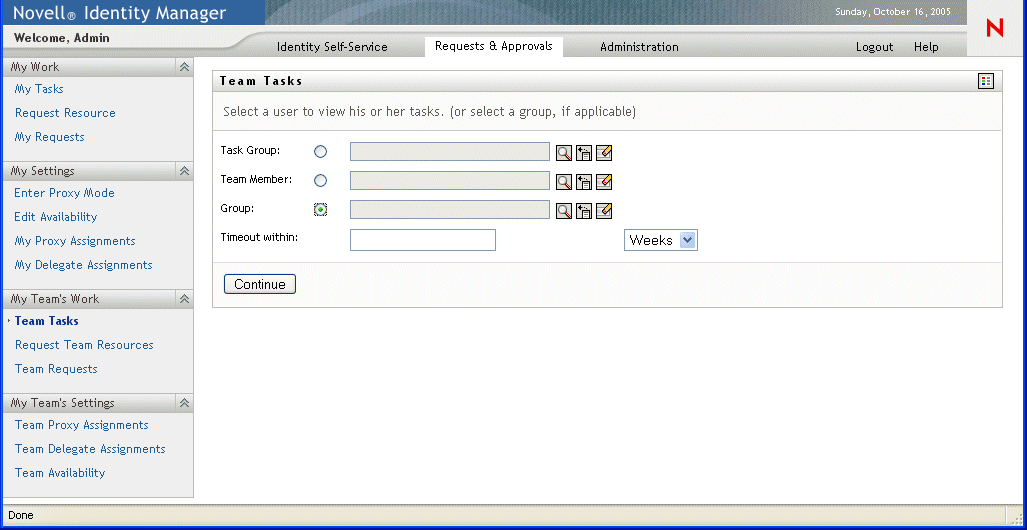
11.2.1 Viewing tasks
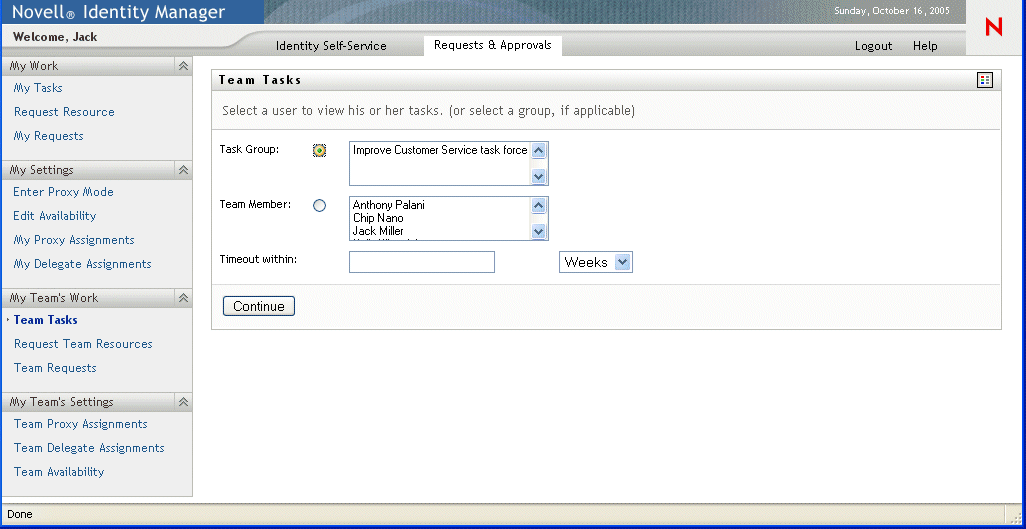
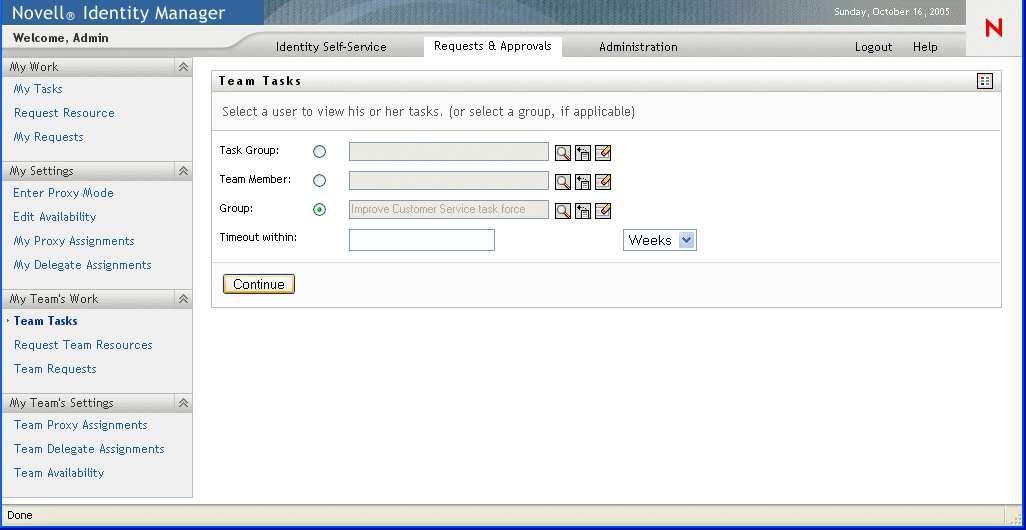
View tasks by task group, team member, or group.
Viewing tasks by task group
Task Managers and User Application Administrators can view tasks by task group.
To see the tasks that have been assigned to a task group:
-
Click Team Tasks in the My Team’s Work group of actions.
-
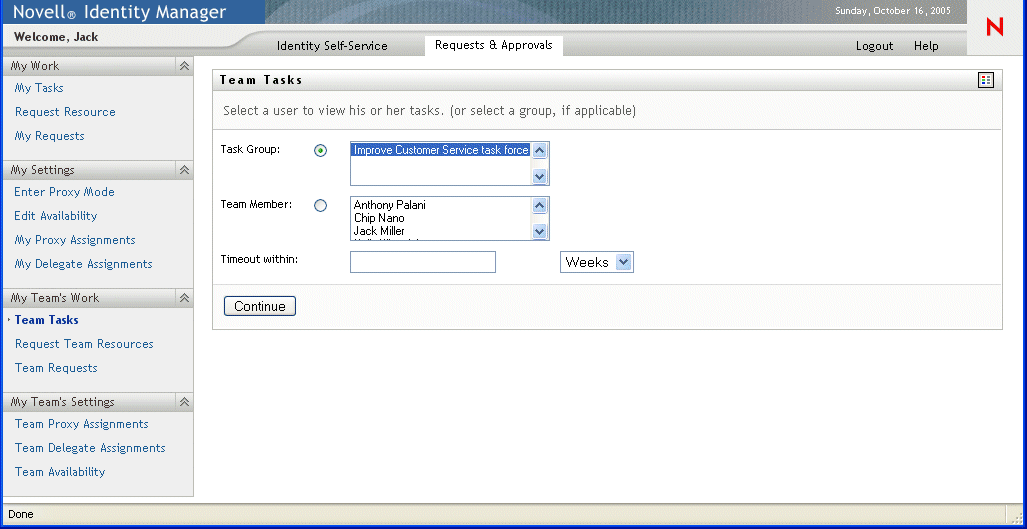
If a Task Group radio button is present, click it to select Task Group. In the example that follows, Jack sees Task Group because he is a Task GroupManager, and he sees Team Member because he is also an Organizational Manager.
-
If you are a Task Group Manager, click a task group name to select it.
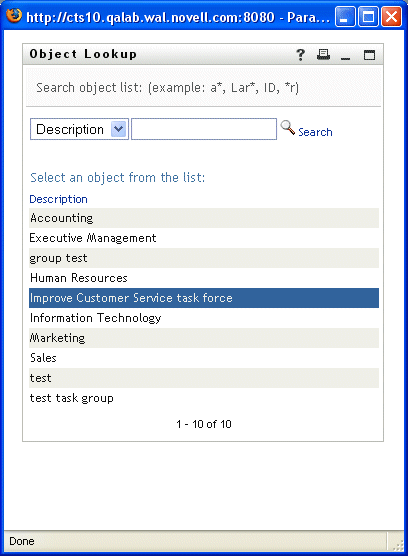
If you are a User Application Administrator, you see a Select Object icon
 beside
the Task Group selection box. Click the icon. Optionally specify
search criteria for finding the name of the task group and click Search,
or select a group from the list in the Object Selector window. (By
default, all task groups are displayed in the Object Selector window.)
beside
the Task Group selection box. Click the icon. Optionally specify
search criteria for finding the name of the task group and click Search,
or select a group from the list in the Object Selector window. (By
default, all task groups are displayed in the Object Selector window.) -
Optionally, in the Team Tasks window, specify a Timeout within interval to find tasks that expire (“time out”) within the time you choose. Enter one or more digits and select weeks, days, or hours. For example, you could enter 10 and choose Days.
-
Click Continue.
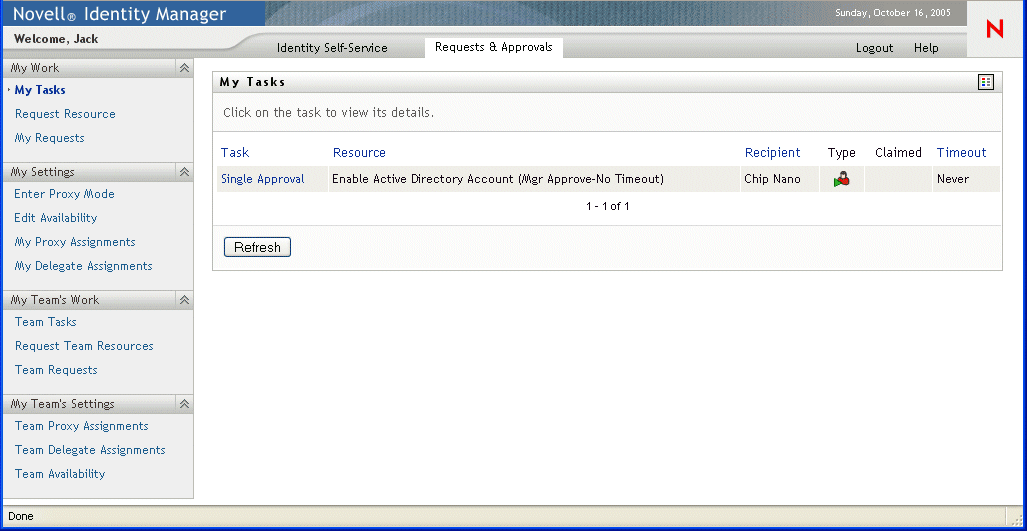
-
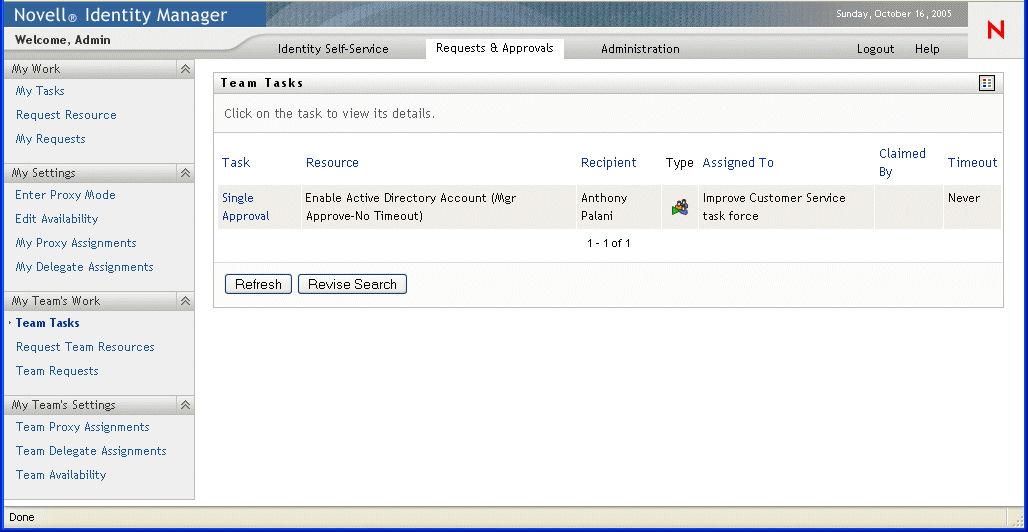
The tasks in the task group’s queue are displayed.
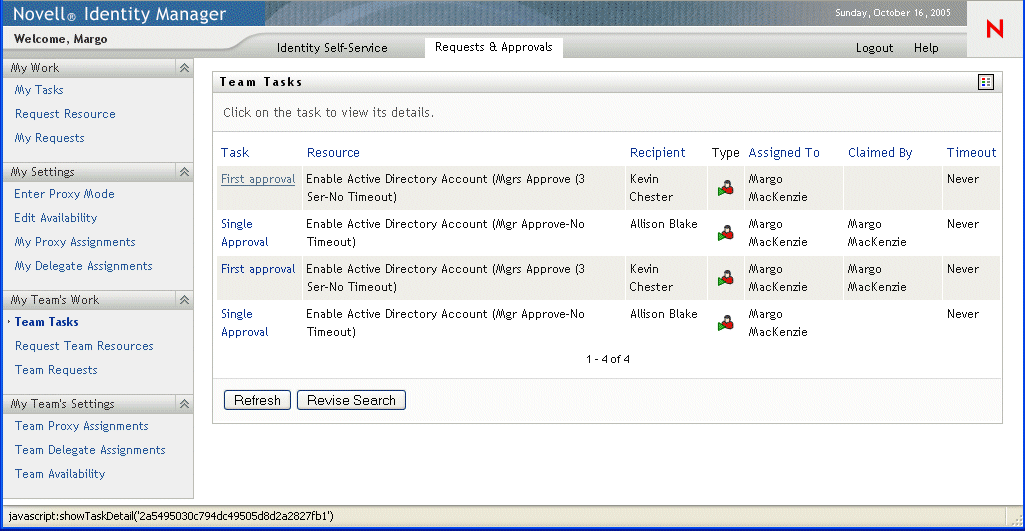
Viewing tasks by team member
Organizational Managers and User Application Administrators can view tasks by team member.
To see the tasks that have been assigned to a team member:
-
Click Team Tasks in the My Team’s Work group of actions. You will see the Team Tasks window.
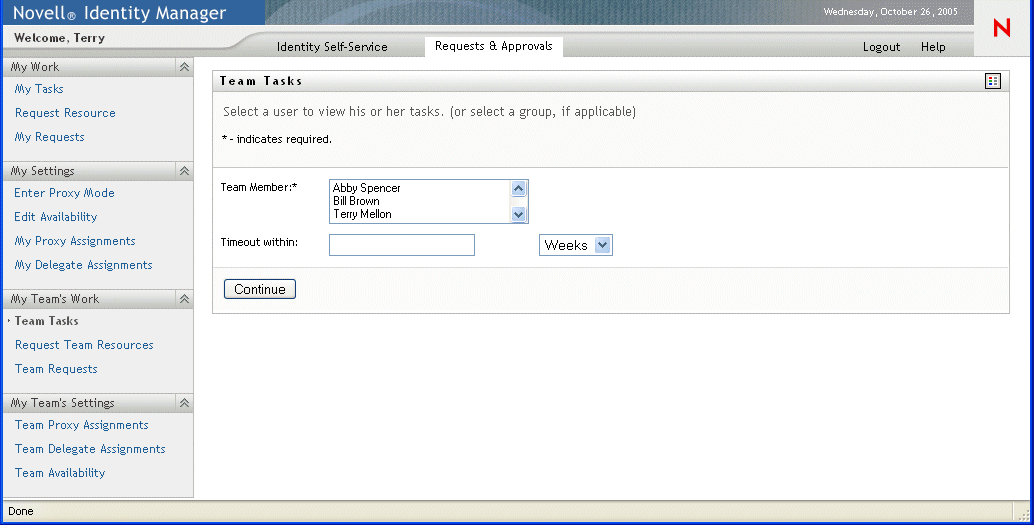
-
If the Team Member radio button is present, click it to select Team Member.
-
If you are an Organizational Manager, click a Team Member name to select it.
If you are a User Application Administrator, you see an Object Selector icon
beside
the Team Member selection box. Click the icon to open the Object
Selector window. Specify search criteria for the team member, click Search, and
choose the team member. -
Optionally, in the Team Tasks window, specify a Timeout within interval to find tasks that expire within the time you choose. Enter one or more digits and select weeks, days, or hours. For example, you could enter 10 and choose Days.
-
Click Continue.
The tasks in the team member’s queue are displayed.
Viewing tasks by group
The User Application Administrator can view tasks by group.
To see the tasks that have been assigned to a group:
-
Click Team Tasks in the My Team’s Work group of actions.
-
Click the Group radio button.
-
Click the Object Selector icon
.
You can optionally specify search criteria for finding the name
of the task group and click Search, or select
a group from the list in the Object Selector window. (By default,
all task groups and organizational groups are displayed in the Object Selector
window.) -
Click a group name to select it.
-
Optionally, specify a Timeout within interval to find only those tasks that expire (“time out”) within the interval you set. Enter one or more digits and select weeks, days, or hours. For example, you could enter 10 and choose Days.
-
Click Continue.
The list of tasks in the task group’s queue is displayed.
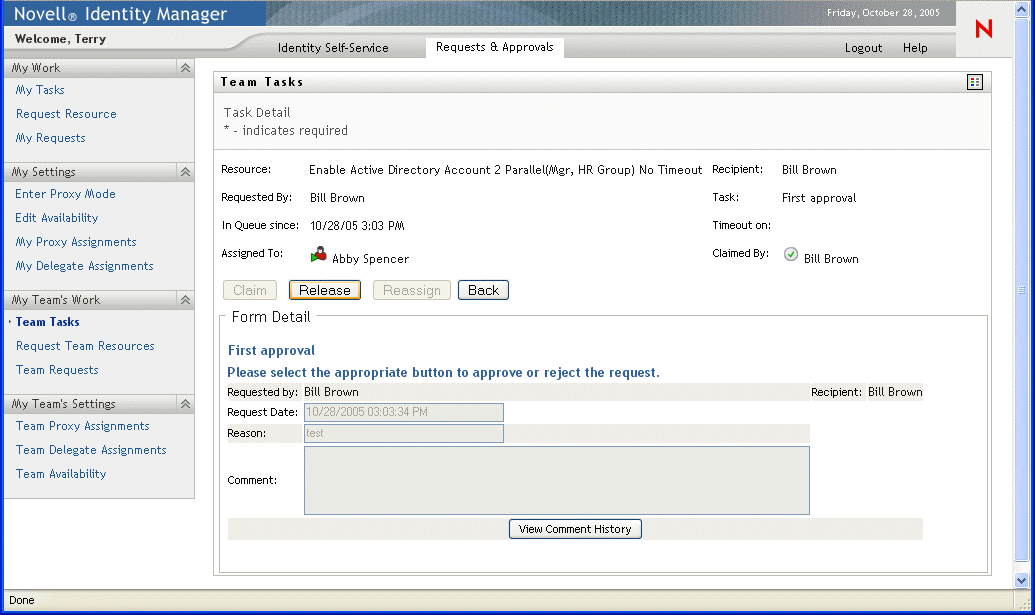
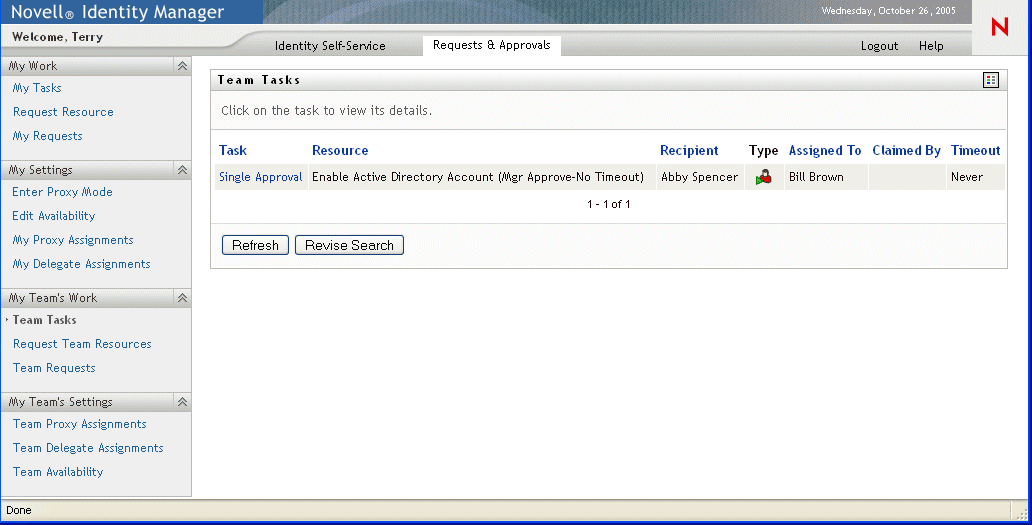
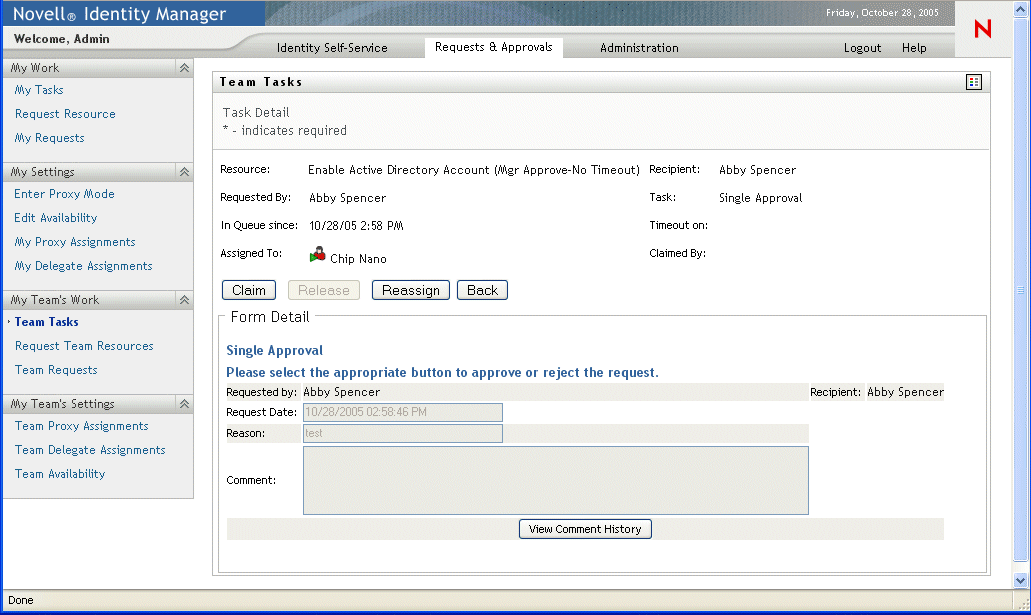
11.2.2 Selecting a task
To select a task in the queue list:
-
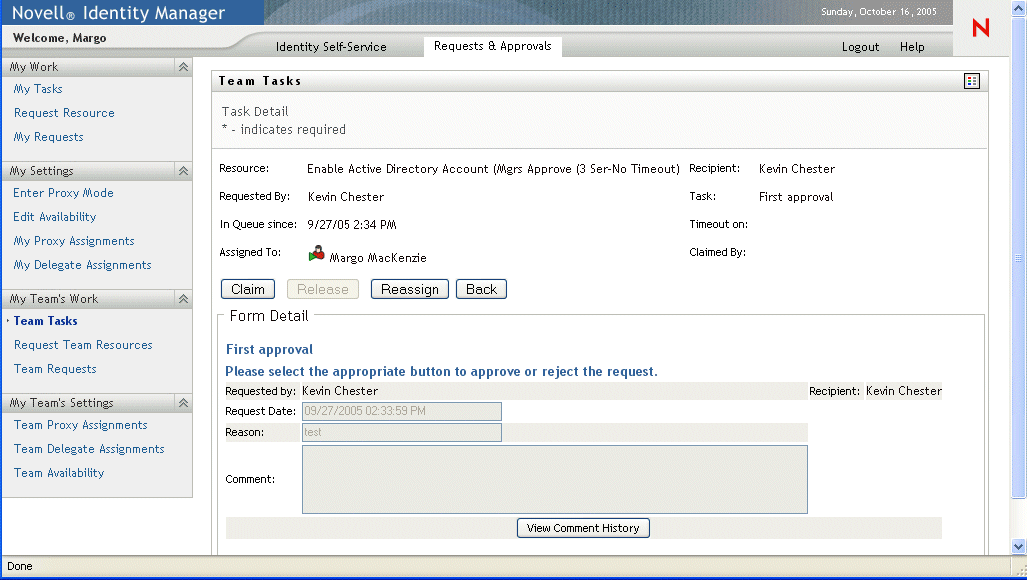
Click on the name of the task in the queue.
The Team Tasks Task Detail form is displayed.
-
To claim a task, follow the instructions at Section 9.2.3, Claiming a task.
-
To return to the task list, click Back.
11.2.3 Reassigning a task (for the User Application Administrator)
This section details how the User Application Administrator reassigns tasks. Organizational Managers can follow the instructions at Section 9.2.4, Reassigning a task.
To reassign a task:
-
Click Reassign in the Team Tasks task detail window.
-
Choose to reassign to a user (team member) or a group.
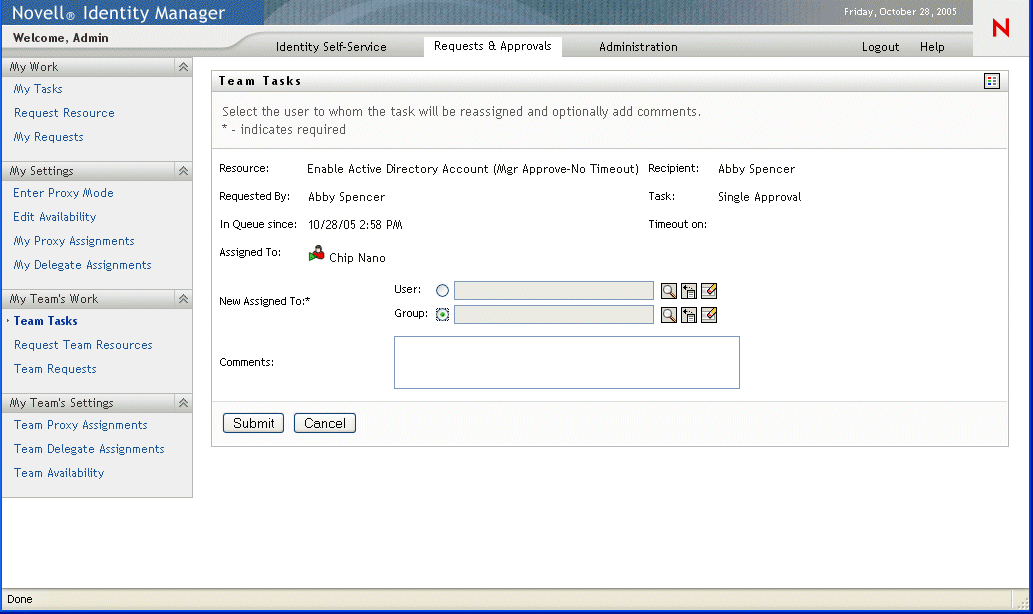
-
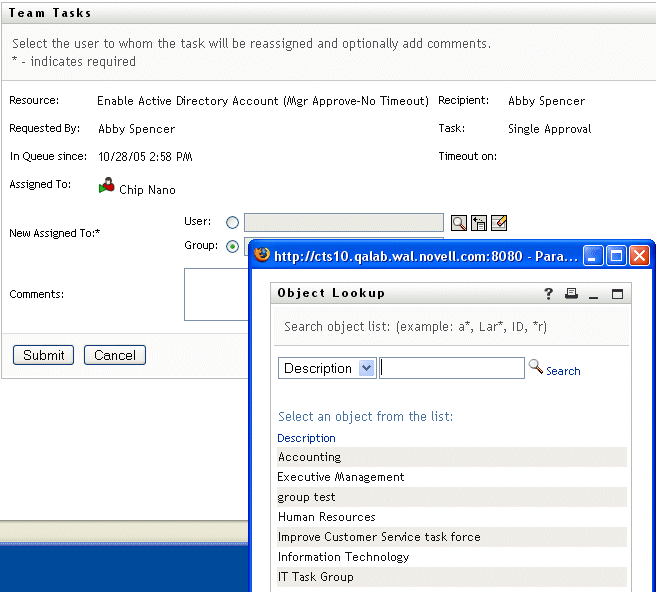
Click the Object Selector icon
beside
your chosen entry box. -
Select the user or group to which to reassign the task. When you choose Groups, all groups are listed, by default.
-
Optionally type a comment to explain the reason for the reassignment in the Comments field.
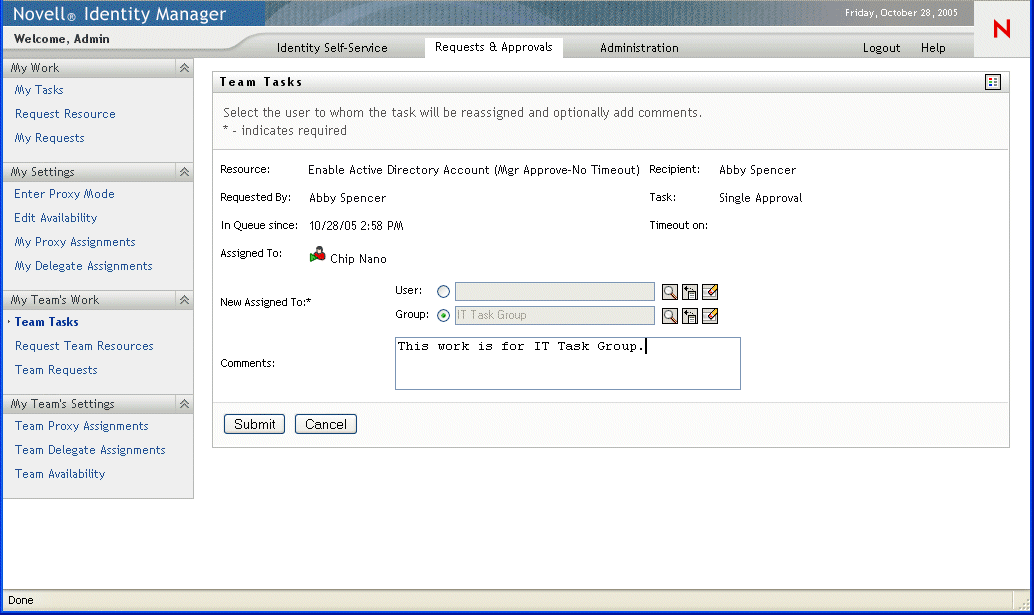
-
Click Submit.
The user application displays a message indicating whether the action was successful.
11.2.4 Releasing a task
Release a task so that it can be assigned to or claimed by another team member.
To release a task:
-
Click Release in the Team Tasks Task Detail window.