11.3 About the Role Editor
The Role editor allows you to create and configure the roles you want to assign and manipulate in the tab of the User Application. You use the editor to define the role details.
11.3.1 Understanding Role Hierarchy
The Roles Based Provisioning module uses a role hierarchy to simplify the model for assigning users to roles (and thus permissions to users). The role hierarchy allows you to assign roles in a more efficient way. For example, rather than assigning a user to twenty roles, you can do it by assigning role levels.
About Role Levels
Role levels define role hierarchy. Roles defined at the highest level (called Business Roles) define operations that have business meaning within the organization. Mid-level roles (called IT Roles) supports technology functions. Roles defined at the lowest level of the hierarchy (called Permission Roles) define lower-level privileges.
A higher-level role automatically includes privileges from the lower-level roles that it contains. For example, a Business Role automatically includes privileges from the IT Roles that it contains. Similarly, an IT Role automatically includes privileges from the Permission Roles that it contains.
Role relationships are not permitted between peer roles within the hierarchy. In addition, lower-level roles cannot contain higher-level roles.
You can modify the label used for each role level in the User Application by defining localized strings for the level’s Name and Description in the Role Configuration editor.
About Role Containers
A role container is an organizational unit within the User Application driver. The User Application allows you to assign a role to a container When you to assign a role to a container, the users in the container are assigned to the role. This type of role assignment is called an indirect assignment. Roles explicitly assigned to a user from within the User Application are called direct assignments.
You can use the Role editor to create role containers (see Creating a Role Container).
11.3.2 Using the Role Editor
Creating New Roles
-
Open the Create a Role Wizard in one of these ways:
-
From the , open , right-click , then select .
-
Right-click a role container, then select .
-
Select .
The Create a Role wizard displays:

-
-
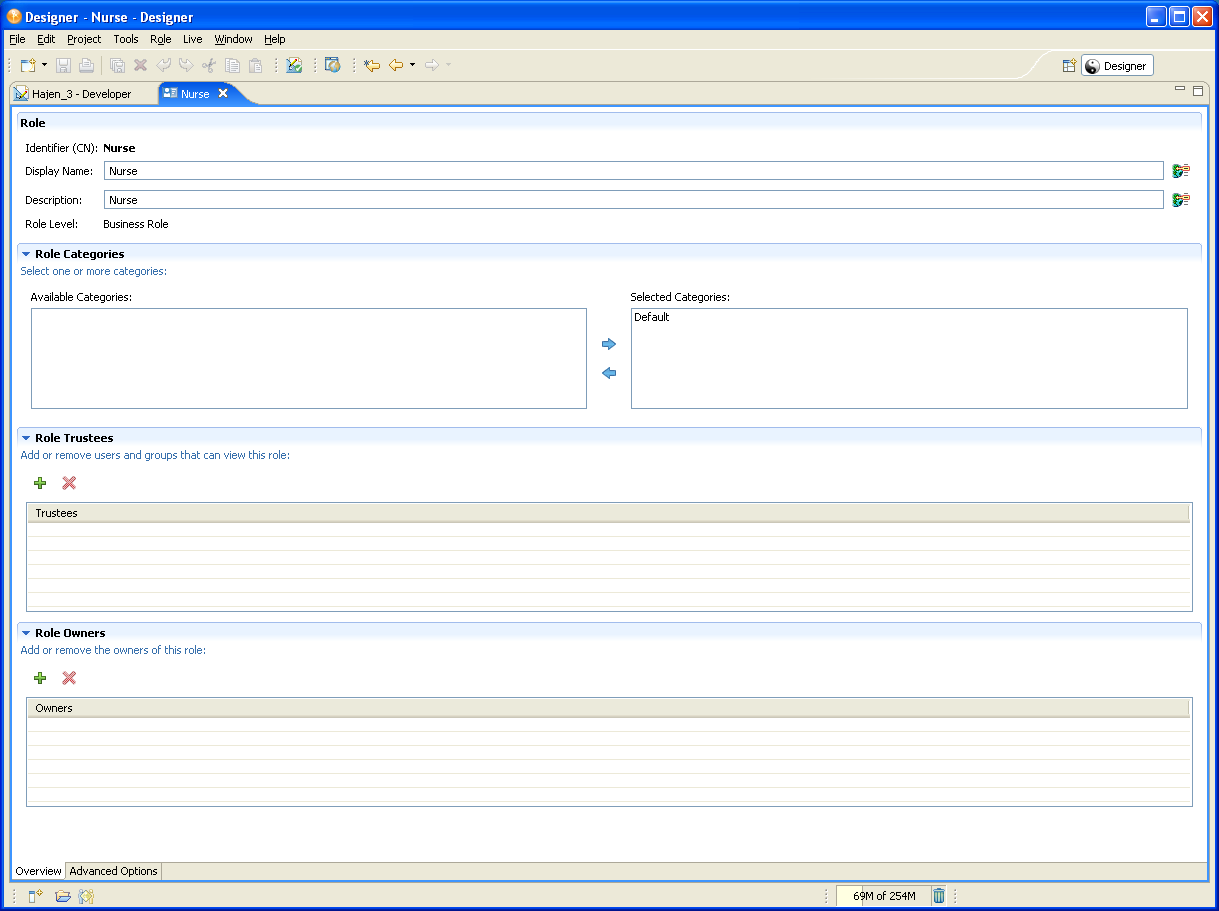
Fill in the fields as follows:
Field
Description
I *
The name of the Identity Manager project and the provisioning application where you want to create the role.
NOTE:These two fields display when you launch the wizard from the menu.
*
The unique identifier for the role.
*
The text displayed as the field in the User Application. You can translate this text into any of the languages supported by the User Application. For more information, see Section 2.10, Localizing Provisioning Objects.
The text displayed as the field in the User Application. You can translate this text into any of the languages supported by the User Applications. For more information, see Section 2.10, Localizing Provisioning Objects.
The root location of the roles objects within the User Application driver. It defaults to Business Role.
To specify a Role Container:
-
Click to open the container selection dialog box.
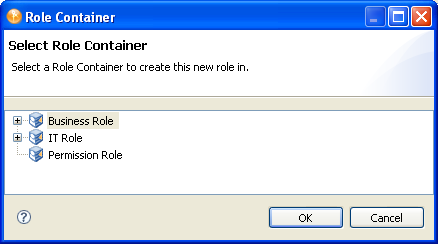
-
Select a container or subcontainer from the list.
-
Click .
*
Allows you to categorize roles. Categories are used for filtering role lists in the User Application. The category names are defined in the directory abstraction layer Role Category list.
Specifies the users, groups, or containers that can read, compare, and browse the roles. (Read, compare, and browse are the default privileges.)
NOTE:* Indicates the field is required.
-
-
Click . Designer creates the role locally and opens the Role editor.
-
Fill in the remaining fields in the tab as described in Table 11-2, Role Overview Properties.
-
Click .
For more information on completing the Contained Roles section, see Specifying a Role Hierarchy. For more information on how to use the Entitlements section, see Specifying Entitlements.
-
In the Approval Options section, choose an .
You are prompted for different values, depending your selection. See Table 11-3, Roles Advanced Options Properties for information about each type.
-
Save the role.
For information on deploying a role, see Section 2.7, Deploying Provisioning Objects.
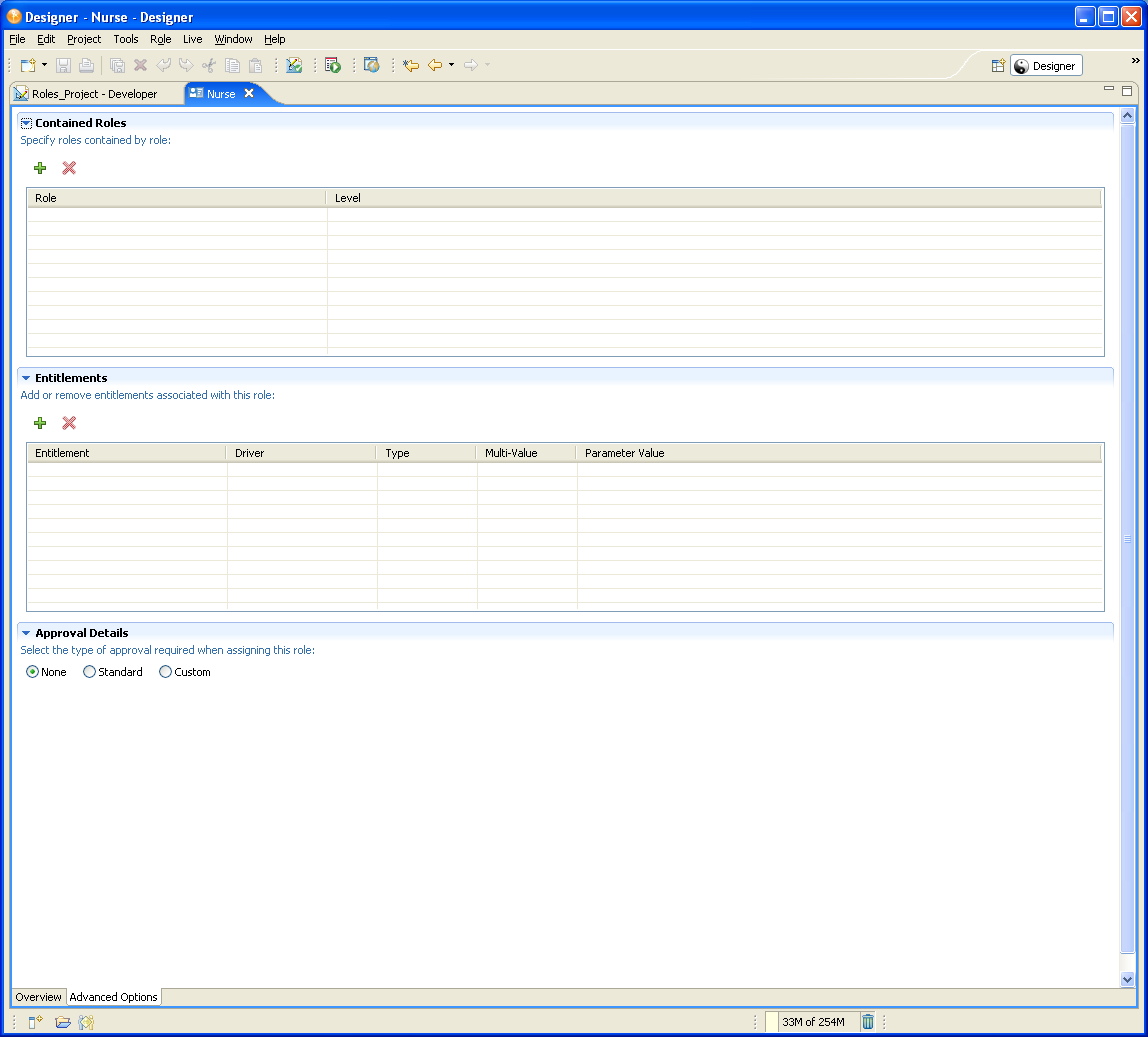
Specifying a Role Hierarchy
You specify a role hierarchy by defining the roles that contain other roles (called Role Relationships in the User Application).
To define a role hierarchy for a new or existing role:
-
Navigate to the tab of the Role editor.
-
In the section, click + to add a lower-level role to the current role.
The current role must be a mid-level (IT Role) or top-level role (Business Role), because the lowest level role (Permission Role) cannot contain other roles. The Role Search dialog box displays:
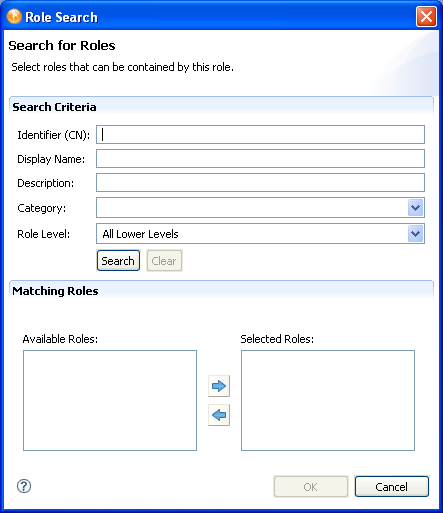
-
To use the Role Search dialog box:
-
Specify the , , , , and on which you want to search.
For CN, Display Name, and Description, you can enter a wildcard (such as S*, *S), or regular expressions (such as [A-Z][a-z]*).
You can enter a value for all of the fields or none of the fields. If you do not supply a value in a particular field, the search returns all of the possible values for that field. If you enter values in one or more of the fields, the values are ANDed together to create the search filter. The search occurs on the roles defined locally, not the roles deployed to the driver.
Role Level values are All Lower Levels, Level 10, and Level 20 depending on the level of the currently selected role.
-
Click . Roles matching the search criteria are displayed in the section within the roles list.
-
Double-click the role or select the role and click
 .
.
-
Click when you are done adding roles.
Designer closes the search dialog and displays the roles you selected in the section.
-
Specifying Entitlements
-
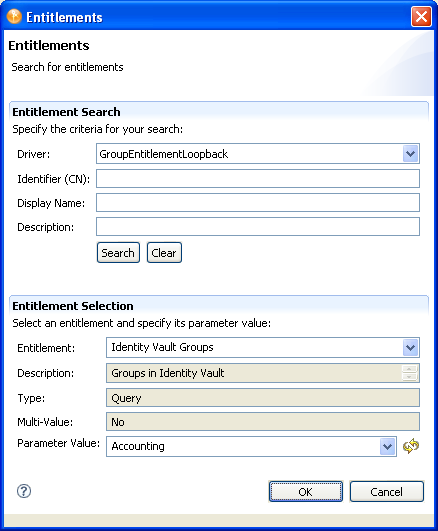
In the section, click + to add an entitlement for this role. The Entitlement Search dialog displays:
-
To complete the Entitlement Search:
-
Choose the driver that contains the entitlement you want.
-
Specify the , , and on which you want to search.
You can enter a wildcard (such as S*, *S) or a regular expression (such as [A-Z][a-z]*), then click .
You can enter a value for all of the fields or none of the fields. If you do not supply a value in a particular field, the search returns all of the possible values for that field. If you enter values in one or more of the fields, the values are ANDed together to create the search filter. The search occurs locally. Entitlements contained by the selected driver that match the search criteria are displayed in the Entitlements Selection section.
-
The search is complete when the Entitlement field displays .
-
-
To complete the Entitlement Selection:
-
Choose the entitlement from the Entitlement drop-down list.
The , , and fields are read-only. These values are obtained from the Entitlement definition.
-
Choose the parameter value.
-
Click to save the definition. Designer displays the definition in the Entitlements table. Query parameter values are translated to the query’s full CN when displayed in the table.
-
 :
:
 :
:
The entitlements defined for the role are triggered when the role is granted.
Creating a Role Container
-
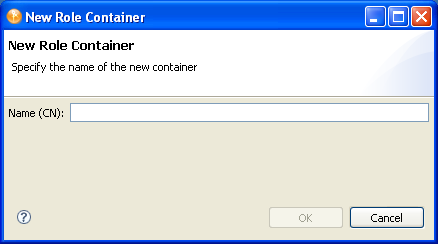
From the Provisioning view, open the , navigate to a Role-level container, right-click it, then select . The New Role Container dialog box displays:
-
Type the name of the container, then click .
Designer creates the sub-container locally. On deploy, the container is created in the role-level container of the RoleDefs.RoleConfig.AppConfig node of the User Application driver specified by this project.
11.3.3 Role Properties Reference
Table 11-2 Role Overview Properties
|
Section |
Field |
Description |
|---|---|---|
|
|
|
The unique identifier for the role. |
|
|
The text displayed in the tab of the User Application as the Role Name. You can translate this text into any of the languages supported by the User Application. For more information, see Section 2.10, Localizing Provisioning Objects. |
|
|
|
The text displayed in the tab of the User Application as the Role Description. You can translate this text into any of the languages supported by the User Application. For more information, see Section 2.10, Localizing Provisioning Objects. |
|
|
|
Defines the role’s level in the role hierarchy. Level 30 roles are top-level roles. Level 20 roles are mid-level roles. Level 10 roles are the lowest-level roles. Higher-level roles include privileges from lower-level roles. |
|
|
|
|
Lists the categories that are available for the new role to be associated with. The items in this list are populated from the Role Category list in the directory abstraction layer. |
|
|
Lists the categories that the new role is associated with. Use the and buttons to associate the current role with one or more categories. |
|
|
|
|
Specifies the users, groups, or containers that can read, compare, and browse the roles. (Read, compare, and browse are the default privileges.) |
|
|
|
One or more users who are notified about changes made to a role modification or role assignment. The role owner is also notified of the need to update a role assignment. The role owner does not automatically have the authorization to administer changes to a role definition. In some cases, the owner must ask a role administrator to perform any administrative actions on the role. |
Table 11-3 Roles Advanced Options Properties