5.1 Creating New iPrint Appliance
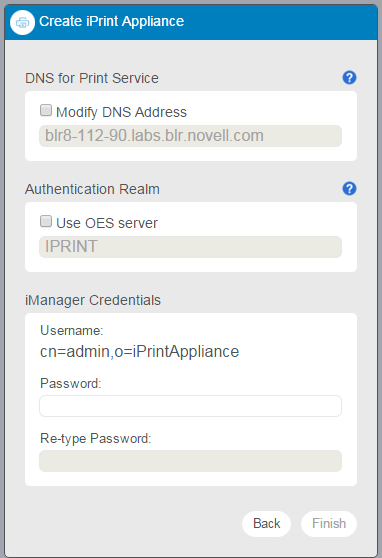
Figure 5-1 Create iPrint Appliance
-
DNS for Print Service: The host name is tied to a Print service, rather than the server. The host name must resolve to the IP address of the Appliance. You must validate that the DNS address is correct and functional before continuing because a wrong DNS address can result in errors.
The default value is the host name of the iPrint Appliance. If you modify this value to a different host name it allows you to move the iPrint server without interrupting the workstations. The host name is used to connect to the Windows and Mac desktop clients.
NOTE:If you configure a Remote Driver Store, you must manage (using iManager) the Remote Driver Store from the machine where the Driver Store resides.
-
Authentication Realm: Specify the tree name only if you want to authenticate to an existing OES server.
In an OES iPrint server, the Authentication Realm is the eDirectory tree name. When a user logs in to the workstation with NetIQ eDirectory credentials, the credentials are shared with the iPrint Client to provide seamless login experience to all the iPrint servers in your tree.
-
iManager Credentials: The credentials in this section are used to log in to the iManager interface. In the earlier release this label was Embedded Data Store.
Administrator Username: The administrator account user name is pre-populated in the following format: cn=admin,o=iPrintAppliance. This field is not editable.
Administrator Password: Specify the password for the iManager administrator account. This password will be used to log in to the iManager for managing the print environment.
Re-type Password: Specify the password again to confirm.
-
Click .
After configuring iPrint Appliance, you must create or import users, create or import printers, and upload drivers. You can also configure printers to accept print jobs from mobile devices, AirPrint, or email.