Installing and Configuring the Plug-in
Adding the Trusted Certificate to a Mac
Before communications between the Kanaka clients and Engine service work, the engine's certificate issuer, its Certificate Authority (CA), must be trusted.
NOTE: You will need local administrator access to the Mac for several of the steps in this process, so have those credentials ready before proceeding.
To add the Certificate Authority to your macOS trusted certificates list:
Obtain the CA public certificate.
IMPORTANT: The following steps assume the Kanaka Engine service TLS certificate was generated using the included kanaka-create-cert utility.
For all other cases using a custom 3rd party certificate, consult your Kanaka administrator for details on obtaining the necessary CA certificate.
-
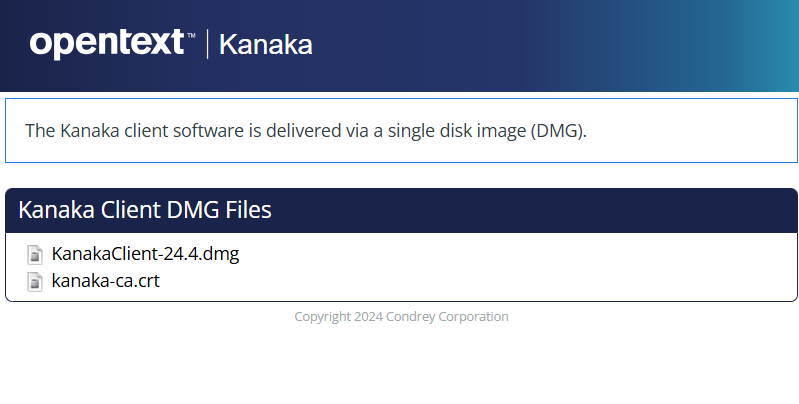
From the Mac where the Desktop Client or Plug-in is installed, access the following URL from a browser:
https://Kanaka-Engine-server-address:3089/m/GetClientClient.html.
IMPORTANT: Until the CA certificate has been trusted, you will need to manually trust access to the Kanaka Engine service site when accessing it via a browser.
-
Click kanaka-ca.crt to download and save the certificate to the Mac.

-
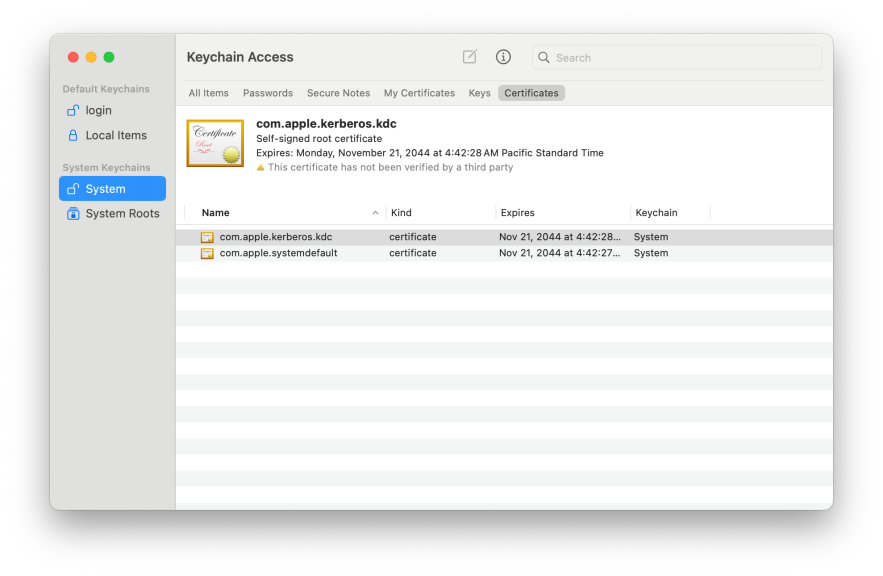
Open the Keychain Access system utility on the Mac.
-
Select the System keychain in the left panel.
-
Click Certificates in the toolbar at top.
-
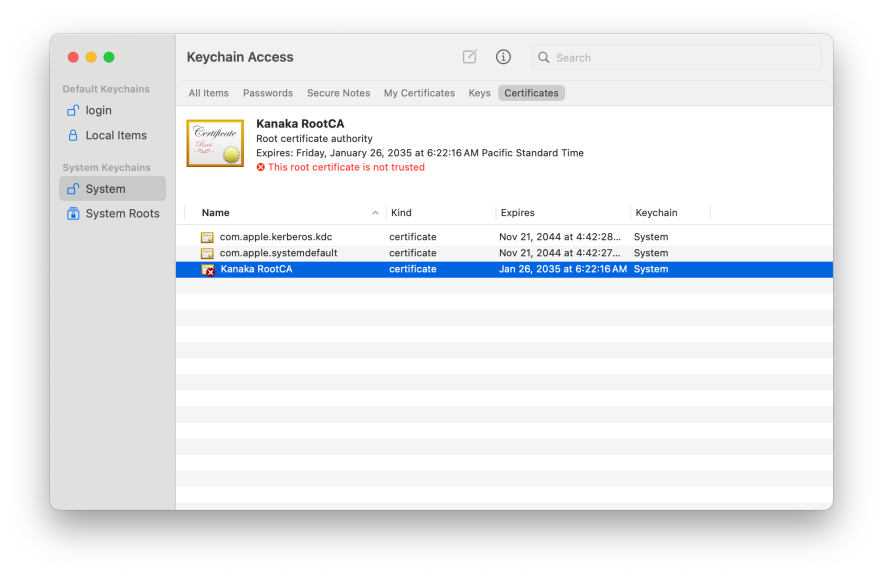
From the Keychain Access menu, select File > Import Items...
-
Select the certificate downloaded earlier for import, then click Open.
-
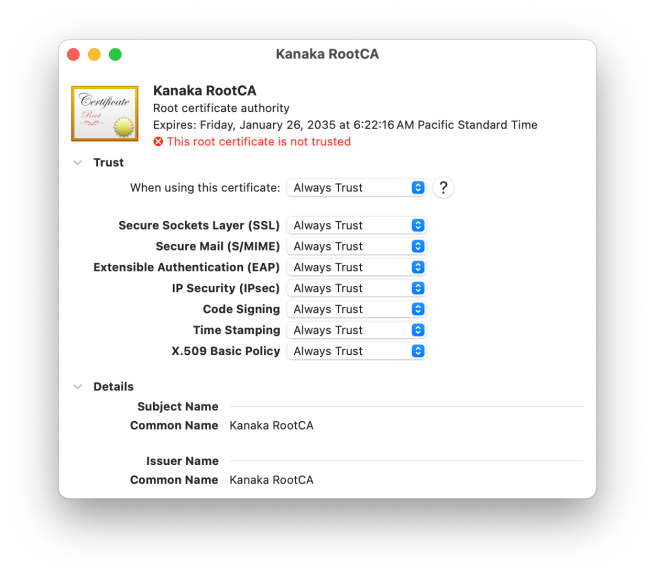
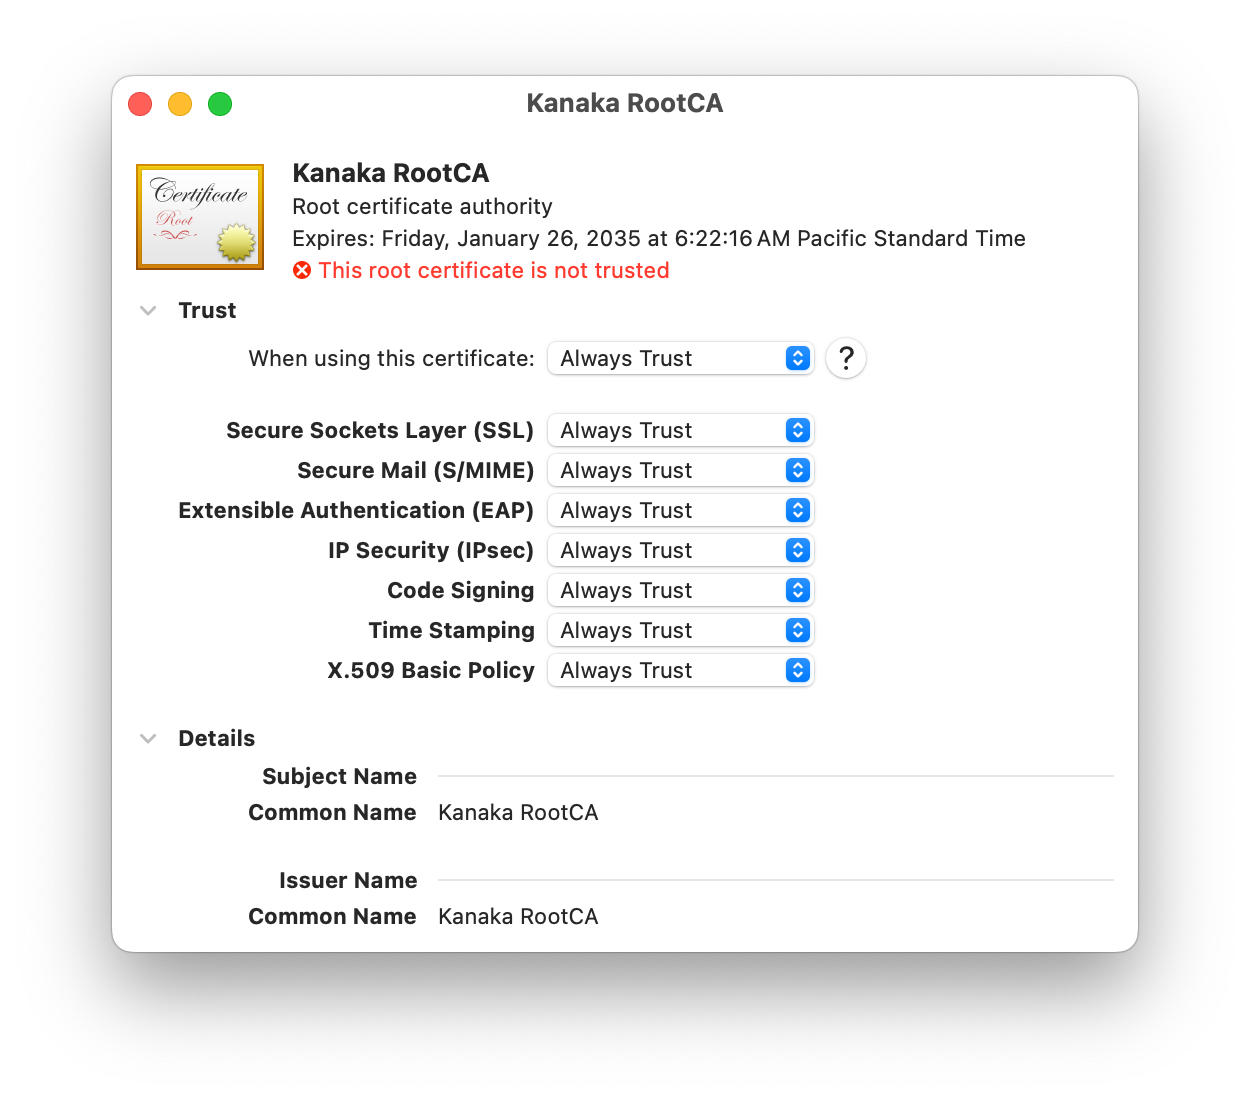
Open the imported certificate details by double-clicking the certificate item or selecting the Get Info context menu item for that certificate.
-
Select the drop-down for When using this certificate:and select Always Trust.
-
Close the details dialog to save the changes.
-
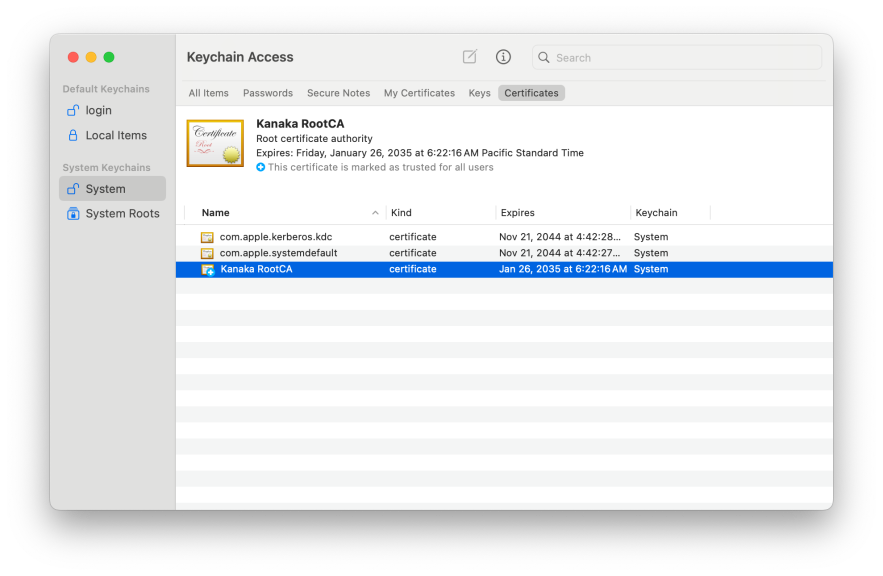
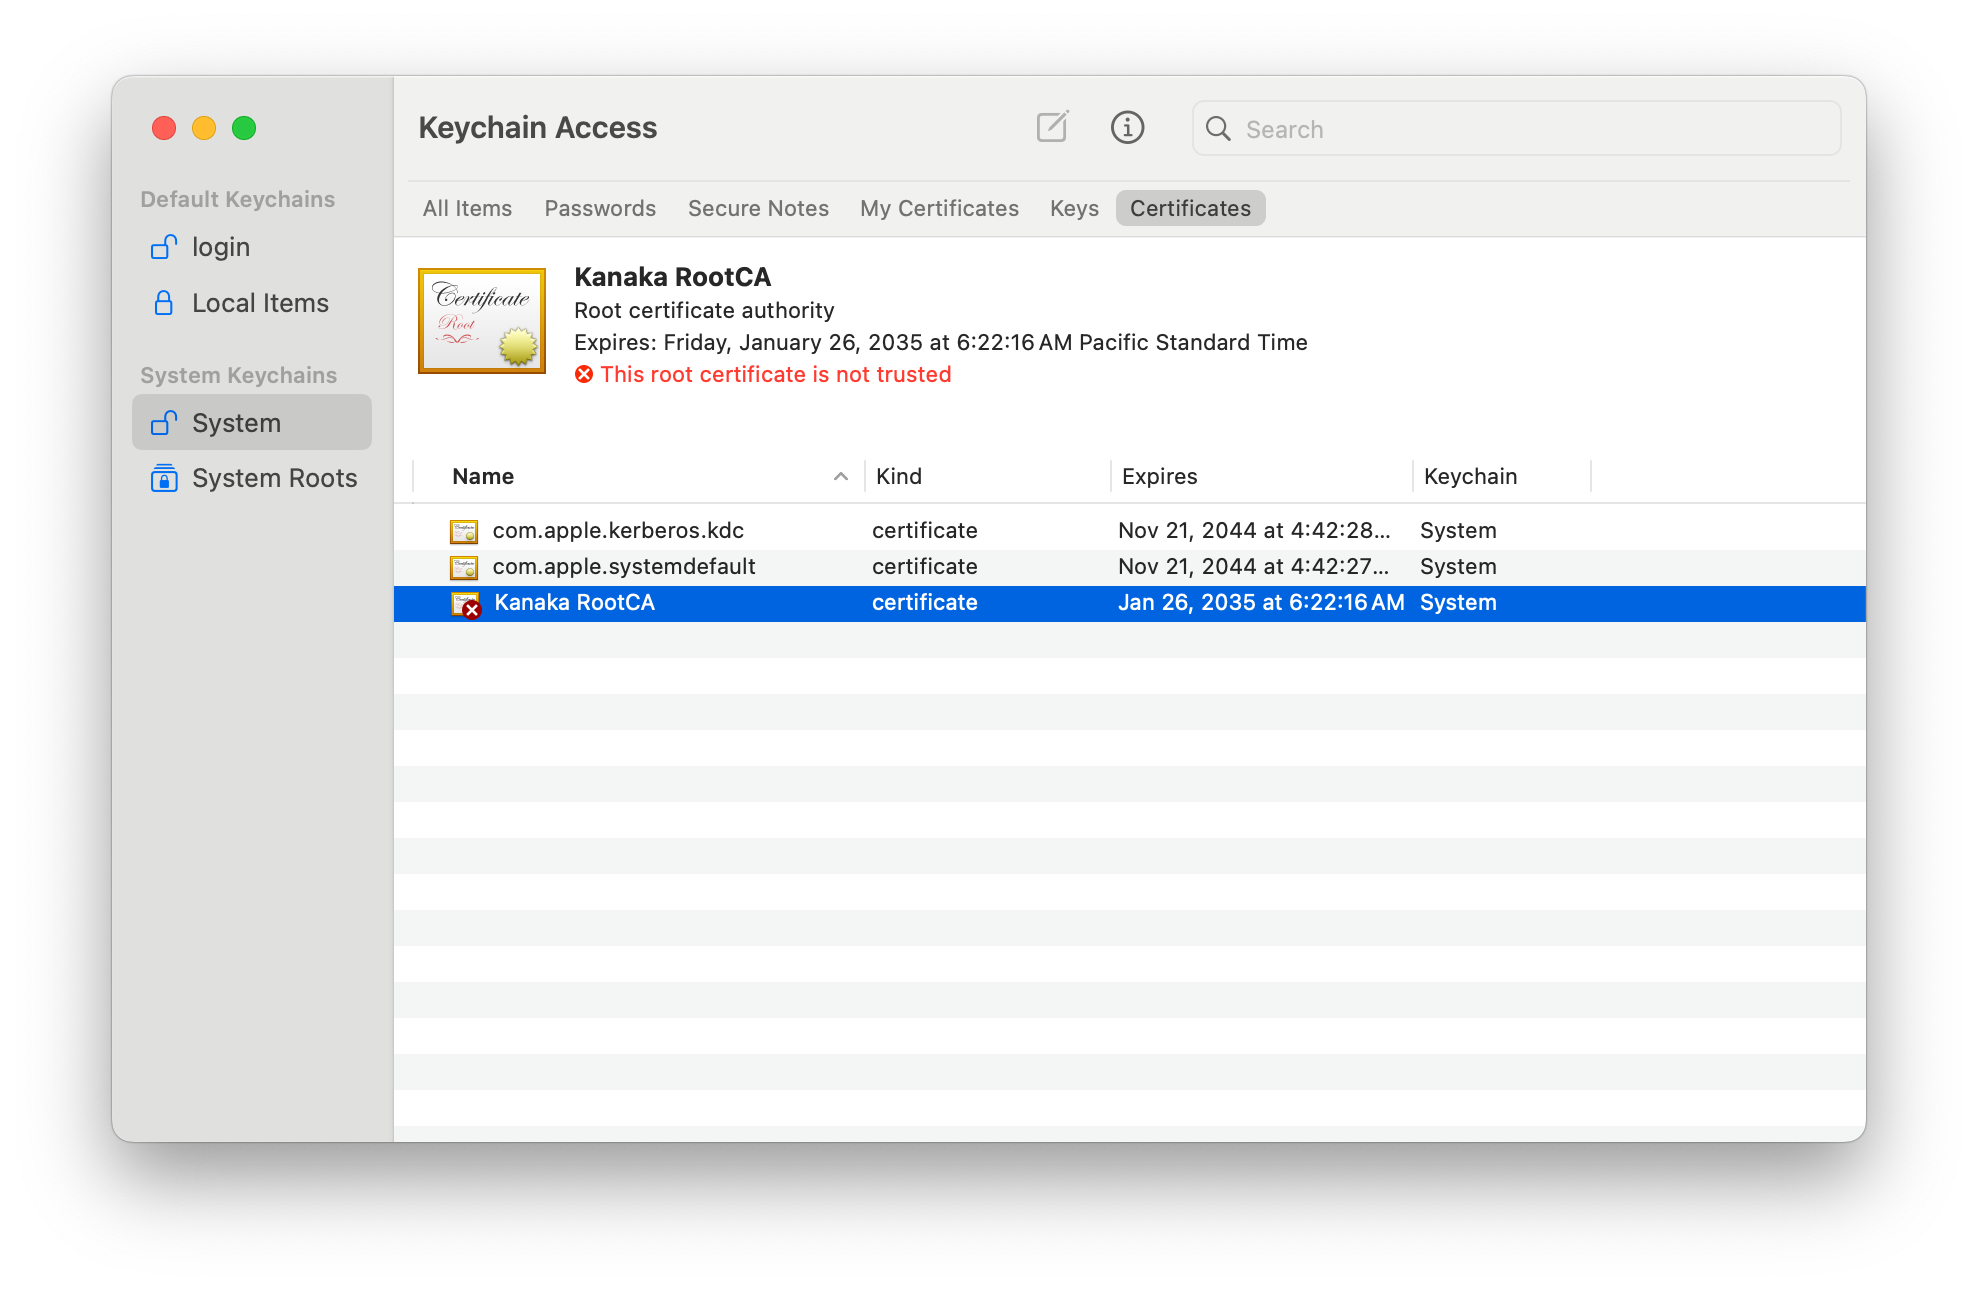
You should now see the certificate listed with the proper badge indicating full system trust.


Retrieving the Installation File
-
Via the ISO File
-
From the Kanaka ISO, select the DMG image file.
-
Copy the DMG file to each Mac where the Plug-in or Desktop Client will be installed.
-
-
Via the Engine Web Service
-
From the Mac where the Plug-in or Desktop Client will be installed, open a browser and navigate to https://Kanaka-Engine-server-address:3089/m/GetClientClient.html.
-
Click the link to KanakaClient-24.4.dmg to copy the installation file to the Mac.
-
Installing the Plug-in
-
Double-click the KanakaClient-24.4.dmg file.
-
Click Agree on the license screen.
-
Double-click Install Kanaka Plug-in.
-
Click Continue.
-
Review and accept the license agreement.
-
Click Install.
-
Enter the local Administrator's credentials and click Install Software.
-
Click Close when the installation is complete.
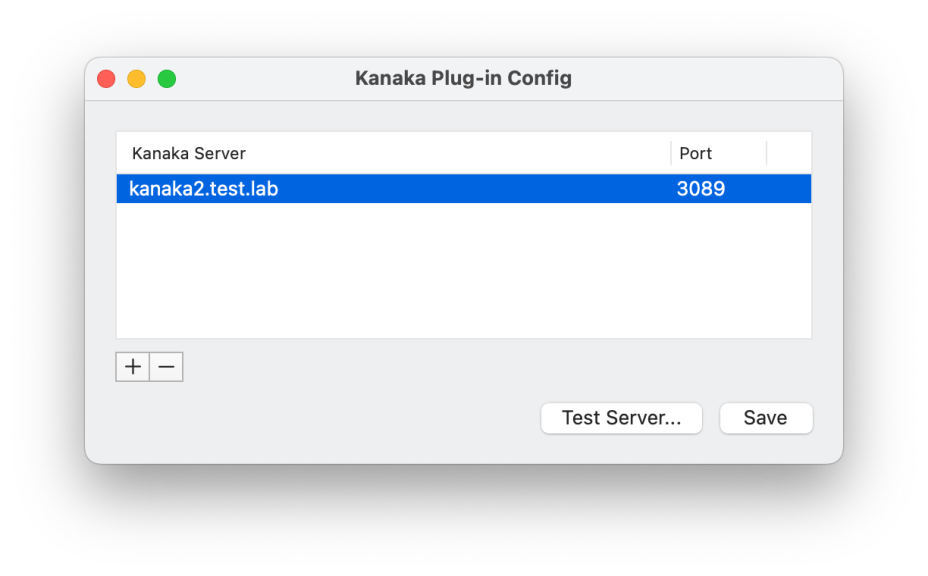
Configuring the Plug-in
You must configure the Kanaka Plug-in so it can communicate with the server hosting the Kanaka Engine.
-
Run the Kanaka Plug-in Config utility by selecting Applications > Kanaka.
-
Enter local Administrator’s credentials for the Mac in order to continue, and click Modify Configuration.
-
Click + to add a server.
In this case, the Kanaka Engine host server.
-
Specify the DNS name for the Kanaka Engine server.
-
Specify the port used to communicate with the Kanaka Engine service.
By default, this is 3089.
-
Click Save and when prompted again, enter local Administrator’s credentials.
-
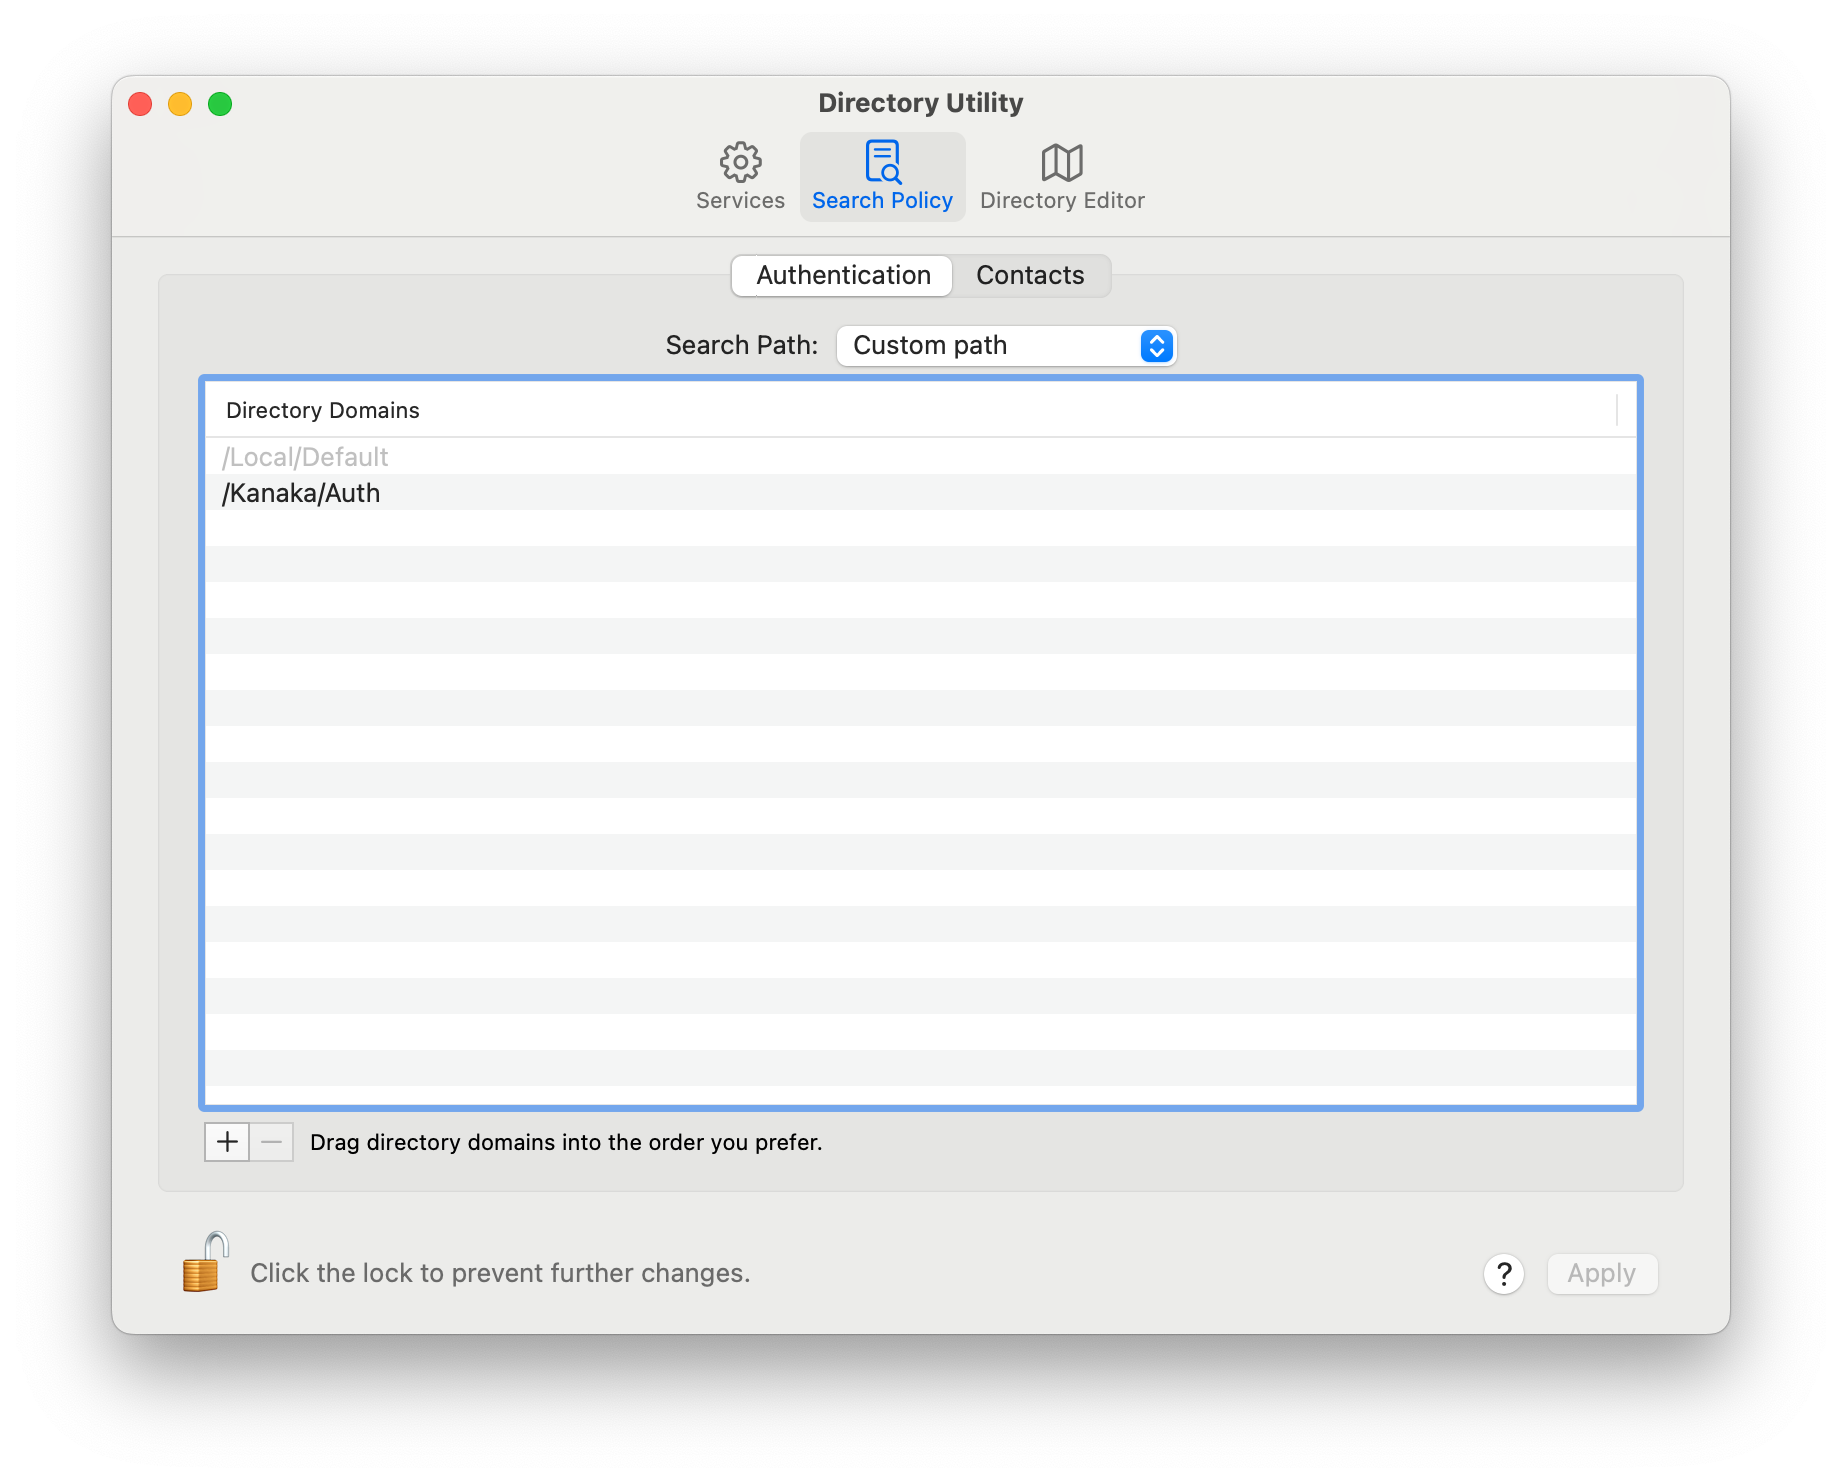
Open the Directory Utility application.
-
Click Search Policy and confirm that /Kanaka/Auth is listed under Directory Domains.
If it is not, continue with the steps below to add the Kanaka search path.
-
(Conditional) Click the lock icon to enable you to make changes.
-
In Search Path select Custom Path.
-
Click +.
-
From the Available Directory Domains select /Kanaka/Auth.

-
-
Click Apply and close the Directory Utility.
The Kanaka Plug-in should now be available for use.