5.3 Configuring the Engine
The Kanaka Engine services all requests made by the Kanaka Plug-in or the Kanaka Desktop Client. Besides performing the initial authentication, the Kanaka Engine allows the Kanaka Plug-in or the Kanaka Desktop Client to operate in a contextless manner to pull relevant individual user and storage access information from eDirectory and the file system and return the information in a format relative to the native Mac OS X operating system.
The Engine also services password change requests, specifies client storage information through the Kanaka Plug-in Console, and informs Novell Kanaka for Mac users of password expirations that will occur in the near future.
-
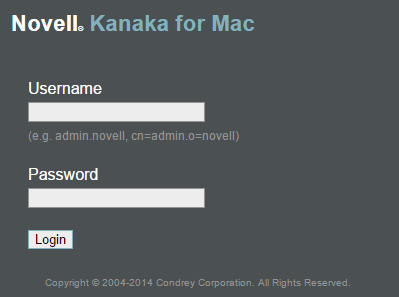
From a Web browser, launch the management interface by entering https://server_ip_or_DNS_name:3089.
-
Enter eDirectory credentials capable of modifying directory services and schema, such as an Admin or Admin equivalent.
Because you are performing administrative work, your must log in using a fully distinguished name in the field. You can use a format such as cn=user.o=org or user.org.
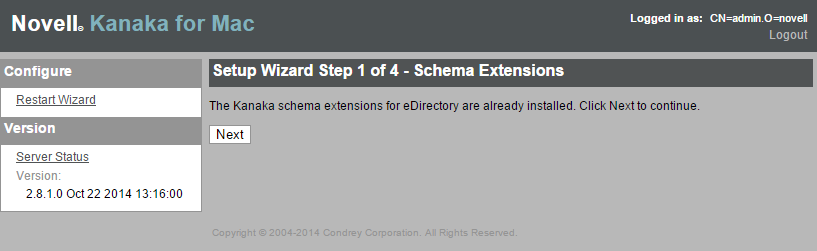
The management interface launches the Setup Wizard.
-
Click to extend the eDirectory schema.
As with all schema extensions, be aware that it might take some time for the schema extensions to be synchronized in a large tree.
The following page appears for you to create a proxy user and administration group:
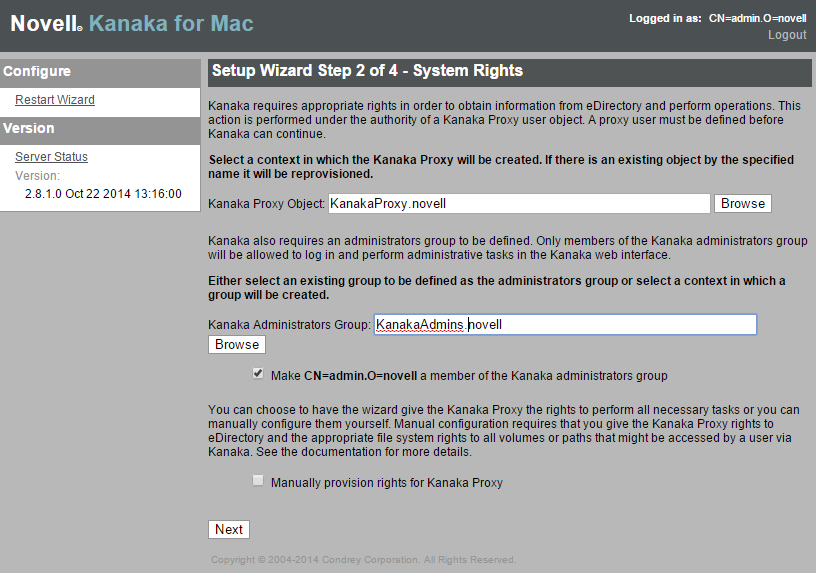
A proxy user is needed because Novell Kanaka for Mac authenticates and operates under the rights of a proxy user.
-
Use the button that corresponds to the field to browse to the container where you want the Novell Kanaka for Mac proxy user to reside, then click .
Ensure that this user has rights to retrieve user and group information from eDirectory as well as view quota information in the file system of all volumes holding user and collaborative storage.
The name KanakaProxy is appended to the path you specify.
The proxy user object is created in eDirectory after you have completed all tasks in the Setup Wizard.
-
Use the button that corresponds to the field to do one of the following:
-
Locate and select a group whose members you want to be Novell Kanaka for Mac administrators.
-
Browse to the location where you want the new KanakaAdmins group to reside in eDirectory.
The name KanakaAdmins is appended to the path you specify.
The proxy user account and password are self-managed by the Kanaka Engine. The password is never stored in any location, so there is no concern for security of the password. No two Kanaka Proxy users ever have the same password.
-
-
Leave the check box selected so the user you are logged in as can be a member of the administrators group.
-
Click .
The Kanaka Administrators Group object is created and the logged-in user is added to the group.
The Kanaka Proxy Object is also created. By default, this user object is automatically assigned Supervisor rights at the root of the eDirectory tree. You can remove this rights assignment and assign rights more granularly to the tree and the associated file systems. The object needs the following minimum rights:
-
Browse Entry rights to the eDirectory tree
-
Read and Compare Attribute rights to any of the following objects that might be used or accessed through Novell Kanaka for Mac:
-
Users
-
Groups
-
Containers, including Os, OUs, Domains, Countries, and Locales
-
Login scripts
-
Profiles
-
Servers
-
Volumes
-
-
Read and FileScan rights to any file system directories that might be used or accessed by a Novell Kanaka for Mac user, including user home directories, group home directories, or any file system that might be mapped and later accessed through a login script.
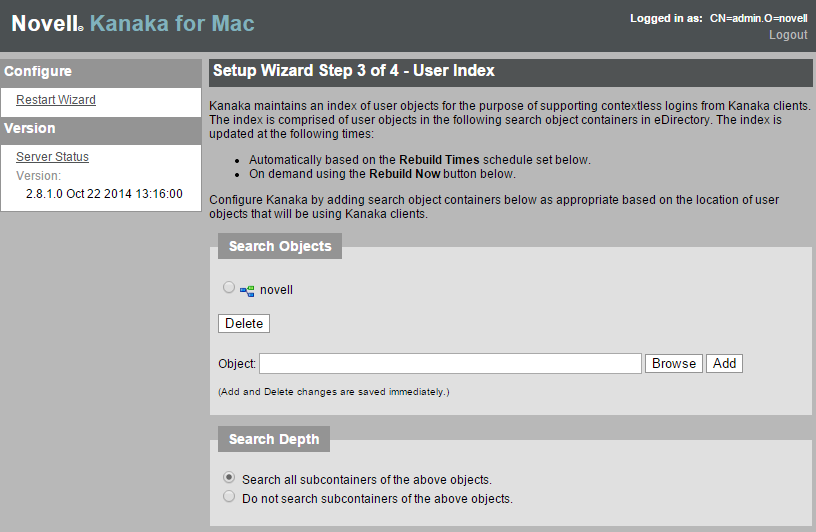
The following page appears for you to create a user index:
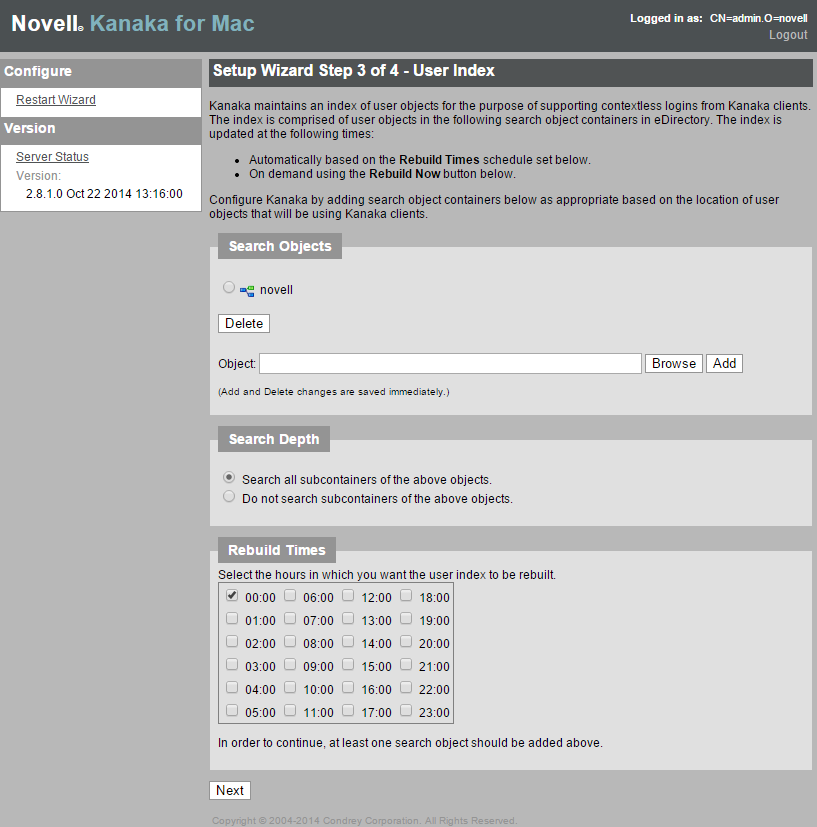
Novell Kanaka for Mac maintains an index of user objects for the purpose of supporting contextless logins from the Kanaka Plug-in and Kanaka Desktop Client. The index is made up of user objects in a set of search object containers in eDirectory.
-
-
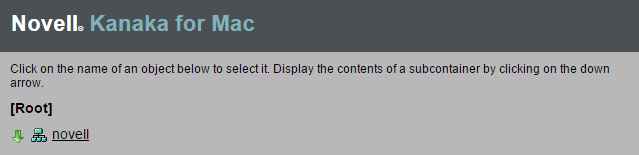
Use the button to locate a context where your Novell Kanaka for Mac users reside in eDirectory.
-
Click , then repeat Step 8 to add another container.
Repeat this step until you have added all the contexts you want to the list.
Novell Kanaka for Mac does not have the ability to differentiate users with the same name in different contexts. If you index containers with users having identical names, those users cannot log in.
-
In the region, specify whether you want Novell Kanaka for Mac to search for users only at the top layer of the container, or within subcontainers as well.
-
In the region, specify the hours when you want Novell Kanaka for Mac to rebuild the index.
You should choose an hour when there is minimal network activity.
-
Click .
This begins the build process for the initial index of users.
The index is updated under different circumstances:
-
Automatically based on individual users logging in.
If a given user is not found in the index, the user is automatically located in the given search containers and dynamically added to the index.
-
Automatically based on the hourly rebuild times schedule set in the configuration.
-
Automatically 90 seconds after the engine loads.
-
On demand using the Novell Kanaka for Mac management interface.
The following page appears:
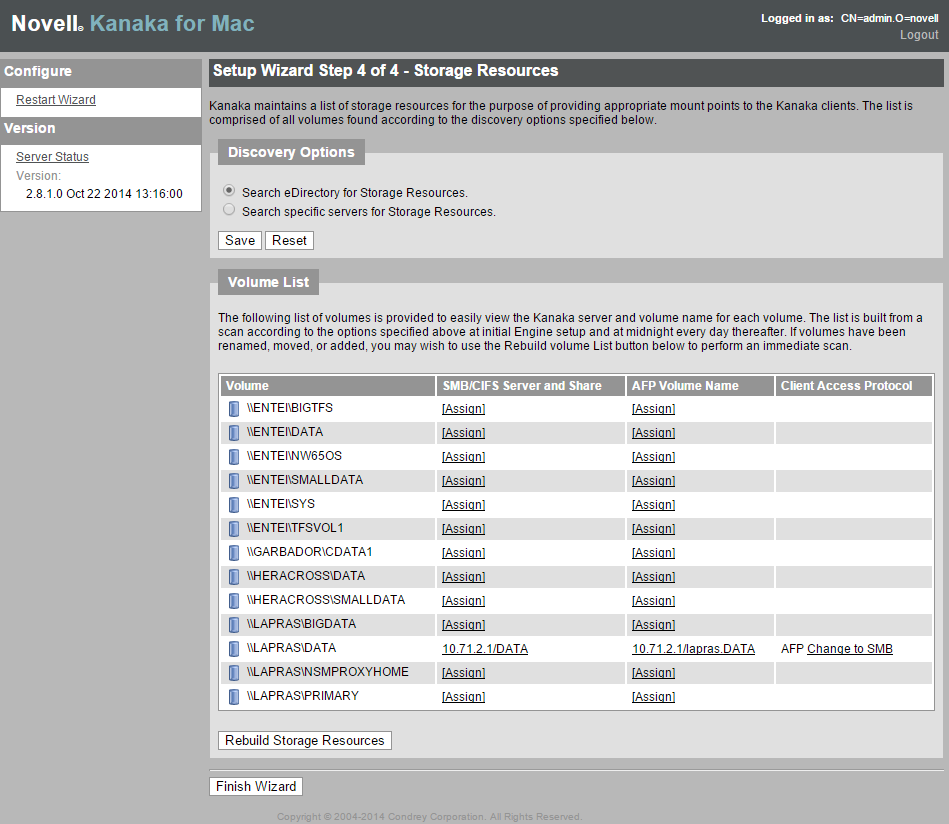
Novell Kanaka for Mac must be configured for each AFP or CIFS volume name for each volume on the network containing home directories or collaborative storage.
For a description of the process that Novell Kanaka for Mac uses to retrieve mount points for Mac OS X machines, see Section 12.1, Storage Resources.
If the volume list is empty, this indicates that the initial volume index has not yet completed.
-
-
Wait until the server has completed the process of creating the volume index.
-
Reload in the browser to refresh the page.
-
After each volume is listed and assigned, click to conclude the Setup Wizard.
At this point the Kanaka Engine is configured and operational.
When you assign a volume name in the section, you must use correct case. AFP mounts in Mac OS X Tiger and later are case-sensitive. You can remove this requirement if you force AFP to be case-insensitive. To do this, go to the server console where you have AFP installed, open a terminal session, and issue the following command: afpnames case-insensitive vol.
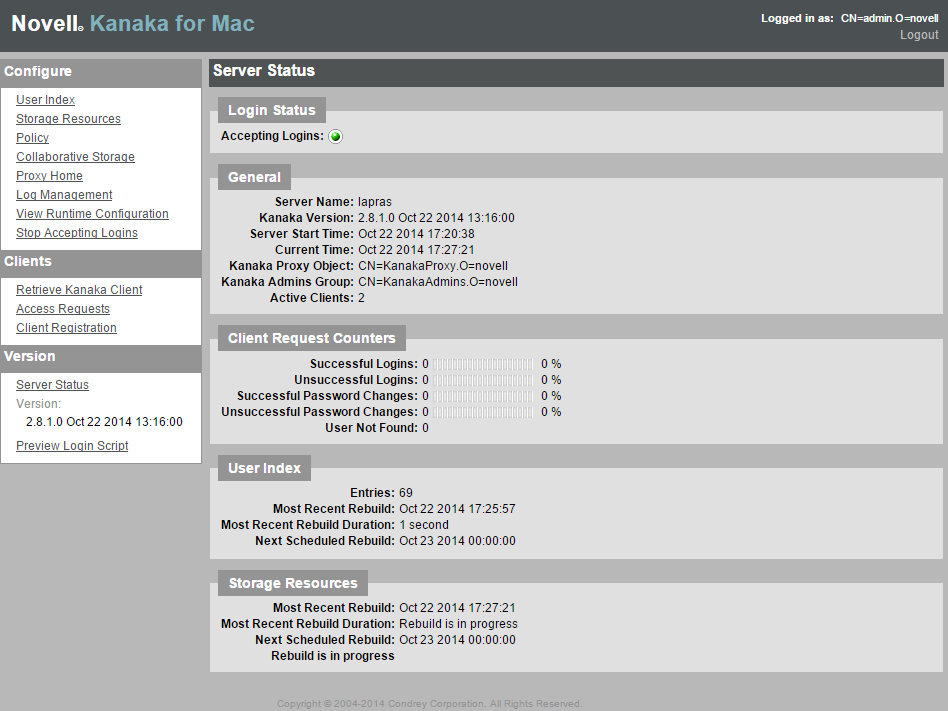
The Server Status page appears, indicating that the Kanaka Engine is now configured.