Novell Filr 1.1 Mobile App Quick Start
Novell Filr allows you to easily access all your files and folders from your desktop, browser, or a mobile device. In addition, you can promote collaboration by sharing files and folders with others. For more general information about Novell Filr, see About Novell Filr
in the Filr Web Application User Guide.
This Quick Start focuses on how to use Filr from your mobile device.
In addition to accessing Filr from a mobile device, you can also access Filr in the following ways:
-
From a web browser on your workstation, as described in the Filr Web Application User Guide
-
From your desktop, as described in the Filr Desktop for Windows Quick Start and the Filr Desktop for Mac Quick Start
You can access Novell Filr from your supported mobile device. Be aware that access to the Filr site through the app can be deactivated by your Filr administrator. If you are unable to access Filr through the app, consult your Filr administrator.
1.0 Supported Mobile Devices
The Novell Filr app is supported on the following mobile devices:
-
iOS phones and tablets for iOS 6.x or later
The native app is available as a free download in the Apple App Store.
-
Android phones and tablets for Android 2.3 or later
The native app is available as a free download in the Google Play App Store, the Amazon Appstore for Android, and the Samsung Knox Apps store.
-
Windows phones version 8.0 and 8.1
Windows tablets are not currently supported.
Supported only with a Filr 1.1 server or later.
-
The BlackBerry PlayBook and Z10
The native application is available in the BlackBerry World app store.
In this document, the BlackBerry steps are the same as for Android devices.
Accessing Filr through a web browser on a mobile device is not supported. Instead, download the Filr mobile app that is compatible with your mobile device.
2.0 Supported Languages
The default language that the Filr mobile app is displayed in is defined by the language set on the mobile device where the app is running. If the language on the device is not supported, the application is displayed in English.
The Filr mobile app supports the following languages:
-
Czech
-
Chinese (Simplified)
-
Chinese (Traditional)
-
Danish
-
Dutch
-
English
-
Finnish
-
French
-
German
-
Hungarian
-
Italian
-
Japanese
-
Polish
-
Portuguese (Brazil)
-
Russian
-
Spanish
-
Swedish
3.0 File Viewing Support
The Filr mobile app allows you to view most files within the app. Depending on the size and type of file, the app might need to be opened in a third-party app, or a warning might be displayed before you can view it in the Filr app.
3.1 Files That Cannot Be Viewed in the Filr App
The Filr app cannot display files of the following type that are larger than 20 MB on iOS devices and 2 MB on Android devices:
-
Text files (such as .txt, .odt, .pdf, and so forth)
-
HTML files
To view these files, you need to open the file in a third-party app, as described in Editing or Viewing a File in an External Application.
3.2 Files That Give a Warning Before They Are Displayed
Because viewing a file within Filr consumes data (when using a mobile service provider), a warning is shown if you attempt to view a file over 5 MB in size.
When connected to Wi-Fi, a warning is shown if you attempt to view a file over 50 MB in size on iOS devices, because the process can be time-consuming.
4.0 Getting Started
4.1 Installing the App
Download the Filr mobile app from the appropriate store for your mobile device. (For a list of supported devices, see Supported Mobile Devices.) To locate the app, search for Novell Filr.
4.2 Connecting to the Filr Site
When you first set up the app, you need to specify information for just one Filr site. After you have performed the initial setup as described in this section, launching the Filr app automatically connects you and authenticates you to your Filr server (if your Filr administrator has enabled you to save your password).
-
Launch the Filr mobile app on your iOS, Android, or Windows device.
-
Android devices: Accept the Filr license agreement.
-
On the Login page, specify the following information:
User ID: Specify the name that you use to log in to the Filr site.
Password: Specify the password that you use to log in to the Filr site.
Server: Specify the URL for the Filr site. For example, https://Filrsite.com.
Your server must be configured with a secure HTTP (HTTPS) connection in order to connect to it from a mobile device.
Save Password: Select this option if you want your password to be securely stored on your device so that you can automatically be signed in to the Filr site when you launch the app. (This option can be disabled by the Filr administrator.)
-
Tap .
The home page is displayed.
4.3 Modifying the Configuration Settings for the Filr Site
To modify the configuration settings for the Filr site after you have already configured it in the Filr app, sign out of the app and sign back in using different configuration settings. For example, you can modify your user name, password, and server URL.
For information about how to sign out, see Signing Out.
5.0 Navigating to the Home Page of the App
Regardless of where you are in the Filr app, you can easily navigate to the home page.
-
If you are not already on the Home page, tap the button (for iOS, tap
 ; for Android, tap
  ; for Windows, tap
  ).
).
The home page is displayed.
6.0 Searching the App
When you perform a search in Novell Filr, Filr searches the following content:
-
Folder names
-
File names and file content
-
Comments on files
-
Net Folders
Searches file names by default. Depending on configuration settings set by the Filr administrator, file content might or might not be searched.
If you have access rights to view a file but you do not have access rights to view the folder where the file is located, the file is not returned in search results.
In offline mode, file content is not searched for downloaded files in the section. File names, comments, and author are searched.
The Novell Filr app enables you to search for items either in a specific folder or across the entire site.
6.1 Searching in a Folder
-
Navigate to the folder that you want to search.
-
iOS devices: Tap the icon
 .
.
Android devices: Tap the icon
 next to the folder name.
Windows devices: Tap the icon
 .
.
-
Choose from the following search options:
-
Current Folder: Searches files only in the current folder. Subfolders are not included. This is the default setting.
-
Include Subfolders: Searches files in the current folder and in any subfolders.
-
-
iOS and Android devices: Begin typing the words or phrases that you want to search for. Search results are displayed as you type.
Windows devices: Specify the word or phrase to search for, then tap the Enter key.
Filr supports numerous wildcards and operators that you can use to refine your search. For more information, see
Supported Operators and Wildcards for Search
in the Novell Filr 1.1 Web Application User Guide.When you search in the section, only wildcards with the * operator and the ? operator are functional.
6.2 Searching Globally
Global search searches everything on the Filr site for which you have access.
To perform a global search on your mobile device:
-
If you are not already on the Home page, tap the Home button (for iOS, tap
; for Android, tap ; for Windows, tap ).
-
iOS and Android devices: Tap
 .
.
Windows devices: Tap the icon
.
-
iOS and Android devices: Begin typing the words or phrases that you want to search for. Search results are displayed as you type.
Windows devices: Specify the word or phrase to search for, then tap the Enter key.
Filr supports numerous wildcards and operators that you can use to refine your search. For more information, see
Supported Operators and Wildcards for Search
in the Novell Filr 1.1 Web Application User Guide.
For information about how to search from within the Filr Web application, see Searching for Information
in the Novell Filr 1.1 Web Application User Guide.
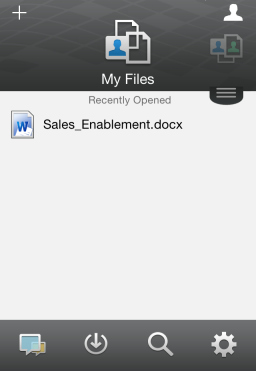
7.0 Accessing Your Personal Files (My Files)
All your personal files and folders are stored in one convenient location.
Personal files (My Files) include files that you upload to the Filr site and other personal files that are associated with your Home directory on a corporate server.
To access My Files from your mobile device:
-
If you are not already on the Home page, tap the Home button (for iOS, tap
; for Android, tap ; for Windows, tap ).
-
Windows devices: Tap .
-
Tap .
-
Tap an individual file to view it in HTML.
If the file is not displayed, it might be too large to view within the Filr app. For more information, see File Viewing Support.
For information about how to open the file in another application, see Editing or Viewing a File in an External Application.
For information about how to access My Files from within the Filr Web application, see Accessing Your Personal Files and Folders (My Files)
in the Novell Filr 1.1 Web Application User Guide.
8.0 Accessing Shared Files and Folders
Files and folders that you have shared with others are stored in one convenient location. Files and Folders that others have shared with you are stored in another location.
To view files and folders that have been shared with you:
-
If you are not already on the Home page, tap the Home button (for iOS, tap
; for Android, tap ; for Windows, tap ).
-
iOS and Android devices: Tap the drop-down tab.
Windows devices: Tap .
-
Tap .
Items that have been shared with you are displayed in the order that they were shared, with the most recent displayed first.
Information specific to the share is displayed beneath the shared item (such as who shared the item, when it was shared, and any notes associated with the share).
-
Tap an individual file to view it in HTML.
If the file is not displayed, it might be too large to view within the Filr app. For more information, see File Viewing Support.
For information about how to open the file in another application, see Editing or Viewing a File in an External Application.
To view files and folders that you have shared:
-
If you are not already on the Home page, tap the Home button (for iOS, tap
; for Android, tap ; for Windows, tap ).
-
iOS and Android devices: Tap the drop-down tab.
Windows devices: Tap .
-
Tap
 .
.
-
Tap an individual file to view it in HTML.
For information about how to open the file in another application, see Editing or Viewing a File in an External Application.
For information about how to access your shared files and folders from within the Filr Web application, see Accessing Shared Files and Folders
in the Novell Filr 1.1 Web Application User Guide.
9.0 Accessing Files and Folders in the Corporate File System (Net Folders)
Net Folders are folders and files on your corporate file system. Corporate files can be files on your home directory, files on a mapped drive, or files on a remote server. Filr gives you seamless access to these files, regardless of their location. The corporate files that you have access to are defined by your Filr administrator.
Files in Net Folders might or might not be fully indexed and searchable in the Filr site, depending on configuration settings made by the Filr administrator.
Your Filr administrator can disallow access to Net Folders from the Filr mobile app. If you do not have access to files in Net Folders that you normally have access to, your administrator has disabled this functionality.
To access Net Folders on your mobile device:
-
If you are not already on the Home page, tap the Home button (for iOS, tap
; for Android, tap ; for Windows, tap ).
-
iOS and Android devices: Tap the drop-down tab.
Windows devices: Tap .
-
Tap .
For information about how to access Net Folders from within the Filr Web application, see Accessing Files and Folders in the Corporate File System (Net Folders)
in the Novell Filr 1.1 Web Application User Guide.
10.0 Accessing Public Files and Folders
Public files are files that have been shared with the public. The ability to make files and folders available to the public must be enabled by your Filr administrator.
-
If you are not already on the Home page, tap the Home button (for iOS, tap
; for Android, tap ; for Windows, tap ).
-
iOS and Android devices: Tap the drop-down tab.
Windows devices: Tap .
-
Tap .
Items that have been shared with the public are displayed in the order that they were shared, with the most recent displayed first.
Information specific to the share, such as who shared the item, when it was shared, and any notes associated with the share, is displayed beneath the shared item.
-
Tap an individual file to view it in HTML.
If the file is not displayed, it might be too large to view within the Filr app. For more information, see File Viewing Support.
For information about how to open the file in another application, see Editing or Viewing a File in an External Application.
11.0 Sharing Files and Folders
NOTE:This functionality is not currently available on Windows Phone.
Understanding Sharing Options:
Filr provides various methods of making files and folders available to others. How you decide to make files available might depend on various factors, such as the sensitivity of the information you are distributing or the relevance of information to certain individuals.
-
Sharing with individual users and groups: Sharing allows you to share files and folders with specific users and groups internal to your organization or with specific users external to your organization. When you share a file or folder, you define the level of access users have to the item. For example, you might give a user Viewer access only. Or, you might give a user Editor access to a file and allow them to re-share the file with others.
Sharing with specific users and groups provides the greatest level of security for your files and folders. Users receive a notification about the shared item and the item is displayed in their Shared with Me area.
How to share with individual users and groups is described in this section.
-
Distributing a File Link: You can distribute a link (URL) to a file. When you distribute a link to a file, any user with the link can access the file. However, the file is not displayed in the Public area, so users must have direct access to the link in order to view the file.
For information about how to distribute a File Link, see Distributing a Link to a File.
-
Sharing with the Public: When you share an item with the Public, any person with the URL to the Filr site can view the file in the Public area.
How to share with the Public is described in this section.
You can share files and folders directly from the Filr mobile app.
-
Navigate to the location that contains the file or folder that you want to share or for which you want to modify share settings.
-
iOS devices: Tap the information icon
 next to the file or folder name.
Android devices: Tap the drop-down icon
 next to the file or folder name.
-
Tap the icon
 .
.
The Share dialog box is displayed.
-
Tap inside the search field.
-
Begin typing the name of the user or group that you want to share with, then tap the name when it appears in the drop-down list.
or
Type the complete email address of the external user that you want to share with, then tap the address when it appears in the drop-down list.
HINT:If you plan to share with multiple users and you want to grant all users the same access rights, set the access rights of the first user that you share with (as described in Step 7), then share with additional users (as described in Step 4 and Step 5).
Each additional user that you share with inherits the access rights of the user who was most recently added to the list.
-
(Optional) Repeat Step 4 and Step 5 to share with additional users.
-
(Conditional) To modify access settings for an individual user:
-
In the section, tap the user whose access settings you want to modify.
-
Choose from the following access settings to modify:
Access: Grant one of the following access roles to the user or group:
-
Viewer: Users can view individual files that are shared with them or all files within the folder that is shared with them.
-
Editor: Users can view and modify individual files that are shared with them or all files within the folder that is shared with them.
-
Contributor: (Applies only when sharing folders). Users can create files in the folder, rename existing files, modify files, move files, and delete files inside the folder. Users cannot perform actions on the folder itself.
Expires: Specify when the share will expire.
You can configure the share to expire either after a given number of days (each day is counted as a 24-hour period from the time that you set the expiration) or on a specific day (rights expire at the beginning of the day that you select).
Allow re-share: Allow share recipients to re-share the item with the following groups:
-
Internal users: Allow share recipients to re-share the item with internal users.
-
External users: Allow share recipients to re-share the item with external users.
-
Public: Allow share recipients to re-share the item with the public.
-
File Link: Allow share recipients to re-share the item via a File Link.
For more information about File Links, see Distributing a Link to a File.
Note: Include a personal note to share recipients. Only share recipients can read the note.
-
-
iOS phones: Tap to return to the section.
Android phones: Tap
.
-
-
(Conditional) To modify access settings for multiple users simultaneously:
-
iOS devices: Tap (located above the section), then select the users whose access settings you want to modify. On phone devices, tap .
Android devices: Long press (tap and hold) each user that you want to select. Then, on phone devices, tap after each user whose settings you want to modify are selected.
-
Choose from the following access settings to modify:
Access settings that you leave undefined retain any individual access settings that are present on a given user. Access settings that you define are modified for each user that is currently selected.
Access: Grant Viewer, Editor, or Contributor access rights. (Contributor applies only to folders.)
Expires: Set a date when the share will expire.
Allow re-share: Allow share recipients to re-share the item with the following groups:
-
Internal users: Allow share recipients to re-share the item with internal users.
-
External users: Allow share recipients to re-share the item with external users.
-
Public: Allow share recipients to re-share the item with the public.
-
File Link: Allow share recipients to re-share the item via a File Link.
For more information about File Links, see Distributing a Link to a File.
Note: Include a personal note to share recipients. Only share recipients can read the note.
-
-
iOS phones: Tap to return to the section.
Android phones: Tap
.
-
-
(Optional) Tap the icon
 to make the item publicly available. In the section, tap that was just added, then set the access control settings for the public.
-
(Optional) Tap , then choose from the following notification options:
None: Send no notifications.
All recipients: All recipients in the share list are notified.
Only newly added recipients: Only recipients that you add to the share list are notified.
New and modified recipients: Only recipients whose share rights you are modifying, as well as new recipients, are notified.
-
iOS devices: Tap to save the share settings.
Android devices: Tap the icon
 to save the share settings.
12.0 Distributing a Link to a File
NOTE:This functionality is not currently available on Windows Phone.
You can distribute a link (URL) to a file. When you distribute a link to a file, any user with the link can access the file. However, the file is not displayed in the Public area, so users must have direct access to the link in order to access the file.
-
Navigate to the location that contains the file for which you want to share a link.
-
Tap the information icon next to the file name (for iOS, tap
; for Android, tap ).
-
Tap the icon
 .
.
The File Link dialog box is displayed.
-
If a link has not previously been created for the file, click .
The following URLs are created for accessing the file:
Download File Link: Depending on browser settings, users are either prompted to download or open the file, or the file is automatically displayed in the browser. This link allows users to access the file directly.
View File Link: This link displays the file in a web browser in an HTML view. If the file type cannot be displayed in a web browser, this link is not available.
The File Link is now included in the Share dialog. You can modify the expiration date or note associated with the link, or you can remove the link so that the file is no longer accessible to users with the link by accessing the Share dialog, as described in Sharing Files and Folders.
-
(Optional) You can configure an expiration date by tapping the section, selecting an expiration date, then clicking or .
You can configure the link to expire either after a given number of days (each day is counted as a 24-hour period from the time that you set the expiration) or on a specific day (rights expire at the beginning of the day that you select).
-
iOS devices: Choose from the following actions for distributing the File link:
-
Copy: Allows you to select either the Download or View link to copy, and copies the link to your device’s clipboard. You can then paste the link into another application on your device.
-
Email: Uses your device’s default email app to email the link. Both the Download and View links are included in the email.
-
Filr Email: Uses Filr’s built-in email system to email the link. Both the Download and View links are included in the email.
-
Remove: Deletes the File link so that users are not able to access the file by using the current links.
Android devices: Click .
A list of options is displayed for sending File link data to other applications on your device. The following Filr-specific actions are available:
-
Email via Filr: Uses Filr’s built-in email system to email the links. Both the Download and View links are included in the email. You can set an expiration date from the email form.
-
Copy to clipboard: Allows you to select either the Download or View link to copy, and copies the link to your device’s clipboard. You can then paste the link into another application on your device.
-
-
(Optional) After you create the File Link, you can modify user access and perform other management functions for the File Link by accessing the Share dialog, as described in Sharing Files and Folders.
13.0 Viewing What’s New
NOTE:This functionality is not currently available on Windows Phone.
The Filr app enables you to see new files that have been added to the Filr site. (Files that have been most recently added, modified, or commented on are displayed.)
-
If you are not already on the Home page, tap the Home button (for iOS, tap
; for Android, tap ; for Windows, tap ).
-
Tap
 .
.
Files that have been most recently added, modified, or commented on that you have access to are displayed.
You can filter the list by tapping a category, such as My Files, Shared With Me, Shared By Me, and Net Folders.
-
Tap an individual file to view it in HTML.
For information about how to open the file in another application, see Editing or Viewing a File in an External Application.
For information about how to view what’s new from within the Filr Web application, see Finding What’s New
in the Novell Filr 1.1 Web Application User Guide.
14.0 Viewing Recent Files
The Home page displays the files that you have most recently viewed or modified, in chronological order.
-
If you are not already on the Home page, tap the Home button (for iOS, tap
; for Android, tap ; for Windows, tap ).
The files that you have most recently viewed or modified are displayed in the column.
-
iOS and Android devices:
-
On a phone device: Swipe to the right to view recent files in the , , , and columns.
Recent files for that area are displayed.
NOTE:If you view files via What’s New or from a global search and the files have not been cached, those files are not displayed in the list of recent files.
Windows devices: Swipe left to view the Recent list.
-
-
Tap an individual file to view it in HTML.
For information about how to open the file in another application, see Editing or Viewing a File in an External Application.
15.0 Viewing Comments for a File
NOTE:This functionality is not currently available on Windows Phone.
-
On your mobile device, navigate to and view the file for which you want to view comments.
-
iPad and Android devices: When you view the file, tap the icon
 .
.
iPhone: When you view the file, tap the icon
 , then tap .
16.0 Commenting on a File
NOTE:This functionality is not currently available on Windows Phone.
-
On your mobile device, navigate to and view the file that you want to comment on.
-
iPad and Android devices: When you view the file, tap the icon
.
iPhone: When you view the file, tap the icon
, then tap .
-
Tap the icon to add a new comment.
or
To reply to an existing comment, tap the icon
 next to the comment that you want to reply to.
-
Specify your comment, then tap / .
For information about how to comment on a file from within the Filr Web application, see Commenting on a File
in the Novell Filr 1.1 Web Application User Guide.
17.0 Editing or Viewing a File in an External Application
You can open files in applications external to Filr. You might want to do this for either of the following reasons:
-
To edit the file.
You can open a file in another application, edit it, then save it back to Filr.
For example, on iOS devices, you can view a .doc document in Filr and open it in the Pages app. (All third-party apps must be downloaded separately.)
-
The type of file is not supported for viewing within the Filr app.
Most types of files are supported in the Filr app. For those that aren’t, you can open them in another application.
NOTE:If your Filr administrator has disallowed the downloading of files to mobile devices, you cannot edit or view a file in an external application as described in this section.
To open a file in an application external to Filr:
-
Navigate to the file that you want to open in an external application, then tap the icon (iOS devices, tap
; Android devices, tap  ; Windows devices, tap
  ).
).
-
Tap the name of the application that you want to use to open the file.
On iOS devices, Filr is registered with the Open In technology to import and export all file types. Other applications can also choose the types of files they support.
-
(Optional) Edit the file, then save it to the Filr site, as described in Uploading a File to Filr.
or
On Android devices: Edit the file in the external application, save the file, then close the app or use the Back button to navigate back to the Filr app.
Filr asks if you want to upload the changes that you made. Tap and the changes are uploaded.
18.0 Downloading a File
You can download files onto your mobile device to make them available when you are offline. Comments already made on downloaded files are also available.
Your Filr administrator can disallow the downloading of files to mobile devices from the Filr mobile app. If you cannot download files to your mobile device as described in this section, or if files that you previously downloaded are no longer there, your administrator has disabled this functionality.
-
Navigate to the file that you want to download.
-
iPhone: When you view the file on the iPhone, tap the icon
, then tap .
To remove the file from your downloads, tap the icon
, then tap .
iPad: When you view the file on the iPad and on Android devices, tap the icon
 .
.
To remove the file from your downloads, tap the icon
 .
.
Android devices: Tap the Menu button, then tap .
To remove the file from your downloads, tap the Menu button, then tap .
Windows devices: When you view the file on a Windows phone, tap the icon
 .
.
To remove the file from your downloads, tap the icon
 .
.
The following icons indicate that a file has been downloaded:
-
The download icon overlays on the file icon, next to the file name.
On iOS and Android devices:

On Windows devices:

-
On the iPad, the icon
is changed to the icon .
On Windows devices, the icon
is changed to the icon .
You can access your downloaded files by tapping  from the home screen.
To see how much memory your downloaded files are consuming on your device:
-
Tap the Home button (for iOS, tap
; for Android, tap ; for Windows, tap ).
-
iOS devices: Tap
 > .
> .
The section displays the memory usage of your downloaded files.
Android devices: Tap
. In the section, the displays the memory usage of your downloaded files.
Windows devices: Tap
 , then swipe to the section. The displays the memory usage of your downloaded files.
19.0 Synchronizing Downloaded Files
Filr synchronizes your downloaded files on your mobile device with the files on the server at a schedule set by your Filr administrator.
To modify your synchronization settings or to synchronize your files immediately:
-
Tap the Home button (for iOS, tap
; for Android, tap ; for Windows, tap ).
-
iOS devices: Tap
, then look at the options in the section.
Android devices: Tap
, then look at the options in the section.
Windows devices: Tap
, then swipe to the section to view the synchronization options. (In addition to the synchronization settings, you can view the date and time of the last synchronization and whether a synchronization is currently in progress.)
The following options are displayed:
-
WiFi only: When this option is enabled, the synchronization process occurs only when your mobile device is connected to WiFi. When it is disabled, the synchronization process uses WiFi when available, and uses data through your mobile provider when WiFi is not available.
-
Synchronize Now: Synchronizes your downloaded files immediately, regardless of the setting.
-
20.0 Saving a File to the Photos App (iOS Only)
You can save a file directly to the Photos app on your iOS device:
-
On your mobile device, navigate to and view the file that you want to save to the Photos app.
The file must be an image file, such as .jpg or .png.
-
Tap the icon
, then tap .
-
(Conditional) Click if you are prompted to allow Filr to access your photo album.
21.0 Uploading a File to Filr
NOTE:This functionality is not currently available on:
-
Windows Phone devices
-
BlackBerry devices
You can upload files to the Filr site from your mobile device.
21.1 Uploading a File from within Filr
-
iOS devices: Navigate to the folder or area where you want to upload the file, tap the icon
 , then select the file that you want to upload.
Android devices: Tap the menu icon
next to the folder where you want to upload the file, tap , then select the file that you want to upload.
21.2 Uploading a File from Another App
-
From another app on your mobile device, view the file that you want to upload to Filr.
-
iOS devices: Tap the icon
 , then tap the Filr icon.
This option is not available from the Photos app on iOS devices. Instead, tap the icon from the Home page within the Filr app, select the files that you want to upload, then tap . (If Filr is unable to access photos from the Photos app, ensure that the privacy settings for the Photos app are configured to grant access to Filr.)
NOTE:Filr is registered with the Open In technology to import and export all file types. Other applications can also choose the types of files they support.
Android devices: Tap , then tap the Filr icon.
The Filr app is launched and the Upload File dialog box is displayed.
-
(Optional) In the field, rename the file.
-
To save the file to the default destination (My Files), tap .
or
To save the file to another destination on the Filr site:
iOS devices: In the section, tap either or , navigate to the folder that you want to save the file to, then tap > .
Android devices: Tap , tap the location drop-down list to choose either or , tap the folder where you want to save the file, then tap > .
22.0 Creating a Folder
NOTE:This functionality is not currently available on Windows Phone.
You can create a new folder from your mobile device.
-
(Conditional) To create a folder within an existing folder, navigate to the folder where you want to create a new folder, then tap the information icon next to the folder name where you want to create a new folder (for iOS, tap
; for Android, tap ).
-
(Conditional) To create a folder at the root of the My Files area, navigate to the My Files area, then click the icon.
-
iOS devices: Tap the icon
.
-
Tap .
-
Type the name for the new folder, then tap /.
23.0 Moving a File or Folder
NOTE:This functionality is not currently available on Windows Phone.
You can move a file or folder to another location on the Filr site by using your mobile device.
-
Navigate to the location that contains the file or folder that you want to move.
-
Tap the information icon next to the file or folder name that you want to move (for iOS, tap
; for Android, tap ).
-
iOS devices: Tap the icon
.
-
Tap .
-
In the section, click either the , , or icon that represents the location where you want to move the file or folder.
For example, if you want to move a file to a folder in your My Files area, click the icon.
-
(Optional) If you want to move the file or folder to a specific folder within either the My Files, Shared with Me, or Net Folder areas:
-
Navigate to the folder where you want to move the file.
-
iOS devices: Click .
-
Click .
-
24.0 Copying a File or Folder
NOTE:This functionality is not currently available on Windows Phone.
You can copy a file or folder to another location on the Filr site by using your mobile device.
-
Navigate to the location that contains the file or folder that you want to copy.
-
Tap the information icon next to the file or folder name that you want to copy (for iOS, tap
; for Android, tap ).
-
(Conditional) For iOS, tap the icon
.
-
Tap .
-
In the section, click either the , , or icon that represents the location where you want to copy the file or folder.
For example, if you want to copy a file to a folder in your My Files area, click the icon.
-
(Optional) If you want to copy the file or folder to a specific folder within either the My Files, Shared with Me, or Net Folder areas:
-
Navigate to the folder where you want to move the file.
-
iOS devices: Click .
-
Click .
-
25.0 Renaming a File or Folder
NOTE:This functionality is not currently available on Windows Phone.
You can rename a file or folder from your mobile device.
-
Navigate to the location that contains the file or folder that you want to rename.
-
Tap the information icon next to the file or folder name that you want to rename (for iOS, tap
; for Android, tap ).
-
iOS devices: Tap the icon
.
-
Tap .
-
Type the new name, then tap /.
26.0 Deleting a File or Folder
NOTE:This functionality is not currently available on Windows Phone.
You can delete a file or folder from your mobile device.
-
Navigate to the file or folder that you want to delete.
-
Tap the information icon next to the file or folder that you want to delete (for iOS, tap
; for Android, tap ).
-
iOS devices: Tap the icon
.
-
Tap .
-
Tap / to confirm the deletion.
27.0 Viewing File Details
You can view important details about files on your mobile device.
-
Navigate to the file for which you want to view the details.
-
iOS and Android: Tap the information icon (for iOS, tap
; for Android, tap > ) next to the file name.
Windows: Long-press the file name, then tap .
The following details are displayed:
-
File Name: The name of the file.
-
File Path: The path to the file.
-
Size: Size of the file.
-
Created By: User who created the file.
-
Created: Date that the file was created.
-
Modified By: User who last modified the file.
-
Last Modified: Date the file was last modified.
-
Note: Note associated with the share from the user who shared the file. (Displayed only for shared files in the Shared with Me area.)
-
Downloaded: Indicates whether the file has been downloaded and is available to view offline.
-
Share With: Displays who the file has been shared with and information regarding the share.
-
28.0 Viewing Folder Details
You can view important details about folders on your mobile device.
-
Navigate to the folder for which you want to view the details.
-
iOS and Android devices: Tap the information icon (for iOS, tap
; for Android, tap ) next to the folder name.
Windows devices: Long-press the folder name, then tap .
The following details are displayed:
-
Folder Name: The name of the folder.
-
Folder Path: The path to the folder.
-
Created By: User who created the folder.
-
Created: Date that the folder was created.
-
Modified By: User who last modified the folder.
-
Last Modified: Date the folder was last modified.
-
Note: Note associated with the share from the user who shared the folder. (Displayed only for shared folders in the Shared with Me area.)
-
Share With: Displays who the folder has been shared with and information regarding the share.
-
29.0 Managing Cached Files
If you cannot see updated content on the Filr app, or if you experience similar problems, you might need to clear the Filr cache. You can also view the amount of data your cached files are using and you can set a maximum size for cached files.
29.1 Clearing the Cache
-
If you are not already on the Home page, tap the Home button (for iOS, tap
; for Android, tap ; for Windows, tap ).
-
iOS devices: Tap
> > .
Android devices: Tap
, then in the section, tap .
Windows devices: Tap
, swipe to the section, then tap .
The amount of data that cached items are consuming is also displayed in the section (iOS), the section (Android), and the section (Windows).
29.2 Setting a Maximum Size for Cached Files
You can set a maximum file size so that nothing over the maximum size is cached.
-
If you are not already on the Home page, tap the Home button (for iOS, tap
; for Android, tap ; for Windows, tap ).
-
iOS devices: Tap
> , then tap .
Android devices: Tap
, then in the section, tap .
Windows devices: Tap
, swipe to the section, then tap in the field.
-
Tap the number that represents the maximum file size that you want to cache.
30.0 Signing Out
-
If you are not already on the Home page, tap the Home button (for iOS, tap
; for Android, tap ; for Windows, tap ).
-
iPhone: Tap the icon
 .
.
iPad and Android devices: Tap your linked user name in the upper-right corner of the page
Windows: Tap
.
-
Tap .
31.0 Security Considerations
When you access Filr on your mobile device, it is important that your sensitive documents are secure. Filr provides secure access to files from your mobile device. However, if your Filr administrator has allowed you to download files to your mobile device, you need to make sure your device is set up to encrypt files.
31.1 Default Security Settings
When you access Novell Filr from your mobile device, you enjoy the same security as when you access Filr from your workstation. Security features include:
-
Secure access via SSL
-
All previously established access control settings
31.2 Encrypting Downloaded Files
Your Filr administrator can allow you to download files to your mobile device and allow you to open files in third-party applications. If your Filr administrator has given you these abilities, ensure that your mobile device is set up to encrypt files:
Encrypting Downloaded Files on iOS Devices
NOTE:This functionality is available only on devices that offer hardware encryption, including iPhone 3GS and later, iPad (all models), and iPod Touch 3rd generation and later.
To set up your iOS device to encrypt files, you need to enable a passcode:
-
Turn on passcode encryption by tapping > > .
-
Follow the prompts to create a passcode.
-
After the passcode is set, scroll to the bottom of the screen and ensure that the text is visible.
Encrypting Downloaded Files on Android Devices
NOTE:This functionality is available only on Android 4 and later. The steps might vary depending on your device.
To set up your Android device to encrypt files, you need to configure data encryption:
-
Tap > .
-
Tap , then follow the on-screen prompts to set up data encryption for your device and for the SD card (the SD card is where downloaded files reside).
Encrypting Downloaded Files on Windows Devices
NOTE:This functionality is available only on Windows Phone 8.0 or 8.1 and must be enabled by your system administrator.
-
Ensure that your device is connected to a network that is running Exchange ActiveSync, then select .
For more information about Windows Phone for Business, see the Microsoft website.
32.0 Features Not Available in the Mobile App
The Filr mobile app enables you to access your most important files wherever you are. However, not all Filr features are available in the mobile app. For a full set of features, access Filr from a web browser on your workstation, as described in the Novell Filr 1.1 Web Application User Guide.
33.0 Legal Notices
Copyright © 2013-2015 Novell, Inc. All rights reserved. No part of this publication may be reproduced, photocopied, stored on a retrieval system, or transmitted without the express written consent of the publisher. For Novell trademarks, see the Novell Trademark and Service Mark list. All third-party trademarks are the property of their respective owners.