13.10 Disabling Clustering for an LVM Volume Group and Logical Volume
Before you attempt to disable clustering for an LVM volume group and logical volume, you must take the resource offline.
WARNING:If you attempt to delete a cluster resource without first offlining it, deletion errors occur, and the data associated with the clustered volume group might not be recoverable.
Deleting a volume group cluster resource disables only the Novell Cluster Services cluster settings. There are additional tasks to perform to prepare the LVM volume group and logical volume for non-clustered access on one of the cluster nodes. To delete a resource and create a new one with the same name, you must wait to create the new one until after eDirectory synchronizes all of the objects in the tree related to the deleted resource.
If the volume was NCP enabled, the definition of the NCP volume in the load script is automatically deleted, but you must manually remove its NCP Volume object in eDirectory. To re-create the NCP volume on the non-clustered Linux LVM logical volume, can use the Manage NCP Services plug-in for Novell Remote Manager or use the ncpcon create volume command.
All resource configuration should happen from the master node. On the Cluster Options page for iManager, you are automatically connected to the Cluster object, which is associated with the master node.
We strongly recommend that when you need to delete a cluster resource, that you do so only from the master node in the cluster. You might want to delete a cluster resource on a non-master node if the master node is not a preferred node for the resource, or if there is a resource mutual exclusion rule that prohibits the resource from being moved there. If the resource cannot be migrated to the master node, follow the additional steps that are annotated as Non-Master
.
Use the procedure in this section to disable clustering for a Linux LVM volume group and logical volume. Afterwards, you can mount and dismount the volume on only one node in the cluster.
-
Ensure that the resource is online on the node where you want mount the volume after clustering is disabled.
If the resource is not on the desired node, open a terminal console as the root user, then enter
cluster migrate <resource_name> <from_node> <to_node>
For example, if node2 is the to node, enter
cluster migrate vg44_resource node1 node2
-
Log in to iManager as a cluster administrator.
-
In , select > , then select the cluster.
-
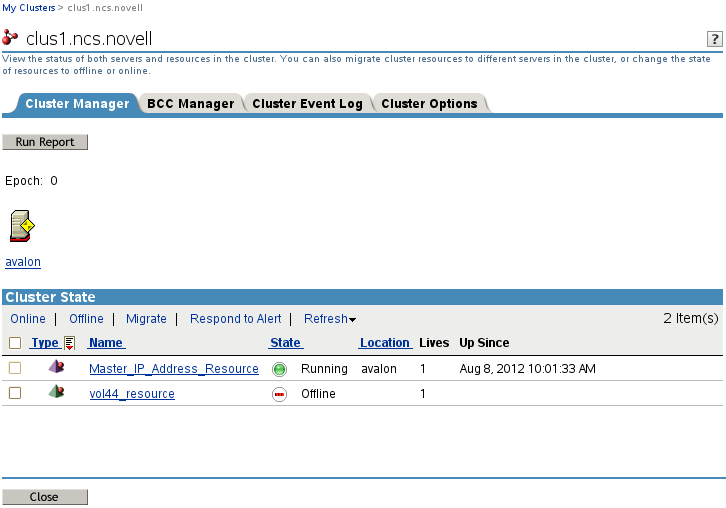
Take the volume group cluster resource offline, by using one of the following methods:
-
In iManager on the Cluster Manager page, select the check box next to the LVM volume group cluster resource (such as vg44_resource), then click . Wait until the resource is offline to continue.
-
Open a terminal console as the root user, then enter
cluster offline <resource_name>
The unload script unbinds the NCP virtual server from the resource IP address, dismounts the NCP volume, dismounts the Linux LVM logical volume, and deactivates the Linux LVM volume group.
-
-
Delete the volume group cluster resource:
-
(Non-Master) If the volume group was taken offline on a non-master node, verify that the revision and resource information is the same on the non-master node as on the master node before you delete the resource.
-
On the non-master node, log in as the root user, then open a terminal console. At a command prompt on the non-master node, enter
/opt/novell/ncs/bin/ncs-configd.py -init
-
Look at the file /var/opt/novell/ncs/resource-priority.conf to verify that it has the same information (REVISION and NUMRESOURCES) as the file on the master node.
-
-
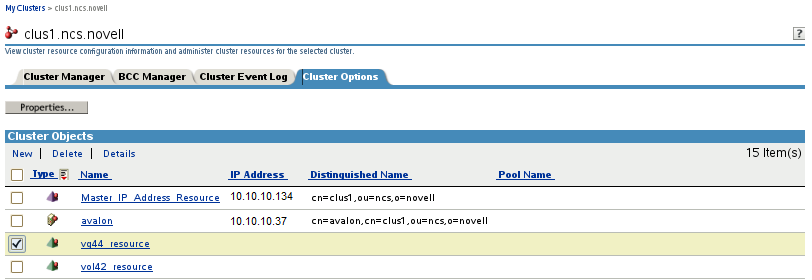
Click the tab.
-
Select the check box next to the volume group cluster resource, then click .
-
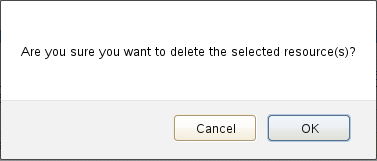
When you are prompted to confirm the deletion, click to continue, or click to abort the deletion.
-
(Non-Master) If the volume group was taken offline on a non-master node, verify that the revision and resource information is the same on the master node as on the non-master node after you delete the resource.
-
On the master node, log in as the root user, then open a terminal console. At a command prompt on the master node, enter
/opt/novell/ncs/bin/ncs-configd.py -init
-
Look at the file /var/opt/novell/ncs/resource-priority.conf to verify that it has the same information (REVISION and NUMRESOURCES) as that of the non-master node where you deleted the cluster resource.
-
In iManager, select > , then browse to select the Cluster object.
-
Click , select the tab, then click on the Priorities page.
-
At a command prompt, enter
cluster view
The cluster view should be consistent.
-
Look at the file /var/opt/novell/ncs/resource-priority.conf on the master node to verify that the revision number increased.
If the revision number increased, you are done. Do not continue with Step 13.
If the deleted resource is the only one in the cluster, the priority won’t force the update. A phantom resource might appear in the interface. You need to restart Cluster Services to force the update, which also removes the phantom resource.
-
If the revision number did not automatically update in the previous steps, restart Novell Cluster Services by entering the following on one node in the cluster:
cluster restart [seconds]For seconds, specify a value of 60 seconds or more.
For example:
cluster restart 120
-
-
-
If the Linux volume was NCP enabled, delete the NCP volume object.
-
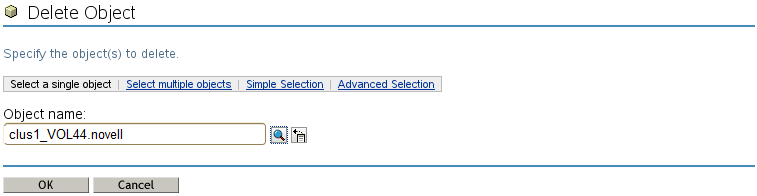
In iManager, select >
-
On the Delete Object page, browse to locate and select the resource’s NCP Volume object, such as clus1_VOL44.novell, then click .
-
Click to delete the NCP volume object, then click again to close the success message.
-
-
If the Linux volume was NCP enabled, or if you manually created an NCP virtual server for the resource, delete the NCP virtual server object:
-
In iManager, select >
-
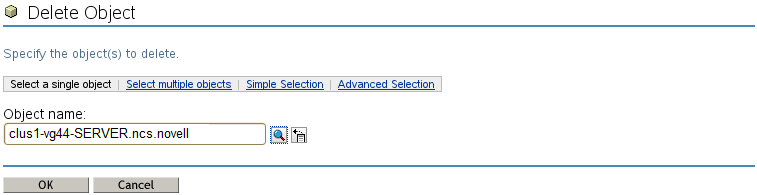
On the Delete Object page, browse to locate and select the resource’s NCS:NCP Server object, such as clus1-vg44-SERVER.ncs.novell, then click .
-
Click to delete the NCP virtual server, then click again to close the success message.
-
Visually confirm that the resource does not appear in the list of Cluster objects, then exit iManager.
-
-
Log in as the root user on the server where the resource was online, then open a terminal console.
-
Deactive the volume group from Clustered LVM:
vgchange -c n <vg_name>For example:
vgchange -c n vg44
-
Activate the volume group locally on the current node:
vgchange -a ey <vg_name>For example:
vgchange -a ey vg44
-
Mount the LVM logical volume locally on the current node:
mount -t <fstype> <device_name> <full_mount_point_path>
Replace fstype with the file system type of the volume.
Replace device_name with the full device path of the logical volume, such as /dev/<vg_name>/<lv_name>.
Replace full_mount_point_path with the volume’s mount point.
For example:
mount -t ext3 /dev/vg44/vol44 /mnt/vol44
-
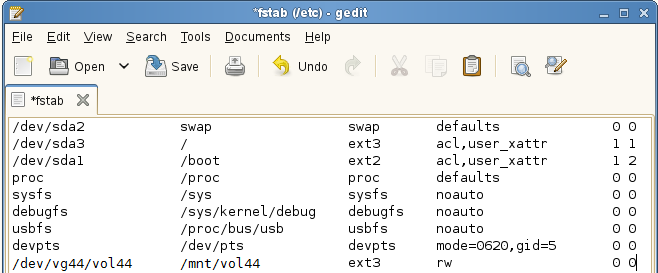
Add an entry for the LVM volume in the /etc/fstab file to allow the volume to be mounted automatically on reboot. It also provides the automatic mount information for NSSMU to use to mount and dismount the volume on the node.
In a text editor, modify the /etc/fstab file to specify the mount point information and file system type.
For example, complete the line for the volume’s device path, such as:
/dev/vg44/vol44 /mnt/vol44 ext3 rw 0 0
-
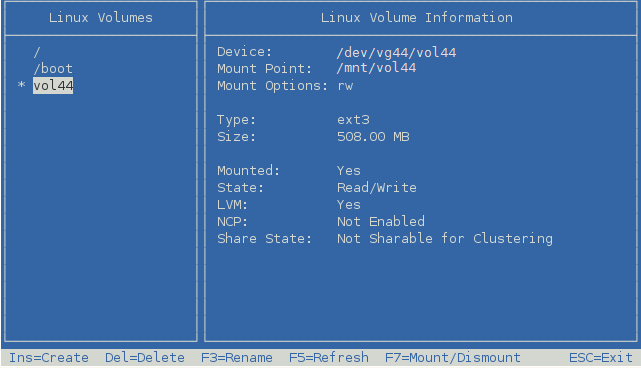
View details about the non-clustered LVM logical volume:
-
Open an terminal console as the root user, launch NSSMU:
nssmu
-
In the NSSMU main menu, select , then press Enter.
-
On the Linux Volumes page, then select the volume to view its details.
The volume is no longer cluster enabled. You can mount and dismount the volume only on the current node.
-
-
(Optional) Create an NCP volume for the Linux volume by using Novell Remote Manager. For information, see
Creating NCP Volumes on Linux File Systems
in the OES 11 SP3: NCP Server for Linux Administration Guide.To use the same volume name that was used in the cluster resource load script, wait to re-create the NCP volume until after eDirectory synchronizes all of the objects in the tree related to the deleted resource.