18.3 Apache 403 Warning Error Reported in Nagios on a New Installation or Upgrade to OES 11 SP3
You might see an Apache 403 Forbidden Warning error reported in Nagios after a new installation or upgrade to OES 11 SP3.
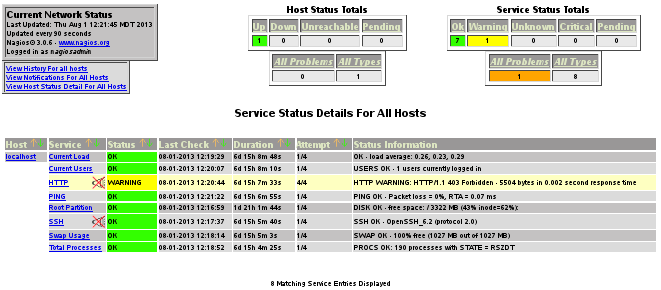
Figure 18-1 HTTP 403 Forbidden Warning Error
To resolve the issue, you can try the following:
-
Log in to the server as the root user, open a terminal console, then navigate to the /etc/nagios/objects directory.
-
In the localhost.cfg file, modify the check_command parameters in the section, “# Define a service to check HTTP on the local machine”:At the command prompt, enter
define service { use local-service ; Name of service template to use host_name localhost service_description HTTP check_command check_http! -e 'HTTP/1.0 200','HTTP/1.1 200','HTTP/1.1 403 Forbidden' notifications_enabled 0 }NOTE:If the status for any other service is yellow or red, you must modify the relevant parameters in the localhost.cfg file. For example, if you have 300 processes running on your cluster node, the status of Total Processes will display yellow, since the default values are set to 250 (yellow color) and 400 (red color). You can modify the values to 400 and 500 depending on your environment.
define service { use local-service ; Name of service template to use host_name localhost service_description Total Processes check_command check_local_procs!400!500!RSZDT } -
Restart Nagios.
rcnagios restart
-
After a few minutes, verify that the HTTP status for Nagios has been updated to the (green) state.
-
Log in as the root user to Novell Remote Manager.
-
Select > , then click .
-
In the Nagios Authentication Required dialog box, specify your Nagios user credentials, then click .
-
View the HTTP status in the Nagios main dashboard.
-