8.3 Configuring AFP in a Cluster
Configuring or enabling AFP and making it available in a cluster environment requires you to perform the following tasks:
8.3.1 Identifying the Nodes to Host the AFP Service
-
Install the AFP server on all the nodes in cluster or on the nodes identified for running AFP. For instructions on installing, see Section 4.0, Installing and Setting Up AFP.
-
Restart the AFP server.
-
Continue with Section 8.3.2, Installing Novell Cluster Services.
8.3.2 Installing Novell Cluster Services
-
Install Novell Cluster Services 1.8.8 on the OES 2 SP3. For details, see
Installing and Configuring Novell Cluster Services on OES 2 Linux
. -
When you have finished installing Novell Cluster Services, continue with Section 8.3.3, Creating Shared NSS Pools.
8.3.3 Creating Shared NSS Pools
You can create a pool by using iManager or the NSSMU utility. The shared partition is automatically created when you create the pool.
Creating Shared Disk Partitions and Pools through iManager
-
Open an Internet browser and enter the URL for iManager.
The URL is https:// server_ip_address/nps/imanager.html. Replace server_ip_address with the IP address or DNS name of the Linux server running AFP.
-
Enter your username and password.
-
In the left pane, locate and select the task.
-
Specify a cluster server name or browse and select one, then click .
-
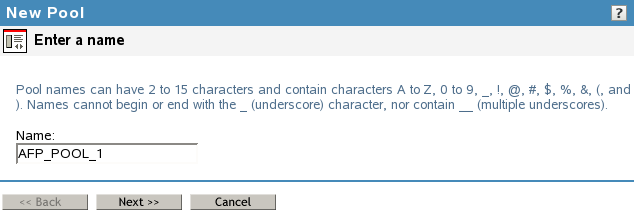
Specify the new pool name and click .
-
Allocate the size of the pool and click .
-
Specify an IP address for the virtual server.
Make sure you select AFP as the advertising protocol. You should also make sure that NCP is selected. NCP is essential to activate the NCP protocol on the cluster.
-
Click to complete configuration of the pool.
-
Continue with Reviewing Load and Unload Scripts.
Creating Shared Disk Partitions and Pools through NSSMU
-
From the NSSMU main menu, select .
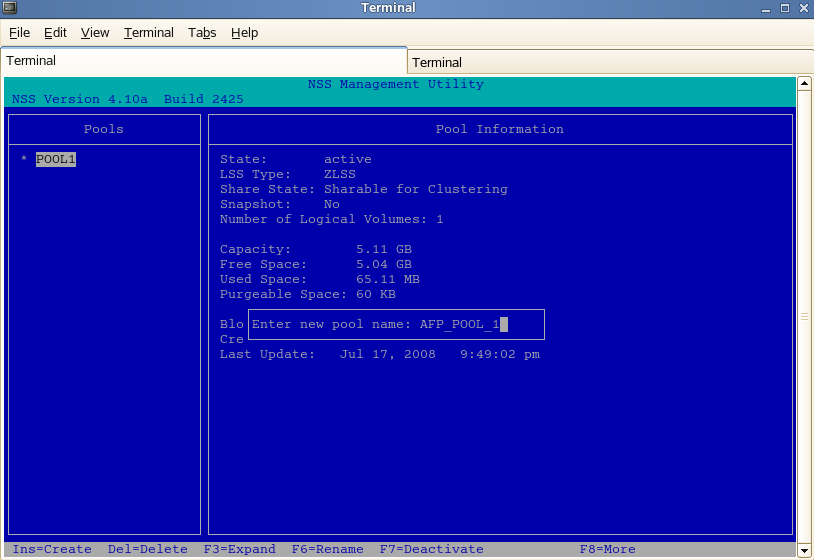
-
Select the device where you want the pool to be created.
-
Specify the name of the pool and the IP address of the virtual server.
Make sure you select AFP as the advertising protocol. You should also make sure that NCP is selected. NCP is essential to activate the NCP protocol on the cluster.
-
Click to complete configuration of the pool.
-
Continue with Section 8.3.4, Reviewing Load and Unload Scripts.
8.3.4 Reviewing Load and Unload Scripts
Cluster resource load and unload scripts are automatically generated for pools when they are cluster-enabled. You can review the load and unload scripts for the AFP cluster by using the following procedure:
-
Open an Internet browser and enter the URL for iManager.
The URL is https:// server_ip_address/nps/imanager.html. Replace server_ip_address with the IP address or DNS name of the Linux server running AFP.
-
Enter your username and password.
-
In the left pane, locate and select the task.
-
Select the cluster resource and click the tab. The Load and Unload scripts are displayed. Ensure that your load and unload scripts are similiar to the following examples:
Load Script
#!/bin/bash
. /opt/novell/ncs/lib/ncsfuncs
exit_on_error nss /poolact=POOL1
exit_on_error ncpcon mount VOL2=253
exit_on_error ncpcon mount VOL1=254
exit_on_error add_secondary_ipaddress 192.168.0.0
exit_on_error ncpcon bind --ncpservername=CLUSTER1_POOL1_SERVER --ipaddress=192.168.0.0
exit_on_error cluster_afp.sh add CLUSTER1_POOL1_SERVER 192.168.0.0
exit 0
Unload Script
#!/bin/bash
. /opt/novell/ncs/lib/ncsfuncs
ignore_error cluster_afp.sh del CLUSTER1_POOL1_SERVER 192.168.0.0
ignore_error ncpcon unbind --ncpservername=CLUSTER1_POOL1_SERVER --ipaddress=192.168.0.0
ignore_error del_secondary_ipaddress 192.168.0.0
ignore_error nss /pooldeact=POOL1
exit 0