8.9 Automating Index and Server Maintenance
You can eliminate a lot of manual work in keeping indexes up-to-date by using the QuickFinder Server index scheduling feature. Because the Web and file content you have indexed will eventually change, you can direct QuickFinder to update your indexes on specific dates and at specific times or intervals.
8.9.1 Adding a Scheduled Event
-
On the QuickFinder Server Manager Global Settings page, click in the row of the virtual search server that you want to work with.
-
Click in the left frame of QuickFinder Server Manager.
-
Click .
-
Specify the month, days, days of the week, or time (in hours and minutes) when you want QuickFinder to run the event.
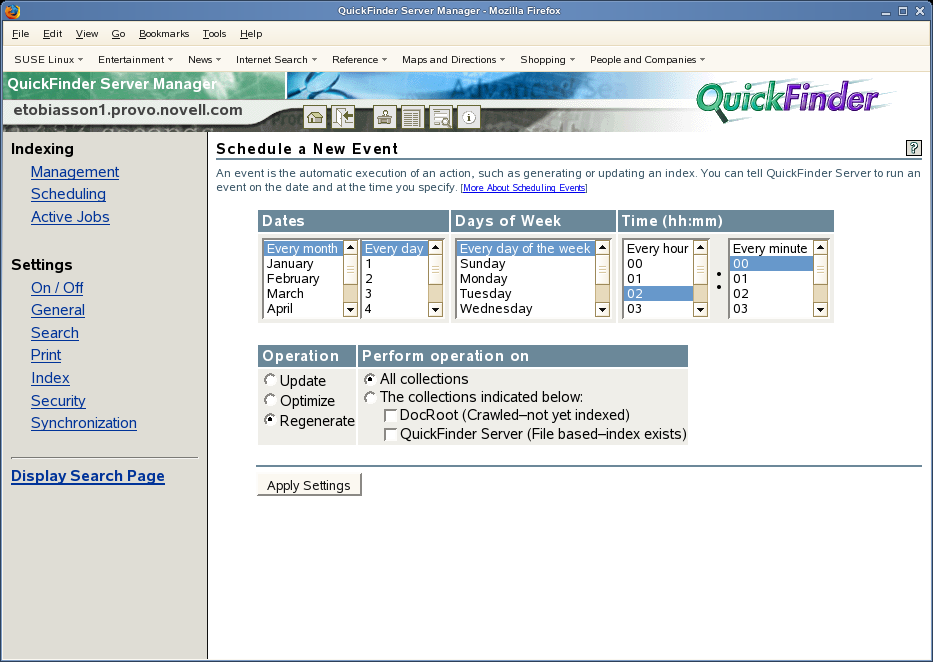
To select multiple dates and times, hold down the Ctrl key and click all of the items you want added. To select consecutive items, click the first item, hold down the Shift key, then click the last item.
-
Select the type of operation you want performed on your indexes.
-
Update: QuickFinder identifies new content on Web or file servers and updates the index.
-
Optimize: QuickFinder improves searching performance by removing unnecessary content and making the index file more compact.
-
Regenerate: QuickFinder replaces the existing index with a newly generated one.
-
-
In the column, determine whether you want the chosen operation performed on all indexes or only on specified ones.
If you have large indexes, you might consider creating multiple events that update your indexes at varied times. Doing so minimizes CPU utilization. By default, QuickFinder supports up to 5 simultaneous indexing sessions. All other indexes wait until a previous index job has completed. You can control the number of simultaneous indexing jobs from Services Settings. (See Section 7.3, Configuring Services Settings.)
-
Click .
8.9.2 Editing or Deleting an Event
-
On the QuickFinder Server Manager Global Settings page, click in the row of the virtual search server that you want to work with.
-
Click in the left frame of QuickFinder Server Manager.
If no events have been scheduled, refer to Section 8.9.1, Adding a Scheduled Event for instructions on adding a scheduled event.
-
To edit a scheduled event, click in the row of the event you want to modify.
-
Make the desired changes, then click .
-
To delete a scheduled event, click in the row of the event you want to delete.
-
Click to confirm the deletion, or click .