4.2 Installing CIFS after the OES Installation
If you are installing CIFS after installing OES, ensure that you have the required eDirectory admin credentials before you proceed with the CIFS installation.
-
Launch YaST, using one of the following methods:
From your Desktop: Click .
or
From your Terminal: Run the yast2 command on the server console.
-
Click > > .
-
Select from the software patterns listed.
IMPORTANT:When "Novell CIFS" is selected, the CIFS dependency packages are also selected. These dependencies include: NetIQ eDirectory, Novell Linux User Management (LUM), NetWare Core Protocol Server (NCP), Novell Remote Manager (NRM), and Novell Storage Services (NSS). These packages are in addition to any other OES service or dependency packages selected by default
-
Click .
-
Select an appropriate install option.
The subsequent pages allow you to configure CIFS on OES.
-
To change the default configuration settings for CIFS, click or click to continue with the default configuration.
NOTE:If you are installing CIFS after installing OES, you are prompted to enter the eDirectory admin password. Enter the password, then click to proceed.
-
Fill in the following fields, then click .
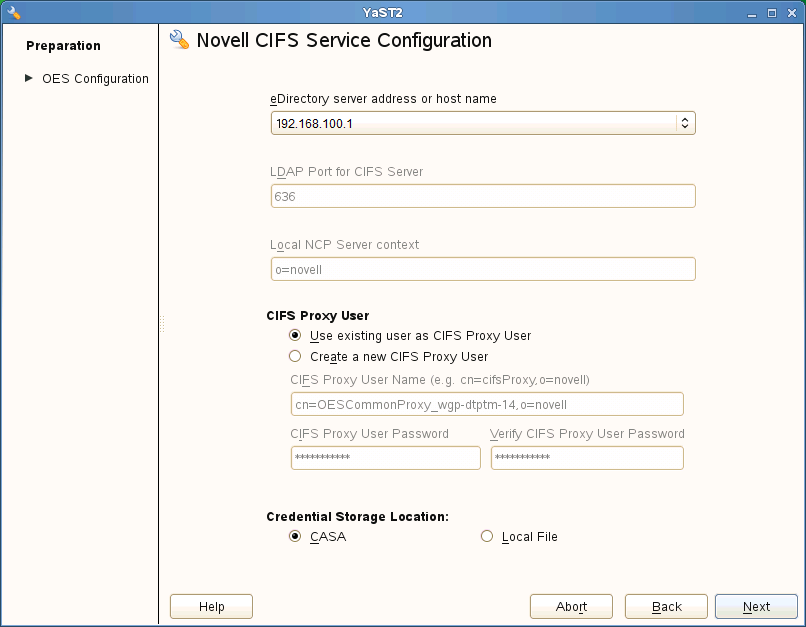
Parameter
Description
eDirectory server address or host name
This is the default eDirectory server IP address. Select from the drop-down list to change to a different server.
LDAP port for CIFS Server
The default is 636. This is preferred. Do not change the default port value during a fresh installation of the tree.
NOTE:If the OES server is attached to an existing tree, you can change this to another LDAP port.
Local NCP Server context
Displays the NCP Server context.
CIFS Proxy User Name
Create a new proxy user. Use the format cn=proxyusername,o=company.
During eDirectory configuration, if you have selected the check box, then the proxy user and password fields are populated with common proxy user name and password. You cannot change this password in the CIFS configuration screen.
CIFS Proxy User Password
The password specified here is set in CASA or the local file.
Verify CIFS Proxy User Password
Re-enter the password for verification. It should be identical to the CIFS proxy user password.
Credential Storage Location
By default, the credential is stored in CASA. It is possible to store the credentials by using the Local File option. The password file is encrypted and encoded in the credential storage location.
-
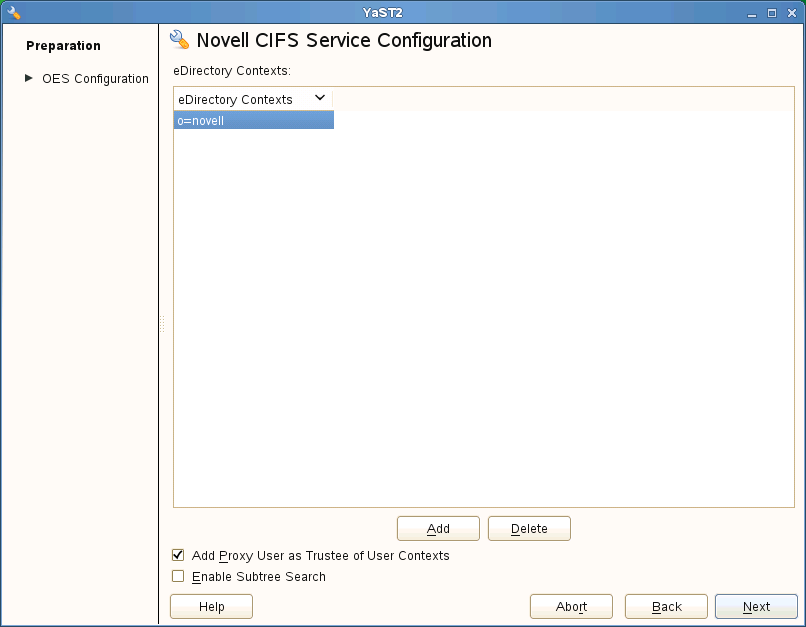
Select that have CIFS users. CIFS server searches these contexts for CIFS users during authentication.
If you want to add a CIFS user context, click .
For example: ou=eng,o=novell
If you want to delete a CIFS user context, select a context from the available list and click .
The CIFS user contexts are stored in /etc/opt/novell/cifs/cifsctxs.conf.
Add Proxy User as Trustee of User Contexts: This option is selected by default. Deselecting this option will not grant the CIFS proxy user the rights required over eDirectory contexts to search for a CIFS user in the subtree.
Enable Subtree Search: This option is not selected by default. Selecting this option enables CIFS to search for a user in the entire subtree of selected contexts.
-
The CIFS configuration settings that you specified are saved successfully on your OES server.