2.2 Migration Pane
This is the top pane of the Migration Tool GUI.
Figure 2-8 Top Pane
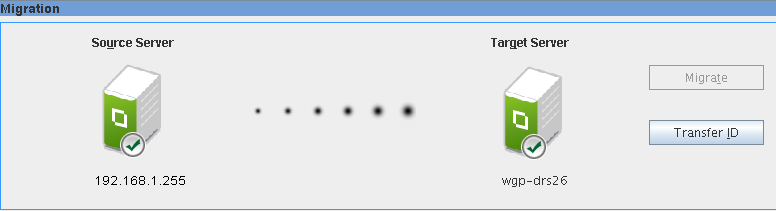
Use this pane to perform the following tasks:
-
Authenticate the source server and target server credentials.
-
Select the type of migration as Migrate or Transfer ID. The option is enabled only after configuring a service for migration. By default, only the Transfer ID option is enabled.
2.2.1 Authenticate Source Server and Target Server
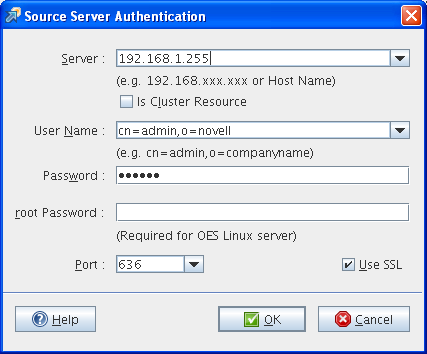
Specify the credentials to authenticate the source server and target server.
Figure 2-9 Source Server Authentication Screen
-
In the field, specify the IP address or hostname of the source server.
The server IP, user name and port information is cached by the Migration GUI. When entering values in the or field, Migration GUI auto-fills this information. To clear the cache entries, delete the entries from the /opt/novell/migration/plugin/conf/migration.history file.
(Optional) Is Cluster Resource: To migrate cluster volumes, specify cluster resource IP in the field and select the option. If you select this option, only the file system and iPrint services are migrated. This option supports only Migrate scenario and does not support Transfer ID.
For example, use the NSS Cluster Pool IP to migrate NSS cluster volumes and use the iPrint cluster IP to migrate iPrint.
Use the node IP address for migrating other services.
-
In the field, specify the FDN of the admin user of the source server. Use the LDAP (comma-delimited) format. For example, cn=admin,o=novell
-
In the field, specify the password for the admin user who is performing the migration.
-
If the source server is OES, specify the password for authentication in the field.
-
In the field, specify the port number to use for the SSL connection on the source server. By default, port 636 is used for the SSL connection and port 389 for the non-SSL connection.
-
(Optional) To use a secure connection for LDAP authentication, select .
-
Click to authenticate the credentials on the source server.
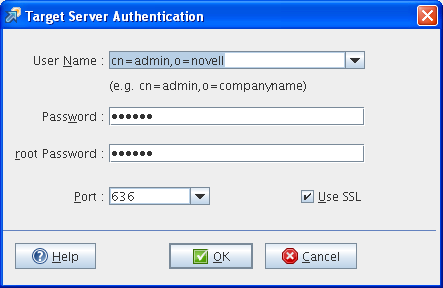
In the Target Server Authentication dialog box there is no field available to specify the IP address or the hostname because the Migration Tool is launched from the target server.
If the source and target servers are in the same tree, the credentials on the target server are automatically populated when the credentials on the source server are authenticated.
Figure 2-10 Target Server Authentication Screen
-
Specify the credentials of the administrator of the target server.
-
Specify the root password.
-
(Optional) To use a secure connection for LDAP authentication, select .
-
Click .