5.3 Migration Process
-
Launch the Migration Tool.
-
Do one of the following to create, open, or save the migration project:
-
To create a new migration project, click , specify the name of the project, then click .
-
To open an existing project, click , then select the project and click . When a confirmation message to open the project is displayed, click .
-
To save a project, click .
-
-
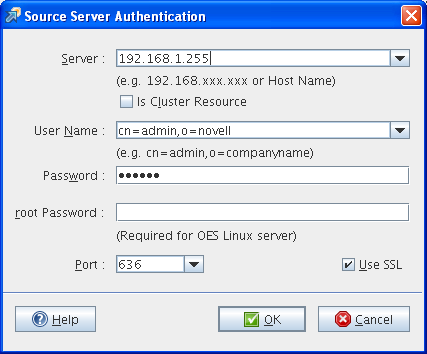
Specify the credentials of the source server, then click .
-
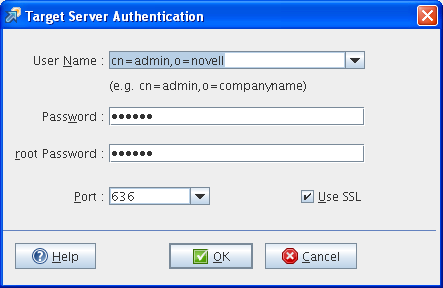
Specify the credentials of the target server, then click .
-
Depending on your requirements, select the migration type:
-
Migrate: To perform migration, see Section 7.0, Preparing for Server Migration
-
Transfer ID: To perform a Transfer ID, see Section IV, Transfer ID Migration.
-
-
In the pane, select the services to migrate from the source server to the target server.
Only the services installed on the target server are listed for migration.
-
To display the list of services for migration, click .
-
In the window, select the services to migrate, then click .
-
-
Select the service for which you want to configure the migration options, then click .
-
Click to proceed with migration. The status of the service changes to .
In > , you can view the progress of migration. When the migration is complete, the status of the service changes to .
In the tree view displays the progress of migration for each service. The and , displays the number of error encountered on performing migration. Click to view the service-specific log file.