2.7 GroupWise WebAccess Plugin
IMPORTANT:The Retain Plugin for GroupWise WebAccess doesn’t work in GroupWise version 18.3 and later.
2.7.1 Overview
The Retain for GroupWise WebAccess Plugin is a quick and effective way to integrate access to the Retain archive into WebAccess for users. The Plugin adds a button which will automatically take users to their personal archive. The archive interface will be displayed inside the WebAccess window, and provides all the same access and management of the archive which users can experience by directly logging in to Retain.
The GroupWise WebAccess Plugin is found on the tools page. To access the tools page, select the 'tools' link from the top right of the Retain Server administration page.

2.7.3 Installation
To install the plugin, execute the installation file.
Linux:
Linux requires root access to install the plugin. Change the files to executable and run the files.
-
chmod +x *.sh
-
./installgui.sh (if a graphical install is desired)
or
-
./installtext.sh (if a text install is desired)
Windows:
On Windows, double click and run the .bat file.
-
install.bat
Graphical install shown
-
Click ‘Next’ to begin the installation

-
Accept the license agreement.

-
Select the GroupWise WebAccess version. GroupWise 8 or older, or GroupWise 2012 or newer.

-
Select the platform the WebAccess is being installed to. Linux or Windows.

-
Specify the active ...webapps/gw directory, or browse to it.

-
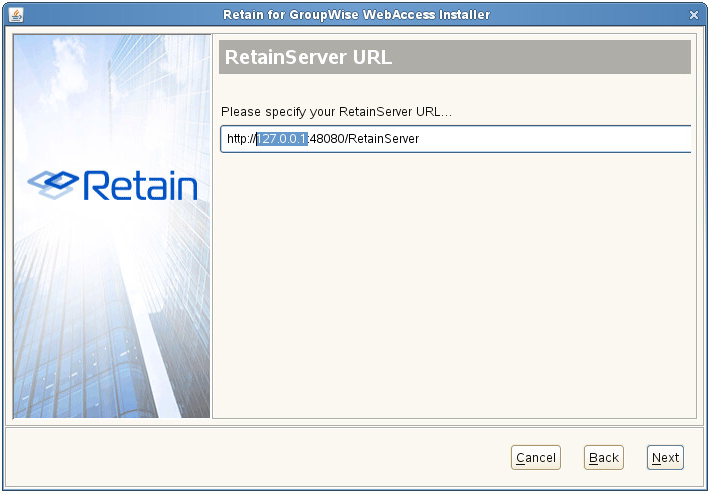
Specify the Retain Server URL. An open connection to the Retain Server is required for the plugin to work.
-
Confirm the settings. Click ‘Next’ to begin the install, or ‘Back’ to change the settings.

-
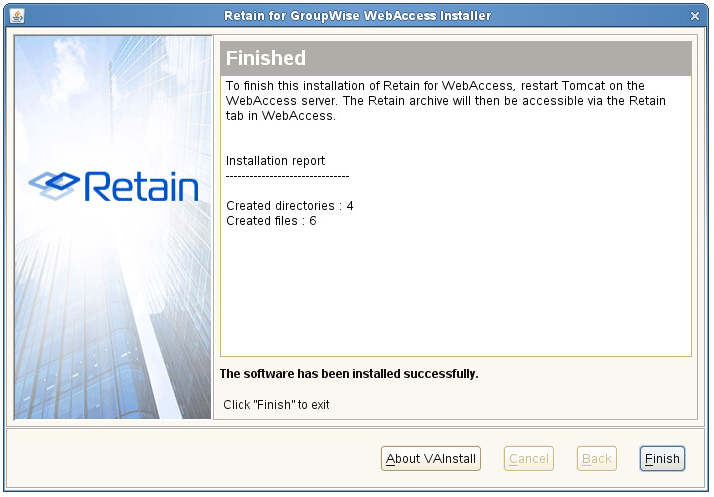
Once finished, click ‘Finish’ to exit the installer.
2.7.5 Confirmation
The plugin is now installed. Once WebAccess has been restarted, simply login as usual.
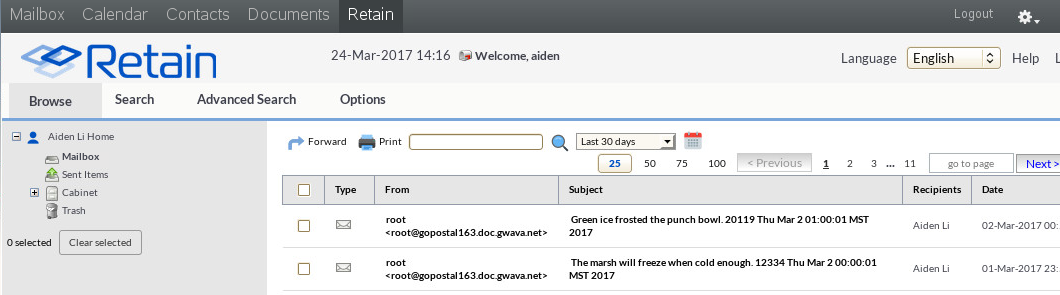
After logging in, users will see the interface they usually see, with an additional ‘Retain’ tab on the end of the top ribbon.

For users to access their own archive, all they need to do is click on the ‘Retain’ button and their archive will automatically open. Choose a folder to see the contents.