3.9 Linux Installation
3.9.2 Retain Install
Pre-install tasks:
-
Download the latest version of Retain.
You may use the command line "wget http://download.gwava.com/download.php?product=Retain&version=current"
-
Extract the archive. This will extract into a new folder.
In the GUI right-click and select "Extract Here"
On the command line use "unzip Retain<version>.zip"
-
Open a terminal window in the Retain install folder and make the installer script executable by running the command: "chmod +x *.sh"
If a previous version of Java was installed via YaST, tomcat may fail to start. Uninstall the existing Java with YaST and unset the JRE_HOME path (unset JRE_HOME).
Retain Install:
(The installer installs Retain-Tomcat and initialize the Retain installation which will install the embedded Tomcat as well. Consider removing any existing Tomcat installation.)
-
Install Retain. Enter the following command:
./RetainInstall.sh
-
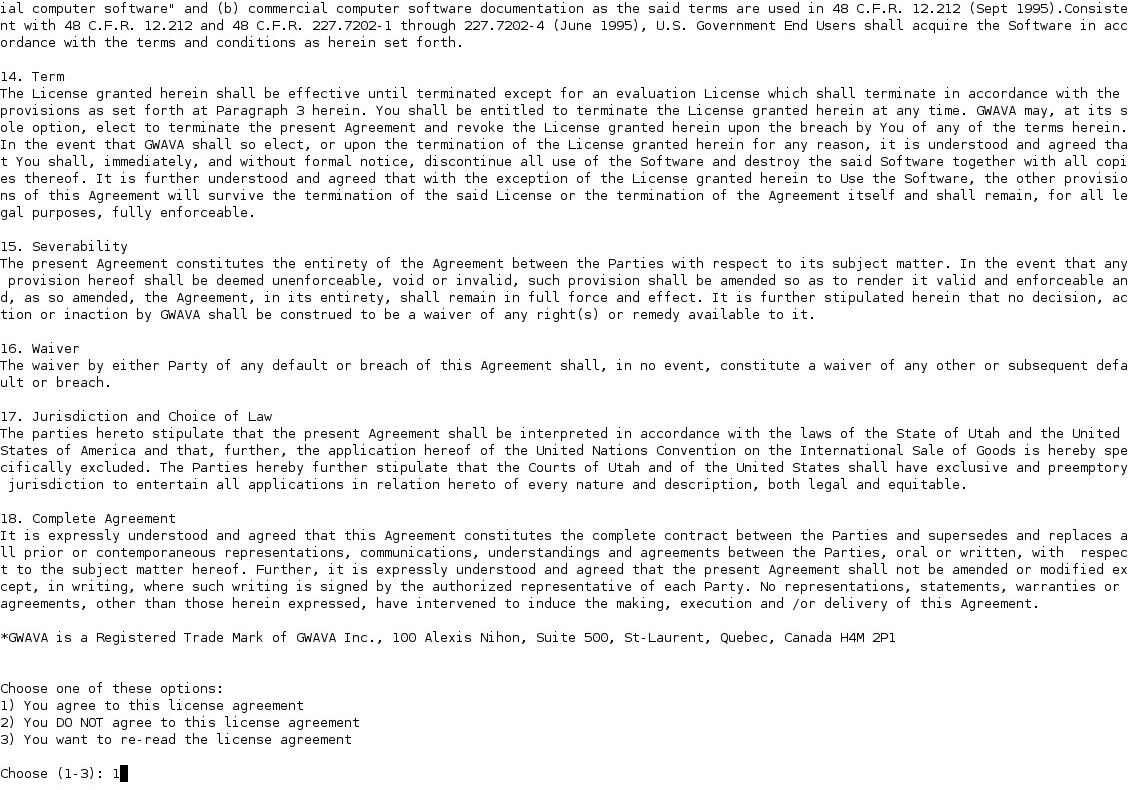
Read and accept the license agreement.
-
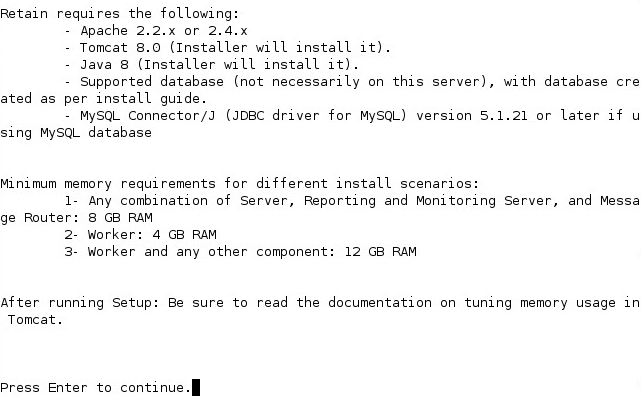
Read the software requirements and press Enter.
-
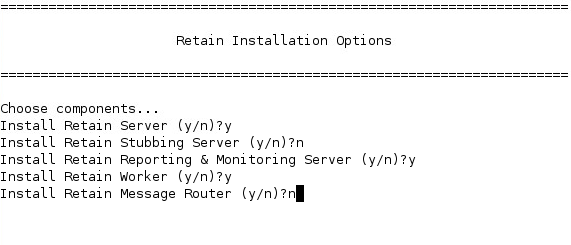
You will be asked what components to install. Each of these components can be installed on a separate server or on the same server. However, the Message Router needs to be in the network DMZ and is usually installed separately. Options include:
Retain Server
Stubbing Server (GroupWise only)
Reporting and Monitoring Server
Retain Worker
Retain Message Router (needs to be installed in the network DMZ)
Generally, we recommend installing the Server, Reporting and Monitoring, and Worker on the Retain server.
-
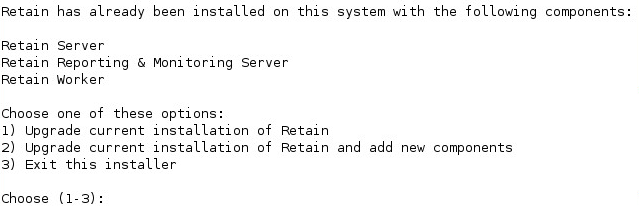
If you are upgrading Retain, you are given a list of currently installed options and the ability to select upgrade options, if you wish to add components you can choose which ones to add here. Otherwise during a new installation, Java will be installed.
-
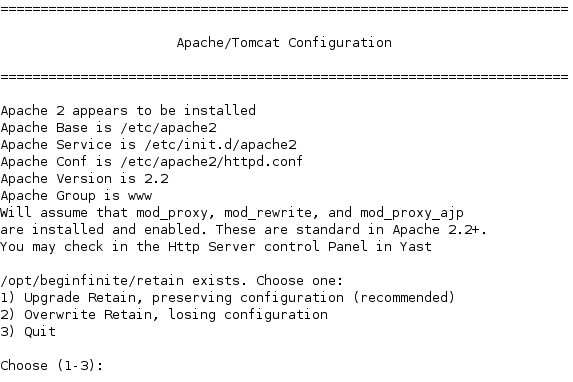
During an upgrade the installer will check the Apache/Tomcat configuration.
NOTE:If components already exist on the system, but new features are being added, all new and existing features must be selected for install, AND the upgrade must be selected with the first option: “Upgrade Retain, Preserving configuration” must be selected.
-
-
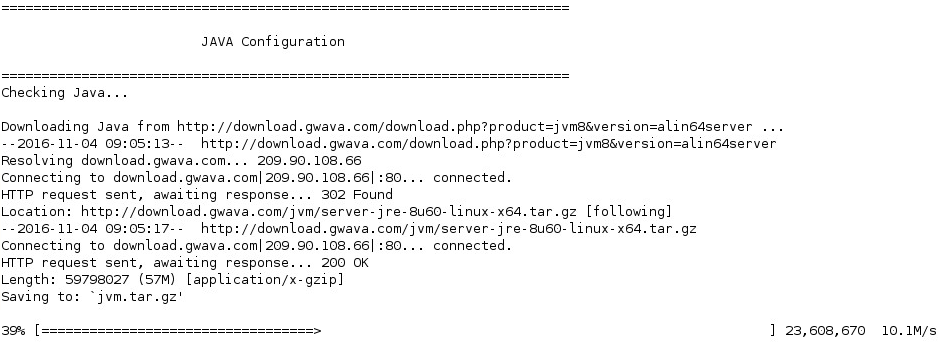
Java is checked, and automatically installed or upgraded, if necessary.
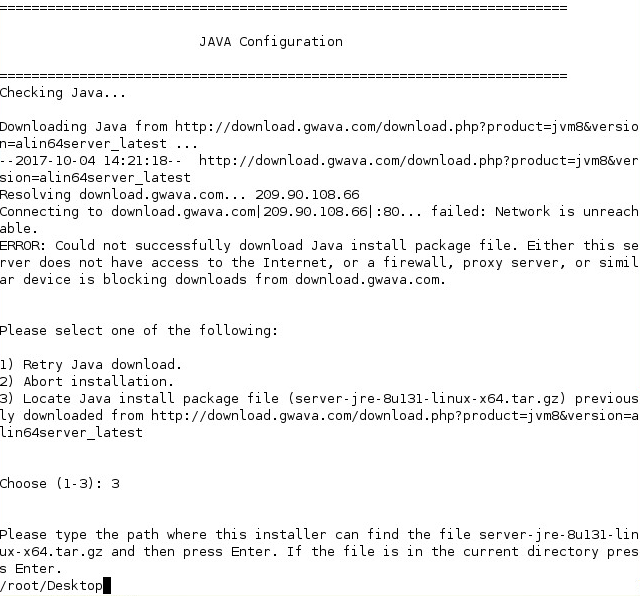
5a. If an Internet connection cannot be made, the installer will ask to retry, abort, or for the local path to the Java installation package. The Java installer can be downloaded from:
-
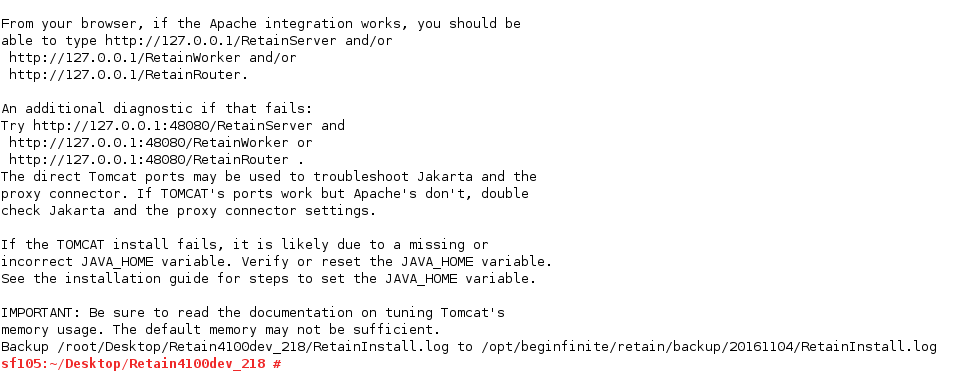
Installation completes, shows the URL to the RetainServer web console and returns to the prompt.
-
Check the status of Apache 2 and Retain Tomcat. (They should both be 'running'.)
Controlling Tomcat
SLES12
To check the status, start or stop apache or retain-tomcat, use the following runtime commands:
service apache2 status|start|stop|restart
service retain-tomcat8 status|start|stop|restart
SLES11
To check the status, start or stop apache or retain-tomcat, use the following runtime commands:
rcapache2 status|start|stop|restart
rcretain-tomcat8 status|start|stop|restart
-
If using MySQL, install the MySQL Connector/J MySQL Connector/J (JDBC driver for MySQL) Installation before configuring Retain.
You are now ready to continue to the configuration tasks. See the Initial SetupInitial Configuration section.
If you wish to set a custom storage path or install additional workers, those instructions are continued below.
3.9.3 Custom Storage Path Rights
If the data is to be stored on a disk other than the default volume, follow these instructions to set the directory ownership and permissions.
During initial configuration, a storage path for the archived mail is selected. Retain requires read and write access and permissions to the storage path. If a storage path other than the default (/var/opt/beginfinite/retain) is desired, then rights and ownership need to be granted to Retain.
After running ./retainInstall.sh, find out which user Retain is using to access the file system. (For SLES 10.1, 10.2, 11 the user is called ‘tomcat’).
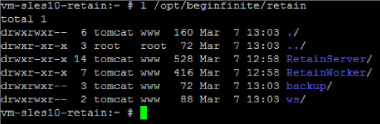
In a console, get a listing of the files and owners by typing:
l /opt/beginfinite/retain
This shows the User and the group that own the directory structure. In the system shown, Retain is using tomcat as the user.
Create the directory structure for the desired storage location, and then grant the permissions and ownership to the Retain user.
(mkdir <desired directory structure>)
(chown –R <user> <storage directory>)
(chmod –R 744 <storage directory>)
(In this example, we have already mounted our SAN or physical drive to the /Retain directory and wish to store mail in the /Retain/archives directory.)
mkdir /retain/archives
chown –R tomcat:www /retain/archives
chmod –R 744 /retain/archives
Now check the directories for ownership:
l /retain

Tomcat now has rights to the storage location.
3.9.5 Installing Additional Workers on Linux
Overview
In larger email systems, it can take a long time to dredge all the users especially if the users are on multiple mail servers. You can install multiple workers that can run in parallel to speed up the archiving process. We generally recommend one worker per mail server. The Retain installer can install up to 10 workers on a single server. We recommend an additional 1GB for RAM per worker. Workers are accessed by browsing to http://[IPAddress or HostName]/RetainWorkerN
The installer allows you to install one additional worker at a time.
Procedure
-
From the terminal run "./retaininstall.sh" and install at least one Worker or upgrade the existing installation, if you haven't already done so.
-
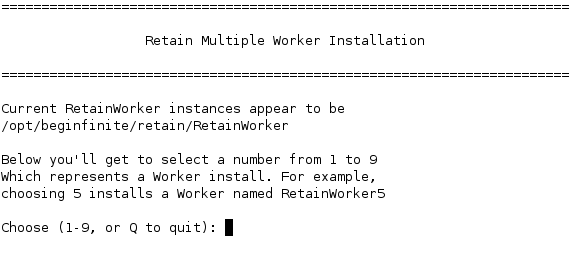
Run "./retaininstall.sh addworker" to start the installer in Add Worker Mode.
-
Acknowledge requirements.
-
Accept the license agreement.
-
Enter the number (1-9) of the Worker agent you wish to install. You may install workers in any order.
-
Confirm the install location.
-
Choose to keep or move the log location.
-
Choose to run retain-tomcat8 on start up or not.
-
After installing and acknowledging the location of the documentation the installer will show you how to access the Workers that were just installed.
-
Log into the Retain web console as admin
-
Create a new Worker and download the Bootstrap for each new Worker you installed. You may save it with a different name to organize it.
-
Browse to the new Worker at http://[ServerAddress]/RetainWorkerN where N is the number of the worker you just installed.
-
Upload the bootstrap.
-
Click Continue and login to the worker.
-
Check the friendly name that it is the one you expect.
There is a separate log file for each worker, found in /var/log/retain-tomcat8/RetainWorkerN.yyyy-mm-dd.log unless otherwise specified in Configure Tomcat.