4.2 Upgrading from Retain 3.5.1.1 or 4.x to Current version
4.2.3 GroupWise Module
If you are archiving with the GroupWise Module, log into Retain and determine which storage flag Retain is currently using. This is the flag you want to choose during the upgrade process. Retain will query GroupWise and update the Item Store Flag in the Retain database for each user.
If you should choose incorrectly, it can be changed in the module. If not set correctly, it will mean that the next job will, at most, do a full dredge.
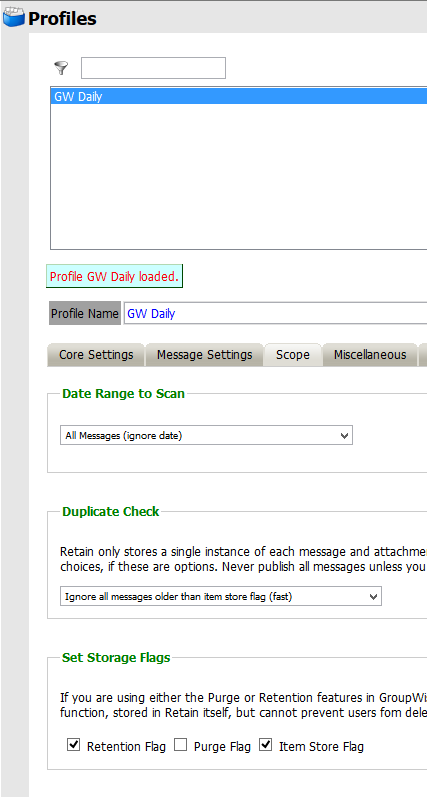
Please note that after the upgrade to 4.2 there will be a new default Scope setting in Profile(s).
The option "New items" will become the default selection if previously the Date Range to Scan was set to "All Messages (ignore date)" and Duplicate Check was set to anything other than "Try to publish all messages (SLOW)."
Please note that in 4.2 upgrade the controls for the GroupWise Storage Flags have been moved from the Profile to the Module Configuration page.
See the GroupWise module page for more details.
4.2.4 Upgrade Process
If upgrading from Retain 4.0.x the upgrade process should take between 15 and 30 minutes, depending on the size of the system, very large systems may take longer.
-
Download the latest version of Retain.
On Linux, you may use the command line "wget http://download.gwava.com/download.php?product=Retain&version=current"
-
Extract the archive. This will extract into a new folder.
On Linux, in the GUI right-click and select "Extract Here" or on the command line "unzip Retain<version>.zip"
On Windows, right-click and select "Extract All..."
-
If on Linux, open a terminal window in the Retain install folder and make the bash script file executable by running the command: "chmod +x *.sh"
-
Run the installer:
On Linux: "./RetainInstall.sh"
On Windows: "RetainInstall.exe"
-
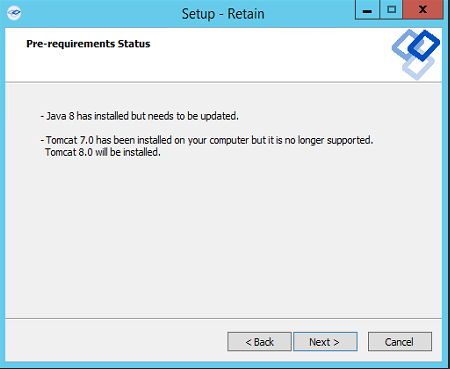
The installer will check the tomcat version that is installed and will upgrade it to Tomcat 8.0
-
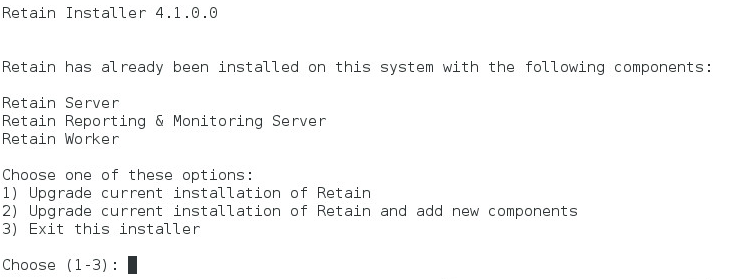
Retain will detect if a previous version of Retain exists on the server. It will report what components have been installed and will ask if you wish to upgrade the current installation or if you want to add new components as well.
-
If you choose to install additional components it will ask what you wish to install.
-
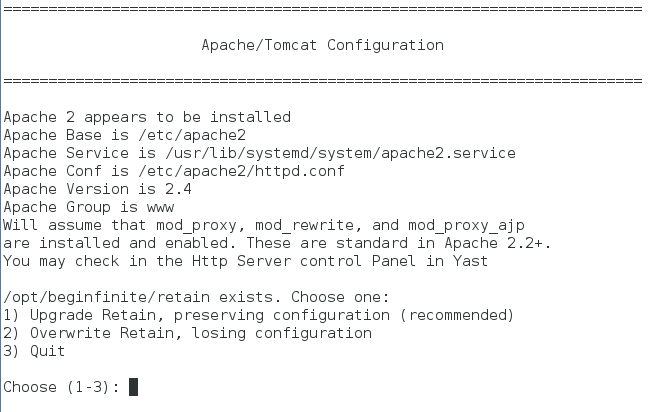
Then the installer will ask if you want to Upgrade Retain, preserving the existing configuration or Overwrite Retain which will replace the configuration file but will not erase data. This is useful in certain troubleshooting circumstances.
-
After choosing to upgrade or overwrite Retain, the installation will begin. Wait until the installation is finished.
4.2.5 Post-Install Tasks
-
Browse to Retain Web Console.
-
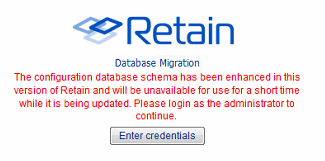
The upgrade may require a configuration database update, depending on the version of Retain you upgraded from. Select the ‘Enter Credentials’ button and enter the administrator account username and password. Select the button to start the migration.
-
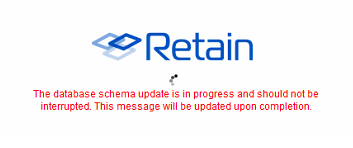
During the database Migration, do not interrupt the process. Wait until the process completes.
-
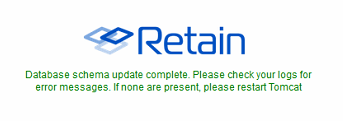
Once the migration is complete, the system will instruct you to restart tomcat.
-
Once the update has completed, restart tomcat to initiate the new database.
-
The tomcat restart will take a little bit longer than a normal restart, as the database needs to be initialized and set up the new interface.
-
After a few minutes, browse again to the Retain Management interface.

-
-
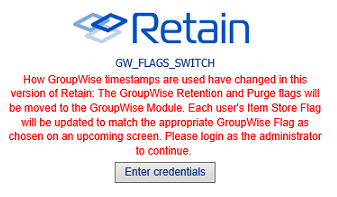
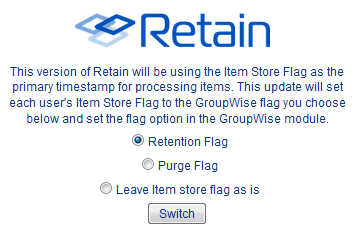
If you have the GroupWise module configured how the GroupWise timestamps are used by Retain have changed.
-
You will receive a warning page describing what will happen.
-
You will need to enter the admin credentials.
-
Choose which timestamp flag Retain will use in the Module.
-
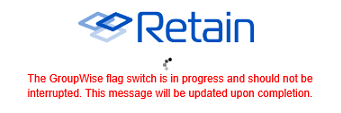
Retain will update, which will take some time. The Retain interface will not be available until this process completes. In Retain 4.2, this process is done in the background so the interface is available immediately, however jobs will be disabled until the process is complete.
-
When the migration is complete you will need to restart tomcat. In Retain 4.2, no restart of tomcat is needed, jobs will begin again on schedule once the process is complete.
-
-
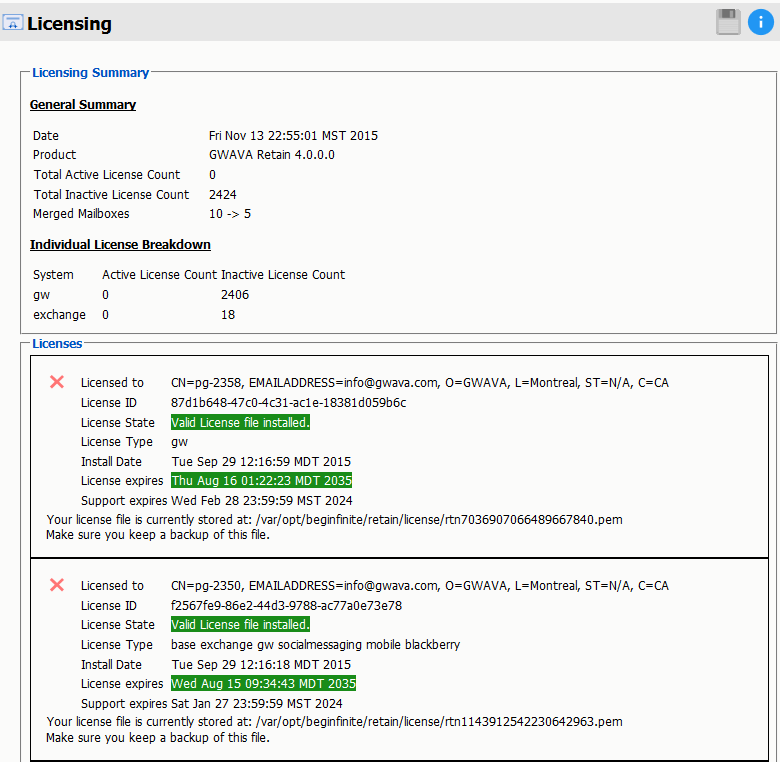
Login to the Retain Management interface. If upgrading from a version of Retain previous to Retain 4.x, new licenses for Retain 4 must be immediately applied. These licenses should be provided by the sales representative. (Removing old licenses is not required, but may help to keep interface looking clean.)
-
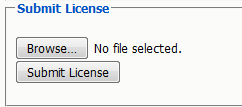
To install the new licenses, select the ‘Browse’ button from the ‘Submit License’ section at the bottom of the screen. Select the desired license and when back in the Retain interface, select ‘Submit License’ to upload the new license to the system. Repeat the process for each license required for the active and desired modules in the system.
-
It is a good practice to remove expired licenses from the Retain system to keep the interface clean and to easily see any licensing issue. However, removing expired licenses is not required.
-
-
If upgrading from Retain 3.5.1.1:
-
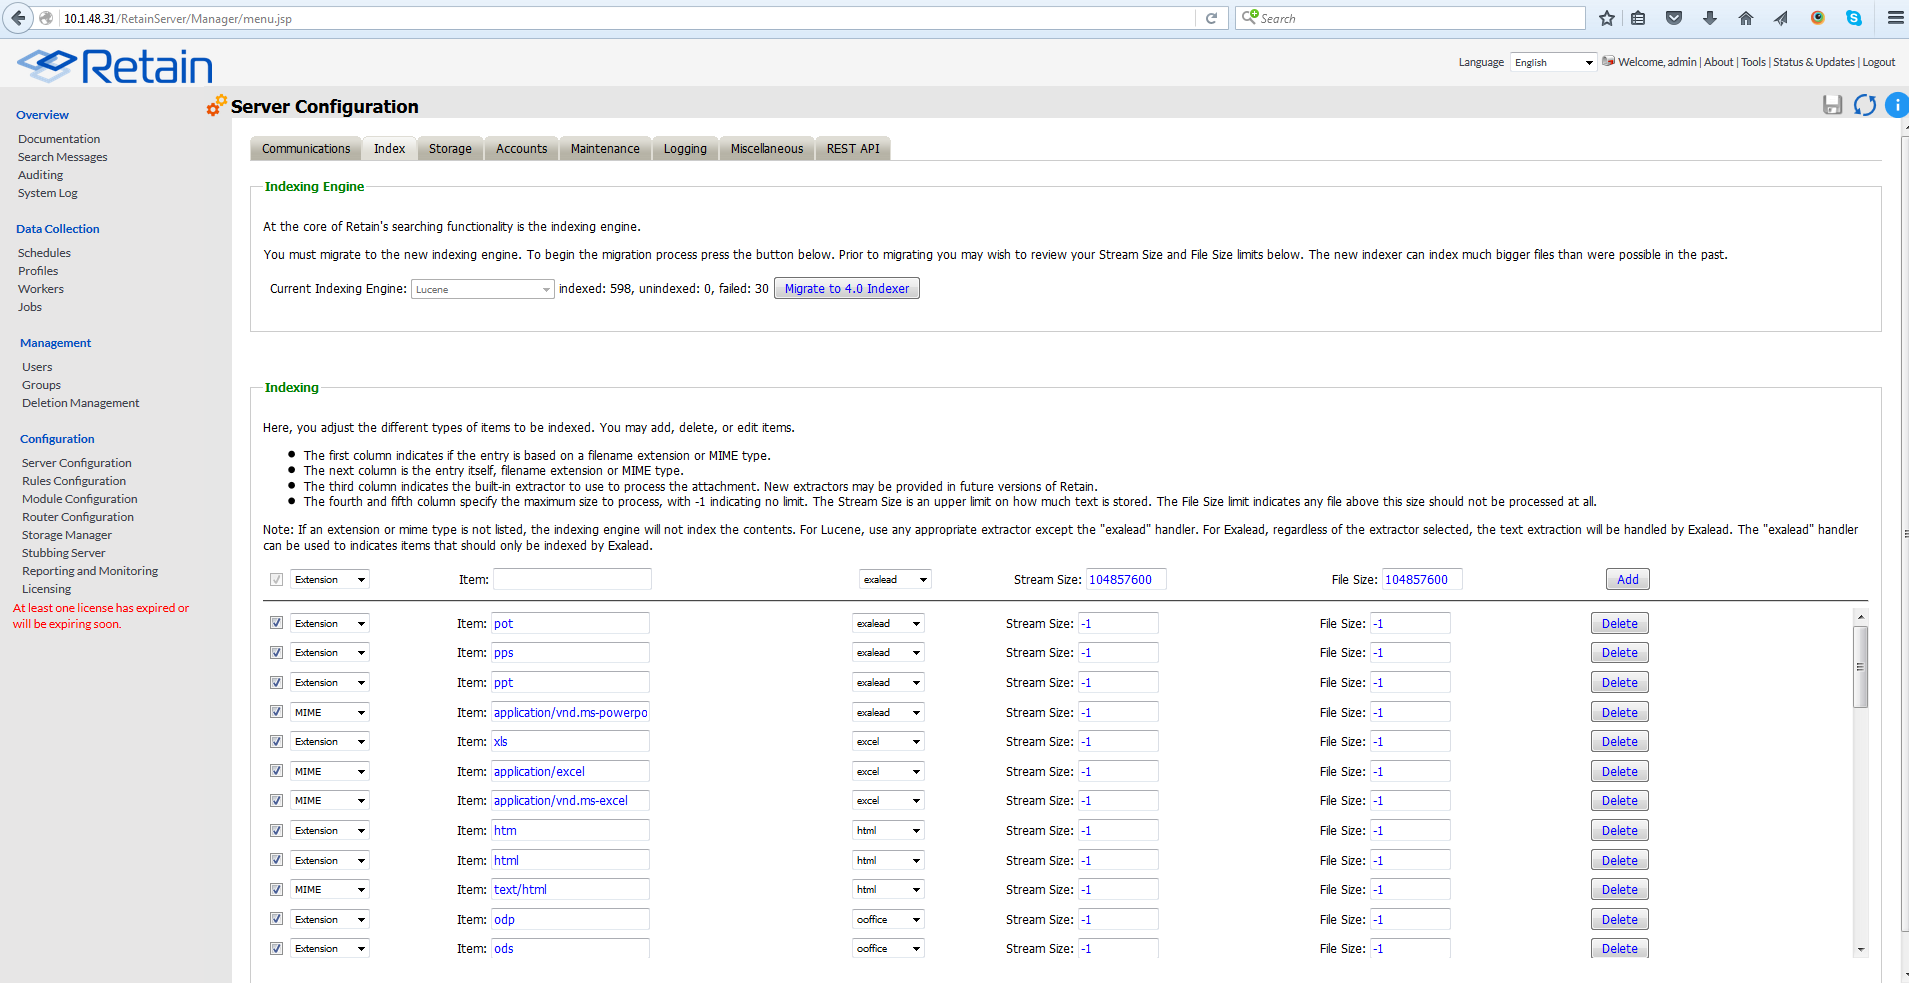
Immediately go to the Server Configuration page and select the Index tab.
-
Select the Migrate to 4.0 indexer button.
-
There are two index options: High Availability Indexer and the standard index. Both options utilize the same high performance index engine and will both provide new searching functionality; however, the 'standard' engine is embedded while the 'High Availability Indexer' is a scalable, external, cluster system for large systems. The default is set to the standard index. The standard index engine is very powerful and sufficient for everything up to extremely large or busy systems.
If you wish to use the High Availability Index engine, a separate license is required. Please contact support for guidance, system planning, and installation.
-
Once the migrate button has been pressed, the new indexer section is displayed.

-
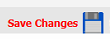
The Standard engine only requires the Retain admin credentials. Enter the administrator credentials then save the changes by selecting the save-changes button to continue.
-
The index migration begins automatically. During the migration of the index, the active index is displayed at the top of the page. The active index displayed at the top of the page will still be available and fully functional. New search options and features will not be available until the new index becomes active.
-
The index page is updated every 10 seconds to display the progress. With no archive jobs, migrations of the index will average 60 messages per second on a Linux server, and about 45 messages per second on Windows Server. Migration speed is limited by disk IO, (and network speed with external indexes). Large messages with large attachments will take longer. If archival jobs are running, the speed of the migration will depend wholly on the size and activity of the archival job.
-
When the index page updates showing the new index is running, the new index has automatically become active.
-
Once the index migration is complete, the indexer will need to optimize the index files. This is done during the nightly maintenance. The larger or more segmented the indexes the longer this will take. This may temporarily triple the disk space the indexes use as the files are consolidated. It is a recommended to go to the Server Configuration | Maintenance tab and set the Enable Index Optimization to Saturday weekly. The first optimization is the longest and may take many hours, after that it usually only takes minutes and can be done nightly.
-
-
The upgrade is complete.