5.3 Exchange Module Office365
Retain supports Office 365.
5.3.6 Setup Users
NOTE:Retain uses PowerShell to connect to O365. PowerShell does not allow the following special characters in names or passwords: # $ ( ) * + . [ ] ? \ / ^ { } |
Retain Impersonation User
In O365 Exchange Admin Center create the Retain Impersonation user with a mailbox, making sure to give it a license.
Give the Impersonation user the proper rights. Under Permissions, create a new Admin Role (e.g. Retain Impersonation Management), add the ApplicationImpersonation right and the Retain Impersonation user as a member.
Retain Administrator User
Retain needs a user with Administrator rights to download the address book from Office 365 every day with the Office365 Address Book Synchronization Script. This can be an existing administrator account or you may create a separate one. It needs to have sufficient rights to see all the users in the address book.
Shared Mailboxes, Rooms and Equipment
Impersonation rights allow the Retain user to enter other mailboxes but those rights do not extend to shared mailboxes. To access a shared mailbox the Retain user would need delegate rights to each shared mailbox that is to be archived. These rights can be granted through the Exchange Management Shell.
If the shared mailbox is owned by “John Doe” and your Retain impersonation account is "Retain", you would issue the following command in an Exchange Management Shell (EMC):
Add-MailboxPermission -Identity "John Doe" -User Retain -AccessRights FullAccess -InheritanceType All -AutoMapping $false
Address Book Synchronization
For Retain to authenticate users and access mailboxes for archiving, it needs to know what mailboxes are in Office365. To download the domain address book, Microsoft requires third-parties to use Powershell.
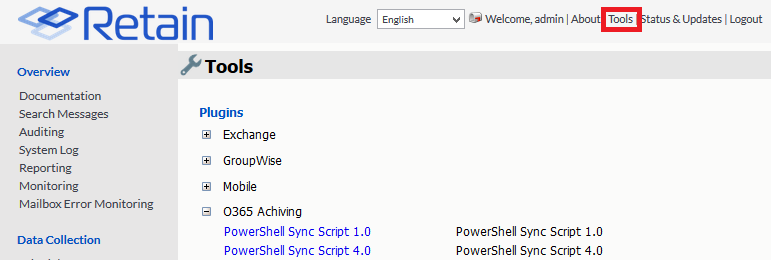
There are two scripts to do that both found under the Tools menu at the upper right of the Retain admin console.
The two scripts do the same thing: download the address book from Office365.
PowerShell Sync Script 1.0 saves the username and password in plaintext in the script.
PowerShell Sync Script 4.2 encrypts the password to a separate file.
Retain will not be able to archive members of the distribution lists if the field: HiddenFromAddressListsEnabled is True.
If using multiple modules, you will need to create separate folders for the script and the resulting CSV files. The folder location that Retain should pull the CSV file data from is set in the module as detailed below. You will also need to create a scheduled task for each script.
5.3.10 PowerShell Sync Script 4.2
The standard sync365.ps1 script requires entering a plaintext administrator password. If that is not acceptable by your security policy, there is the O365 Archiving PowerShell Sync Secure Storage Script: Save-CredentialsEncrypted.ps1 which allows you to securely save the password used by the admin user.
Requirements
-
The script can be found under O365 archiving under the Tools menu at the top-right of the Retain admin console.
-
This must be run on the same machine as it was created on as the encryption is dependent on the machine it was run on.
-
This script requires PowerShell 4.0 or higher or the script will abort.
-
If using Windows Server 2008R2 or earlier, the script will throw errors because the Task Scheduler cmdlets are not supported and the Scheduled Task must be created manually.
Running the Script
-
After downloading and extracting the script, open PowerShell and change to the directory the script is in and type .\Save-CredentialsEncrypted.ps1
1a. If you haven't run a PowerShell script before, you may have to change the Execution Policy to get a script to run. Set the execution policy to Set-ExecutionPolicy -ExecutionPolicy Bypass -Scope Process. If PowerShell 4.0 or higher is not installed the script will abort.

-
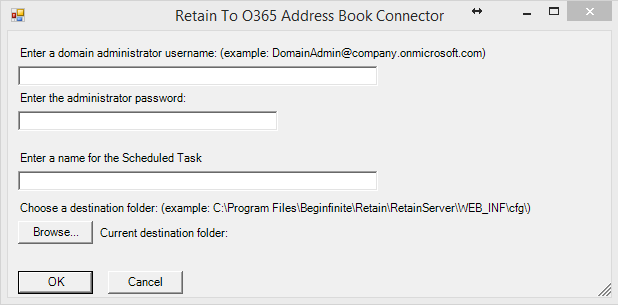
A dialog box will appear requesting the credentials for an administrator user and the destination folder of the address book files.
The administrator user must have sufficient rights to download the address book from O365. This would be the logon name and password of an administrator user (e.g. DomainAdmin@company.onmicrosoft.com).
Provide it with a name for the Scheduled task.
You can set the destination folder to anywhere you wish. However, the address book files exchangeuser.csv and exchangegroup.csv must end up in the ~\Program Files\Beginfinite\Retain\RetainServer\WEB_INF\cfg\ folder of the Retain Server. Retain will look for the address book files there when refreshing the address book.
If you are using a Linux-based Retain Server, you will need to set up a process to move the address book files to the Linux-based Retain Server's opt/beginfinite/retain/RetainServer/WEB-INF/cfg folder.
If you are running Retain will multiple modules each module will need a separate task and destination folder.
-
The script will then setup a recurring task (SyncO365) in Task Scheduler to download the address book every day at 12:30am.
The script will request your logon credentials as it sets up the task. The script will start the task before exiting. If you are using Windows Server 2008, multiple errors will appear because the Task Scheduler cmdlets do not exist, this is expected and the task can be created manually in Task Scheduler.
-
It will take a moment to download the address book files: exchangeuser.csv and exchangegroup.csv. For a small system (<100 users) it may take a few minutes, for a large system (>10k users) it may take more than half an hour. After the script completes, make sure that the address book files are filled with items. If this does not generate the files it may be an execution policy issue, see notes section below.

Notes
We have found that Task Scheduler will sometimes stop working, so we recommend monitoring the .CSV files that they are updated every day.
Blank .CSV files:
Office365 requires regular password changes. If the wrong credentials are entered or the password has expired two blank .CSV files will be created. You will need to run this script again entering the Administrator logon name, the new password and the destination folder. The task will be started by the script to update the address book files.
Common Errors:
If you see red text and the window closes immediately that means, there was an error of some kind. Open a PowerShell window, change to the script folder, and run the script manually:
.\Save-CredentialsEncrypted.ps1
It may be that the proper version of PowerShell is not installed. This script requires at least version 4.0. You can determine the installed PowerShell version by running the cmdlet:
$PSVersionTable.PSVersion
To change the execution policy manually, the following command in a PowerShell window will allow execution for the current process:
Set-ExecutionPolicy -ExecutionPolicy Bypass -Scope Process
Then run the script from the same process window.
5.3.11 Configure SharePoint Online/OneDrive for Archiving
In Office365 you can attach documents stored in SharePoint Online/OneDrive. However it doesn’t send the actual document but only a link to that document.
NOTE:As a cloud service these screens may change at anytime.
When Retain attempts to archive an attached document it often runs into trouble because the retain user, while it does have ApplicationImpersonation right, doesn’t have rights to anything outside of Exchange. So Retain will error because it knows there is supposed to be something there but can’t reach it.
11:04:16, 704[Thread-4920] [ERROR] ExchangeAttachment: error while creating attachment. java.io.IOException: SharePointError - Impersonation has no access to: https://gwava-my.sharepoint.com/personal/user08_gwava_onmicrosoft_com1/Documents/Email attachments/office 365 users(1) (1).txt
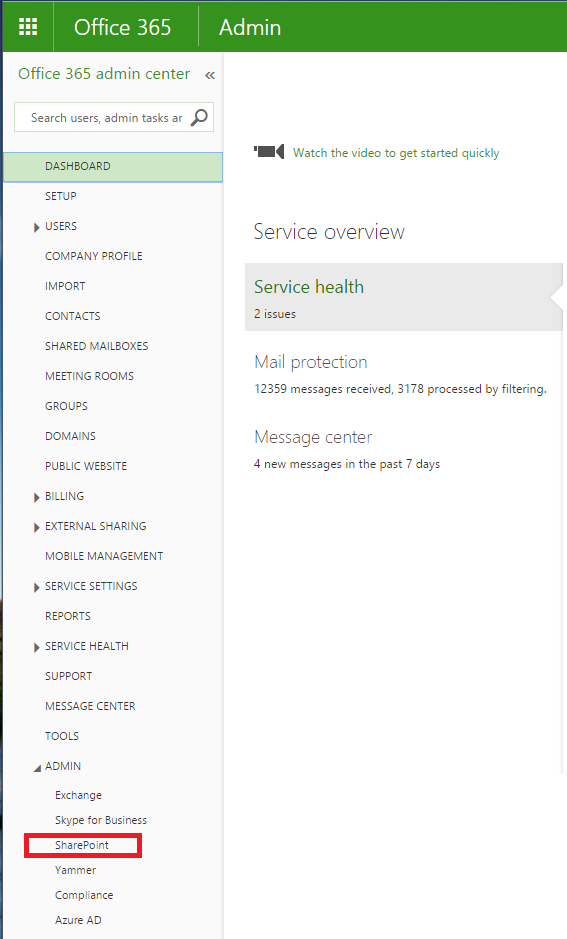
What needs to be done is the retain user needs be added as a “site collection administrator” in SharePoint/OneDrive. Start by going to the Office365 admin page and selecting SharePoint.
Go to the Site Collections, select the collection to add the retain user too, click the “Owners” tab.
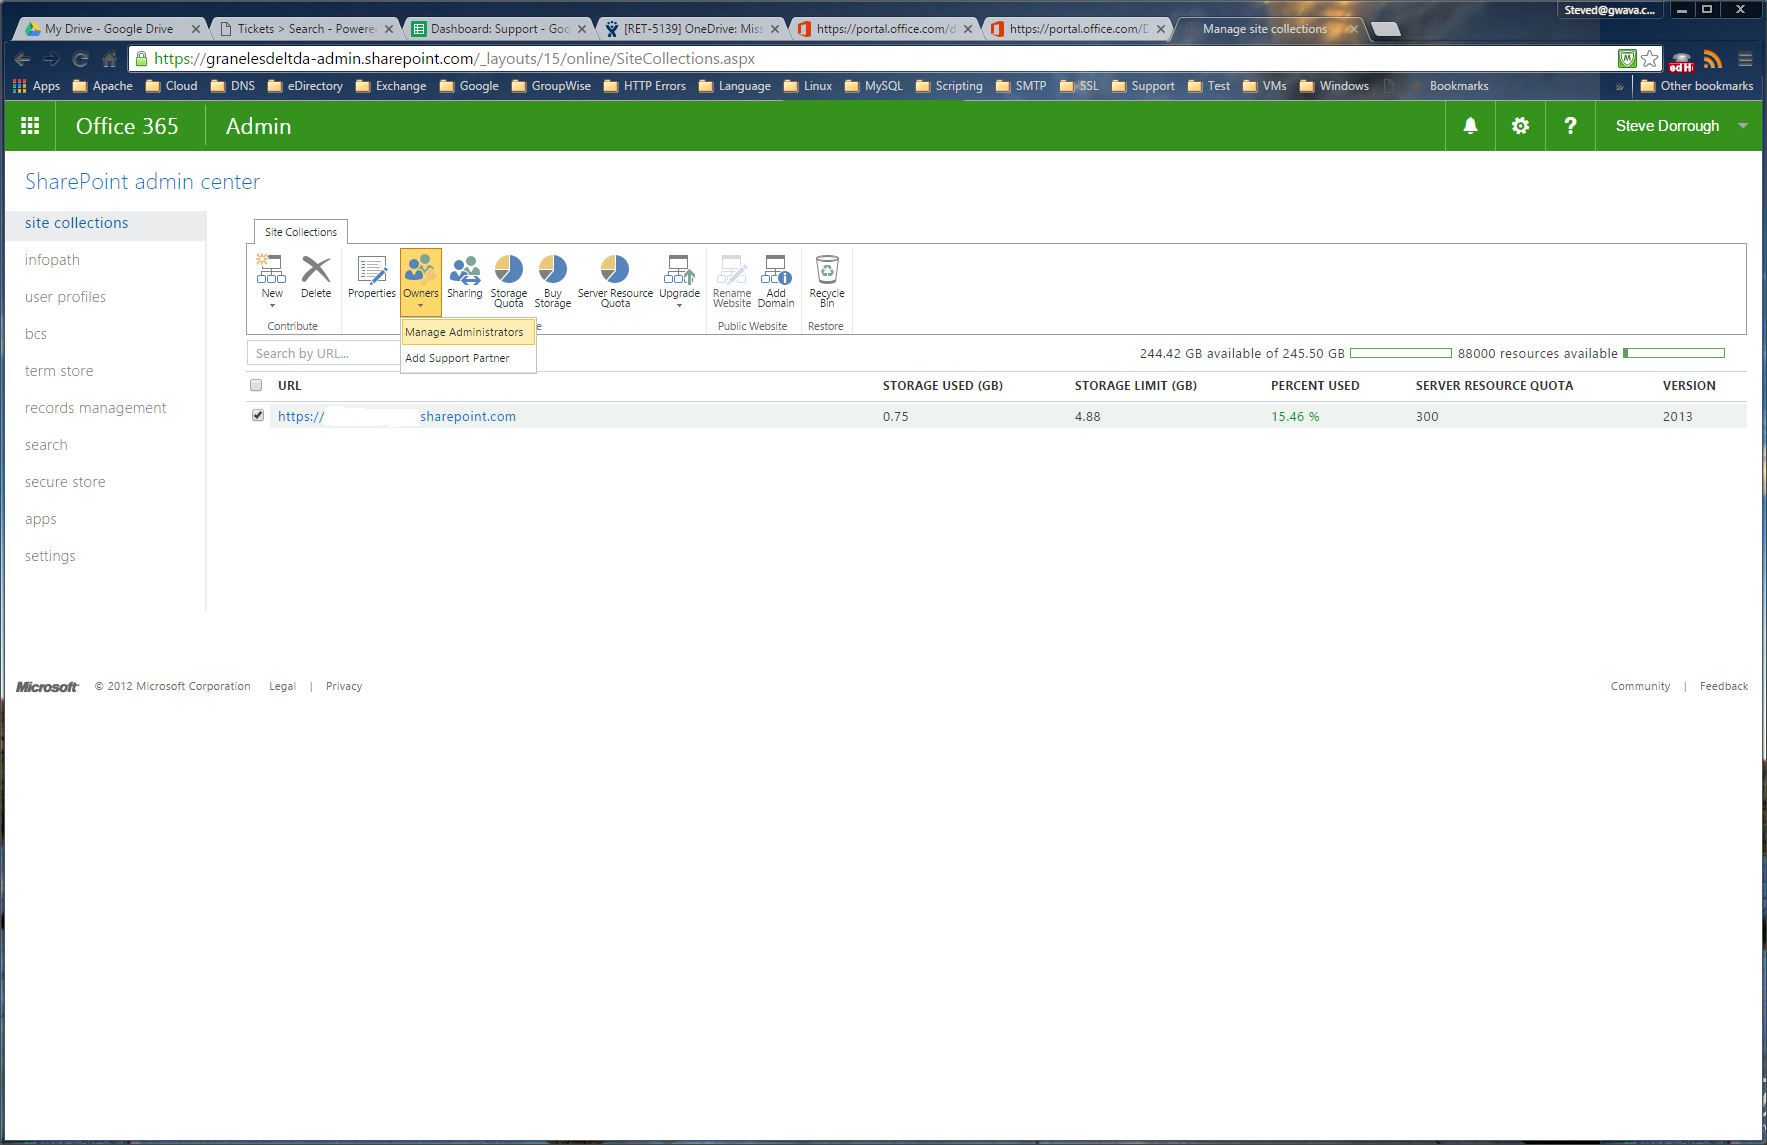
You can now add the retain user as a “Site collection administrator”. This way the retain user will have rights to access the data.
This works for individual site collections, but it would be difficult to do that individually if you have many site collections. There is no way in SharePoint to change more than one collection at a time.
Changing Across The Domain However, there is a SharePoint Online Management Shell script that you could modify for your use to do all site collections at once.
5.3.12 Configure Exchange Module for Office365
The Exchange module must be configured in the Retain Server before any communication between Retain and an existing Exchange message system can occur. Open the Retain management page on the Retain Server, and select Module Configuration.
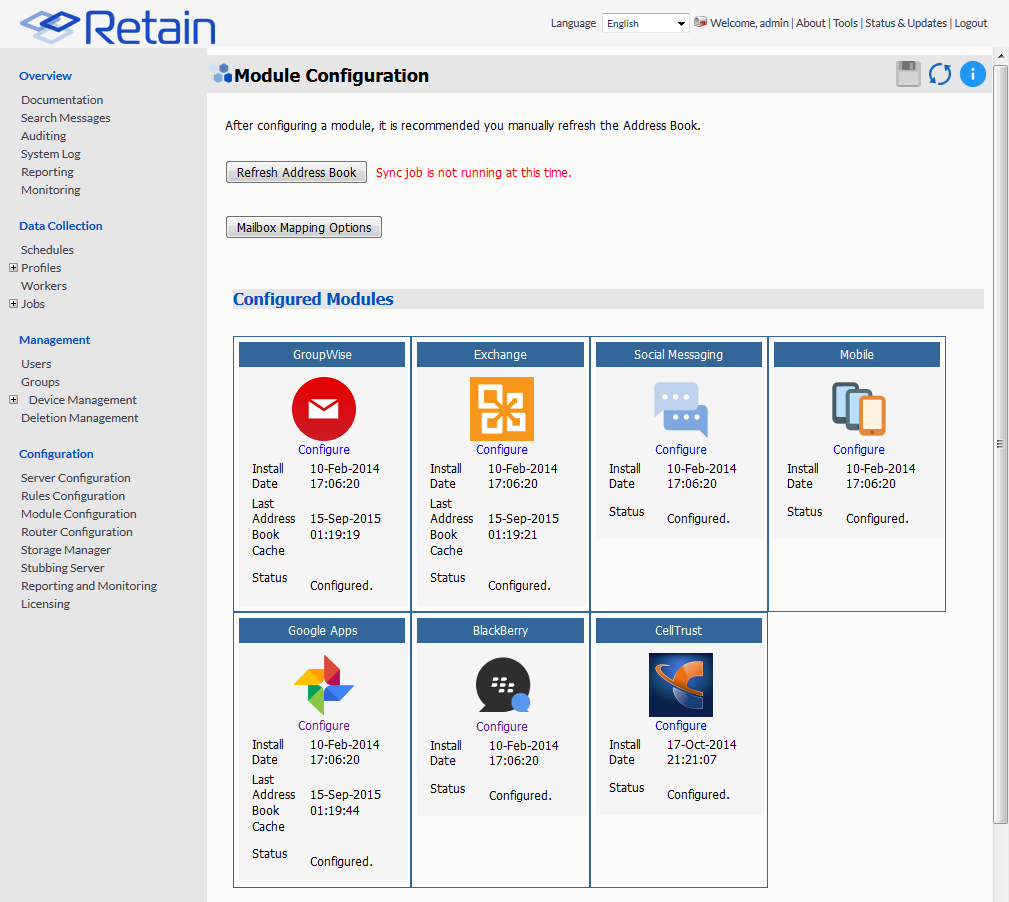
Select the ‘Configure’ option in the Exchange module. A new window or tab will open with the module configuration.
NOTE:Ensure that your Retain Server DNS is set to the same DNS server that your Exchange server uses. The Exchange module uses these DNS setting to auto discover critical information about Exchange stored in Active Directory and will not function correctly unless both systems are pointed to the same DNS server.
5.3.13 Core Settings Tab
The Core Setting Tab allows you to disable all jobs and disable users logging into Retain.
The module needs to be enabled on this page to make it active in the Retain system.
The module can be given a name.
The Send Method option enables either the SMTP Forwarding or FTP features. For either feature to appear and function, the Module Forwarding tab must be configured on the Server Configuration page. See that section for more information.
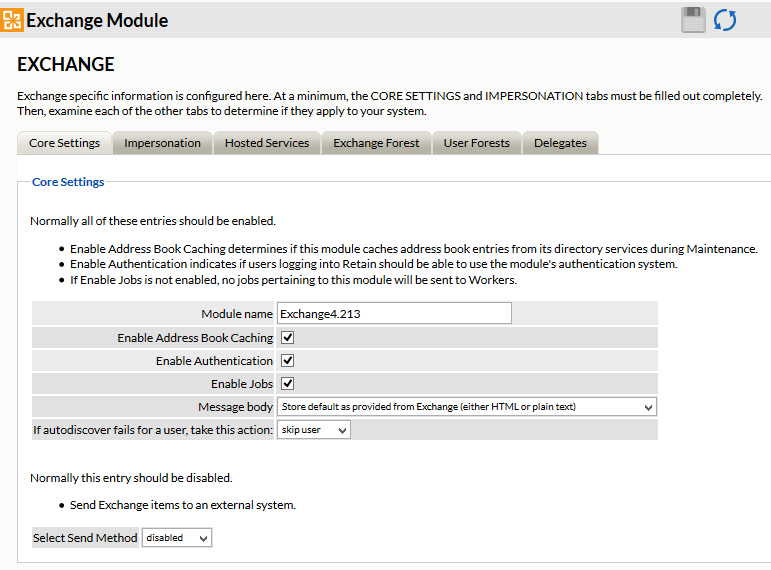
Normally all the checkboxes on this tab are always left selected. It is rare that you would ever deselect any of them. Two cases where you might, would be: troubleshooting, (as instructed by Technical Support), or retrieving an old email system.
The Enable Address Book Caching function allows Retain to regularly cache the online email systems address book and synchronize it with Retain. This is critical for administration, authentication, and archiving purposes. It is recommended to cache the Address Book once every 24 hours to keep the Retain storage system up to date. By default, maintenance is set to cache the Address Book once every 24 hours.
The Enable Authentication checkbox determines if end-user authentication is performed when the user logs into Retain. If it is deselected, the Retain system will NOT authenticate the user against the email system and the user will not be able to log in unless another authentication method is enabled.
The Enable Jobs checkbox determines if configured data retrieval jobs are ever passed to the Worker. Even if the individual job is fully configured and enabled, if this checkbox is switched off, no jobs configured for this module will be processed.
The Message body allows the administrator to decide whether to store either the HTML or plain text message body, or both.
Send Method
The Send Method option enables either the SMTP Forwarding or FTP features. For either feature to appear and function, the Module Forwarding tab must be configured on the Server Configuration page. See that section for more information.
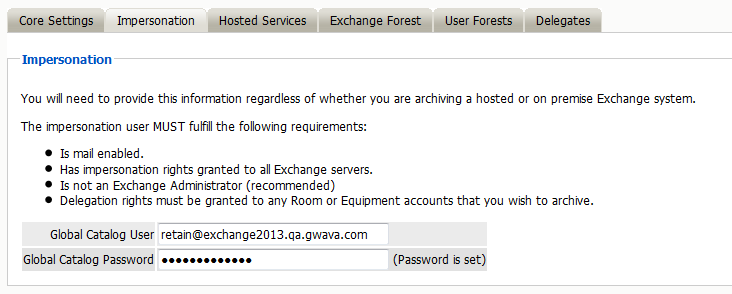
5.3.14 Impersonation Tab
If the Impersonation and Core Settings tabs are not completely configured with the correct information, the hosted system will not be archived correctly.
Enter the Impersonation user credentials.
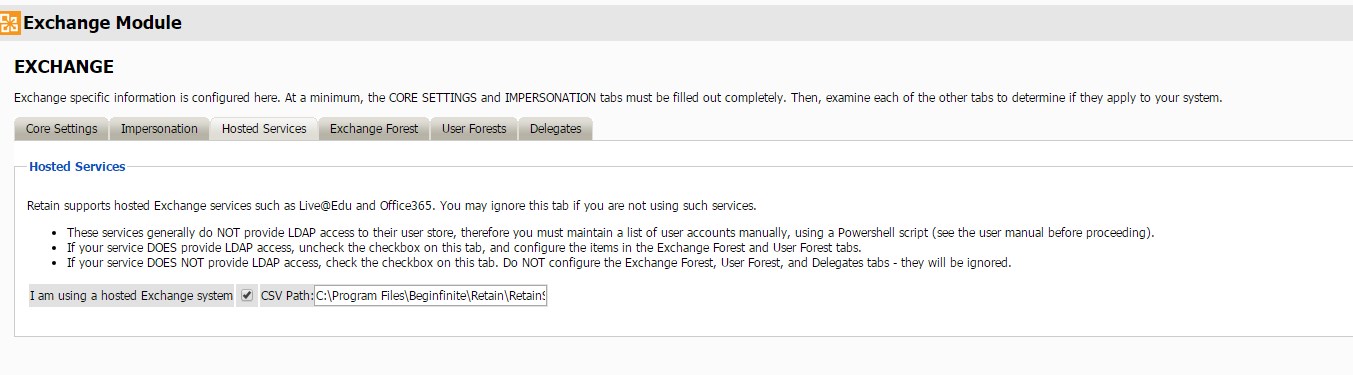
5.3.15 Hosted Services Tab
Mark the checkbox to enable Retain support for hosted Exchange services.
Provide the path that Retain will use for the CSV files that the PowerShell Sync script will save the user list. By default: C:\Program Files\Beginfinite\Retain\RetainServer\WEB-INF\cfg
All other tabs will be ignored. Save all changes before closing the Exchange Module page.
Multiple Modules
If using multiple modules, each module must have a different folder for the script and CSV files.
For example, C:\Program Files\Beginfinite\Retain\RetainServer\WEB-INF\cfg\domain1 and C:\Program Files\Beginfinite\Retain\RetainServer\WEB-INF\cfg\domain2
Each module will also need a separate Scheduled Task.
5.3.16 Refresh Address Book
After saving changes, return to the Retain Server's Module Configuration page, and trigger a refresh of the Address Book.
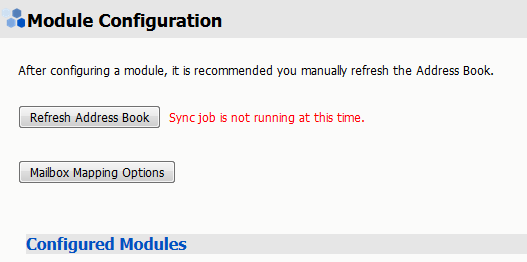
Depending on the size of the address book, it may take several minutes to return with information, but a successful configuration will return a correct address book cache date and no errors. The date should reflect the date of when the address book refresh was triggered.
The Status may show “Address Book Cache Never Run” or may list commonly mis-configured or missed items if the Refresh job fails.
Once the status is configured and the Address Book has been cached, Retain can connect to and archive messages from the Exchange server. The system is ready to have workers, schedules, profiles, and jobs configured, and those options will now appear on the main administrative interface.
The Address Book is refreshed whenever the button is pressed, during the nightly maintenance cycle, and before each job.
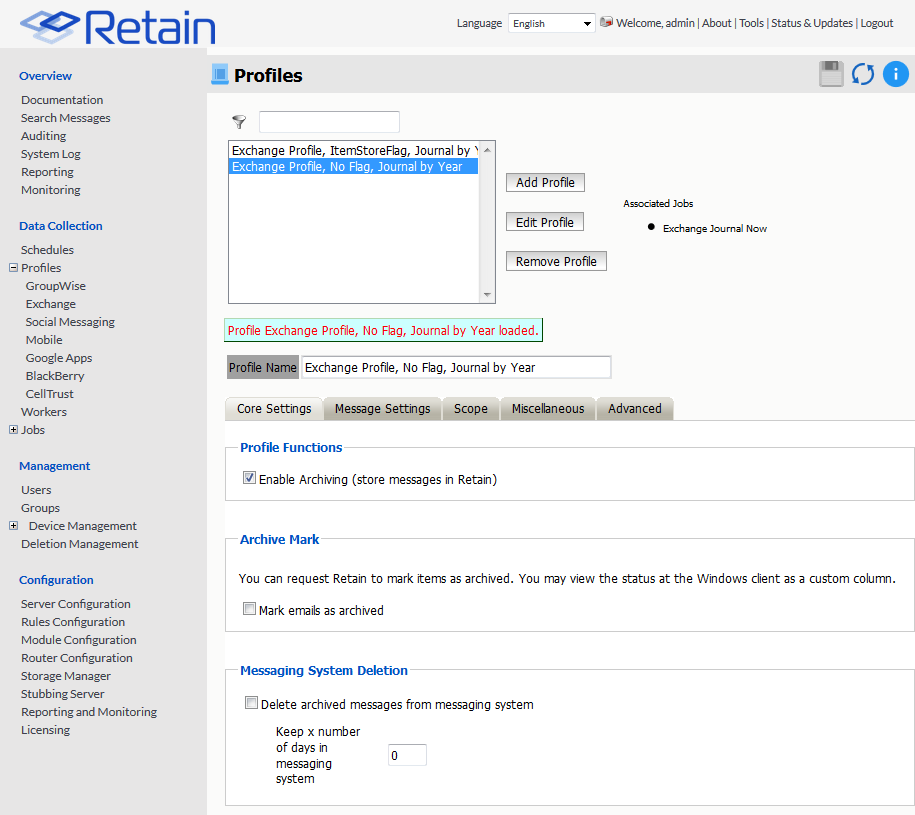
5.3.18 Core Settings
The core settings consist of an enabled/disabled option which must be enabled for any jobs based on this profile to archive anything.
5.3.20 Message Settings
Retain can archive and select specific types of mail and Exchange system items to be archived. The Manage Settings tab provides access to manage those settings.
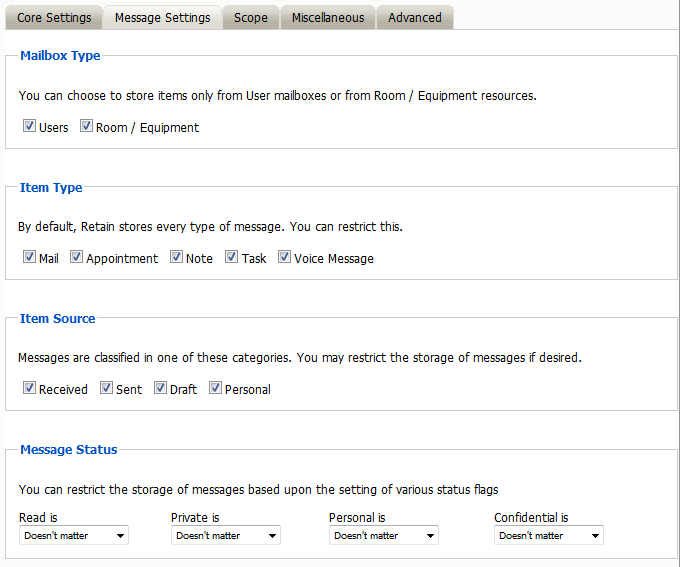
The Mailbox type specifies whether to include or exclude the available types of mailboxes. Because there can be multiple profiles and jobs, it may be advantageous to archive the Users and Room / Equipment mailboxes separately as needed and appropriate for the system.
The Item Type option specifies the different types of messages found in Exchange that can be archived, and allows the exclusion of or inclusion of the different individual types.
The Item Source option allows administrators to exclude or include messages that have not yet been sent or received, or posted.
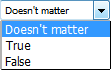
The Message Status allows messages which have or have not been read or opened, or marked private or confidential to be archived. The different options in the drop-down menu are as shown.
5.3.21 Scope
The Scope tab dictates the date range Retain will scan in the attached archiving jobs.
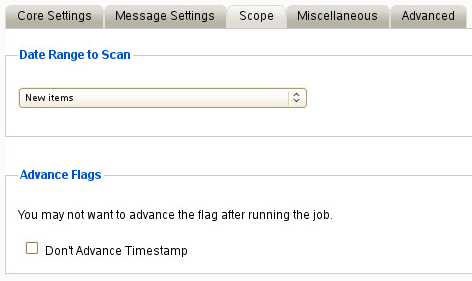
Date Range to Scan
The Date Range to Scan instructs Retain to scan for, and archive, messages after, or before, a certain date. This is useful if only specific chunks or areas of mail are to be archived.
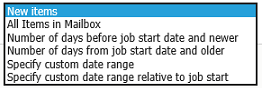
New Items: All items that have not been archived by Retain since the last time the job ran.
All Items in Mailbox: All items in the mailbox starting from 1/1/1970, duplicates will be processed but not stored if they already exist in Retain's archive.
Number of days before job start date and newer: Only items from the relative number of days from the time the job began will be archived. E.g. messages that came into the email system less than 7 days ago.
Number of days from job start date and older: Only items previous to the relative number of days from the time the job began will be archived. E.g. messages that came into the email system more than 7 days ago.
Specify custom date range: Only items between two absolute dates will be dredged.
Specify custom date range relative to job start: Only items between two relative dates will be dredged. E.g. messages that came into the email system between 7 and 5 days ago.
It is recommended to archive all New items.
Advance Flags
Enabling "Don't Advance Timestamp" will not update the timestamp flag. Items that are dredged will still be considered new by Retain the next time the job runs.
This is useful when troubleshooting, but is generally not used for normal jobs.
NOTE:Unlike GroupWise, Exchange does not ensure any compliance when scanning end user mailboxes; users may freely delete their email. The Item store flag does not prevent mail deletion. Only setting a rolling hold on all mailboxes guarantees all items have been archived.
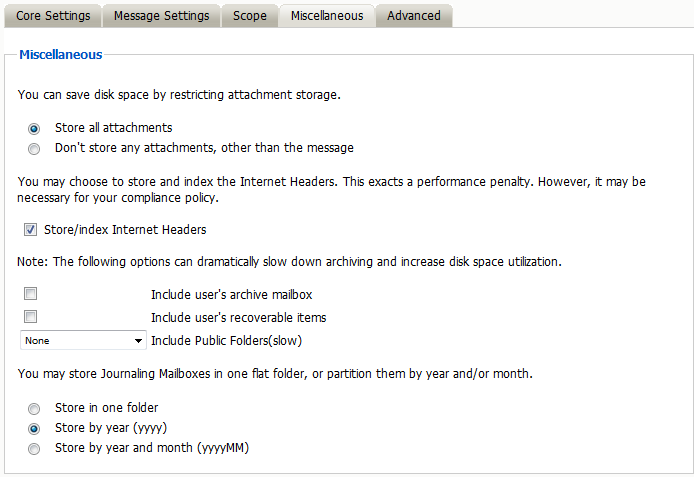
5.3.22 Miscellaneous
The Miscellaneous tab allows access to settings detailing how messages are stored and what is archived. Attachments, message information such as the Internet headers, and how the data is stored and named, (by folders, year, or year and month), dictate not only the message store structure, but affect the storage size.
Miscellaneous options also allow for the archiving of the ‘recoverable items’. To enable checking and archiving of the ‘Recoverable Items’ for compliance reasons, select the checkbox next to the option.
5.3.23 Advanced
The Advanced tab allows you to limit what is stored by Retain. This must be used with caution as this opens holes for data to be lost through. It is recommended to store everything since storage space is inexpensive.
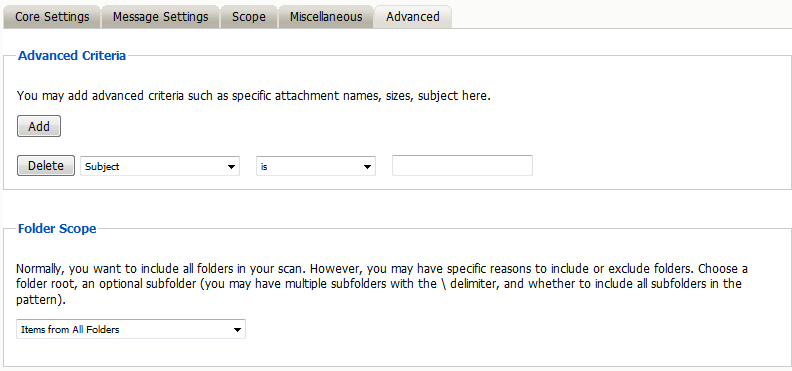
Advanced Criteria
If you want to be more specific as to what to dredge or not to dredge, add the criteria here.
Each line will be logically AND-ed together. Think “Dredge all items where the following is true:” Criteria A AND Criteria B AND Criteria C AND etc.
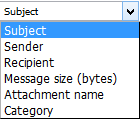
You may select based on:
-
Subject
-
Sender
-
Recipient
-
Message size (in bytes)
-
Attachment name
-
Category
And whether they are is, is not, contains, or does not contain the items specified.
This provides flexibility and granularity. It allows customized dredges and retention for many different groups, or even individuals.
5.3.24 Folder Scope
By default, we dredge items from all folders. You can specify one or more inclusions or exclusions.
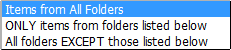
Your choices are:
-
Dredge everything
-
Dredge only these listed folders
-
Dredge everything except these listed folders
How to specify the list of folders to dredge/exclude:
-
Specify a System Folder (mandatory). Example: Calendar.
-
You specify a subfolder of that folder (optional).
Example: entering “old” would mean the folder “old” under “Calendar”.
-
You can have multiple hierarchies under that with the / delimiter.
Example: “old/mail” would mean the subfolder “mail” under “old” under “Calendar”.
-
You specify if the option includes subfolder.
Example: If you select “old” and “includes subfolder” is unchecked, “Calendar/mail” is selected. If “includes subfolder” is CHECKED, “Calendar/old/mail” would also be selected.
You may now configure Schedules, Workers and Jobs.
Skype for Business
With O365, Retain will also archive Skype for Business conversations. They will be saved to the Conversation History folder of the user.