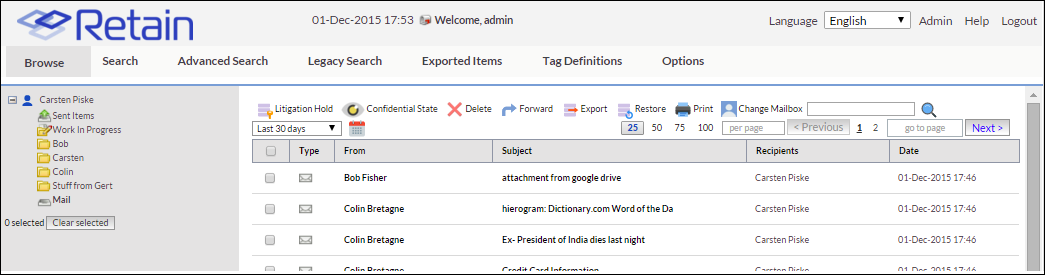
8.3 Browse
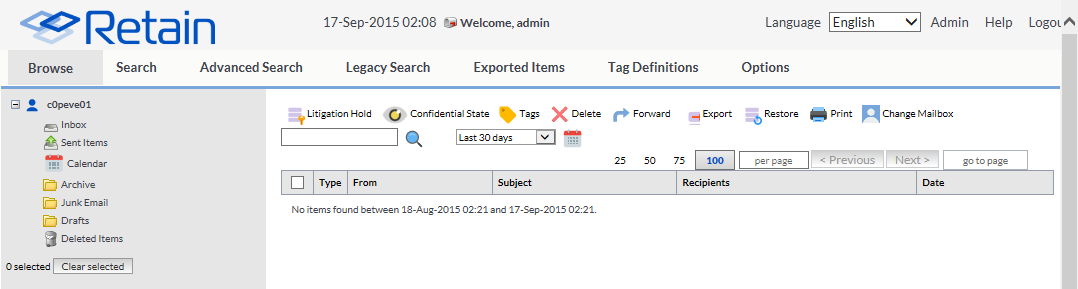
The Browse tab immediately grants access to the selected mailbox. Individual users will only see their own mailbox, while users with the administrator right to search all mailboxes will have the option to change mailboxes to another user.
Retain is an archiving solution not a message management system. All items are stored in the location Retain found them in the production system and cannot be moved.
To change to a different mailbox, select the ‘Change Mailbox’ button in archive toolbar. Once clicked, the ‘Select Mailbox’ dialog will open.
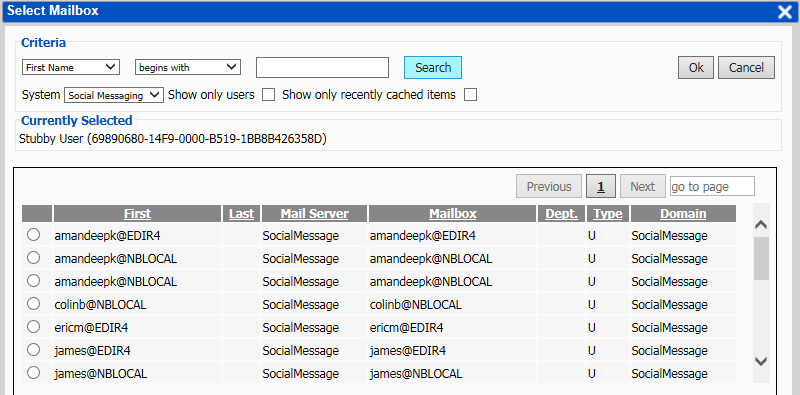
The Select Mailbox dialog asks for specific information. The Select which mailbox you want to see by clicking on its radio button and clicking OK.
When searching for a mailbox, the system of the mailbox must be selected as mailboxes from different systems may have the same user name or criteria. Select which mail system the desired user belongs to, specify any further criteria, or leave the criteria blank to display all possible mailboxes from that system.
(If Retain for Social Messaging is set to anonymous user, all Social Messaging data will be contained under the single user ‘?@?’, and separate user names and pertinent information is contained in the ‘from’ dialog. Otherwise, individual user accounts will be displayed.)
If the search results are extensive, the system will have a ‘Next’ or ‘Previous’ button at the bottom of the search results window, which displays the next set of results.
Refine search parameters to reach a manageable search result.
In Retain, you can only browse one mailbox at a time. To search multiple mailboxes simultaneously, use the search function.
After selecting a mailbox, click ‘Ok’ to load that mailbox into the viewer.
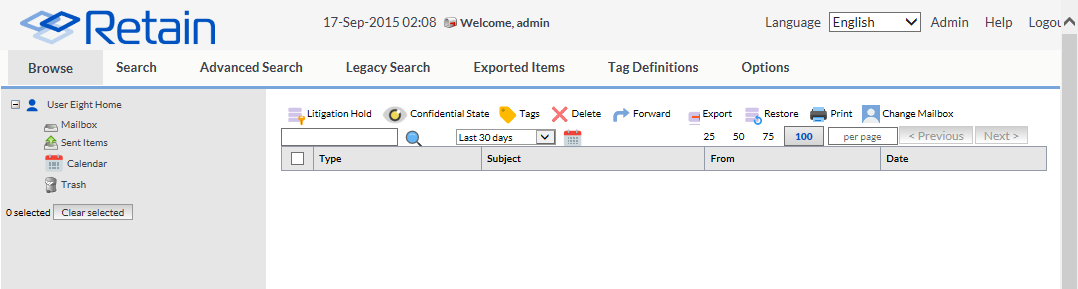
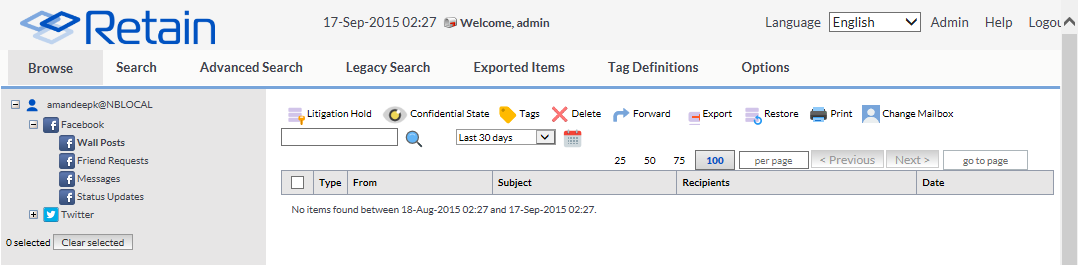
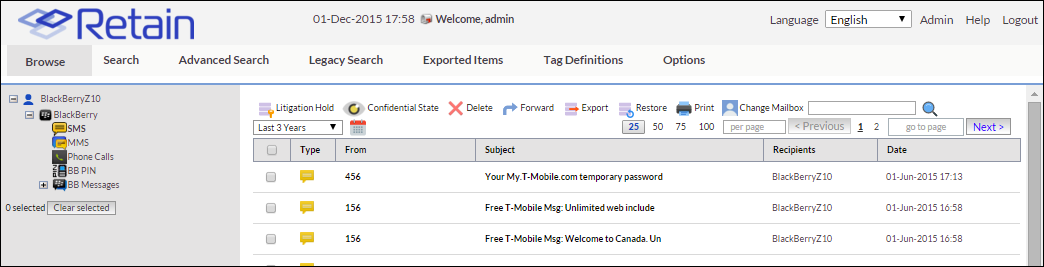
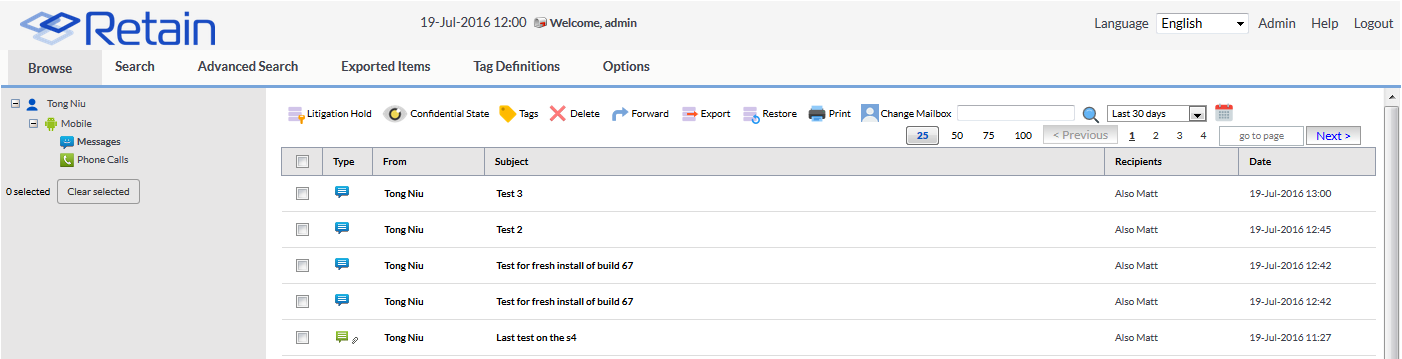
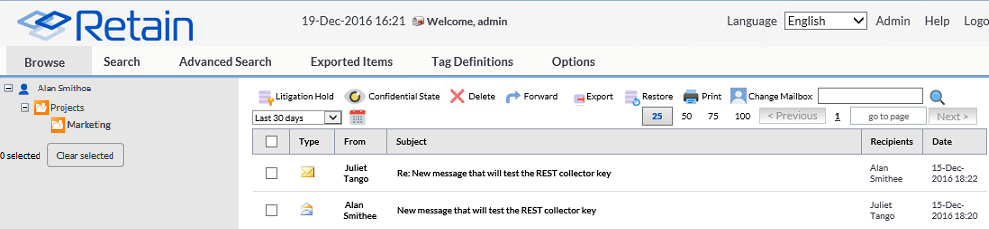
How the browse interface appears will depend on the email system being archived.
Exchange
GroupWise
Social Messaging
Google Apps
BlackBerry
CellTrust

Mobile
GBS Notes
8.3.1 Toolbar
The toolbar has many different tools. Which tools are visible to each user will depend on what user rights they have been granted.
You will first have to select one or more items with the checkbox before these will function.

Date range

Pay special attention to the date range tool. Only messages which fall into this specified time frame will be displayed. The date range can be any of the drop-down options or it can be a custom range as selected through the ‘custom’ calendar button.
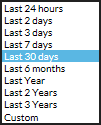
Last 24 hours
Last 2 days
Last 3 days
Last 7 days
Last 30 days
Last 6 months
Last year
Last 2 years
Last 3 years
Custom
Litigation hold

The Litigation hold button applies the litigation hold property to messages and items. Items with a litigation hold cannot be removed from the system. To apply or remove the litigation hold from items in the archive, a user must have the litigation hold right.

To apply or remove a litigation hold, first select the desired item or items, then click the ‘Litigation Hold’ button to open the litigation hold window.
Select whether to apply or remove the hold. Select ‘Ok’ to continue.
Items which have a hold placed on them display a miniature hold icon next to the message icon.

Confidential State

Toggles the confidential state. Confidential items are only visible with Admin rights, or to those specified by the user under the Options | Confidential Exceptions tab. Items which a user has marked in their box as Confidential may be viewed by other users who have the ‘See Confidential Items [other mailboxes]’ admin right.
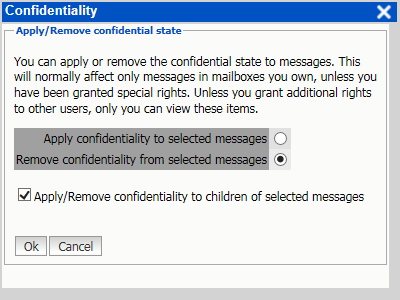
To apply a confidential state to an item, select the item then select the ‘Confidential State’ button.
Items which have been marked confidential display the confidential icon below the message icon.

Tags

The tags icon allows the application or removal of tags from items. This is only visible with appropriate rights. Tags are an informative note which can be attached to any data item in the search messages interface. To apply a tag, select an item and click the ‘Tags’ icon.
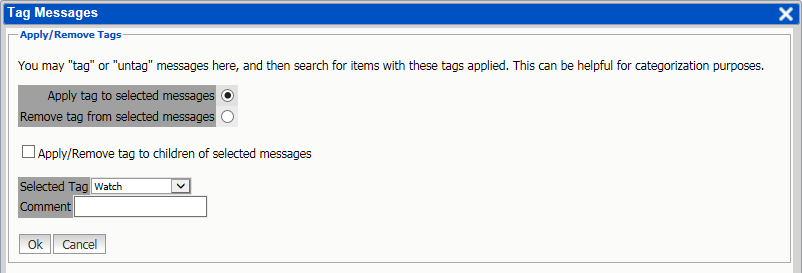
Select the tag which is to be applied. All tags open to use by the user will be displayed. There is no limit to the amount of tags an item may have. An additional comment may be added to the tag for the specific item or items selected. Additionally, any associated items or messages, ‘children’, such as all messages in a thread, may also be selected for tag creation. Tags must be created previous to applying them to messages. See the Tag Definitions tab for more info.
Messages with a tag applied to them, either a global or personal, will show a miniature tag icon next to the message or item icon.
Delete

The delete option allows users to mark items for removal from personal archives. This right is only visible with rights. To delete an item, highlight the item and then select the ‘Delete’ button.
The Delete right is not a default right, it must be specifically added to users or groups. Messages or data marked to be deleted will not necessarily be immediately removed, but will be queued for deletion. The actual item removal will depend on server availability and the amount of items queued for deletion.
Forward

The Forward option allows users to forward messages out of their archive to a specified address. This right is only visible to users who have the Forward Messages right. The STMP server must be setup by the admin user under Server Configuration | Notification for this to function successfully.
Select a message or messages and then the ‘Forward’ button. Specify the address or comma-separated addresses the messages should be forwarded to, a desired subject, and any comments. Finally, select the ‘Forward Messages’ button and Retain will send the message via SMTP. This is a default user right.
There will also be a notification entered in your Notification Center found under "Welcome, [username]" at the top center of the Retain Mailbox web console.

Export

The Export option opens a PDF export window to create a PDF of the selected messages and emails a notification to the specified email address. Messages will be displayed as navigable files in an Adobe PDF Portfolio. The default view provides a list on top of the PDF viewer which works as a table of contents to provide access to the exported archive and requires Adobe Flash to be installed on the viewing workstation.
Core Settings tab
Select the desired message or messages and then the ‘Export’ button.
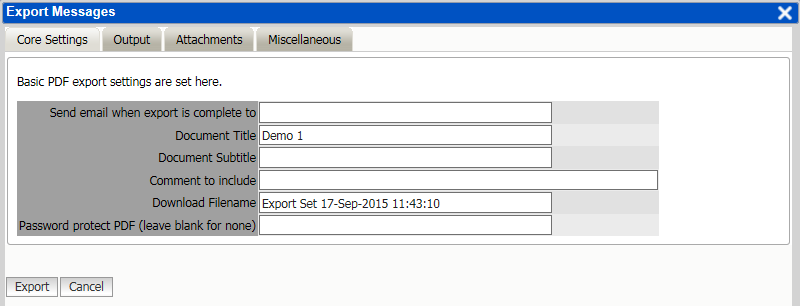
Basic PDF export settings are set here.
Send email when export is complete to
Document Title
Document Subtitle
Comment to include
Download Filename
Password protect PDF (leave blank for none)
Output tab
Fill out the various options as desired.
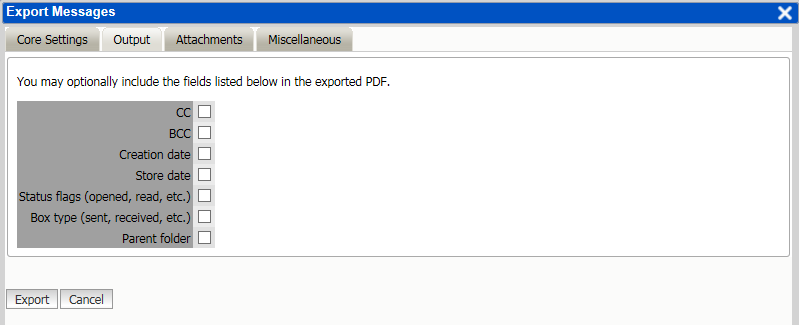
CC
BCC
Creation date
Store date
Status flags (opened, read, etc.)
Box type (sent, received, etc.)
Parent folder
Attachments tab
File output and included fields can be edited
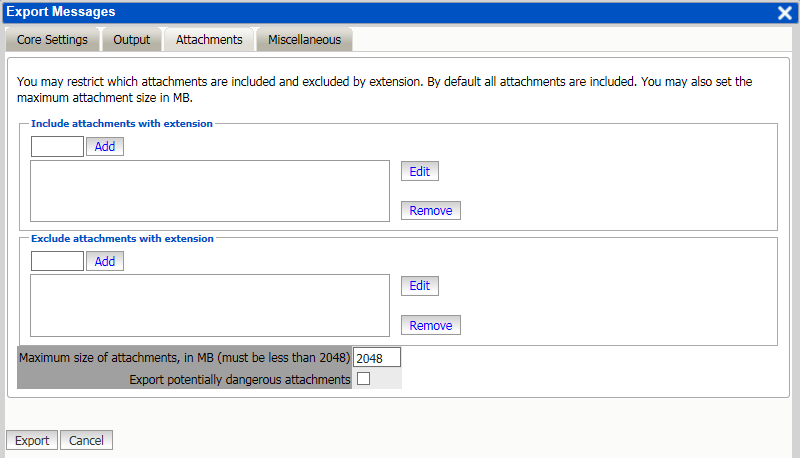
You may restrict which attachments are included and excluded by extension. By default all attachments are included. You may also set the maximum attachment size in MB.
Include attachments with extension
Exclude attachments with extension
Maximum size of attachments, in MB (must be less than 2048)
Export potentially dangerous attachments
Miscellaneous tab
Select which attachments to include and exclude from the PDF.
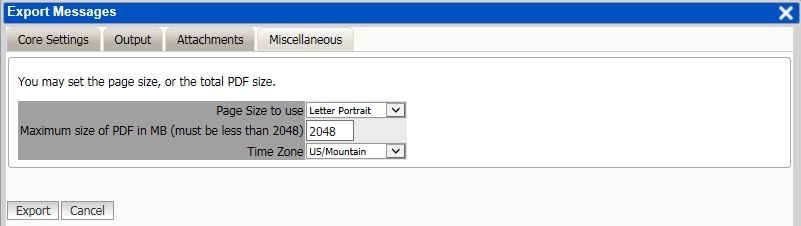
You may set the page size, or the total PDF size.
Page Size to use
Letter
A4
Maximum size of PDF in MB (must be less than 2048)
Time Zone
Additionally, any restrictions to the size or time zone for the PDF. If the archive size does not exceed the maximum size, then the archive will be contained in one file. If the archive is larger than the defined limit, it will be exported in multiple PDFs. Time zone information will be used for formatting any time and date information in the email headers. The time written to the cover sheet and date column in the PDF table of contents is written according to the time zone of the Retain Server.
When ready to export, select ‘Export’. Depending on the size of the selected archive, the export may take some time.
Currently running export jobs are listed under the ‘Exported Items’ tab.
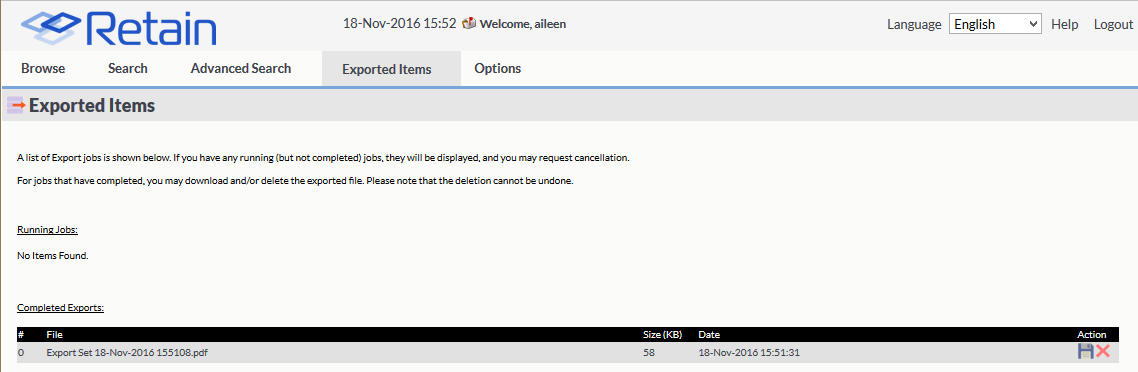
Once complete, a notification email is sent, if a notification address was provided, and the PDF is available under the ‘Exported Items’ tab. Locate the desired export and select the disk icon to download the finished PDF. There will also be a notification entered in your Notification Center found under "Welcome, [username]" at the top center of the Retain Mailbox web console.
Restore

This option restores messages to the message system. Forwarding is the preferred method to return mail to the email system. To use, select the desired messages and select the ‘restore’ button. Once there, select the target message system and mailbox. (If the user has rights to restore to any mailbox, the target mailbox must be selected. Select the ‘Restore Message’ button and messages will be restored to that account.
Restoring a message which currently exists in the target mailbox results in a duplicate message existing in that mailbox. It is recommended to only restore messages that have been deleted from the mail system, but exist in the Retain archive.
Restore works best with On-Premise Exchange, restoring the message completely to the Exchange Inbox, which is seen as a new message by the system. With GroupWise, it restores a link to the message, if stubbing server is configured in Retain but stubbing does not need to be enabled in GroupWise and we do not recommend enabling Stubbing in GroupWise. Restore does not work with GMail.

This option allows users the ability to print selected messages. To use this option, select the desired messages and then select the ‘print’ button. The ‘print’ function utilizes the user’s local print configuration; if there is no printer accessible to the local workstation, print will not function. This is a default user right.
Change Mailbox

This option allows users who have the administrator right to see all mailboxes, or who have proxy rights to another mailbox, the ability to switch mailboxes.
Quick Search

The Quick Search is a way to rapidly search for data in the subject field of messages in the selected mailbox.
Results per page selector

Results are automatically set to 100 per page. The selector allows the user to specify how many messages are to be displayed on each page. There are predefined values, or the user may put their own dictated limit in the field provided.
Previous/Next

The Previous/Next option allows users to navigate through the search or browse result pages. The total number of pages is displayed next to the ‘Next’ button.
Select a number to immediately move to the desired page
Go to Page

The Go To Page option allows users to specify what page they want to jump to.
Select the option box, specify the page number desired, and hit ‘enter’ to immediately go to that page.
Quick View

The Search interface incorporates a quick view option. This option allows users to quickly view the body of a message without having to actually open the message in the interface. To access the quick view, click on the message or data item icon next to the check box.
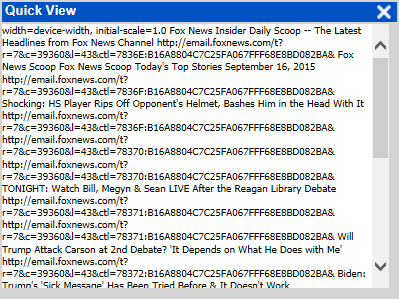
Once selected, the quick view window opens to quickly display the message contents.
The Quick View is a display only function and there are no actions available from this interface. When complete, close the window by clicking on the ‘X’ at the top right corner of the window.
Selection and sorting

The top column bar contains all the different column headers and is located directly beneath the toolbar. This tool contains a select all/none checkbox as well as sortable column headers. Every column in this bar may be sorted by order except the ‘Mailbox’ and ‘Folder’ columns. (They are multi-value attributes and thus are not sortable.)
Browse Tab Defaults
By default, the browse window remembers which mailbox last browsed was, and will return to that mailbox when opened. When Administrators first login, they will be taken immediately to their mailbox. Afterwards, the browse will remember their last location.