3.12 Logging into Retain
3.12.1 Logging In
From your web browser, type: http://<YourServerIP>/RetainServer or https://<YourServerIP>/RetainServer. The capital R and S are important, as it is case-sensitive.
You’ll be brought to the login screen:

After you log in, you will see the main administration page: (Non-administrators will only see the Search interface Section 9.0, Search User Guide.)
NOTE:Only users possessing at least one administrative role will see the administrator’s screen login. Other users will be forwarded to the Search Interface.
An informational screen is displayed, showing among other things the latest job activity, server health information, and software updates that are available.
At this point you will want to continue configuring Retain Install Checklist. Reporting & Monitoring, a module and a job still need to be configured before data will be archived.
3.12.2 Status and Updates
The status page has four different tabs which show the status of your system. The status page is set to default to the tab that is deemed to require the most attention, or is deemed to hold the most important information at a given time. For instance, if an error has occurred, that tab will be shown, likewise the update tab will be shown by default if there is an update available. The tabs are discussed below.
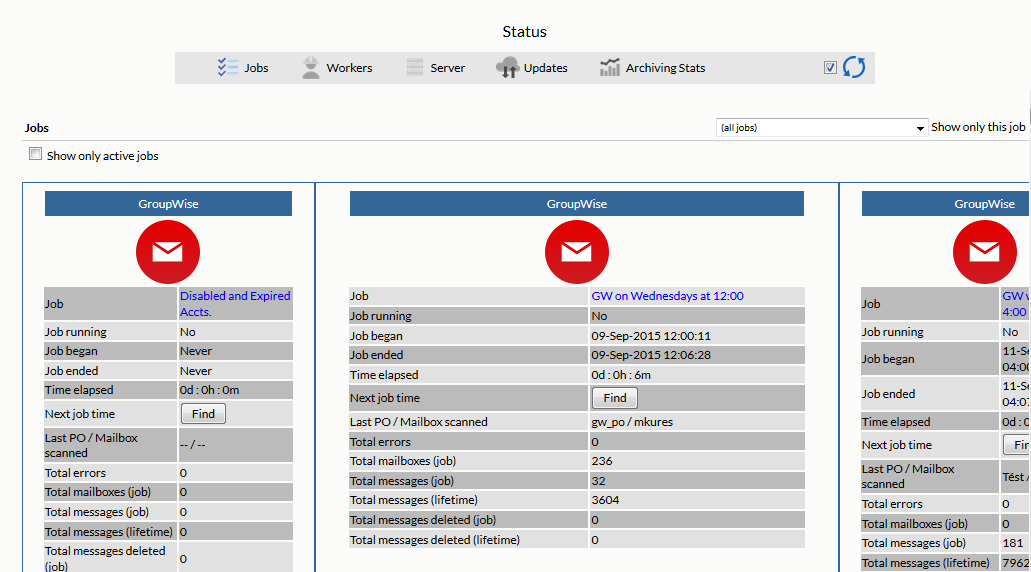
Jobs Tab
The Jobs tab, shown above, shows the jobs that are assigned to the server and their status. You also can select the “show only active jobs” check box, and only jobs that are currently running will be displayed.
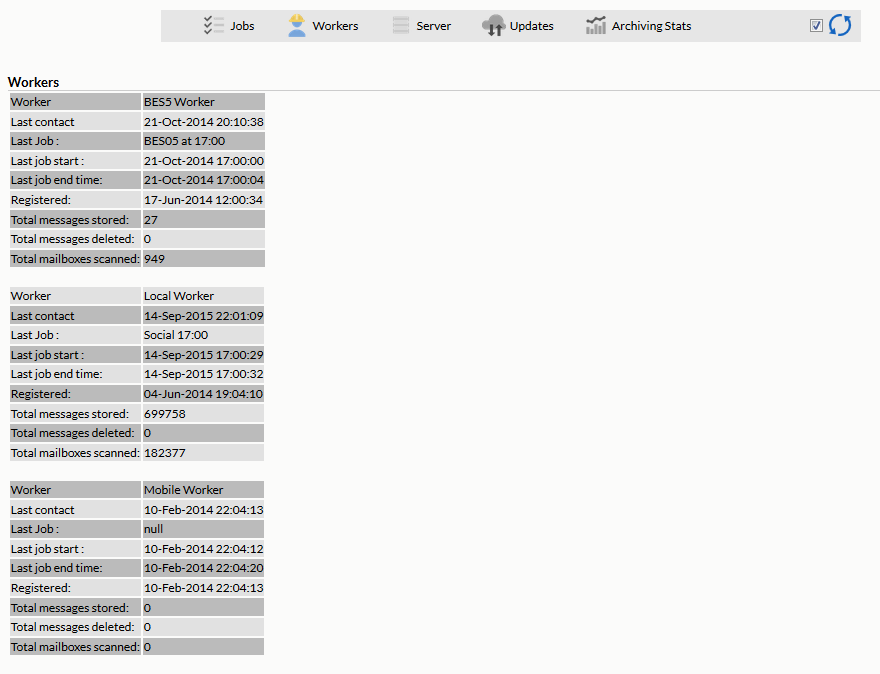
Worker Tab
The workers tab displays the workers and their last active jobs, connections, and totals.
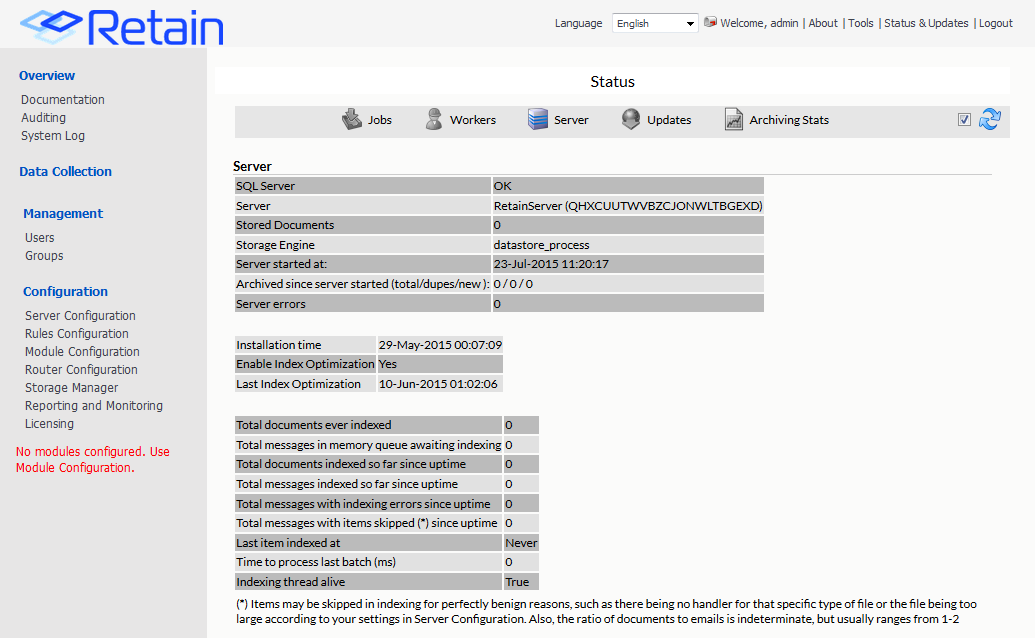
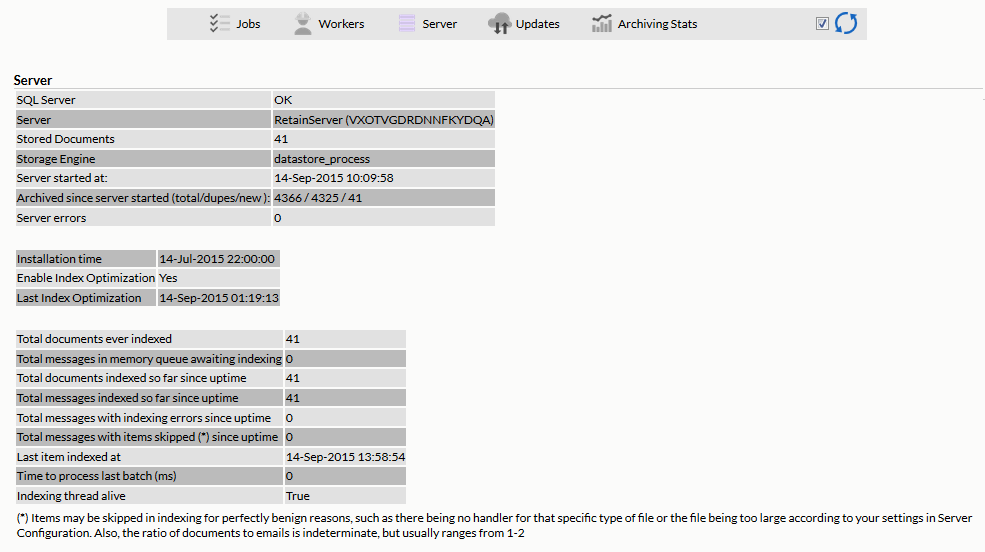
Server Tab
The Server tab shows the basic status of the Server with the messages archived and maintenance information.
Updates Tab
The updates tab displays whether there is a later version of Retain available. This tab will be displayed, by default, only if there is a new update available.

Archive Stats Tab
The archive stats tab is a small statistics portal which allows rapid searching of the archive statistics in the server. The search allows for a time frame, and the categories shown below: Critical Errors, Warnings and Critical Errors, and Summary. Once the ‘Search’ button has been pressed, a new window or tab is opened to display the search results. This function had been deprecated as it has been replaced by Reporting and Monitoring.

3.12.3 Saving Changes
Retain uses a web interface for all administration, and is unaware of changes made on the web page until the information is returned to the Server. To make sure you keep all changes you have made in the interface, select the “Save Changes” button to commit the change to the Server. When you make a change, the website is aware and you will see the ‘Save Changes’ button become colored at the top right of the screen:
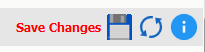
When the “Save Changes” lights up, click on the disk icon to save any changes you have made on this screen otherwise your changes will be lost.
The top right bar also contains a button to reload the current page and a help button which opens a window displaying critical information.
3.12.4 Notifications
Notifications are automatically sent to the administrator whenever data in Retain is moved. Moving data consists of system migration, exporting, forwarding, restoring, and publishing. By default, the address used is the address supplied during severs activation.
To spawn the notifications page, click on the ‘Welcome’ link at the top of the page. When notifications are pending, the red flag on the mailbox is lifted.
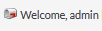
Selecting the mailbox or welcome link opens a new notifications window.
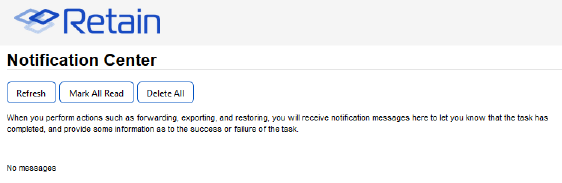
The highlighted notifications are new, unread notifications and events. Selecting the event notification provides all the pertinent information regarding the event.
If there are any errors, a truncated error log is provided which details the error and the reason for the error.