2.7 Installing Additional Servers into an Existing Network
If the Secure Messaging Gateway server is being deployed into an existing Secure Messaging Gateway network, there are a few settings which need to be configured. The Secure Messaging Gateway Network shares the databases to keep the configuration, quarantine, and statistics up to date and common across the whole system. A Secure Messaging Gateway Network is utilized when multiple servers are required to handle the load or must be separated due to the host network and design where multiple Secure Messaging Gateway appliances at multiple locations are required.
2.7.2 Setup
In order for the databases to be accessible to all Secure Messaging Gateway servers, Postgres must be configured to allow remote connections.
-
In a browser, open the VAAdmin Console by going to https://<ip or dns of SMG server>:9443 and login using vaadmin and the password and configure Postgres to allow remote connections.
-
Enable connections to Postgresql by going to and entering the IP Addres of the SMG server in .
-
-
Restart Postgres by going to the , select .
Postgres must be restarted to load the new configuration. Once Postgres has been restarted, the rest of the Secure Messaging Gateway servers may be deployed and initialized.
With Postgres now configured to allow multiple connections, the initialization of the rest of the Secure Messaging Gateway servers may be completed. Make sure that the address for the newly configured Postgres server is used for configuring the remaining servers.
-
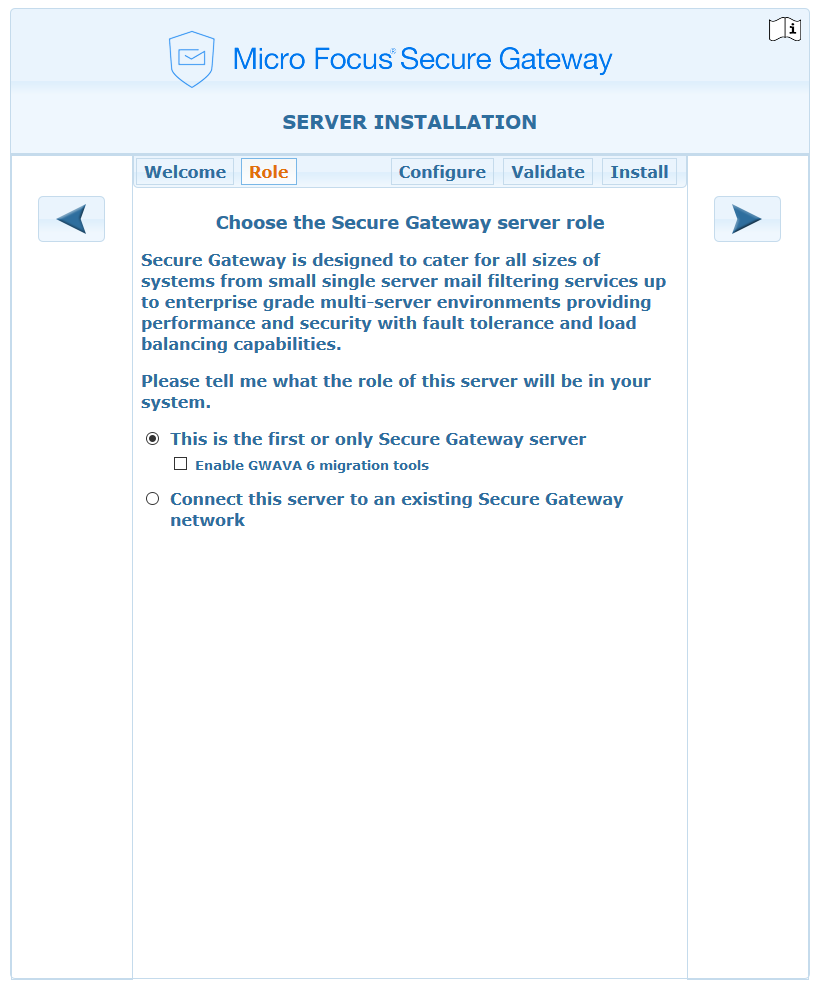
Install the next Secure Messaging Gateway server. Select .
-
Configure next Secure Messaging Gateway server.
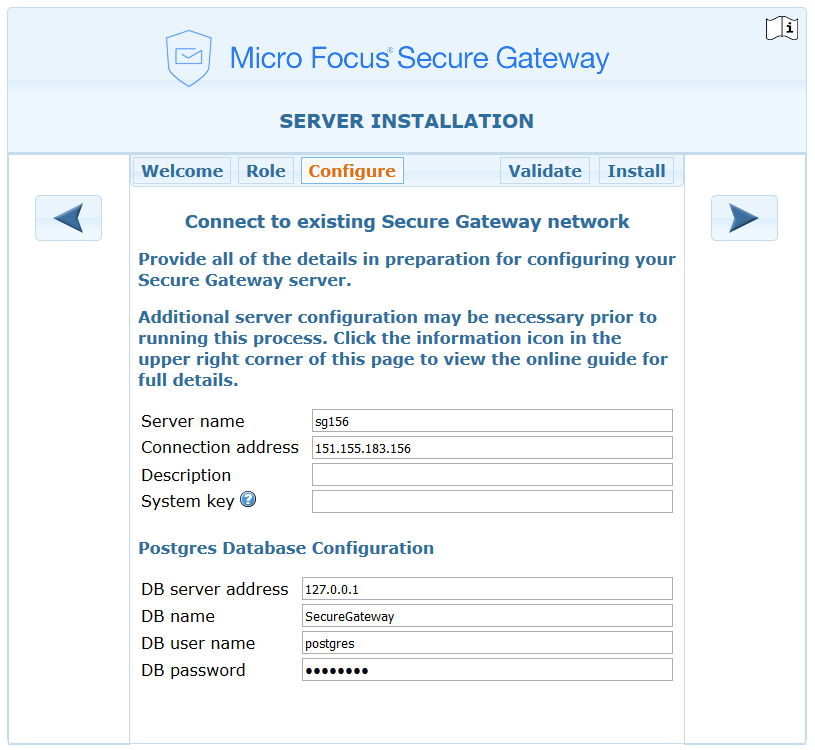
Server name: The name of this server will use.
Connection address: The IP address of this server.
Description: An optional field to describe this server.
System key:The system key is a unique value used to secure your Secure Messaging Gateway system, that is shared across all servers. Due to its sensitive nature, it is not stored in the system database.
Typically you can leave this entry blank, and an existing gwavaman program will be contacted to acquire the key during the validation step.
If the validation process cannot obtain this key from another server, you will need to access the config/system.xml file inside the Secure Messaging Gateway directory on an existing server and enter the <privatekey> entry here manually.
Please note that entering an invalid key will cause secure data to be incompatible between servers and will very likely lead to system instability.
DB server address: The address of the database server configured in Setup above on the first Secure Messaging Gateway server.
DB name: The name of the database from above.
DB user name: The username for the database.
DB password: The password for the database.
-
Validate and install the server.
-
Login and configure the server. Se Post-install Tasks.