6.2 Creating a Block and Quarantine with Exceptions Policy
For this example we will assume that a supplier has an overly enthusiastic marketing department and you have received orders to reduce the amount of unwanted email but allowing the desired email through.
In this case, the Inbound Mail Filter Policy is a wizard created policy that deals with general spam, and malware. However, unwanted message are getting through and need to be dealt with.
6.2.2 Create the Policy
-
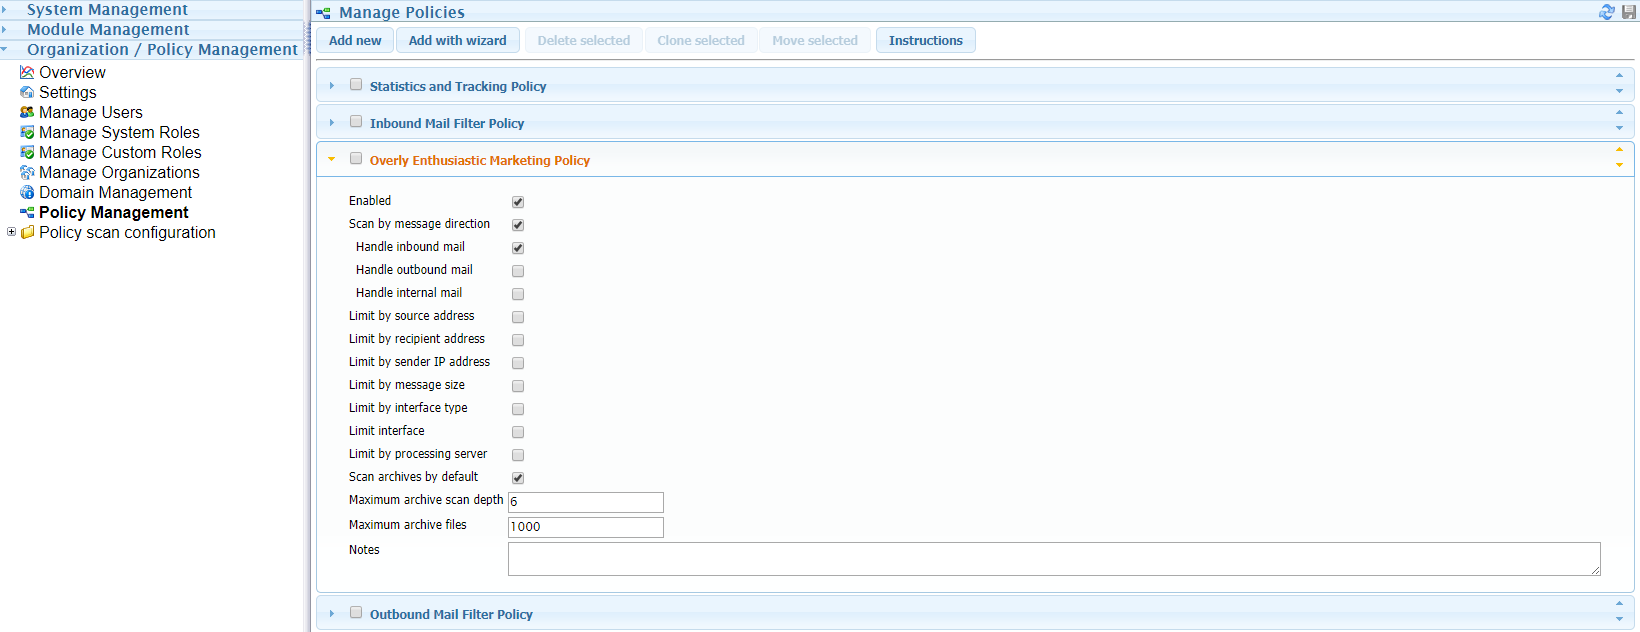
Under Organization / Policy Management | Policy Management, click Add New to create a new policy and name it something easy to remember like Overly Enthusiastic Marketing Policy.
-
Set the Policy Message Direction
-
Open the panel and enable Scan by message direction then enable Handle inbound mail.
-
Configure the Scanner
-
Open the Policy scan configuration folder and select the policy. The workbench will be empty.

-
Add the Filter
-
There are a number of filters that could be used to manage the unwanted mail.
-
Black List: This requires a known Sender address and Recipient address. This is useful if the CEO is getting too much email from a particular marketer.
-
Email Address: This can filter by sender or recipient address and is useful when one sending is sending to many users in the system.
-
IP Address: This filter's criteria is an IP address or IP range. Useful if you are getting spammed from a particular company or country.
-
Message Text: This filter will scan the message body, subject, header and/or source file for particular text.
-
For this example we will use the Message Test filter.
-
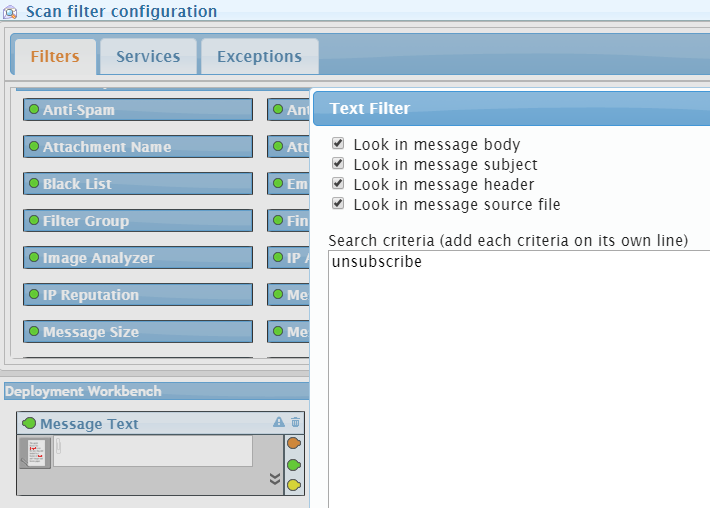
Drag the Message Text filter from the Filter Templates pane to the Deployment workbench.
-
Click on the filter icon to open the filter criteria, enable all sources and enter, for this example, the word "unsubscribe". More words may be added, each on their own line.
-
The filter will now scan messages for the word “unsubscribe”, but without one or more services nothing will be done with the message.
-
Add Service
-
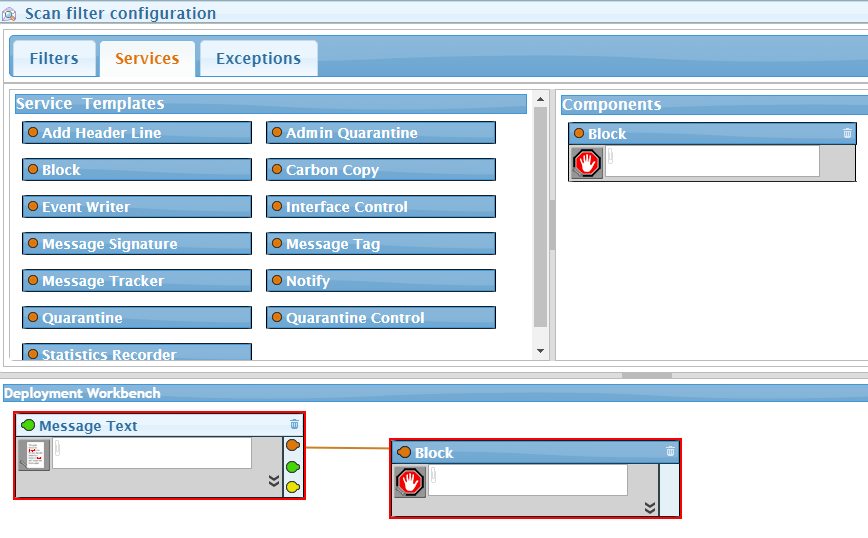
Select the Services tab and drag and drop the Block service to the workbench, or drag and drop the red Services pin and select Block.
-
Messages containing the word “unsubscribe” will now be blocked by Secure Messaging Gateway. However, some of your users may want to subscribe to certain newsletters so there needs to be a way to allow them to allow them through. That means Quarantining the messages.
-
Add the Quarantine Service
-
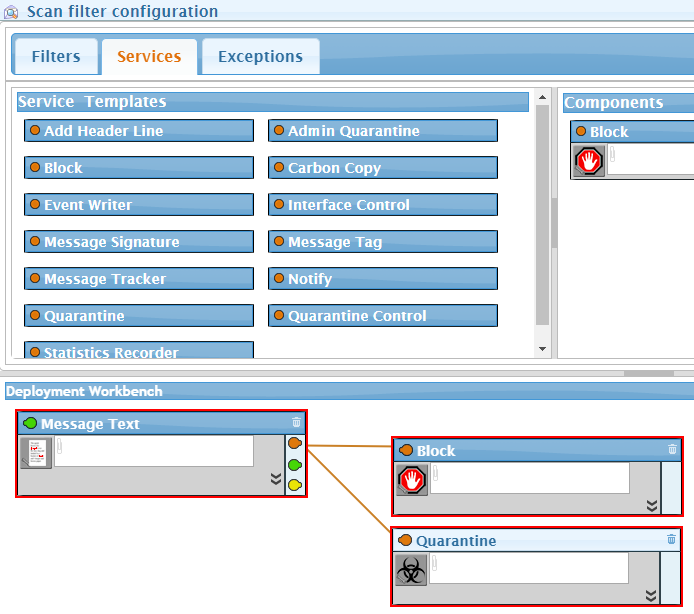
Select the Services tab and drag and drop the Quarantine service to the workbench, or drag and drop the red Services pin and select Quarantine.
-
As part of the post-install tasks Quarantine digests and user auto-provisioning should have been configured. Now when messages containing the word “unsubscribe” enter the system, they are blocked and saved in the quarantine and a digest sent to the user to alert them to the quarantined message(s).
-
But there may be certain messages that have to get though from accounts at Overly Enthusiatic Marketing. An exception can be created.
-
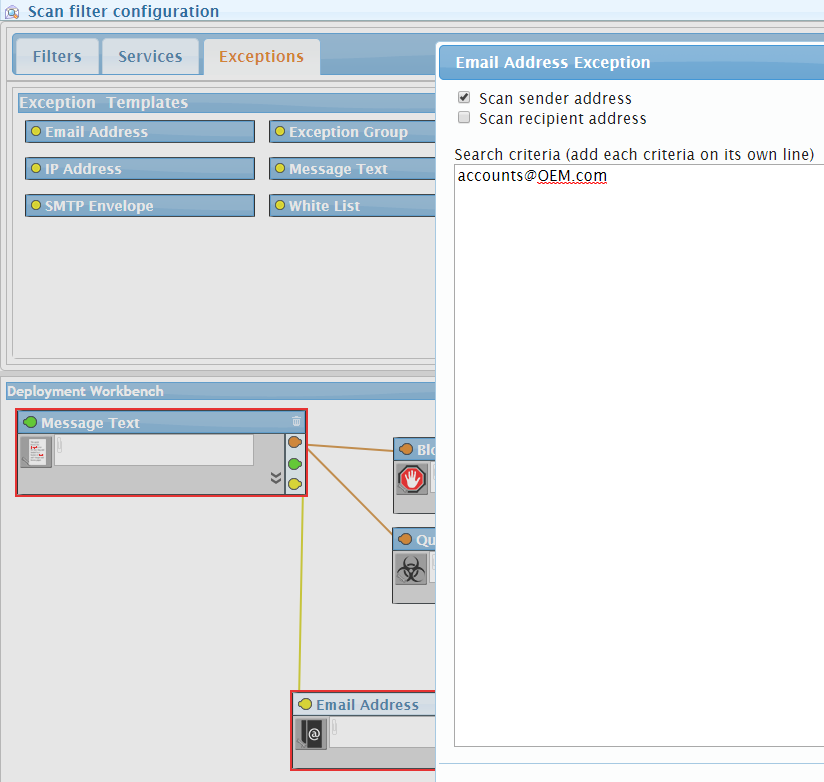
Add an Exception
-
Select the Exceptions tab and drag and drop the Email Address exception to the workbench, or drag and drop the yellow Exceptions pin and select Email Address. Click on the icon of the exception to configure with an email address. In this example, accounts@OEM.com.
-
Click on Save and the policy will become active immediately.