2.6 GWAVA 6 to Secure Messaging Gateway Migration
The migration tools can migrate your data from GWAVA 6 to Secure Messaging Gateway. The migration tool can be run multiple times so a piecemeal strategy is possible for the migration. For example, one recommended strategy is to setup Secure Messaging Gateway and import the exceptions from GWAVA 6.
2.6.1 Pre-migration Tasks
A Secure Messaging Gateway server can be added to an existing GWAVA 6 system and the settings migrated from the GWAVA 6 server.
If the Secure Messaging Gateway server is being deployed into an existing GWAVA 6 network, Secure Messaging Gateway can be added to an existing GWAVA 6 network and the settings migrated from the primary GWAVA 6 server. There are a few settings which need to be configured, these will only apply to the primary GWAVA 6 server.
The GWAVA 6 Network shares the databases to keep the configuration, quarantine, and statistics up to date and common across the whole system. A GWAVA 6 Network is utilized when multiple servers are required to handle the load or must be separated due to the host network and design where multiple GWAVA 6 appliances at multiple locations are required.
Determine type of database in use:
-
Open the GWAVA Management Web page.
-
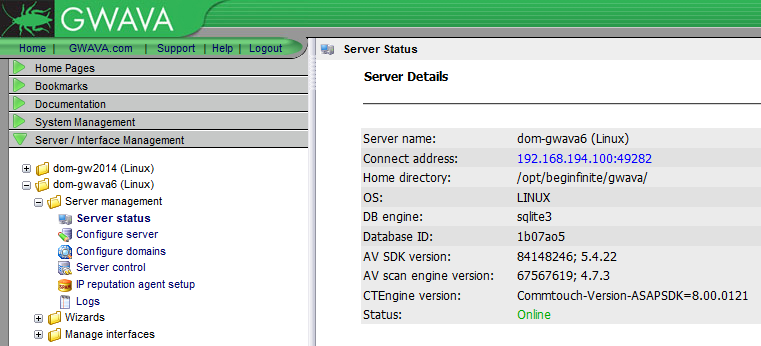
Go to Server / Interface Management | <servername> | Server management | Server status.
-
Under Server Details | DB engine, it will tell you if you are using sqlite or postgres.
For SQLite, skip to the Migration.
For Postgres, setup the primary GWAVA 6 server to allow the migration. The following steps must be completed. All Postgres steps must be completed as ‘root’ user:
-
Configure Postgres to allow remote connections.
-
Determine and set the connection addresses allowed.
-
Restart Postgres.
-
Complete the initialization of the remaining GWAVA 6 servers.
In order for the databases to be accessible to the Secure Messaging Gateway server, Postgres must be configured to allow remote connections.
-
Configure Postgres to allow remote connections.
To unlock the databases, configure Postgres to allow remote connections.
Telnet into the server.
-
If connecting to a GWAVA 6 server. A configuration file must be modified as root user on the GWAVA 6 server. Make a copy as a backup before modifying the file. The file which must be modified is:
/opt/beginfinite/gwava/postgres/pg_hba.conf
As the root user, open the pg_hba.conf file with the preferred editor and locate the line:
# IPv4 local connections:
host all all 127.0.0.1/32 md5
This line only specifies connections from the localhost. Add new connection addresses to this line to allow for multiple and remote connections. It should be of the form:
host all all <Secure Messaging Gateway IP Address>/<Subnet mask> password
For example, adding a remote connection:
# IPv4 local connections:
host all all 127.0.0.1/32 md5
host all all 10.1.29.0/24 password
-
If connecting to a GWAVA 6 network, determine and set allowed connection addresses.
Modifying the pg_hba_conf file correctly requires that the IP addresses of the remaining GWAVA 6 servers, if part of a GWAVA 6 network. The addresses may be specified individually or they may be specified in a range. For example, the above specified address setting of “10.1.29.0/24” will allow connections from any address of 10.1.29.x.
If a subnet of addresses is desired, it may also be specified as such:
10.0.0.0/8 Will allow any connection from addresses 10.x.x.x
172.16.0.0/16 Will allow any connection from addresses 172.16.x.x
192.168.1.0/24 Will allow any connection from addresses 192.168.1.x
Or if a specific IP is to be specified:
192.168.1.20/32
Once the file has been modified to allow connections from the desired addresses, save the file.
Open port 5432 in the firewall.
-
Restart Postgres.
Postgres must be restarted to load the new configuration. Once Postgres has been restarted, the rest of the GWAVA servers may be deployed and initialized.
rcpostgresql-9.1 restart
or
/etc/init.d/postgresql restart
-
Complete the initialization and deployment of the remaining GWAVA servers.
With Postgres now configured to allow multiple connections, the initialization of the rest of the GWAVA servers may be completed. Make sure that the address for the newly configured Postgres server is used for configuring the remaining servers.
-
Revert Secure Messaging Gateway installation to default state by renaming or removing the configuration files from two locations.
Telnet into the Secure Messaging Gateway server.
-
Rename or remove the files in /opt/gwava/config
root@gwava153:/opt/gwava/config# ll
total 4
drwxrwx--- 2 root gwava 24 May 26 10:48 ./
drwxr-xr-x 14 root root 179 May 26 10:48 ../
-rwxr----- 1 root gwava 407 May 26 10:48 system.xml*
-
Rename or remove the files in /opt/gwava/gwavaman/http_local/security
root@gwava153:/opt/gwava/gwavaman/http_local/security# ll
total 8
drwxrwx--- 2 root gwava 67 May 26 10:48 ./
drwxrwx--- 4 root gwava 36 May 26 10:48 ../
-rw-r--r-- 1 www-data www-data 0 May 26 10:48 install.lock
-rw-r--r-- 1 www-data www-data 108 May 26 10:48 pg_auth.php
-rw-r--r-- 1 root gwava 62 May 26 10:48 privatekey.php
-
Restart apache
service apache2 restart
-
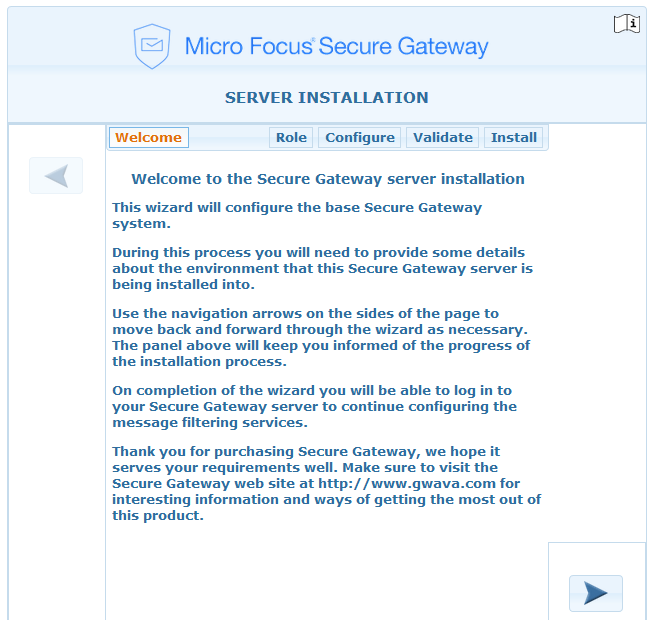
Browse to Secure Messaging Gateway
-
Setup Secure Messaging Gateway
-
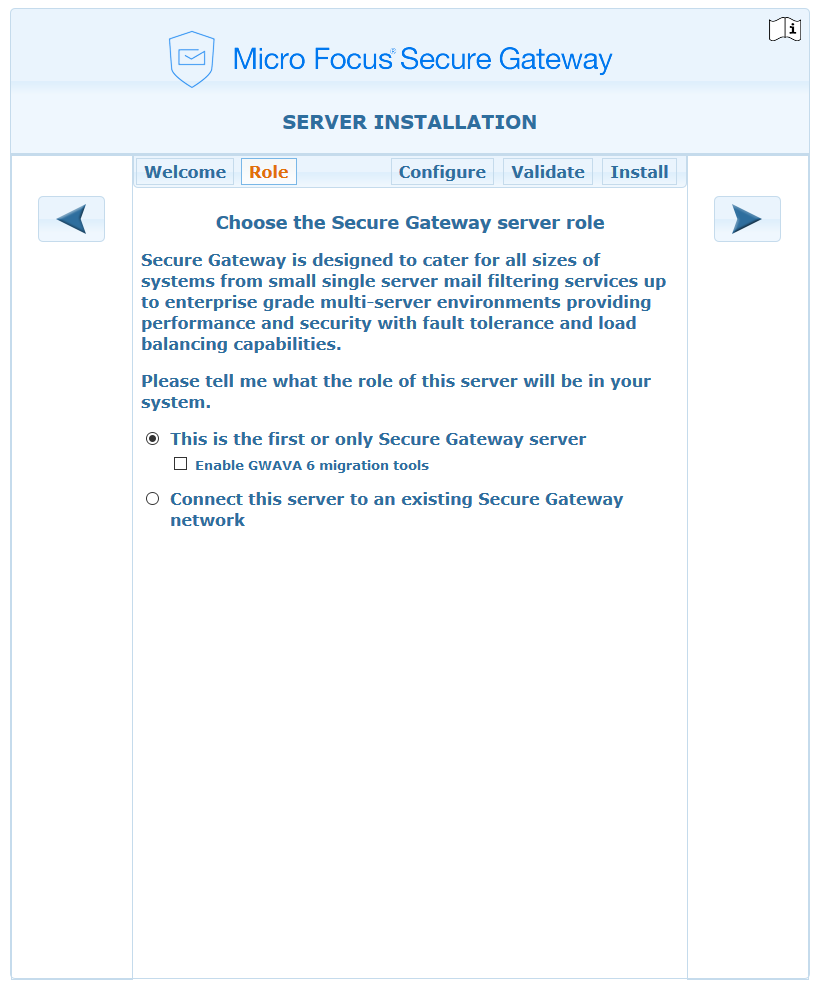
Setup the Server Role and enable Enable GWAVA 6 migration tools.
-
Configure the Secure Messaging Gateway server
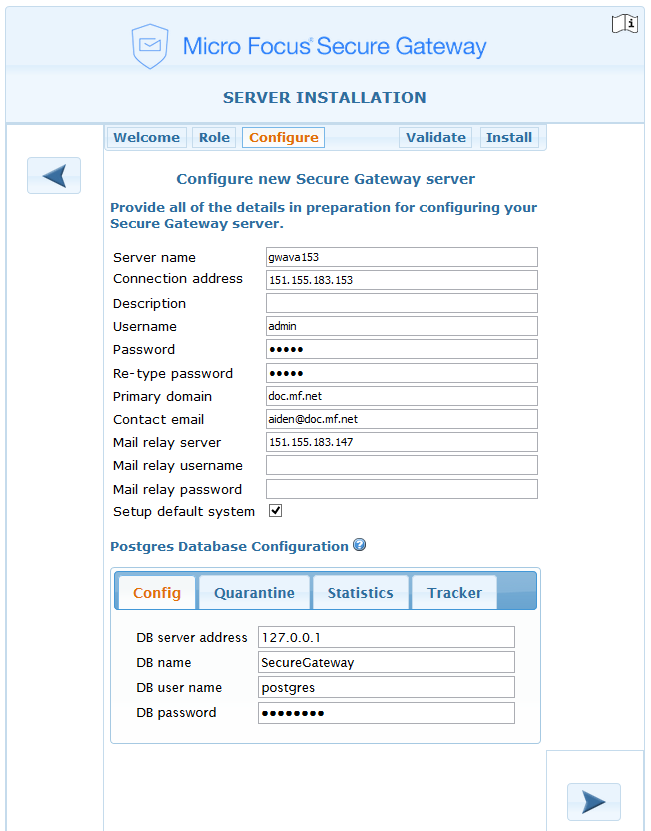
-
Validate the server installation

-
2.6.2 Migration Tasks
GWAVA 6 Migration Tool
On the Secure Messaging Gateway server, log into Secure Messaging Gateway System Administration.
Select System Management | GWAVA 6 Migration

The migration tool is locked for security reasons. To unlock the tool, log into the SMG terminal and run the command: /vastorage/smg/assets/bin/linux/scripts/migration_enable
There are two choices:
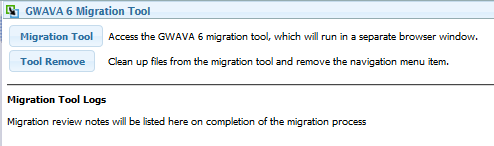
Migration Tool will open a new window to begin the process.
Tool Removal will clean up the migration files and remove the menu item.
By selecting the migration tool you will be given an instruction page.
The migration tool will migrate:
-
GWAVAMAN database
-
Quarantine Management System Database(s)
-
and/or User Exceptions Database.
The migration tool will not migrate:
-
SSL certificates
-
QMS data
-
IP Settings
-
Custom notifications
-
Message Tracker data
-
Interfaces
-
Connection drop settings
-
Spam reporting
-
Conversation tracking
-
SMTP relay configuration
-
Proxy configuration
-
Reporting
Click on the next arrow (>>) to continue
Configure GWAVA 6 Database Connections
Enable a database to reveal its settings. The migration toll can be run as often as desired, so piecemeal migrations are acceptable.
For internal (sqlite) databases, you will need to upload the databases onto the Secure Gateway server so it can access the file directly. Uploading is easily done with the options provided in this toolkit. The files that are required can be located at the following locations on your GWAVA 6 server. On linux, [gwavaroot] will be /opt/beginfinite/gwava and on Windows it will be \Program Files\GWAVA\GWAVA.
-
GWAVAMAN database file: [gwavaroot]/config/gwavaman.db
-
QMS User database file: [gwavaroot]/services/qms/data/db_setup/userdb.sqlite3.xml
-
QMS User database file: [gwavaroot]/services/qms/data/qms_user.db
-
QMS Digest database file: [gwavaroot]/services/qms/data/qms_digest.db
-
QMS User Exceptions Database file: [gwavaroot]/services/qms/data/user_exception.db. The user exceptions database is only stored in an SQLite database file and must be uploaded.
For postgres, provide the required information for the database connection.
If you are using the GWAVA 6 Appliance where postgres is the default use the following default values:
-
Database name: GWAVA
-
Database login name: gwava
-
Database login password: gwava
Otherwise, provide the connection information to the database used by the GWAVA 6 server.
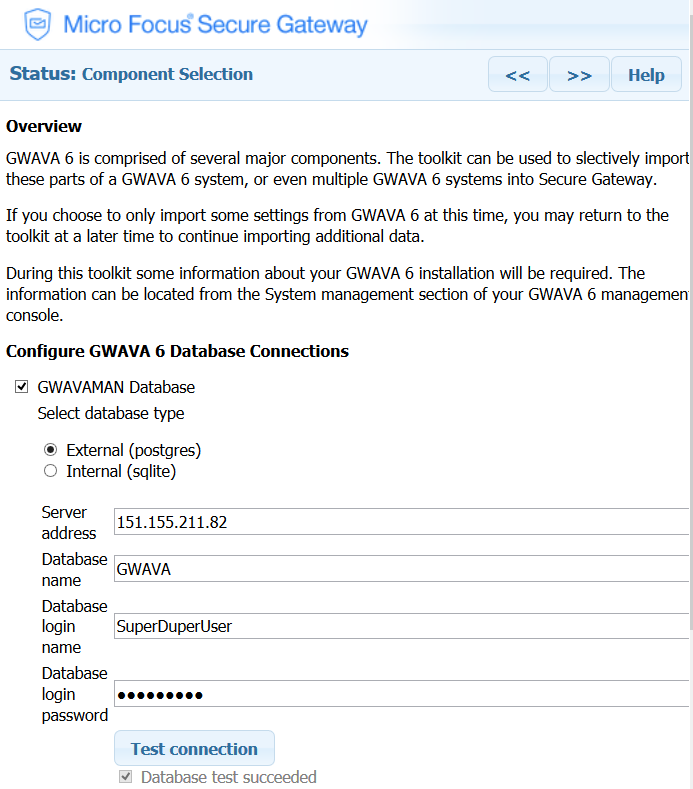
Press Test connection to determine if the database can be accesses by Secure Messaging Gateway.
Press next (>>) to continue. If not all databases are filled in then a warning will appear.
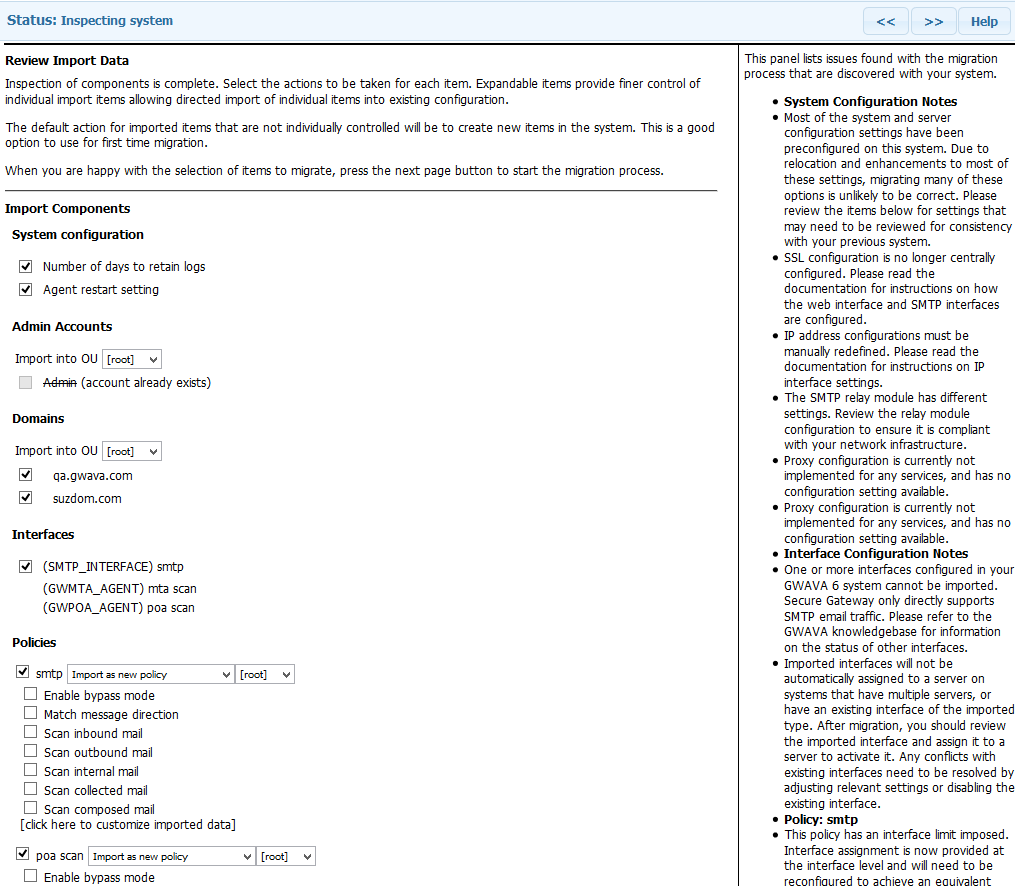
Import Filter Setup
The migration tool can inspect the GWAVA system before importing the data.
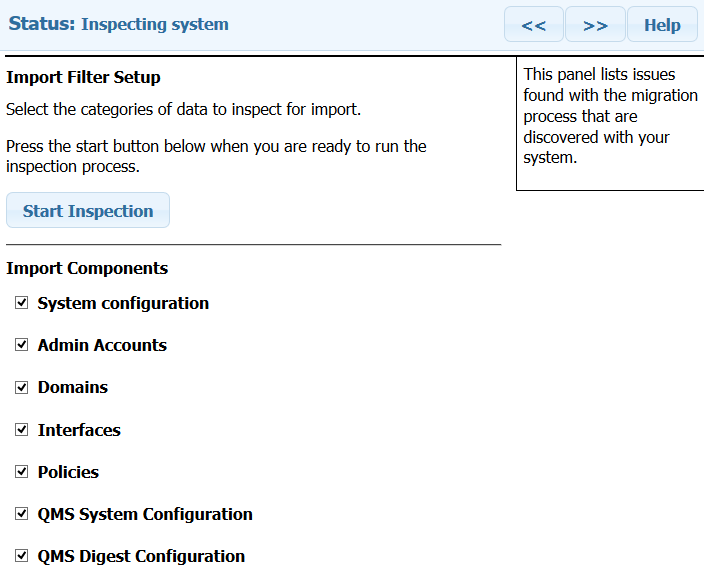
Review the resulting report. The panel at the top right provides detailed information about each section of this migration.
Start the Migration
Click next (>>) to begin the migration. A warning will appear.
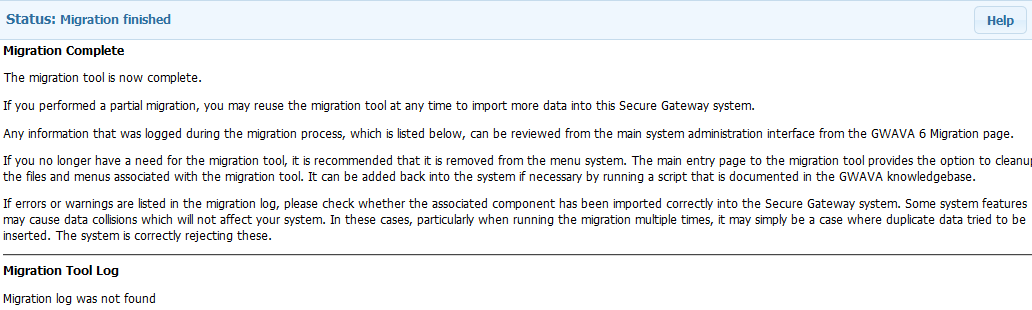
Migration Complete. This will provide a log of the actions taken including the pre-migration inspection.
Post-migration Tasks
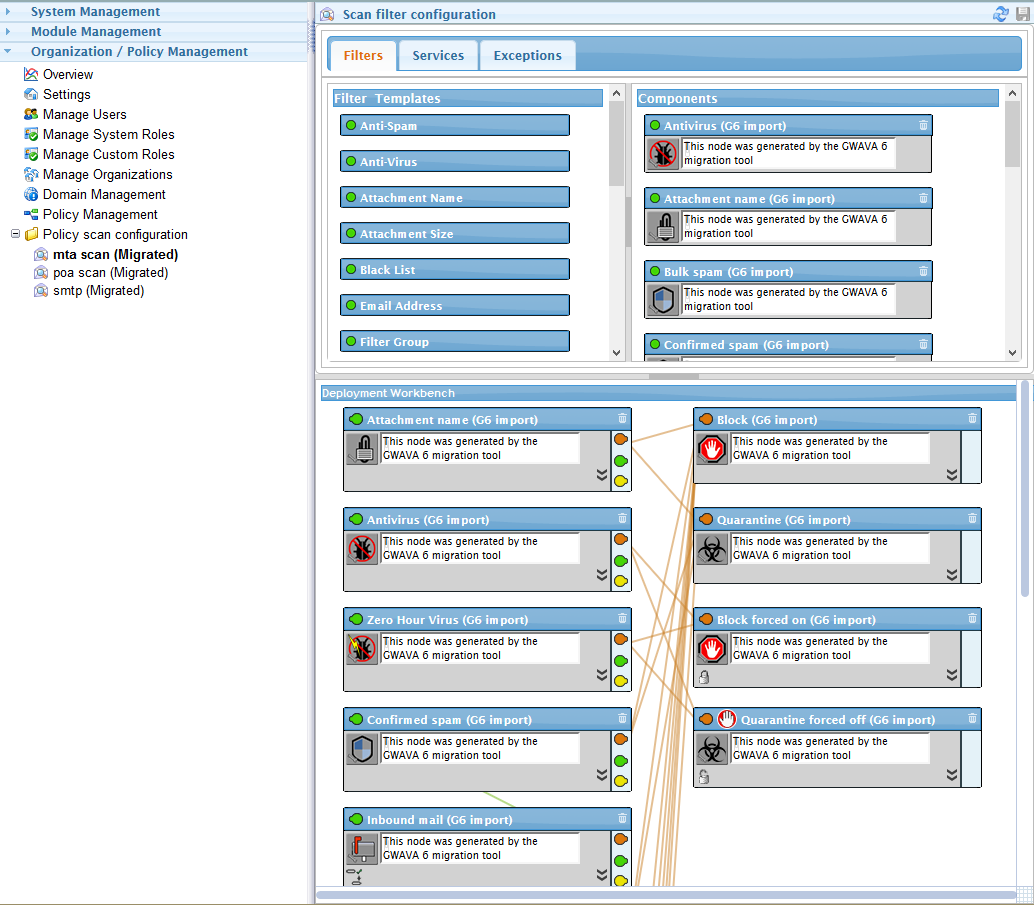
Check that the items were migrated correctly. Migrated data will be marked as (Migrated). For example: mta scan (Migrated).