For eDirectory, rights are automatically granted to a User object if the Novell SecureLogin snap-in to ConsoleOne is loaded when you create that object. If the snap-in isn't loaded when you create the User object, you must grant rights to the User object and to the local workstation cache directory.
Also, if you aren't using eDirectory, you must grant rights to User objects. LDAPSchema.exe doesn't grant rights.
Granting Rights to User Objects
You can automatically or manually grant rights to User objects created after Novell SecureLogin is installed.
Automatically Granting Rights
Using ConsoleOne, you can create a user template that automatically grants rights to required attributes.
Select an O or OU Container object that will contain the Template object.
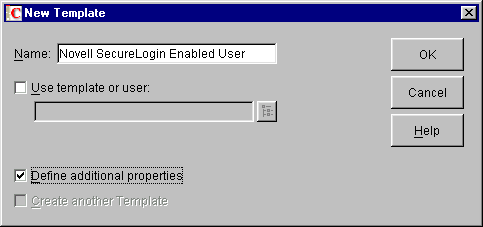
Create a new object of the class Template.
At the New Template dialog box, name the template, check the Define Additional Properties check box, then click OK.
At the properties page for the new Template object, navigate to and select New Object NDS Rights, then select Rights To Other Objects from the drop-down list.
Click New Object > Assigned Rights.
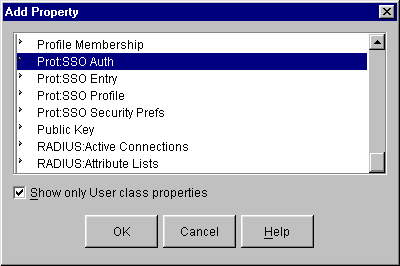
Click Add Property, select the Prot:SSO Auth attribute, then click OK.
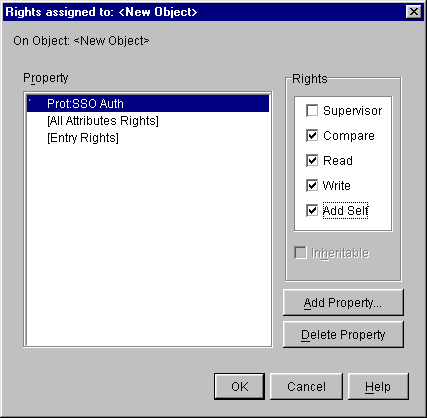
At the Rights Assigned To dialog box, check the Compare, Read, Write, and Add Self check boxes, then click OK.
Configure the Prot:SSO Entry attribute by repeating Steps 5, 6 and 7 for the Prot:SSO Entry attribute.
NOTE: Do not add the Prot:SSO Profile attribute.
Exit by clicking OK.
To use the new template:
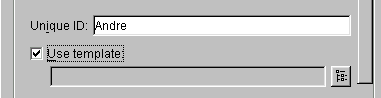
Create a new User object.
At the New User property page, enter a name, enter a surname, check the Use Template check box, then click the Browse button.
Navigate to and select the Template object that you created, then click OK > OK.
Type and confirm a password for the new user, then click Set Password.
Manually Granting Rights
You can manually grant rights to users created after Novell SecureLogin has been installed. Run NDSSchema.exe, which is typically located in the c:\program files\novell\securelogin directory.
This program extends the schema and grants rights to existing users listed in the installation. No harm is done if the schema has already been extended.
Granting Rights to Local Cache Directories
Users on Windows NT, Windows 2000, and Windows XP must have workstation rights to their local cache directory location. To grant rights, do one of the following:
grant rights to the user's cache directory (c:\Program Files\novell\securelogin\cache\VLSC\username)
Use the registry setting to relocate the user's cache to a location that he or she has rights to (for example, the user's documents folder).
You can change where the users SecureLogin cache file is located by setting the following registry key: