Select Operations>Incident Groups Tab
Click
New
Incidents that are related can be linked together to form Groups. Once the Group has been created, the Incidents can be managed together. This may be relevant when mulitple Incidents are:
logged by Users of one department
logged by one Customer
related to a common Description
or Solution.
New Groups can only consist of Incidents that are not already associated with an existing Incident Group, unless the merge facility is used to combine existing Groups.
Users can group Incidents together manually through the Incident Group tab (as outlined below) or within the Incident List (see: Grouping Incidents). Incidents that have multiple Items assigned to them during the Incident creation process, are also listed within the Incident>Groups tab.
The system can also use its Analysis Engine to automatically link Incidents together based on criteria defined by the Administrator. Incidents auto-linked using the Analysis criteria result in the creation of a Problem Group, listed under the Problem tab.

To create a new Group via the Incident Group Option:
Select Operations>Incident Groups Tab
Click
New
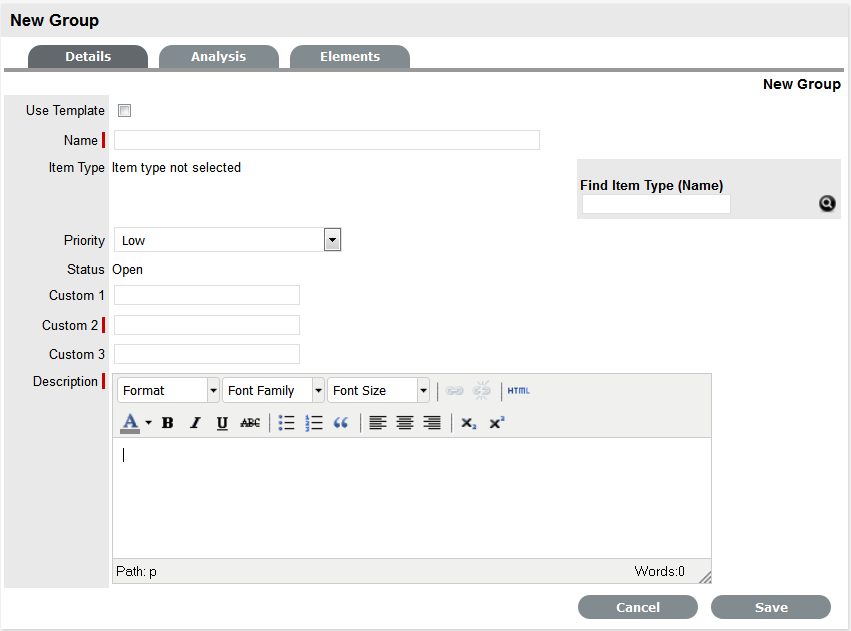
Enter a Name for the Group
Assign an Item Type, if applicable
Assign a Classification if an Item Type is selected
Assign a Group Priority
The Status is set by default to Open.
Enter a Group Description
Click Save
The screen will default to the Analysis Tab, which allows the User
to Group existing requests. The information displayed can be adjusted
by using the Filter options.
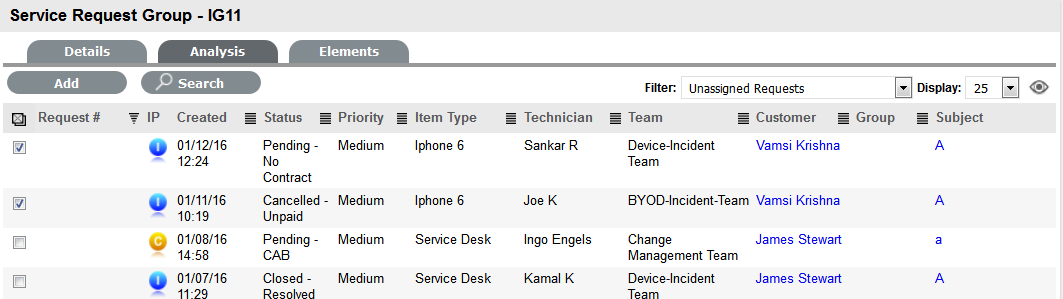
Check the field next to the relevant Request # to add the request to the Group
Select Add
Click Done to record the new Incident Group.
An Incident Group can be created using a Group Template. A Group Template contains a series of tasks in the form of Quick Calls. For more information, see: Group Templates.
Tasks within the Group Template can be created simultaneously or sequentially in the system. If the In Sequence option is used, the first task within the Group Template is created when the Template is selected. When the first task is closed, the next Task within the Template is automatically created and so goes the auto-creation process until all tasks within the Template have been created and closed in sequence.
To create a new Group using a Group Template:
Select Operations>Incident Groups tab
Click
New
The New Group editor is displayed.
Select
the Use Template checkbox
A list of Group Templates is displayed.
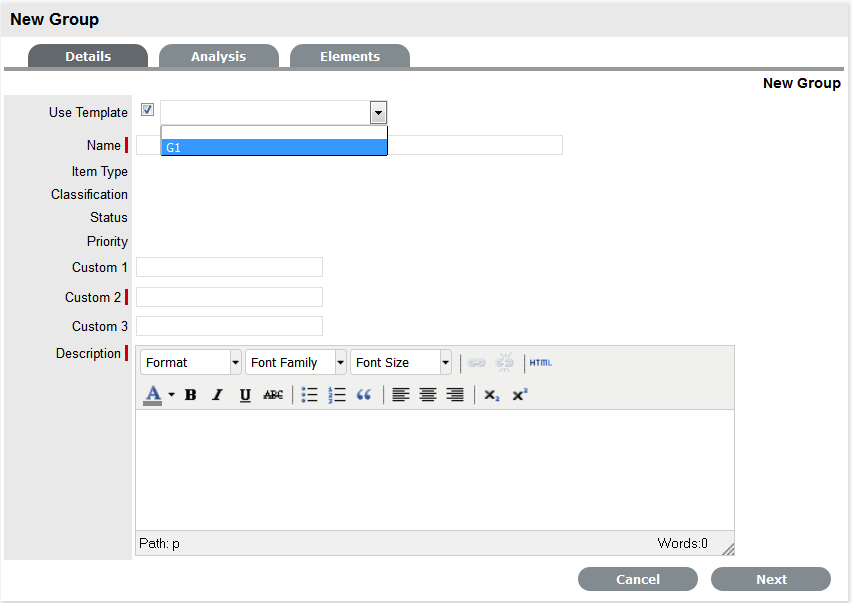
Select
an appropriate Template
The Group details are listed.
Enter
a Name, as unique identifier for this Group
The selected requests for the Group are displayed. These requests are
the Quick Calls assigned to the Group Template.
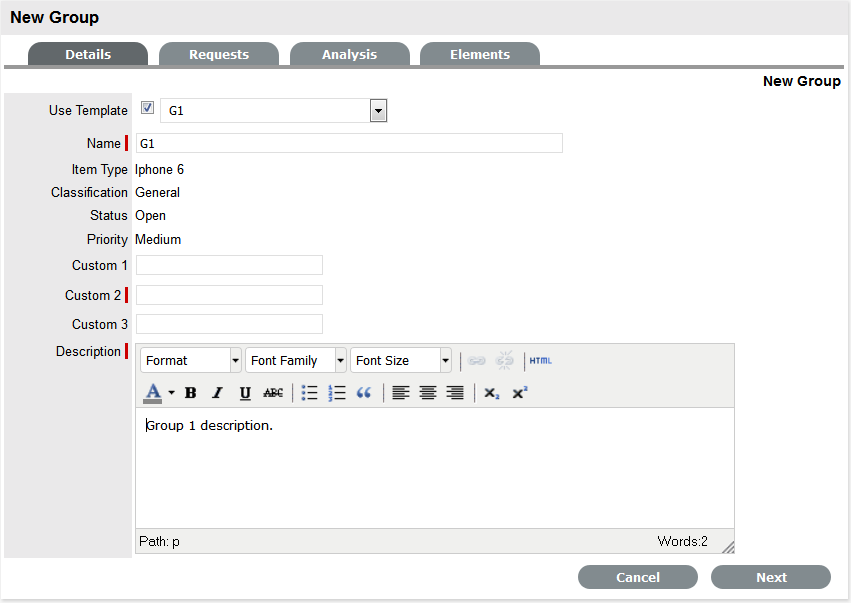
Click
Next
Search
and select the Customer to be associated with the tasks included in
the template
(If the Customer details are not in the database and are to be created
as part of the tasks included in the template, assign a default customer
and update the details in the Customer tab of the Request, when
the Customer details exist in the system.)
The
Selected Requests for the Group are displayed.
These requests are the Quick Calls assigned to the Group Template.
To exclude any of the requests from the newly created Group, deselect
the checkbox next to the Template name.
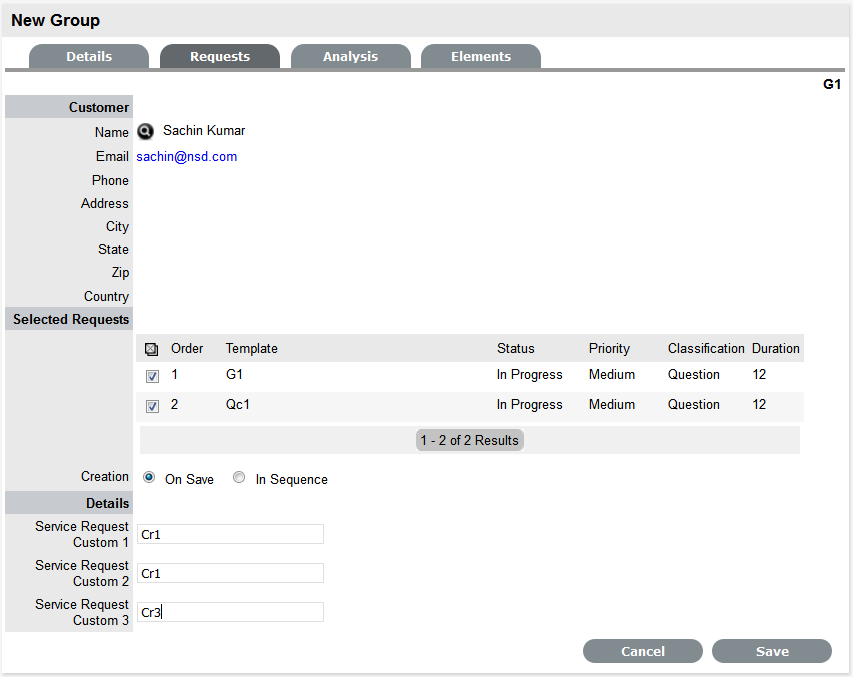
Select the Creation option:
On Save for all the requests to be created when the Request Group is saved
In Sequence for the first request to be created when the Request Group is saved.
Click Save
The Group is created including all Quick Call Requests. To add or remove
Incidents to or from the Group, use the Analysis and Elements tabs
(Covered below).
The type of Group created, whether it be a Service Request, Incident
or Change Group will depend on the Quick Call tasks assigned to the Group
Template.
For example:
If there is a mix of Service Request and Incident Quick Calls, the Group
will become an Incident Group;
If there is at least one Change Quick Call, the Group will become a Change
Group.
If an Incident is related to a Problem or Change Request within a Group and that related request in the other Process is closed, the Incident will be automatically closed. The system views the request hierarchy from low to high as Service Request, Incident, Problem and Change Request, and if a related request of a higher type is closed, all the lesser type requests are automatically closed.
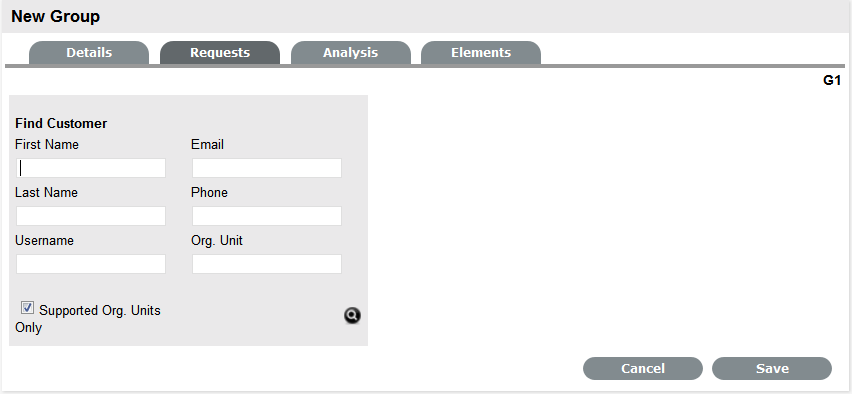
Incidents can be linked to a Group within the Analysis screen of an Incident Group. To search for Incidents to add to the Group, use the system filters or the Search option. The system filter includes the following:
Unassigned Requests |
Description |
|---|---|
Project Requests |
Incidents that have been assigned to the Incident Group/Project. |
Unassigned Requests |
All Incidents that exist in the system and have not been assigned to the Group. |
Potential Requests - Item Type & Classification |
Incidents in the system that match the Item Type and/or Classification of the Group. |
Potential Requests- Keyword match |
Incidents with keywords that match between the Incident Description and the Group Description.
|
All Incidents (sys) |
Lists all Incidents in the system irrespective of Workflow State or User assignment. Note that this option is not visible to Technicians when the privilege to View All Requests is disabled by the Administrator. |
Incident Queue (sys) |
Displays Incidents assigned to the System User by default, which Technicians can reassign after viewing. (This is only available if the functionality is enabled for the system and Team.) |
My Incidents (Active) (sys) |
Displays all Incidents in an active Workflow State that are assigned to the logged-in User. |
My Incidents (All) (sys) |
Displays all Incidents, in active and inactive Workflow States, that are assigned to the logged-in User. |
My Teams Incidents (Active) (sys) |
Displays all Incidents in an active Workflow State, allocated to the Teams with which the User is associated. |
My Teams Incidents (All) (sys) |
Displays all the Incidents, in active and inactive Workflow States, allocated to the Teams with which the User is associated. |
To link Incidents within the Incident Group Analysis tab:
Go to Operations>Incident Groups
Select the Incident Group # link
Move to the Analysis tab
Choose
the Filter option
Select the Incident checkbox on the left
Click the Add button
Click
Done.
The screen defaults to the Groups list.
The Elements tab displays all the requests that belong to the Incident Group. From this screen, any request can be removed.
To remove a request:
Go to Operations>Incident Groups
Select the Incident Group # link
Move to the Elements tab
Select
the checkbox of the relevant Incident.
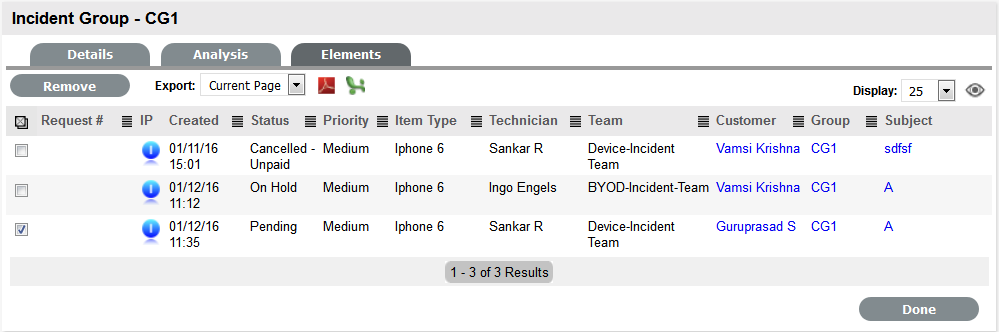
Click the Remove button.
Existing Incident Groups can be merged within the Incident Groups tab, to allow all related Incidents within the Groups to be managed as one.
To combine Incident Groups:
Go to Operations>Incident Groups
Check the fields next to the relevant Group #'s
Click
Merge
The screen defaults to the Details tab for the Merge Group.
Set the Name, Item Type, Classification, Priority and Description that best defines all associated Incidents
Click
Save.
The History tab records details of the Groups merged to form the new
Group. Click the No. hyperlink to view the details. The Impact tab
records the Type and Number of requests associated with the Group.
An Incident Group is automatically closed when all Incidents included in the Group are closed.
To close a Group:
Go to Operations>Incident Groups
Select the Incident Group # link
Move
to the Elements tab

Select a Request # hyperlink
The Summary tab of the Incident is displayed.
Click Edit
Within the Related sidebar
check all related Incidents
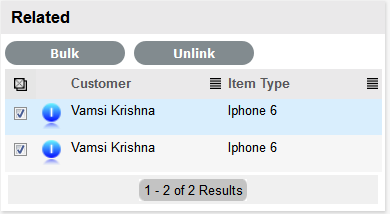
Select the Bulk option
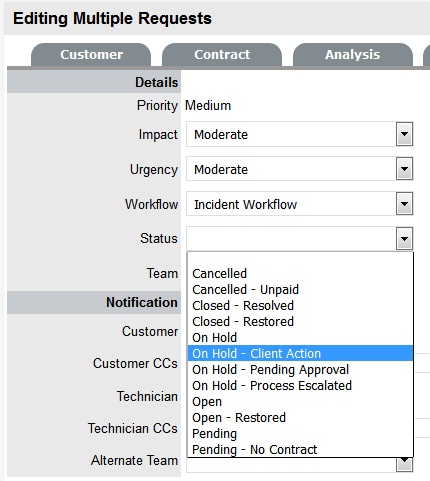
The Bulk Editor screen is displayed.
Select the Status of
Closed - Resolved or desired Workflow Exit State
Click Save
Click Save and Done.
The Details tab of the Group now displays a Status of Closed - Resolved.
When an Incident is duplicated, the new Incident is linked with the original Incident creating an Incident Group. Incidents can be unlinked in the Group's Elements tab.