The Invoices sub-menu
option is available within the Finance tab when the option has been enabled
by the system administrator. Invoices allows support organizations to
charge Customers for support services provided, and manage Items purchased
with Service Contracts.
(For more information about enabling Billing, see: Setup>Billing within the Administrator Guide.)
An Invoice can be created when an Item and Service Contract is ordered by a Customer. Alternatively, Invoices can be created for Service Contracts alone, as the Item may already exist in the system.
Invoices can be generated by the system through the following screens:
Within the Invoices section
When an Incident is created against an out-of-contract Item
When an Item, Customer or Organizational Unit is created, or edited to assign a new SLA.
To create an Invoice:
Select Finance>Invoices
Click
New
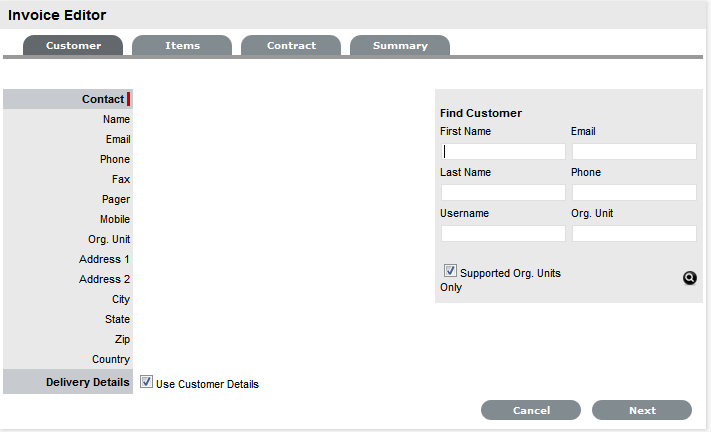
The Customer tab appears.
Assign a Customer to the Invoice:
To
search for a Customer who already exists in the system
Enter any known information such as their First Name, Last Name,
Email Address, Org. Unit or Username in the Find Customer fields.
To view a list of all Customers in the database, leave all the
fields blank.
Click

Click
on a Customer's name to assign them to the Invoice
The Delivery Details are automatically extracted from the Customer
Details. If they are not the same, uncheck
by clicking the tick in the Use Customer Details box and enter
the correct details.
Select
Next to continue.
The system moves to the Items tab.
To add an Item Type for an Item Order:
Select
![]() if the Invoice is to purchase a new Item
if the Invoice is to purchase a new Item
Otherwise, click Next to purchase a Service Contract.
Search
for the Item Type to be associated with the Invoice
Leave the search field blank and click the Search button to display
a list of Item Types that can be assigned to the Invoice.
Select
the relevant Item Type link to add it to the Invoice
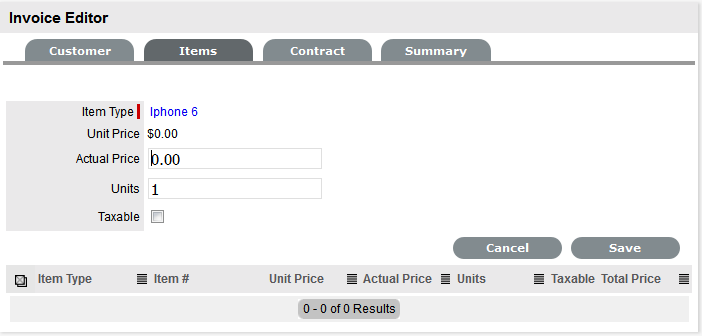
Enter the Actual Price information, if relevant and the number of Units to be ordered
Mark
the order as Taxable, if required
The tax is not included in the Actual Price but will be calculated
within the Invoice Summary tab.
Click
Save to add the Item Type details to the Invoice
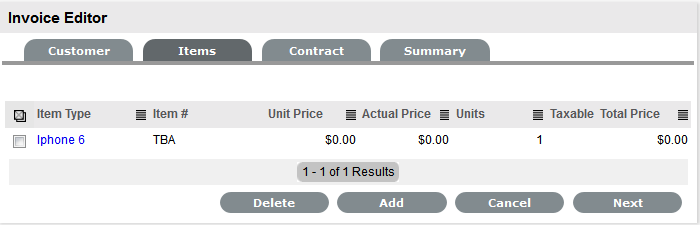
To
add more Item Types, select![]() and
repeat the above process.
and
repeat the above process.
Alternatively, click Next to move to the Contract tab, if required.
To add a Service Contract for a newly ordered Item Type:
Select
![]() to add a Service Contract
to the Invoice
to add a Service Contract
to the Invoice
Or, click Next to go to the Invoice summary.
Select the appropriate SLA from the drop-down options
Select
the Item Type related to the Service Contract
To search for an Item Type enter any known details in the Find
Item Type search field.
Click
the Item Type link to assign it to the Invoice
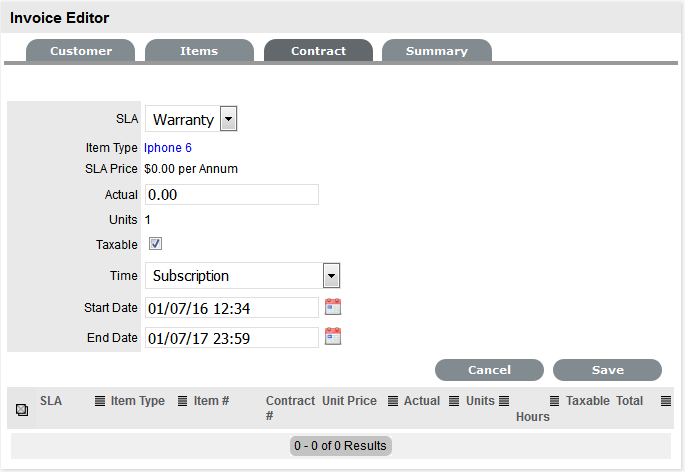
Amend the Actual Price, if relevant
Check the Contract as taxable, if relevant
Select
the Time period covered by the Contract:
If Subscription is selected,
the Start and End Dates are automatically completed by the system,
but can be edited if required.
If Time Limited Subscription
is selected, the Support Hours field is displayed and the number
of support hours purchased by the Customer should be entered.
Also, the Start Date and End Date fields should be completed manually,
entering the length of time for the subscription period.
If Support Hours is selected,
the number of support hours purchased by the Customers should
be entered.
Support Hours by Month
- a contract that covers a total number of support hours purchased
for a defined timeframe and allocated on a per month basis.
Click Save
To
add another contract to the Invoice, click ![]() and
repeat the above process.
and
repeat the above process.
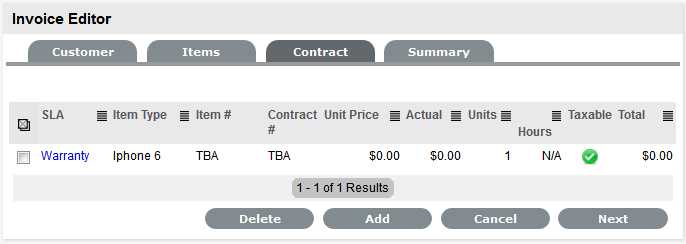
Click
Next to move onto the Summary page.
Enter a PO Number and make any other adjustments, if relevant
Click Save
Select
![]() to send the Invoice to the Customer, if required
to send the Invoice to the Customer, if required
Click Done.
To create a Service Contract Invoice:
Select Finance>Invoices
Click
New
The Customer tab appears.
To assign a Customer to the Invoice:
To
search for a Customer who already exists in the system
Enter any known information such as their First Name, Last Name,
Email Address, Org. Unit or Username in the Find Customer fields.
To view a list of all Customers in the database, leave all the
fields blank.
Click
Click
on a Customer's name to assign them to the Invoice
The Delivery Details are automatically extracted from the Customer
Details. If they are not the same, uncheck
by clicking the tick in the Use Customer Details box and enter
the correct details.
Select
Next to display the Items tab
The system moves to the Items tab and displays the following message

Click
Next again to display the Contract tab.

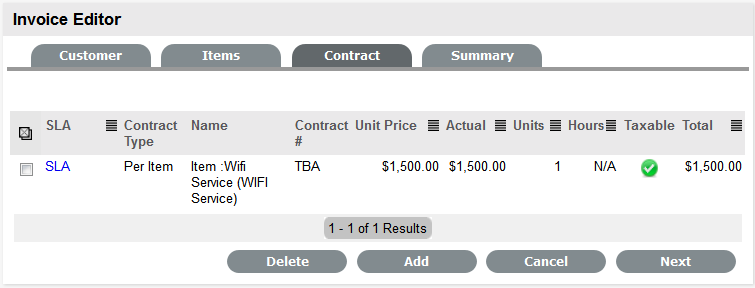
To create a Service Contract:
Select
![]() to create the Service Contract
to create the Service Contract
Select
the appropriate SLA from the drop-down options
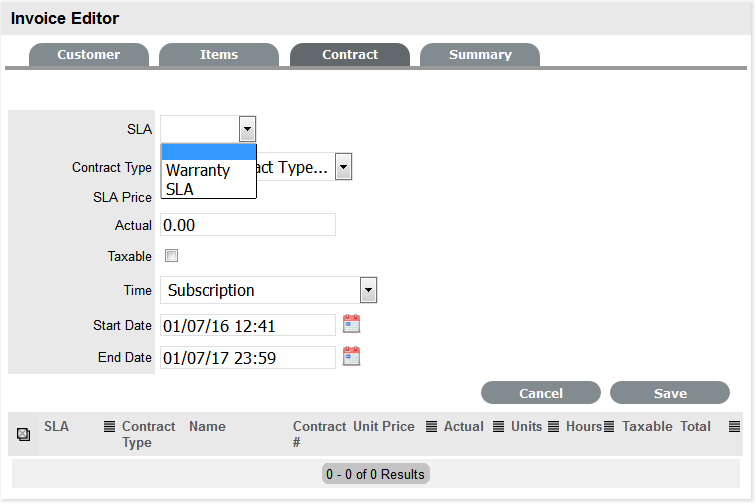
Select the Contract Type:
Contract Type |
Description |
|---|---|
Item Contract |
To purchase a contract for an Item. Search and select an Item using the Find Item search. |
Customer
Contract |
To purchase a contract for a Customer. Search and select a Customer using the Find Customer search. |
Org Unit Contract |
To purchase a contract for an Organizational Unit. Search and select an Org Unit using the Find Org Unit search. |
Amend the Actual Price, if relevant
Check the contract as taxable, if relevant
Select
the Time period covered by the Contract:
If Subscription is selected,
the Start and End Dates are automatically completed by the system.
If Time Limited Subscription
is selected, the Support Hours field is displayed and the number
of support hours purchased by the Customer should be entered.
Also, the Start Date and End Date fields should be completed manually,
entering the length of time for the subscription period.
If Support Hours is selected,
the number of support hours purchased by the Customers should
be entered.
If Support Hours by Month is
selected, a contract
that covers a total number of support hours purchased for a defined
timeframe and allocated on a per month basis.
(If a Contract is forward dated with a Start Date set in the future,
the Pending Contract status is assigned. See Pending
Contracts.)
Click Save
To
add another contract to the Invoice, click ![]() and
repeat the above process.
and
repeat the above process.
Click Next to move onto the Summary page
Make any adjustments, as required
Click Save
Select
![]() to send the Invoice to the Customer, if required
to send the Invoice to the Customer, if required
Click Done.
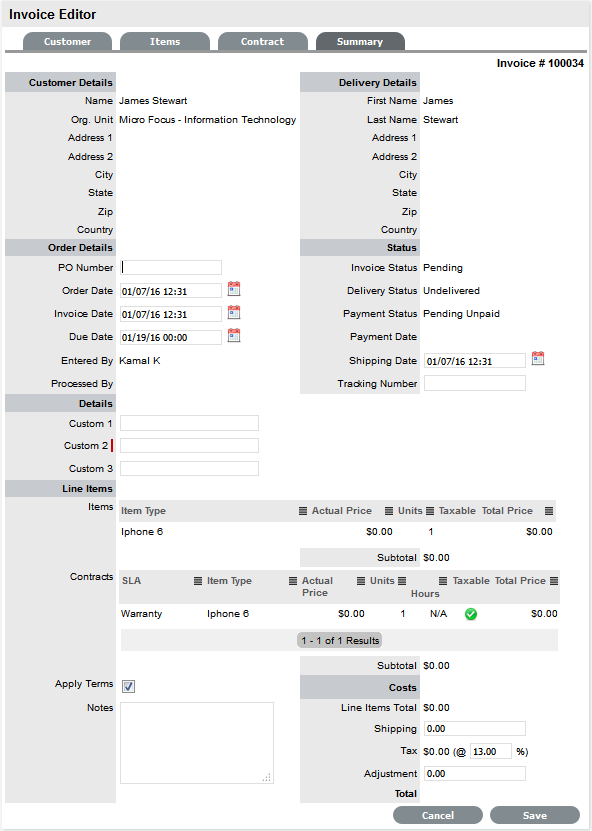
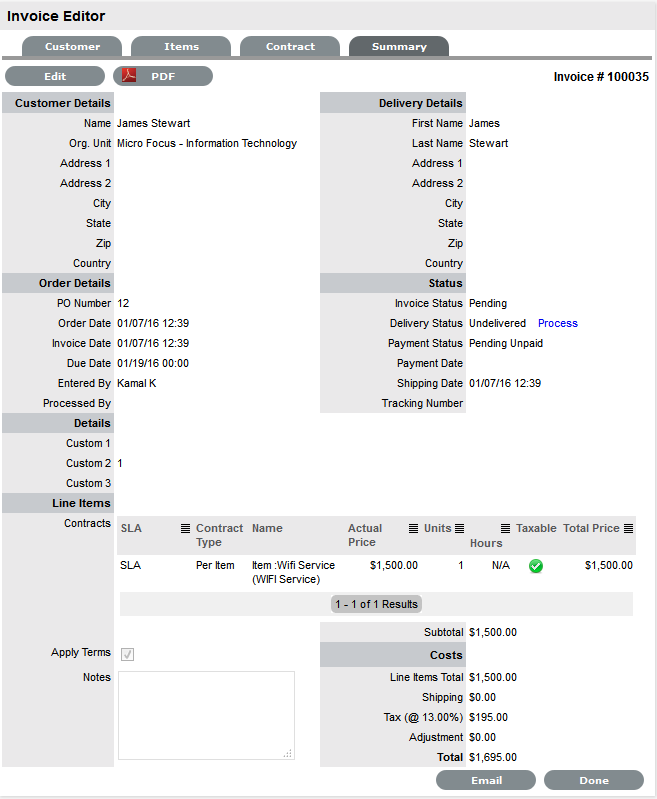
The Invoice Summary tab includes the invoiced Customer, delivery and order details. It allows Users to email the Invoice to relevant parties and displays the status of the Invoice. The summary screen also allows Finance Users to process an Invoice when payment is received.
The following fields are included with the Invoice Summary tab:
Fields |
Description |
|---|---|
PO Number |
Auto-generated or manually entered order identification number. |
Order Date |
Auto-generated or manually adjusted order date. |
Invoice Date |
Auto-generated or manually adjusted date for the invoice creation. |
Due Date |
The date the invoice is due. Auto-generated based on the Default Invoice Due value defined by the Administrator. |
Entered By |
The User who created the invoice. |
Processed By |
The User who processed the invoice. |
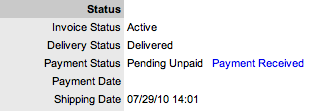
Invoice Status |
Displays what stage of the order process the invoice is in. |
Delivery Status |
Details the status of delivery for items on the invoice |
Payment Status |
Details if the invoice has been paid |
Payment Date |
Date the invoice was processed for payment. |
Shipping Date |
Manually entered date of shipping. |
Tracking Number |
Reference number manually entered to track the order. |
Apply Terms
|
For the system terms and conditions to be included in the PDF Invoice and the Invoice emailed to the Customer, tick the Apply Terms option. |
Notes |
Enter any additional Invoice information within the Notes field. |
Shipping, Discounts and Taxes |
Before saving an Invoice, any shipping costs to be included in the grand Invoice total can be entered in the Shipping field. |
Adjustment
|
The Adjustment field records Customer discounts and will be subtracted from the final order total. |
A flat tax percentage can be added to taxable line Items included on the Invoice. This is a global property that is configured by the system Administrator, in Setup>Billing>Tax Rate, but can be edited if required.
Once an invoice is created, selecting the Email button will send a copy of the Invoice to:
The Customer who placed the order
The system Finance User
The User who recorded the Invoice
The Customer who will take delivery, if different to the person who placed the order.
If the system Administrator has enabled
the Email Invoice functionality in the application Setup, the Invoice
will be emailed automatically to the relevant parties when it is created.
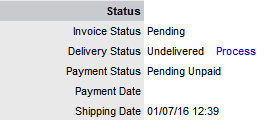
When an Invoice is first logged in the system it has a status of Pending. A pending Invoice can be edited. However, when an Invoice has been successfully delivered or processed, the Invoice Status moves to Active and it is no longer editable.
An Invoice changes to a status of Cancelled when one of the following events occurs:
Another Invoice is created to supersede the original Invoice
The Invoice was created for a specific Incident and that Incident was deleted/cancelled either manually or due to the Incident Cancel Time, set by the system Administrator, being exceeded. See Setup>Billing within the Administrator Guide.
To amend Invoice details or to include additional Line Items, edit or
enter the information prior to selecting the Process hyperlink. This link
is not available when the Invoice is in Edit mode, as all Invoice information
must be locked down to ensure the application has control of the details
of the Items and their delivery.
Relative to the workings of your support organization, Item and/or Support Contract Invoices may or may not need to be paid before an Item can be delivered to your Customer or Support Contract used by your Customer.
To update the Shipping Date, open the Invoice in Edit mode when the Delivery Status is Undelivered and enter the relevant date within the Shipping Date field.
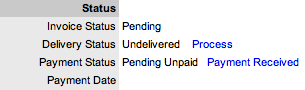
For organizations where the option of Payment Required is enabled by the Administrator, a User with Finance access is the only User who can update the Payment Status of an Invoice. To update the Payment Status, the Finance User selects the Payment Received hyperlink of an Invoice to change the status to Paid. Once payment has been made, any other User, such as a Supervisor, can process the Invoice.
If the Payment Required option has not been enabled by the system Administrator, a Line Item can be activated in the support system by selecting the Delivery Status Process hyperlink. This means that Customer payment does not need to be received by the organization before the Customer Item is delivered or a support contract is activated in the system.
When the Process hyperlink is clicked, the Invoice Status is updated to Active, and the Delivery Status changes to Delivered. (If the invoice is related to a support contract, the request status is moved from Pending - No Contract to the Workflow default open State, such as Pending.)