The Problem Notes tab displays entries made by a User regarding a Problem. New Notes are date-stamped automatically and associated with the User logging the Note. Problem Management is considered an internal support process, therefore Notes are not made visible or sent to Customers.
The
number of Notes recorded against a Problem is displayed in brackets on
the Notes tab, and if a Note has been added by a Technician other than
the Technician assigned to the Problem, an asterisk is visible on the
Notes tab until the assigned Technician opens the Note.
![]()
The Add Note button within the Summary tab can be used to open the Problem in Edit mode and automatically access a new Note window, as shown in Step 4 below.
Use a Problem's Print button to access a list of all Problem Notes in one screen.
When the first Note is created for a Problem, the Problem Description automatically populates the New Note editor allowing the Technician to enter their response.
To add a Note:
Click the Problem ID
Number
The Problem Information>Summary tab appears.
Click Edit
In the Notes tab, click New
Enter the Note details
Or, select a Template if a relevant pre-configured response has been
set for the Item Type or Category for the Item assigned to the Problem.
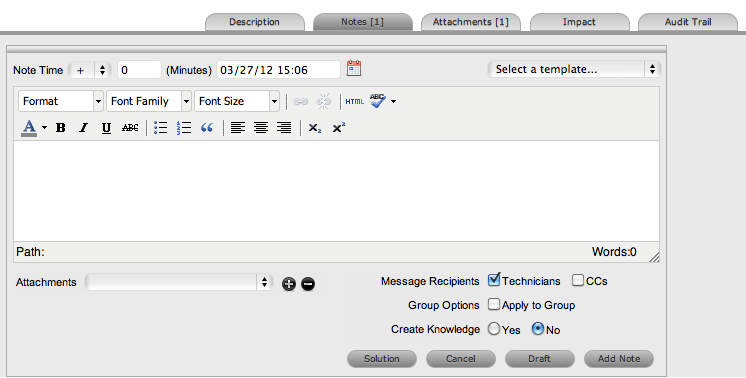
Enter Note Time
The time entered represents the amount of time accumulated to formulate
the Note's content or time spent working on a request away from the
system. If no additional time has been spent on the Problem away from
the application this field will be automatically populated with the
Logged Time when the Problem is in Edit mode, if the Manual Request
Time option is disabled in the Setup>Privileges>User tab. When
this option is disabled, ![]() is visible next to the Problem number in the top right corner of the
Summary Tab screen when the Request is in Edit mode. (See: Contracts
Logged Time.)
is visible next to the Problem number in the top right corner of the
Summary Tab screen when the Request is in Edit mode. (See: Contracts
Logged Time.)
Adjust the time and date of work completed, if required
Add
attachments to be sent with the Note, if required
A maximum of two attachments can be added per Note.
Adjust Email Recipients
and Group Options, if required
Vendors, as Email Recipients, is displayed as
an option if the Problem is in a State associated with an Underpinning
Contract.
Click
![]() .
.
The Note editor screen will close.
![]()
Use the Draft button to save an incomplete Note entry, which will be
displayed in the Notes list. When a Note is saved as a draft, the Status
will be displayed as ![]() . If
the Add Note button is selected when a draft Note has been recorded against
a request, a warning will be displayed. To continue working on a draft
Note, open the request in Edit mode and select the Note No. hyperlink.
. If
the Add Note button is selected when a draft Note has been recorded against
a request, a warning will be displayed. To continue working on a draft
Note, open the request in Edit mode and select the Note No. hyperlink.

![]()
If a Problem Note is the resolution for the issue, the Note can be saved as the Solution/Known Error. This will convert the Note into a Solution Article (found under Problem>Analysis tab), by enabling the Create Knowledge option before selecting the Solution button. Clicking the Solution button will automatically move the Problem to the default Closed State and all related Incidents or Service Requests are automatically closed. When the handshaking facility is enabled for the system and a Solution is recorded for a Problem, the Problem is automatically moved to the default Closed State for the assigned Workflow but all related Incidents and Requests are moved to a Pending-Approval State.
If a Solution is applied to a Problem containing attachments, the attachment is included in the Solution.
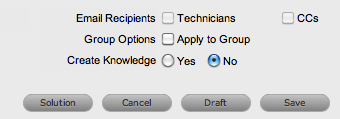
To save a Note as the Solution:
Enter the Note details
Select Create Knowledge, if the Note content is to be available in the Knowledge Base
Click Solution.
For Create Knowledge enabled Notes the content will be recorded as
the solution under the Analysis tab. The Status of the Problem will
change to default Closed State for the assigned Workflow.
To view a Note:
Select a Problem ID Number
Select the Notes tab
Click
on the Problem Note Number hyperlink.

When a Note is created for a Problem that belongs to a Group, the Apply to Group option is visible within the Notes tab. If the new Note is to be assigned to all requests within the Group, select the Apply to Group box.
Any new requests added to the Group at a later date will also have all pre-existing Notes, with this option selected, applied to the newly grouped request.
When the Apply to Group option is selected, the Add Note Time to Group option is displayed. Select this checkbox to also apply the Note Time to each of the requests.
The Solution option is not visible if the Problem is included in a group of requests that includes Change Requests.