Show 

Home > Release Deploy Tab

Release Deploy Tab

The Deploy Tab allows the Manager to define where the Deployment is to be pushed and who will be working on the Release by creating Deployment Tasks. Deployments can be created on a Per Customer, Per Organizational Unit or Global Deployment basis.


To define the Deployments for the Release, with the Deploy tab in edit mode:

  1. Set the Deployment Type option:

    Options

    Description

    Deployment per Customer

    Allows specific Customers and Items to be assigned to the Deployment. By selecting this option Customer Names are displayed for Customers that own Items derived from Item Types associated with the Release. Use the Search Options field to find a specific Customer.


    Use this option if an Item being created, updated or replaced is to be owned by the Customer directly.

    Deployment per Org. Unit

    Allows Organizational Units to be assigned to the Deployment for the Release. Selecting this option displays Org Units configured in the system.


    Use this option for Items that are created, updated or replaced as part of the Deployment, which are shared by all Org. Units included in the Deployment or are assigned ownership on a  per Org. Unit basis.

    • Use the Search Options field to find a specific Org. Unit or select Search All for a search and view all Org.Units configured in the system.

    Global Deployment

    Sets the Workflow that includes the relevant stages to manage the Release. Selecting this option creates the Deployment for the entire customer base and displays the Next button.

  2. Tick the relevant Deployment targets in the list, for Customer or Org. Unit Deployments
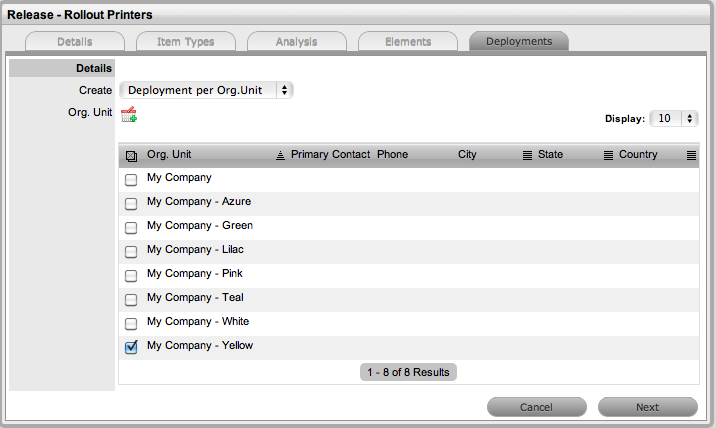
    assign_orgunit_release.png

  3. Click add_cart.png
    The selections are added to the Deployment.

  4. Click Next
    The screen allows the Manager to define the Group of Technicians who will action the Deployment Tasks of the Release, and the State of the Deployment Workflow in which the tasks are to be worked upon.

    The Items Field will also display any Items associated with the Customer or Org Unit for Update or Replace Item Type Releases.
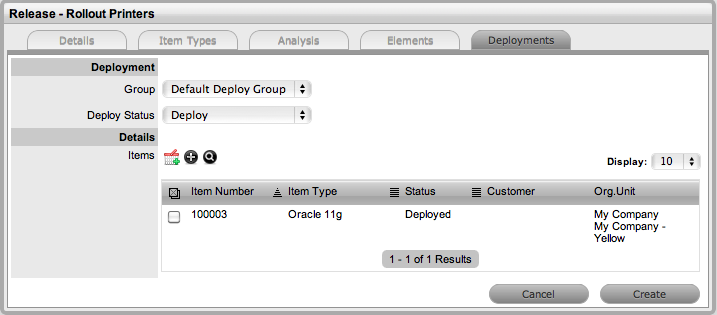
    deploy_items.png

  5. Set the Group of Technicians who will undertake the Deployment Tasks
    The list is derived from the Groups tab of a Release Team.

  6. Set the Workflow State that the Deployment Tasks move to Open and can be worked on by Technicians
    This list is derived from Release Workflow that have Deployment State option set to Yes.

  7. For Update & Replace Item Releases, select one, multiple or all Items displayed in the Items List  or use inline_search.png to search for Items

  8. Click add_cart.png once the Items have been identified
    The Items will be listed in a Selected Items sidebar.

  9. For New Item Releases, click inline_add.png
    The screen defaults to the New Types list.

  10. Select the Item Type for the Deployment

  11. Set the Item Ownership Status

    new_item_release_1.png

  12. Click Create
    The Selected Item box displays the New Item to be created. Continue to create Deployment Tasks, if relevant or click Create to lodge the Deployment in the system.

  13. Click Done when all Deployment Tasks have been created.
    The Deployments will be listed within the Change>Deployments tab.


When all Deployment Tasks are created they are included in the Deployments listed in the Change>Deployments screen. The individual Deployment Tasks will be visible within the All Deployment Tasks filter of the Change>Deployment Tasks tab.


Working on Deployment Tasks

Releases can have multiple Deployments that are to be completed at different stages of a Release lifecyle, and to allow for this, multiple stages of the Release Workflow can be defined as Deployment States when creating a Release Workflow. The different Deployment States can be selected as the Deploy Status for a Deployment when a Release is created in the system. Then, as the Release Manager moves through the Release Workflow, by adjusting the Next Action State in the Details tab of the Release, and when a State that is assigned as the Deploy Status for the Deployment is assigned to the Release, the Deployment Tasks move into an active Open State.


When a State that is assigned as a  Deploy Status is selected for the Release, the Deployment Tasks for that Deployment created within the Release move to Open and can be actioned by the assigned Technicians. However, if Control Deployment via RFC is enabled, when the Release moves into the Deployment State, RFCs are automatically created for the Deployment, and only when the RFCs hit the Deploy State configured for the RFC Control option within the Details tab of the Release do the Deployment Tasks become active. The Change Manager can view all Deployment Tasks related to the RFC within the RFC Summary screen, and when all Tasks are moved to Closed-Resolved the Change Manager can close the related RFC.


When all Deployment Tasks are completed, the Deployment is automatically closed by the system. When all Deployments are closed for a Release, the Release Manager can close the Release within the Details Tab, by moving the Release Workflow Status to the Exit State.