When logging into the system for the first time, update the Supervisor Account within the User>Users tab, with the relevant First, Last and User Name, Password, Roles and Processes.
If the system is to be synchronized with an authentication server, the First, Last and User Name details, including the Password, should be the same as the details stored in the authentication server.
To edit the User account:
Select User>Users
Click the Supervisor User
The User Information screen appears, where the Account details, including
User Name, can be updated.
User Information Fields |
|
Title |
Select a Title from the drop-down menu options, if relevant. |
First Name* |
Enter the User's First Name. |
Last Name* |
Enter the User's Last Name. |
User Name* |
Enter a system User Name (unique). |
Password* |
Enter a User Password. Note: Passwords can be changed under the Users Tab or reset by the User under their My Account tab. |
Roles* |
Assign a Role for the User. Each Role has associated permissions. See Roles. Every Technician Role assigned also needs a Supervisor assigned.
|
Default Portal* |
The Default Portal is the user interface a Customer, who is assigned multiple Roles, accesses by default when they log into the system.
|
Operations Processes |
Assign the licensed access for Request Fulfilment, Incident and Problem Management. Assigning Processes to the User gives them access to support those Processes and enables them to be assigned as Team members for those Processes' Teams. See Teams. See User Processes. |
Change Processes |
Assign the licensed access for Change, Release and Deployment Management. Note, Users assigned Release are automatically assigned Deployment. |
Internal Processes |
Enable the Users privilege to maintain Service Level, Configuration and Knowledge Management. Selecting the Configuration and Knowledge options displays the relevant fields that enable granular controls to be set for those processes.
|
Knowledge |
If the User is assigned the Knowledge Management process, their privilege to create, edit, delete and/or publish KBAs can be configured.
|
Configuration |
If the User is assigned the Configuration Management process, their privilege to create, edit and/or delete Items within the CMDB can be configured on a per task basis. |
Customer Org Unit |
If the User is also allocated a Customer Role within the system, this field is displayed. Enter Company or Department details that apply to the User in their Customer Role. |
Email* |
Enter the User's Email address. System messages are sent to this address. |
Phone |
Enter Phone details. |
Mobile |
A mobile number can be entered as a contact number or for use with SMS (Short Mail Service message). An SMS can be sent to notify the assigned Technician when a request is raised. SMS Messaging options:
|
Service Provider (Required for SMS) |
The name of the service provider through which SMS messages for this User should be sent. The default is SMS Gateway Providers. |
SMS Override |
Enter SMS Gateway override details. |
Fax |
Enter Fax details. |
Pager |
Enter Pager details. |
Salary |
An Annual Salary can be entered. This value is used for reporting. |
Forum Moderator |
Select this checkbox to designate this User as a forum moderator. See Forums. |
Survey Manager |
Select this checkbox to enable this User to act as a Survey moderator. See Surveys. |
Supervisor* |
Select a Supervisor, if the User has a Technician Role. Users with the Technician Role must be allocated a Supervisor. |
Available |
Shows if the User is available for requests to be assigned to them. This is based on work hours configured in the Schedule tab of the User and their Vacation Status. If no hours are set within the Schedule tab when the "Define Works Hours" is enabled within Admin>Setup>Privileges>User screen and the User is not on vacation, the system will consider them to be unavailable. |
Assignment |
**Visible when the Assignment Control is enabled in Admin>Setup>Privileges>User. Set to Off if the User is not to be assigned new requests, irrespective of their Availability status. |
On Vacation |
Placing a Technician on vacation excludes them from being assigned new Incidents automatically. When On Vacation is activated a Technician's existing requests are not reassigned. |
Training |
This option is only visible for Technician Users, and when enabled allows the User to be included in Teams to view requests but does not allow them to put the request in edit mode or add Notes. |
Country |
The User automatically adopts the default Country set for the system. However, the Country can be manually adjusted here for the specific User. |
Last Login |
Auto-populated with the date the User last logged into the system. |
Host |
The IP address of the last login for the User |
Position |
The GPS coordinates of the last known address. |
Timezone |
The User automatically adopts the default Timezone set for the system. However, the Timezone can be manually adjusted here for the specific User. |
* Denotes Mandatory Fields
Complete the User detail information, including setting the relevant Time zone.
Click Done.
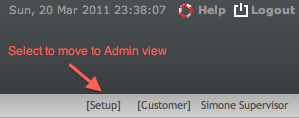
To move to the Administrator access from the Supervisor view, click the [Setup] link next to the logged in User Name on the right hand side of the screen.