Creating Custom Reports
To provide Users with access to service management data that is meaningful
to their organization, the reporting capability of the system has been
extended through the integration with Pentaho Design Wizard. Pentaho allows
Users to create customized reports relevant to their organizational requirements
that are published in the Reports tab .
Creating a Custom Report - Example
To create a report using Pentaho Report Design Wizard:
Start Pentaho Report
Design Wizard
Enter a Title and Description
for the report
Select a Template
For this example, LiveTime.xreportarc is selected. This template is
available from system support and can be supplied on request.
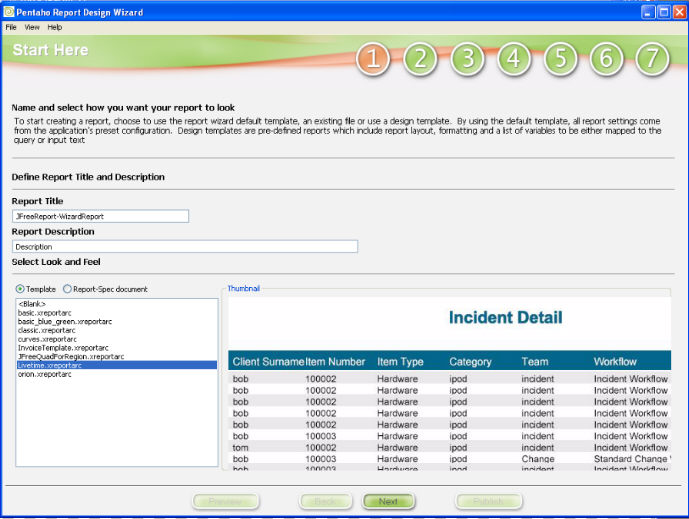
Click Next
Enter Database Connection
information
Select the Connection Type: JNDI.
Click Add
The Add JNDI Connection page appears.
It is important to note that the
appropriate JDBC driver must to be added in order to connect to the
database. To add the driver go to
< Design_Wizard_Home>\Jfree\designwizard\lib\jdbc .
Enter database connection
details, click Test to confirm the connection
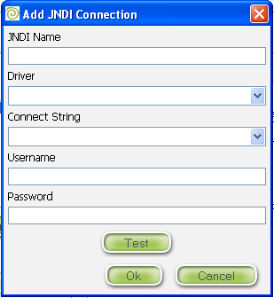
Click OK
Select the Query Designer
button to open the Query Designer window (ensure that the database
is selected first)
Alternatively, enter a query in the text area provided.
For a description of the system
schema please contact support@livetime.com for a current Entity-Relationship
Diagram.
Create a query as desired

Click Done when complete
The Query String will be displayed.
Click Next
Replace any variables
within the template. For example, rename the Report Title, Page Headers
and Footers
Select the Property to Map, then modify the property by selecting the
Custom Value or Column options where relevant.
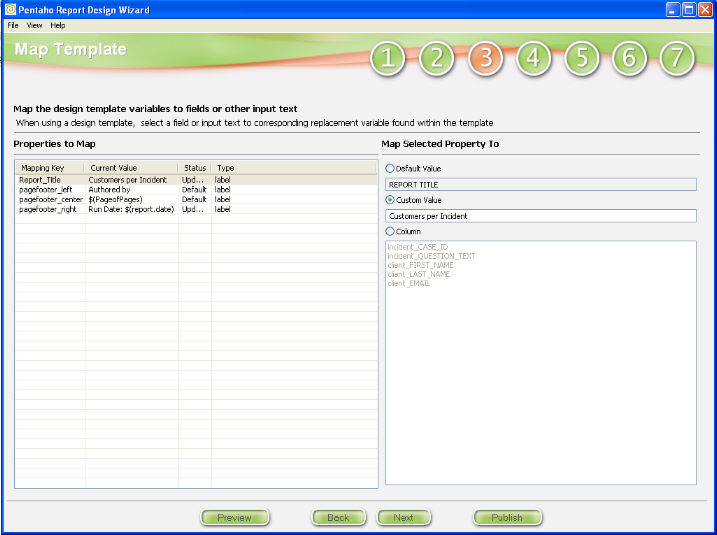
Click Next
Configure the report
layout
Select and position the fields that will appear in the report and arrange
them into groups.
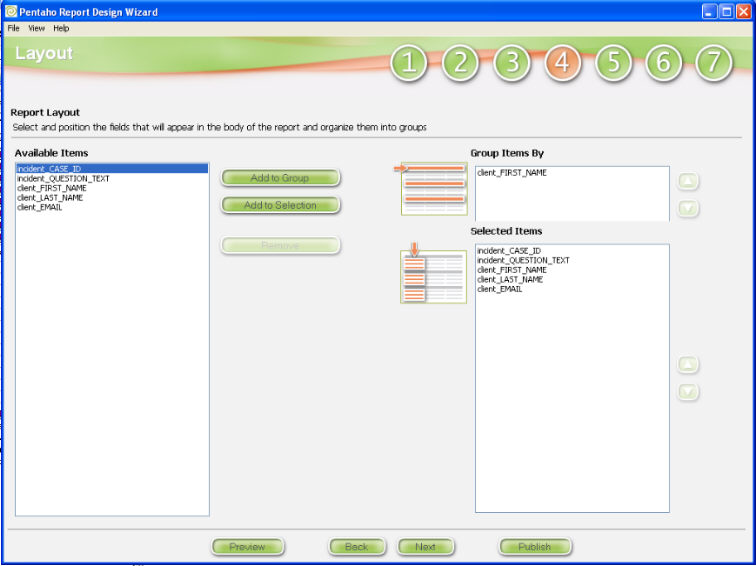
Click Next
Set the formatting and
group computations
These include options such as SUM, AVG, MIN and MAX.
Select and update the
display name for each field
Click Next
Configure the page layout
The options include orientation, margins or add a watermark.
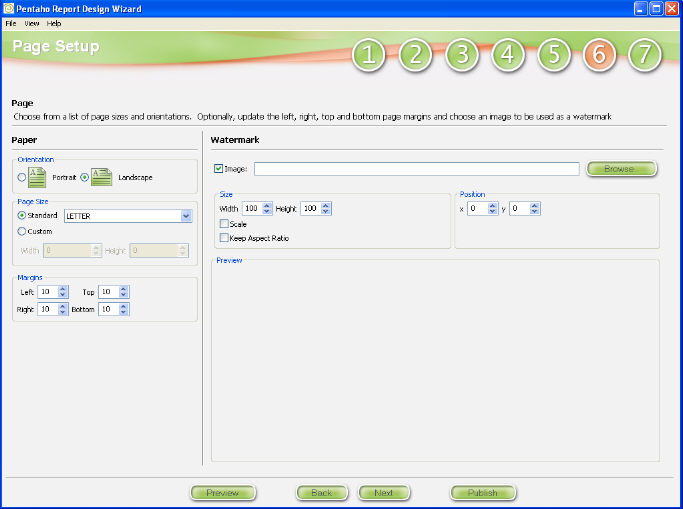
Click Next
Add to the report by
configuring a chart or grand total
Modify column sizes
or fonts
Click Publish.
Publishing a Report
For a newly created report to be available within the Reports tab of
the service management application, it must be published.
To publish a Report:
Open a report within
the Pentaho Report Design Wizard
Click the Publish button
The Publish Report to Server screen is displayed.
Select Publish To: Location
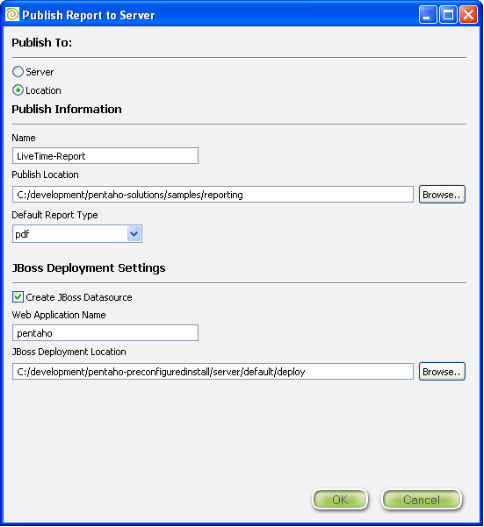
Enter a Name for the
published report
Update the Publish Location
to Desktop or on your local disk
Click OK
Locate the files and
zip them into a single archive.
Customize
The Customized tab displays a list of sample customized reports that
have been created within Pentaho and made available for publication within
the Supervisor>Reports>Customize tab. These default customized reports
can be deleted, if required. Alternatively, more reports can be imported
for publication within the support system using the Customize tab.
Importing Reports
Using the ZIP files exported from Pentaho, to import the customized
reports:
Select Setup>Reports
Click 

Select Choose File to search and select the
Zip file to be imported
Click 
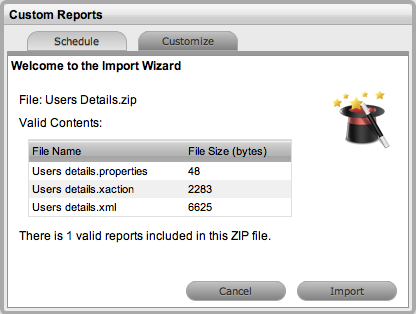
Click .
Sample Reports
A number of sample reports are included with the system, which can be
accessed by the system Administrator in Admin>Setup>Reports>Customize
tab.
Deleting Reports
To remove custom reports from the system:
Select Setup>Reports
Check the report in the list to be removed
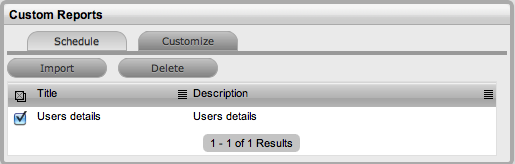
Click  .
.