Custom Fields
The Custom Fields function allows screens
in the system to be adapted to meet specific requirements of an organization,
as additional fields can be created for different parts of the application.
Custom fields can be set for different system screens and include the
option to select:
Data type
Style
Defining if the field
is required or includes a description
Determining whether it
can be viewed or edited by the Customer (Incident, Change and Service
Request
Custom fields only.)
Enabling a Custom Field
To enable a Custom Field:
Select
Setup>Custom Fields
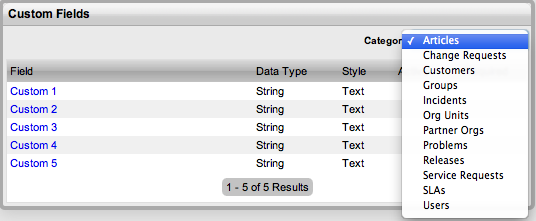
The Custom Fields screen appears.
From
the Category Filter drop-down list select the screen option
The displayed list includes all screens where custom fields can be
added.
Custom Fields |
Custom Field Locations |
Articles |
Additional field for Articles in the
Knowledge Base. |
Change Requests |
Additional field
for a Change Request. |
Customers |
Additional field for Customer Information. |
Groups |
Additional field for Service Request,
Incident, Problem and Change Groups. |
Incidents |
Additional field for Incident Information. |
Invoices |
Additional field for Invoices. (Option
visible when Billing>Invoices have been enabled for the
system.) |
Org
Units |
Additional field for an Organizational
Unit. |
Partner
Orgs |
Additional field for Partner Organization.
|
LDAP/ADS
Accounts |
Customized LDAP/ADS fields can be used
to map to a Directory Server when importing user account details.
See Authentication.
|
Problems |
Additional field
for Problem details. |
Releases |
Additional field
for Release Management details. |
Service Requests |
Additional field
for Service Request information. |
SLAs |
Additional fields for Service Level
Agreement Information screen. |
Users |
Additional field for the Users Information
screen. |
Purchase |
Additional field for Purchase Orders.
(Option visible when Billing>Purchase Orders have been
enabled for the system.) |
To
define a custom field, click on the appropriate field label hyperlink
An editable window appears.
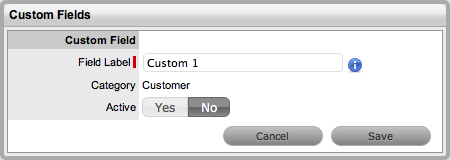
Toggle
the Active field to Yes
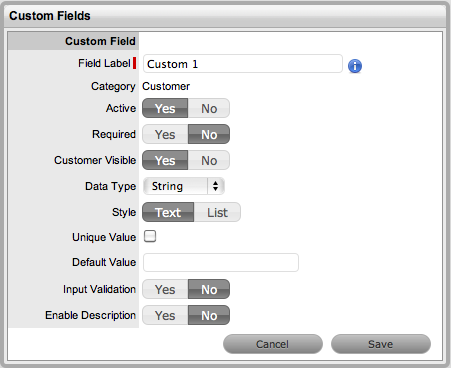
Once activated, a list of options is displayed.
Options |
Description |
Field Label |
Edit the Field Label
by entering the relevant name.
(Required.)
|
Active |
Defines the Custom Field
visibility. |
Required |
Defines if the field
is mandatory when displayed. |
Data Type |
The format required for
the field.
Select
the data type from the following:
String (Text
or List) Number-Custom
Field that requires a number Boolean (Radio
Buttons) Date-Custom
Field that requires a value in a date format Currency-
A currency can be defined for the Field Hyperlink
- A URL can be included in the field. |
Style |
From the options provided,
the way the data type will be displayed.
String custom
field - either an open text field or a list, or Boolean custom
field - uses radio buttons to define Yes/No or True/False. |
Unique Value
|
When
active, the system prevents the duplication of data within
the customized field. |
Input Validation |
When
enabled the Input Mask and User Mask can be defined.
Input Mask : A regular expression
to use for data validation of values entered by a User (i.e.,
Zip/Post Code, telephone no.)
User Mask: A User Friendly
representation of the Input Mask that Customers can understand
should it appear in a validation error message. |
Enable Description |
When
enabled, a Description field appears that allows the
User to enter details of what information the field is expected
to capture. These details are accessible next to the custom
field on the relevant screen. |
Data Type - List
When the Data Type String - List is selected the List Contents field
is displayed, which provides the facility to create a drop down list to
be created as options within the field.
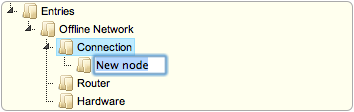
To create a new list entry within the List Contents field:
Right click the Entries
link
The Create option is displayed
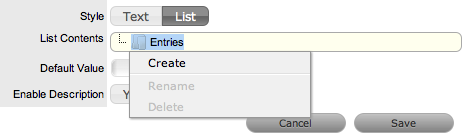
Click Create
A New node link displayed

Enter the name of the
field
Click outside the field
to save the entry

Repeat this process
until all list entries have been added
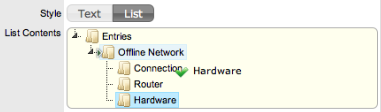
To create a nested list, right click on the relevant list entry and
repeat the above process.
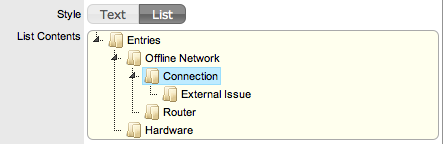
To move an existing
entry to a new position, select the entry, then drag and drop the
entry into its new location
When all the relevant
details have been defined for the custom field, click Save.
Custom Fields for Incidents, Change and Service Requests
If a custom field is enabled for an Incident, Change or Service Request,
additional options are displayed. These include:
|
Description |
Customer Visible |
The
custom field is visible in the Customer Portal, otherwise it can
only be viewed via Technician access. |
Customer Editable |
Allows
the Customer to edit the content within this field. |
Default Value |
The
custom field will automatically be populated with the value entered
here when a request is created. This value can be edited within
the request screen, if required. |

LDAP/ADS Accounts Custom Fields
The LDAP/ADS custom fields are used to define specific Customer and
User fields configured within LDAP/ADS. The custom fields for Customers
and Users are completed when Users and Customers are entered manually
or imported using a .CSV file.
If Mixed Mode LDAP is applied, the same set of custom fields are used.
These are listed with the label Mixed Mode within the Custom Field Category
filter list.