1.20 Creating a Service or Change Request Team
Service and Change Request Teams are built around the selected Workflow. Technicians and Managers are assigned to work groups and each State of the Workflow Lifecycle is associated with a selected work group. When a request moves to a next State, it is assigned to a Technician or Manager within the work group associated with that Workflow State. One or multiple levels of escalation can also be configured for the Workflow, which span the lifecycle of the Workflow the Service or Change Team are assigned.
1.20.1 Creating a Service Request or Change Team
To create a Service Request or Change Management Support Team:
-
Select User>Teams
-
Click New
-
Enter the Team Name
-
Select the Service or Change Request Process
-
Enter the Team email address, if relevant
-
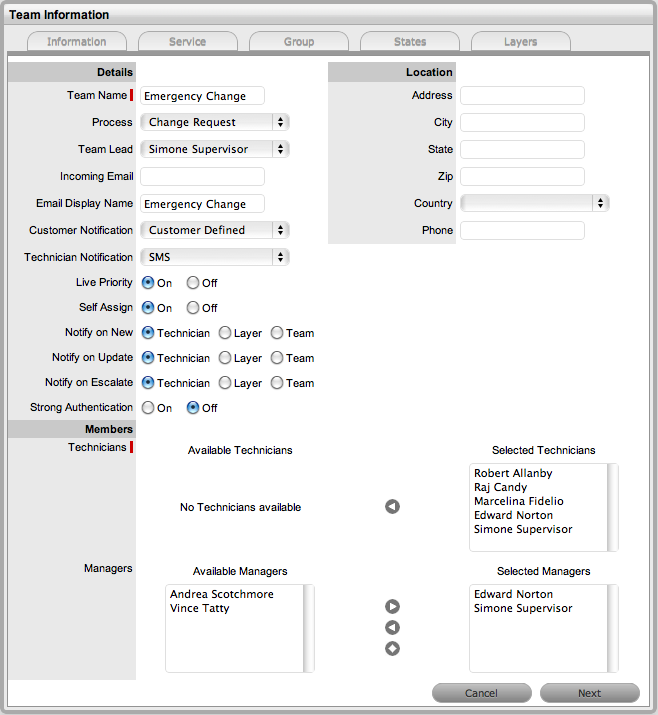
Define the Team options:
-
Options
Description
Process
Indicates if the Team is to manage Change or Service Requests.
Team Lead
The Technician assigned to supervise the Team and its activities. Options are visible when the Technicians have been assigned to the Team.
Incoming Email
Enter a specific Email Address for the Team,which allows Customers to use directly. This address will need to be configured as an alias to the system support address on the Email Server. See: Email Polling & Request Creation.
Email Display Name
If desired, enter a name for the Team that will be used in the From address for email responses sent by members of the Team.
Customer Notification
Sets the default notification method applied to requests for Customer correspondence, when requests are assigned to this Team.
The Customer Defined option, derives the method of notification from the setting within the Customer's Profile or Account Information tab.
Technician Notification
Sets the default notification method applied to requests for Technician correspondence, when requests are assigned to this Team.
Self Assign
When enabled, Requests created by a Technician will automatically be assigned to that Technician.
Notify on New
Determines who is informed about the creation of a new Request.
Technician - notifies only the Technician assigned to the request. (This is the default setting.)
Layer - notifies all members in Layer One of the Team assigned to the request.
Select Team - notifies all members of the Team.
Notify on Update
Determines who is informed when a Request is updated.
Technician - notifies only the Technician assigned to the request. (This is the default setting.)
Layer - notifies all members in Layer One of the Team assigned to the request.
Select Team - notifies all members of the Team.
Notify on Escalate
Determines who is informed when a Request is escalated.
Technician - notifies only the Technician assigned to the request. (This is the default setting.)
Layer - notifies all members in Layer One of the Team assigned to the request.
Select Team - notifies all members of the Team.
Request Queue
(Service Request Teams only)
Allows the Team to use a holding bay for Requests that are received via email or the Customer Portal. (This option is visible if it has been enabled by the Administrator.)
If the Team has only one Technician assigned to the work group associated with the Workflow Default Entry State, new Requests are automatically assigned to that Technician and that Technician is notified of the new Request assignment.
If the Team has multiple Technicians assigned to the work group associated with the Workflow Default Entry State, the new Request is placed in the Queue (i.e., it is assigned to the System User) and all members of the Team are notified that a new Request has been assigned to the Request Queue. See: Queues.
Queue Visibility
(Service Request Teams only)
When the Request Queue is enabled, the option can be refined to allow the Queue to be available for assigned Workflow entry points, or all stages of the assigned Workflow. If All States is enabled Users can move Requests back to the Queue throughout the Request lifecycle. See:Queues.
Edit Assign
(Service Request Teams only)
When set to Yes and a request assigned to the System User (i.e., Queue) is opened in Edit Mode, the system will automatically assign the request to the User editing the request if they are in the Escalation Layer associated with the request.
Close Assign
(Service Request Teams only)
When set to Yes and a request assigned to the System User (i.e., Queue) is moved to an Exit State of the Workflow, the system will automatically assign the request to the User who prompted the close action.
Strong Authentication
If the Manager User Name and Password is required to be re-entered during the processing of a Request in an Approval State, set this option to Yes.
-
Complete the Team Location details, if required
-
Select Technicians from the Available Technicians list
Highlight Technician names within the Available Technicians list and click the arrow icon to move the Users to the Selected Technicians list.
-
Select Managers from the Available Managers list
This is required if a Manager is to be assigned to a Workflow Approval State.
Highlight Manager names within the Available Managers list and click the arrow icon to move the Users to the Selected Manager list.
-
Click Next
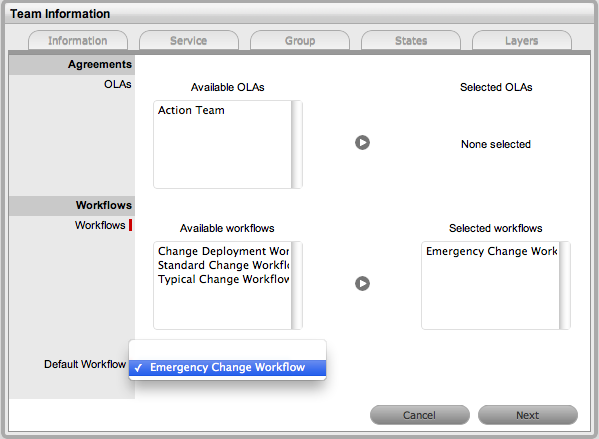
The Service Screen displays all Available OLAs and Workflows
-
Assign the relevant OLAs within Available OLAs list (Optional)
Highlight the OLA and click the arrow icon to move an OLA to Selected OLAs list. Assigning an OLA to the Team ensures the Team's details will be selectable when the assigned OLA is associated with a Workflow State.
-
Assign the relevant Workflows within the Available Workflow list
Highlight the Workflow and click the arrow icon to move the Workflow into the Selected Workflows list. Assigning Workflows to the Team ensures the Team is displayed as an option within the Request Summary tab when the associated Workflows are assigned to a Request.
-
Select a Default Workflow from the drop-down list
This is relevant if more than one Workflow is assigned to the Change Team. The Default Workflow is automatically applied to an RFC that has been allocated to this Change Team.
-
Select Next
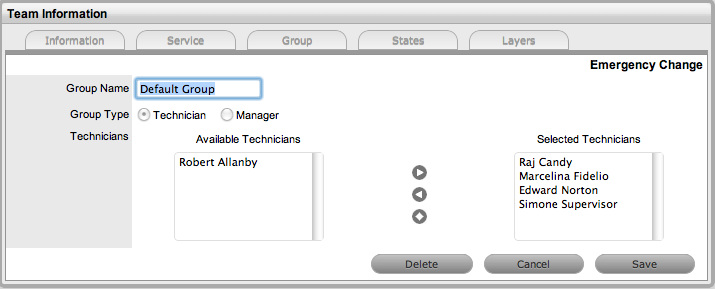
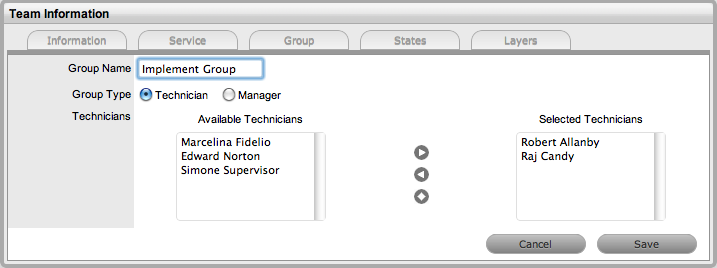
The Group tab displays the Default Technician Group and Default Manager Group. Within this tab multiple groups of Technicians and Managers can be created that are then associated with the relevant stages of the Workflow.
-
Click on the Default Group link
The Team Lead will automatically be applied to the Group. Rename the Work Group, if relevant. Highlight Technician names within the Available Technicians list and
click the arrow to allocate the Technician to the Selected Technicians field.
-
Click Save
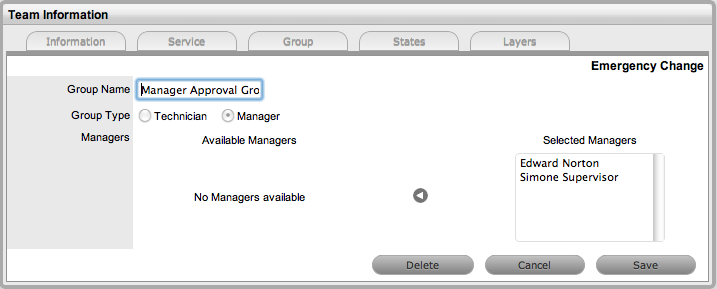
Repeat the process for the Default Managers Group.
-
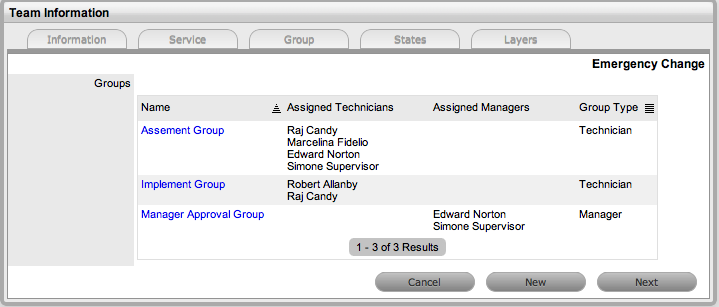
Click New to create any additional Technician or Manager Groups
-
Click Save to save the details of a newly created Technician or Manager Group
-
Click Next, when all Groups that are required for the Workflow have been created
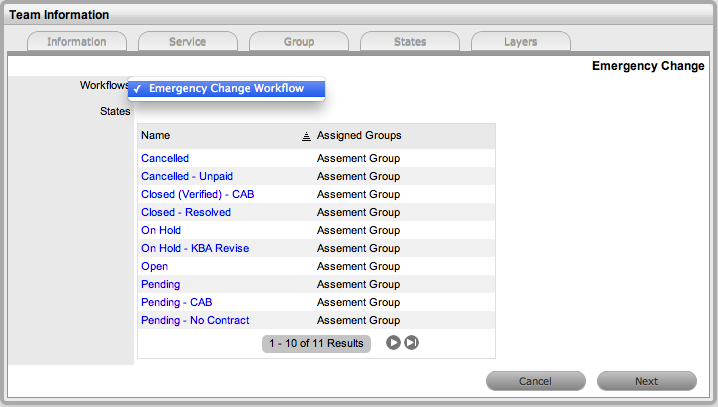
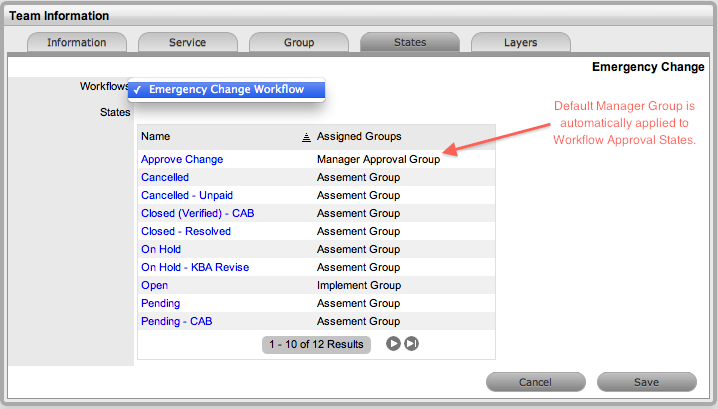
The Workflows/States of the Workflow Lifecycle are displayed with the system Default Group assigned to each State. The default Manager Group will be assigned to any Manager Approval States.
-
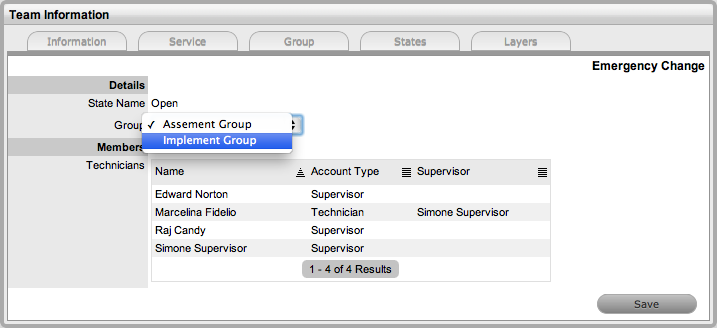
To assign a different Work Group to a Workflow State, click the state Name link
-
Select the relevant Group from the drop-down list
-
Select Save
Repeat the Work Group assignment for each State, where relevant.
-
Click Next
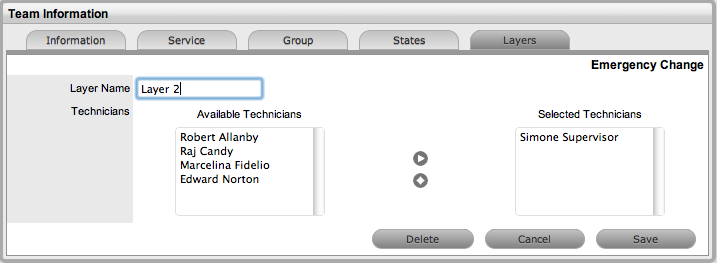
The Layers tab is displayed, where one or more overarching layers of escalation can be applied to the Workflow.
-
Click on the Layer link to assign the relevant Users to the escalation layer and save
-
Click Save and Done.
To remove a User from a Team:
-
In the User tab, click Users
The User Information screen appears.
-
Click on the name of the User
-
Select the Team tab
-
Click on Edit.
The Remove button is visible.
1.20.2 Manager Approval State assignment
For a Manager User to be allocated the privilege of approving a Change or Service Request they must be assigned to a Change or Service Request Team and an Approval State of the relevant Change or Service Request Workflow. Change Workflows must include Approval States (i.e., States where activities are accepted or rejected) before the option to assign a Manager to a Change Team becomes available. See: Service or Change Request Workflows for more information.
To assign a Manager to a Workflow Approval State:
-
Go to User > Teams
-
Select a Service or Change Request Team

-
In Edit mode, assign relevant Managers from the Available Managers list
Highlight Manager names within the Available Managers list and click the arrow icon to move the Users to the Selected Manager list.
-
Go to the States tab
-
Select a Workflow
The Default Manager Group, which may have been re-named, is automatically assigned to all Approval States of the selected Workflow.
-
To adjust the assigned Manager Group, select the Approval Workflow State link
-
Select the Manager Group from the drop-down list and save
-
Click Save and Done.
1.20.3 Layers Tab
Requests moving through Service or Change Request Workflows can be escalated to the Team Lead or Supervisor User at any stage of the Workflow that is configured as a Manager Approval State. This action can be achieved by using the Escalate button within the Summary tab of the Request.
By default escalation layers are created with the Team Lead assigned. To amend or add to the assignment:
-
Go to User > Teams
-
Select a Service or Change Request Team
-
Click Edit
-
Select the Layers tab
-
Click on the Layer hyperlink
-
Amend the assignment, as required
-
Click Save
If additional escalation layers are required, select New and repeat steps 5 to 7.
-
Click Done when all required escalation layers are configured.