7.7 Creating a Group Collaborative Storage Policy
-
Launch NSMAdmin.
-
In the menu, click.
-
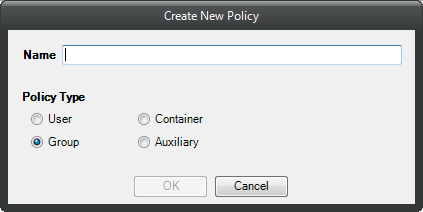
In the menu, select .
The following screen appears:
-
Specify a name in the field.
The Policy Options page appears.
-
Continue with Section 7.7.1, Setting Group Policy Options.
7.7.1 Setting Group Policy Options
Settings within Policy Options let you indicate how the policy is applied, set policy inheritance, and write an expanded policy description.
NOTE:Group policies in Novell Storage Manager are completely independent of Microsoft Group policies.
-
Leave the check box selected.
This indicates that you want the settings in this policy to be applied to all users within the container where this policy is assigned. Deselecting this check box indicates that you want to create a blocking policy that can be applied to a specific user or group. For more information on blocking policies, see Section 4.6, Creating a Blocking Policy.
-
Do one of the following:
-
If you are assigning this policy to a container rather than a group, and you want the settings to apply to subcontainers, leave the check box selected.
-
If you are assigning this policy to a container, and you do not want the settings to apply to subcontainers, deselect the check box.
-
If you are assigning this policy to a group rather than a container, deselect the check box.
-
-
In the Description region, use the text field to specify a description of the policy you are creating.
-
Click to save your settings.
-
Proceed with Section 7.7.2, Setting Group Policy Associations.
7.7.2 Setting Group Policy Associations
The Associations page is where you assign the collaborative policy you are creating to an organizational unit, Group object, or (if you are creating a blocking policy) a User object.
-
In the left pane, click .
-
Click the + button to bring up the Object Browser.
-
Browse through the directory structure and select the organizational unit or Group object you want to associate the policy to.
-
Drag the object to the Selected Items pane and click .
The Object Browser is closed and the path is displayed in fully qualified name format in the right pane of the window. For example, CN=admingroup.O=Dynocorp.
-
Click to close the Object Browser.
-
Click to save your settings.
-
Proceed with Section 7.7.3, Setting Group Policy Provisioning Options.
7.7.3 Setting Group Policy Provisioning Options
The Provisioning Options page is where you indicate collaborative storage rights, the location of a template for provisioning the collaborative storage folder structure and content in a home folder when it is created, and more.
-
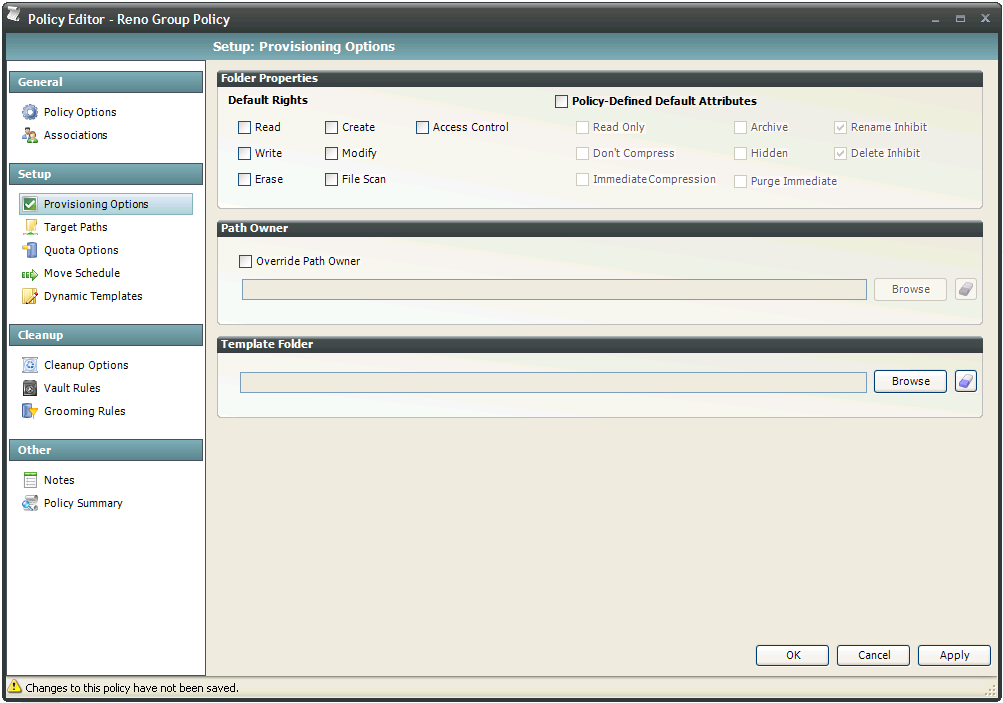
In the left pane, click .
The following page appears:
-
In the Folder Properties region, deselect all rights.
If you chose to create a collaborative storage temple, the rights will be applied from the template that you created in Section 7.4, Creating a Collaborative Storage Template.
-
(Conditional) If you want to override the path owner, select the check box.
-
In the field below the check box, browse to indicate a path owner (that is, the owner of the group folder).
-
In the Template Folder region, click the button and locate the file structure that you created in Section 7.4, Creating a Collaborative Storage Template.
-
Select the topmost folder in the file structure and click .
For example, if you had a structure similar to the Sample Classroom Collaborative Storage Template in Figure 7-1, you would select “8th Grade U.S. History.”
-
Click to save your settings.
-
Proceed with Section 7.7.4, Setting Group Policy Target Paths.
7.7.4 Setting Group Policy Target Paths
The Target Paths page is where you set the paths to the server volumes where the collaborative storage area for this policy will be hosted.
-
In the left pane, click .
-
In the Target Placement region, fill in the following fields:
Random: Distributes storage in an ordered sequence. For example, if you have two target paths listed on this page, Group A’s collaborative storage folder is created using the first path, Group B’s collaborative storage folder is created using the second path, and Group C’s home collaborative storage folder is created using the first path.
Actual Free Space: Distributes the creation of collaborative storage folders according to volumes with the largest amount of absolute free space. For example, if you have two target paths listed, target path 1 has 15 GB of free space, and target path 2 has 10 GB, the collaborative storage folders are created using target path 1.
Percentage Free Space: Distributes the creation of collaborative storage folders to volumes with the largest percentage of free space. For example, if you have two target paths listed and target path 1 is to a 10 TB drive that has 30 percent free space, and target path 2 is to a 500 GB drive with 40 percent free space, the collaborative storage folders are created using target path 2, even though target path 1 has more absolute available disk space. You should be cautious when using this option with target paths to volumes of different sizes.
Leveling Algorithm: Use this option to structure the collaborative storage folders so that they are categorized by the Group object’s first or last name through a subordinate folder. For example, if you choose , all collaborative storage folders are grouped by first name, with individual folders for each first letter.
Maximum Unreachable Paths: If you have a substantial number of target paths listed on this page, this field lets you indicate the number of target paths Novell Storage Manager accesses to attempt to create a collaborative storage folder before it suspends the attempt.
-
For each target path that you want to establish, click the + button to access the Path Browser.
-
Browse to the location of the target path you want and click the + button to add the target path to the Selected Paths pane.
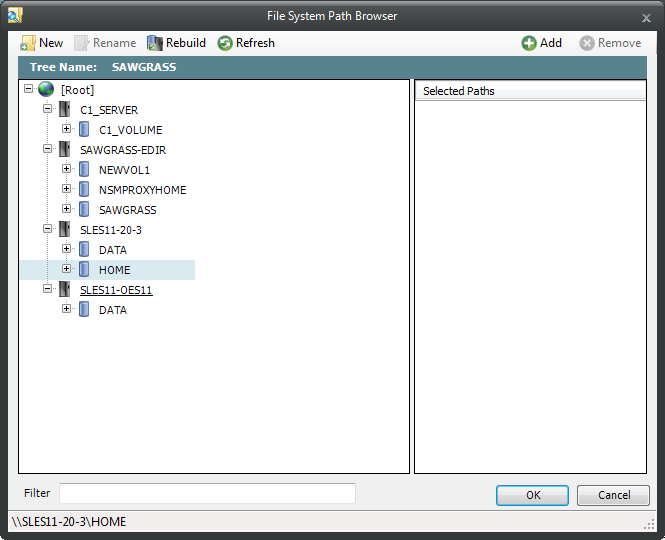
-
Click to save the path.
-
Click to save your settings.
-
Proceed to Section 7.7.5, Setting Group Policy Quota Options.
7.7.5 Setting Group Policy Quota Options
This page lets you establish storage quota for the collaborative storage folder. Until quota management is established, a collaborative storage area has unlimited storage. Quota management for collaborative storage applies to:
-
The quota for the entire storage folder
-
Quotas for personal folders in the collaborative storage folder
NOTE:In order for the quota to be managed on a personal folder, you must also manage the quota on the -OWNER- or -MEMBER- folder. You can set this in the template through the properties of each folder.
The Quota Options page is also where you establish quota management settings for quota managers. A quota manager is a specified user—for example, a help desk administrator or technical support rep, who is granted the ability to increase quotas without having rights to the file system. Quota management actions are performed through Quota Manager, which is a separate Web browser-based management interface. For more information on Quota Manager, see Section 8.0, Using Quota Manager.
-
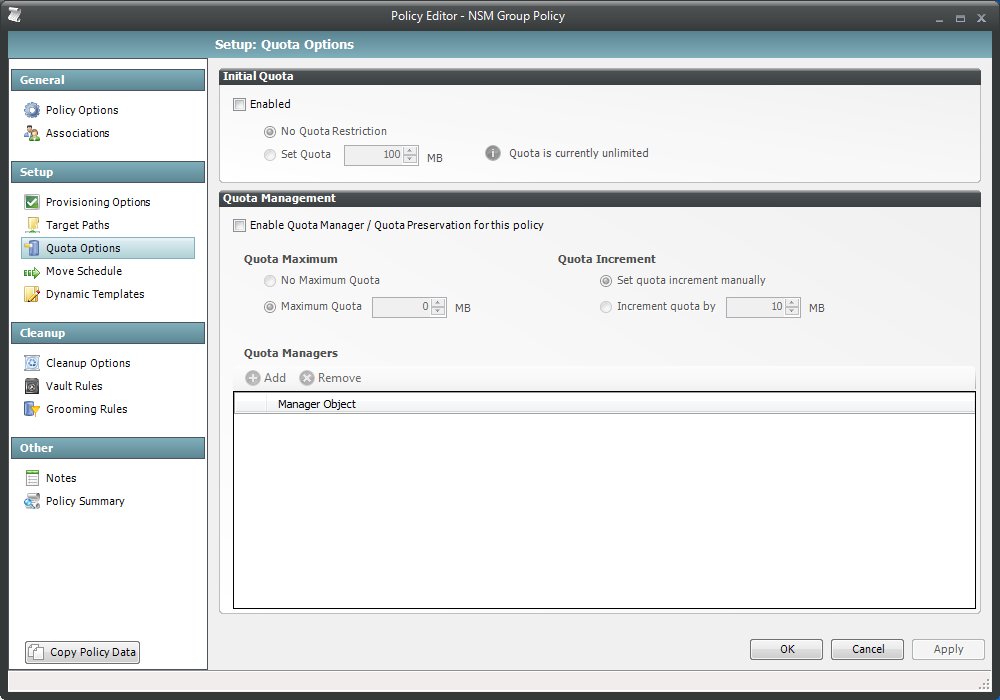
In the left pane, click .
The following page appears:
-
Select the check box to enable quota management.
-
In the field, specify the initial storage quota for the collaborative storage folders.
-
Set up quota managers for this policy by filling in the following fields:
Enable Quota Manager / Quota Preservation for this Policy: Select this check box to enable the Quota Management region of the page.
Quota Maximum: Indicate whether the users associated with this policy will have a maximum quota setting. If so, indicate the maximum quota.
Quota Increment: Indicate whether quota managers will set quotas manually or in set increments. If you select manual increments, the quota manager can increase the quota in any increment until it meets the maximum quota setting. If you select set increments, the quota manager can only increase the quota by the increment setting.
Quota Managers: Click the + button and use the Object Browser to browse to and select a user you want to be a quota manager, then drag the User object to the right pane. Repeat this for each user you want to be a quota manager.
-
Click to save your settings.
-
Proceed with Section 7.7.6, Setting the Group Policy Move Schedule.
7.7.6 Setting the Group Policy Move Schedule
This page lets you use a grid to specify when collaborative storage data can be moved during data migration operations.
By default, all days and times are available for data movement. You might decide that data movement during regular business hours creates unacceptable network performance, and choose to move data after regular business hours.
NOTE:The collaborative storage folder will not move if someone is accessing the folder or there are any open files. Until the folder can be moved, the Move event will be listed as a pending event.
-
In the left pane, click .
-
In the Data Move Schedule grid, click the squares for the day and hour you want to disable for data movement.
-
Click to save your settings.
-
Proceed with Section 7.7.7, Setting Group Policy Dynamic Template Processing.
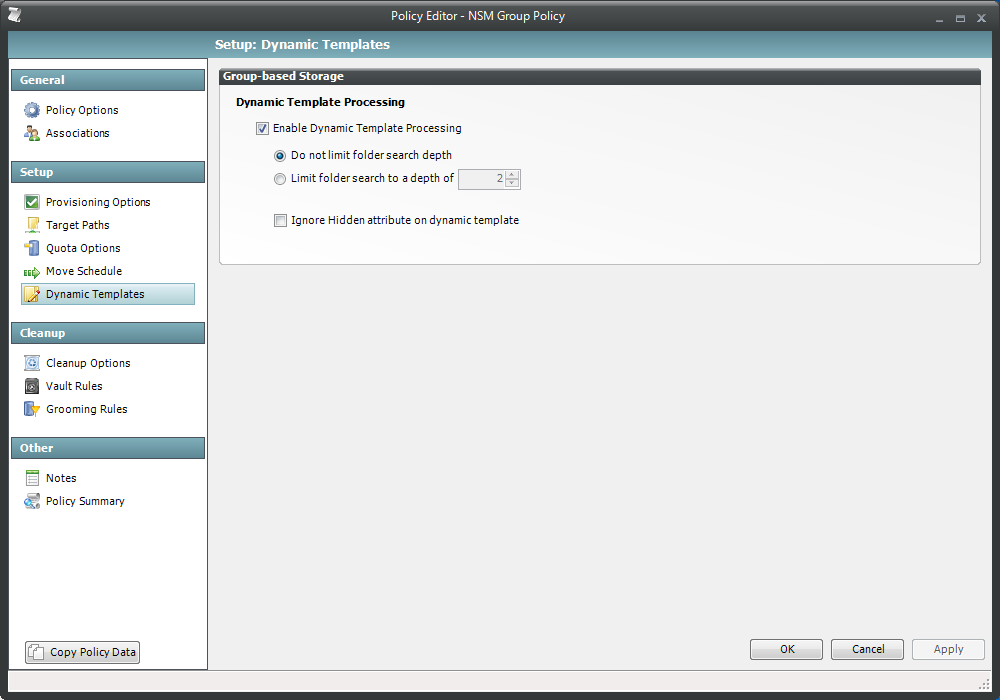
7.7.7 Setting Group Policy Dynamic Template Processing
Dynamic Template Processing is the term used in Novell Storage Manager for creating personal folders in a collaborative storage folder. If Dynamic Template Processing is enabled, creating a -MEMBER- Group object in the collaborative storage file structure automates the creation of a new user’s personal folder when he or she is added to the group.
-
In the left pane, click .
The following screen appears:
-
Do one of the following:
-
If the file structure in your collaborative storage template includes a -MEMBER- folder, Novell Storage Manager automatically creates personal folders within the collaborative storage folder. Leave the check box selected and proceed with Step 3.
-
If your collaborative storage template does not include a -MEMBER- folder, Novell Storage Manager does not create personal folders within the collaborative storage folder. Deselect the check box and proceed with Section 7.7.8, Setting Group Policy Cleanup Options.
-
-
Choose one of the following options:
-
Do not limit folder search depth: The NSM Engine searches through the collaborative storage folder looking for -GROUP-, -OWNER-, and -MEMBER- folders. Depending on the number of folders in the collaborative storage folder, this can take significant time. It is therefore best to not select this option.
-
Limit folder search to a depth of: If you know the level where the -MEMBER- folder is structured in your collaborative storage template, you can select this option and indicate the level.
For example, in the Sample Classroom Collaborative Storage Template in Figure 7-1, the -MEMBER- folder is located four levels down.
-
-
Indicate whether to hide the folders named -MEMBER, -OWNER-, and -GROUP-, objects by leaving the check box selected to hide the objects, or deselecting the check box to display the objects.
Hiding the folders might prevent the folders from being deleted by an administrator who doesn’t know why they are there. Leaving this check box selected displays all personal folders within the collaborative storage folder except for the hidden objects.
-
Click to save your settings.
-
Proceed with Section 7.7.8, Setting Group Policy Cleanup Options.
7.7.8 Setting Group Policy Cleanup Options
This page lets you enable and specify cleanup rules for the Group policy. Options for cleanup include deleting a collaborative storage folder after a set number of days following the removal of the associated Group object from eDirectory, or vaulting (rather than deleting) the collaborative storage folder.
-
In the left pane, click
-
Enable storage cleanup by filling in the following fields:
Enable: Select this check box to enable storage cleanup rules.
Cleanup storage: Specify the number of days a collaborative storage folder remains after the associated Group object is removed from eDirectory.
-
Enable vaulting on cleanup by filling in the following fields:
Enable: Select this check box to enable vaulting on cleanup rules.
Vault Path: Click to browse and select the volume where you want the collaborative storage folders vaulted after cleanup.
When you indicate this path, it also appears in the field of the Grooming Rules page, because grooming rules and vault on cleanup rules share the same vault path.
-
Click to save the settings.
-
Proceed with Section 7.7.9, Setting Group Policy Vault Rules.
7.7.9 Setting Group Policy Vault Rules
When a Group object is removed from eDirectory, you can have Novell Storage Manager vault the contents of the associated collaborative storage folder from a primary storage device to a less expensive secondary storage device. Novell Storage Manager lets you specify what to vault or delete by using vault rules. For example, you might want to remove all TMP files before vaulting the collaborative storage folder. Or, you might want to vault only a single folder, such as Final Proposal and nothing else in the other folders. You accomplish all of this through settings in the Vault Rules Editor.
-
In the left pane, click .
The field displays the vault path that you established when you set up collaborative storage cleanup rules.
-
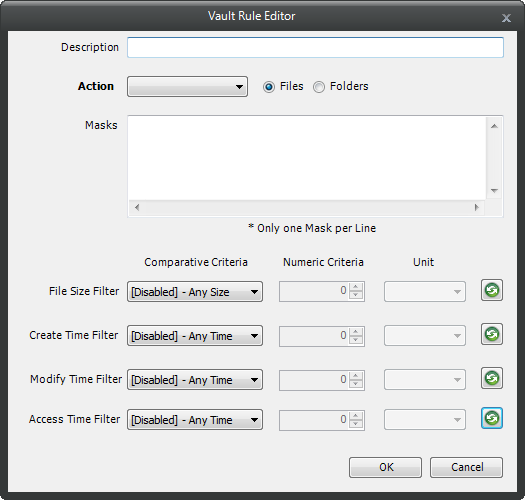
Click the + button to bring up the Vault Rules Editor.
-
In the field, specify a description of the vault rule.
For example, “Files to delete before vaulting,” or “Files to vault.”
-
Fill in the following fields:
Action: Select whether this vault rule deletes or vaults.
Be aware that if you select , only the files or folders that you list in the text box are vaulted and the remainder of the home folder content is deleted. Conversely, if you select , only the files or folders that you list in the text box are deleted, and everything else is vaulted.
Files: If the vault rule you are creating will vault or delete content at the file level, leave the option selected.
Folders: If the vault rule you are creating will vault or delete content at the folder level, select the option.
Selecting disables the filter settings in the lower portion of the Vault Rules Editor.
Masks: List the files or folders you want to be vaulted or deleted, according to what is indicated in the drop-down menu.
File or folder names can contain an asterisk.
-
(Conditional) If the vault rule you are creating is specific to files, complete the applicable filter settings.
Leaving the setting as vaults or deletes all file types listed in the text box, according to what is indicated in the drop-down menu. Choosing any of the other options from the drop-down menu lets you indicate files to delete or vault according to size, when created, when last modified, and when last accessed.
-
Click to save the vault rule.
-
If necessary, create any needed additional vault rules by repeating the procedures above.
-
Proceed with Section 7.7.10, Setting Group Policy Grooming Rules.
7.7.10 Setting Group Policy Grooming Rules
Grooming rules in Novell Storage Manager specify the file types that you do not want network users storing in their home folders or collaborative storage areas. Examples of these might be MP3 and MP4 files, MOV files, and many others. You use the Grooming rule to specify whether to delete or vault a groomed file.
Grooming takes place as a Management Action that is run by the administrator. A Management Action is a manual action that is enacted through NSMAdmin. For more information, see Section 9.1.4, Management Actions.
-
In the left pane, click .
The field displays the vault path that you established when you set up cleanup rules.
-
Click the + button to bring up the Grooming Rules Editor.
-
In the field, specify a description of the grooming rule.
For example, “Files to groom in Community Outreach Group.”
-
Fill in the following fields:
Action: Select whether this grooming rule will delete or vault groomed files.
Files: If the grooming rule you are creating will vault or delete content at the file level, leave the option selected.
Folders: If the grooming rule you are creating will vault or delete content at the folder level, select the option.
Selecting Folders disables the filter settings in the lower portion of the Grooming Rules Editor.
Masks: List the files or folders you want to be vaulted or deleted, according to what is indicated in the drop-down menu.
File or folder names can contain an asterisk.
-
(Conditional) If the grooming rule you are creating is specific to files, complete the applicable filter settings.
Leaving the setting as vaults or deletes all file types listed in the text box, according to what is indicated in the drop-down menu. Choosing any of the other options from the drop-down menu lets you indicate files to delete or vault according to size, when created, when last modified, and when last accessed.
-
Click to save the grooming rule.