3.3 Install a New Instance of SQL Server
NOTE:These procedures and displayed interface are specific to SQL Server 2014. Procedures and interface will vary based on the version of SQL Server you are using.
-
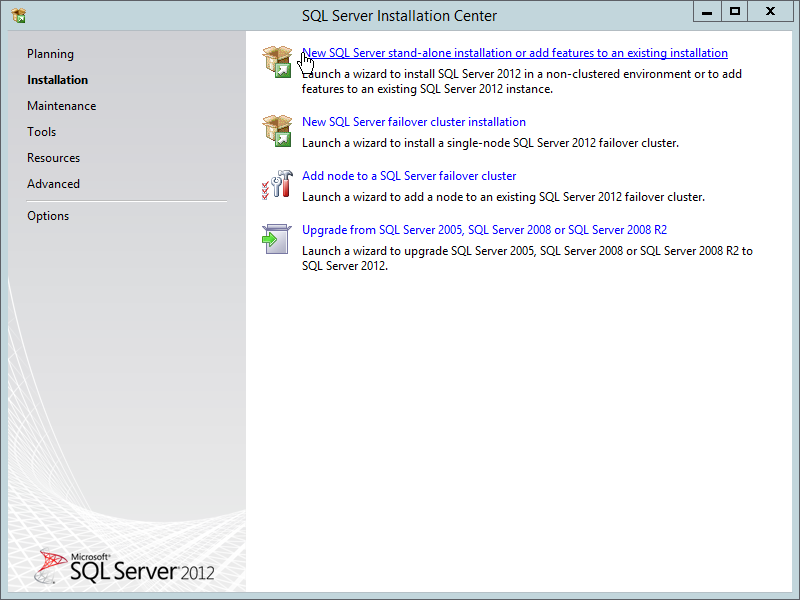
From the Microsoft SQL Server ISO, double-click setup.exe.
-
In the SQL Server Installation page, click .
-
Select .
-
In the Product Key page, enter your product key, then click .
-
In the License Terms page, accept the license terms, then click .
-
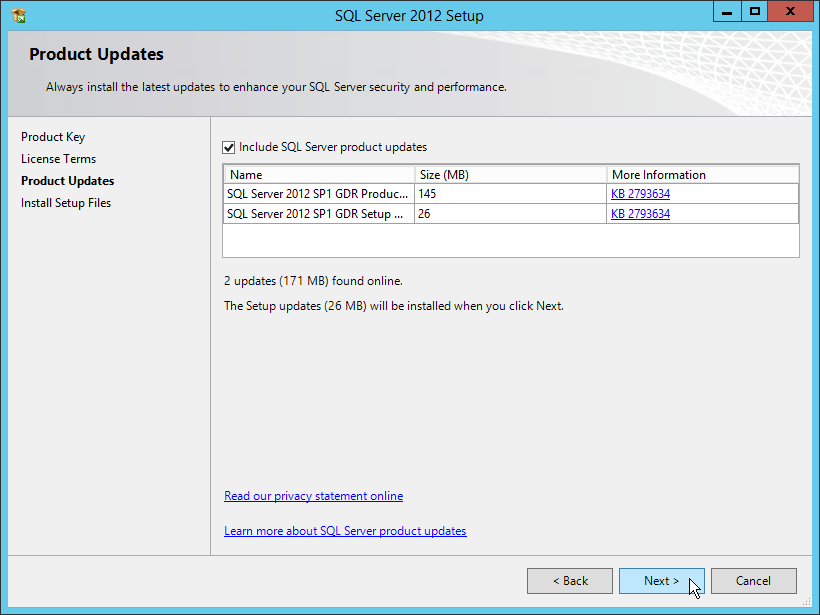
In the Product Updates Page, include all Microsoft SQL Server product updates, then click .
The Install Rules operation is run.
If there are any errors, address them accordingly.
-
Click .
-
In the Setup Role page, select and click .

-
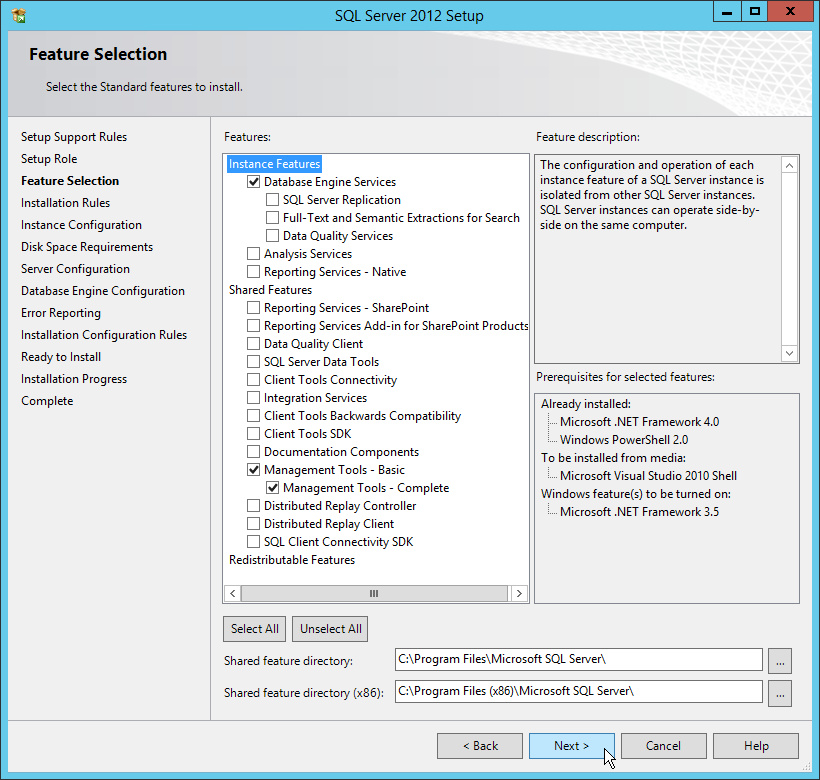
In the Feature Selection page, select the following check boxes:
-
-
Click .
The Feature Rules operation is run.
-
When the operation has completed, click .
-
In the Instance Configuration page, specify a named instance, then click .

-
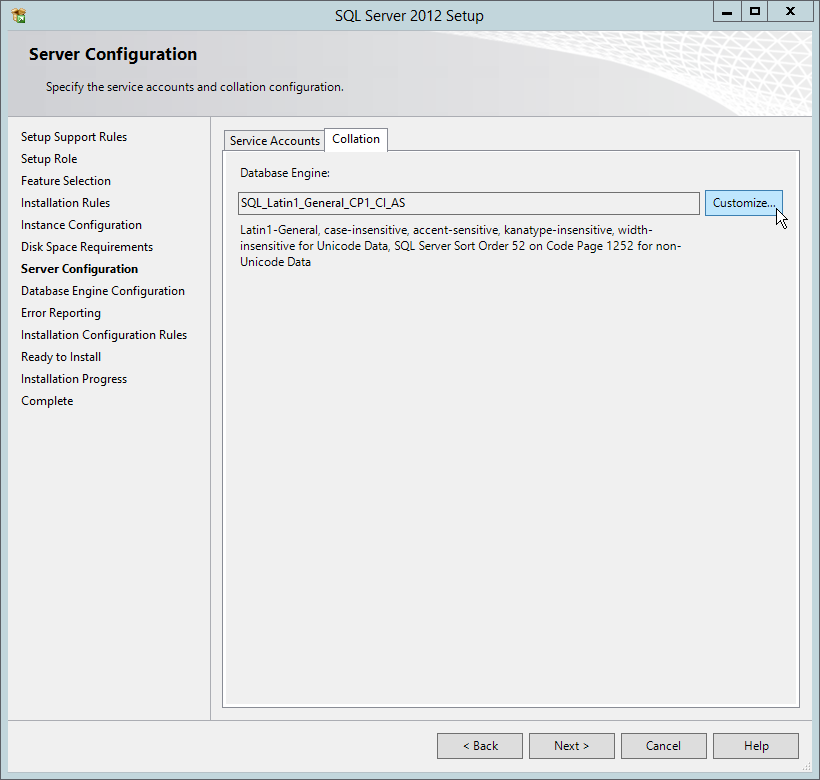
In the Server Configuration page, click the tab.
-
On the tab of the Server Configuration page, accept the service account configurations, then click the tab.

-
Click .
-
Click the option.
-
From the drop-down menu, select an acceptable collation and settings for your locale.
For example, in North America, an acceptable collation would be with the check box selected.
We recommend that you select a collation that aligns with the Windows locale of the server where the Engine is installed.
For more information on collation and locales, refer to this Microsoft document:http://technet.microsoft.com/en-us/library/ms175194%28v=sql.105%29.aspx.
-
Click .
-
Click .
-
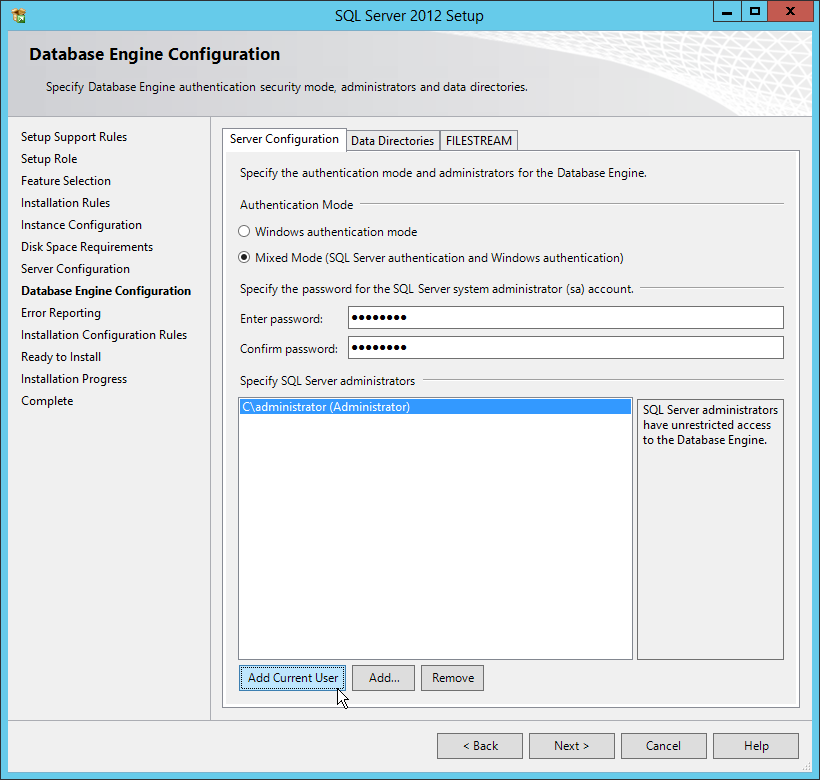
On the Database Engine Configuration page, select the option, enter and confirm the SQL Server administrator password, then click
Novell Storage Manager does not support Windows authentication mode (also known as Integrated Security).
-
Click .
-
Review the data directories that are to be created, then click .
For best performance, the data directories should be located on a dedicated drive or drive array. For other best performance tips, refer to:http://condrey.co/support/bp.
-
Click .
-
Click .
-
When the installation has completed, click to close the wizard.