4.7 Installing and Configuring NSMAdmin
NSMAdmin is the administrative interface for Novell Storage Manager. It can be installed on:
-
Windows 8
-
Windows 7
-
Windows Vista
-
Windows Server 2012, 2008, or 2003
-
At the root of the NSM-EDIR_4_0_0.iso image, double-click the Windows folder.
-
Click .
-
When asked if you want to save or run the file, save the file to the hard drive of a computer where you will administer Novell Storage Manager.
-
From the saved location, launch the NSMAdmin installation file.
-
When you are asked if you want to run this file, click .
An Introduction page appears in the NSMAdmin Installation Wizard.
-
Read the text and click .
-
Accept the license terms and click .
-
Accept the installation path or indicate a new path by using the button.
To review possible locations, you can click to see all available volumes with disk size and disk availability data.
-
Click .
-
If you want to create a shortcut on the desktop, leave the check box selected and click .
NSMAdmin is installed.
-
Leave the check box selected and click .
NSMAdmin is launched.
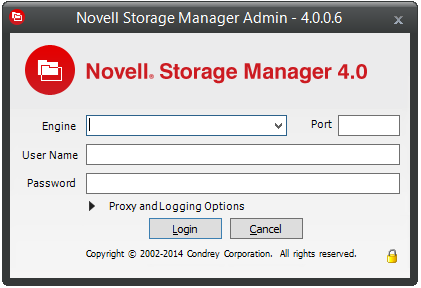
-
In the field, specify the DNS name or IP address.
-
In the field, specify the secure port number.
The default setting is 3009.
-
Specify the username and password.
The user must be a member of the NSMAdmins group to be able to log in.
-
Click .
If you are unable to log in, your proxy settings might be preventing you from doing so. Until you enter a proxy exception in your proxy settings, you can click , select , then click .
The Setup Wizard welcome page appears.
-
Read the text on the page and click .
-
Do one of the following:
-
Click to locate and select the path to the license file
-
Click to obtain an evaluation license
-
-
Click .
-
The following page appears, asking if you want to extend the Novell eDirectory schema.
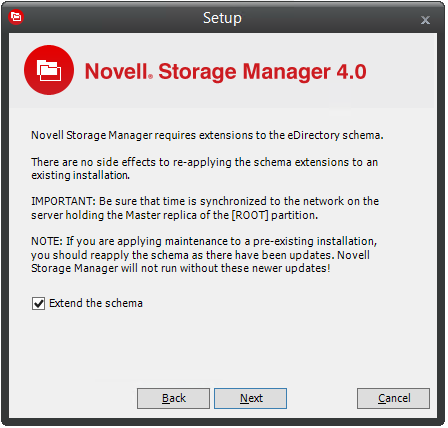
If you plan to manage collaborative storage or auxiliary user storage, you must extend the eDirectory schema.
-
Click .
The following page appears:
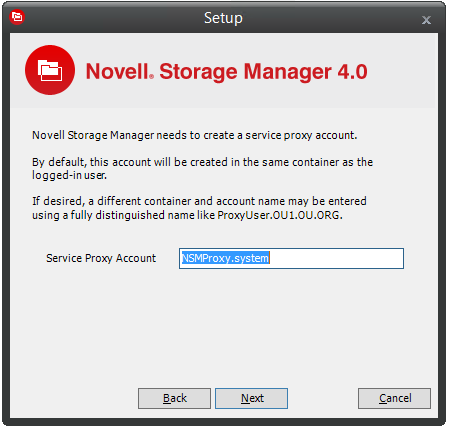
-
Accept the account name that will be created and click .
The following page appears:
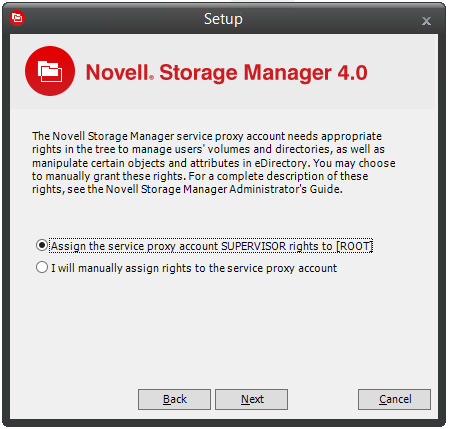
-
Select one of the options and click .
-
Accept or modify the NSM Administrators’ Group name, leave the check box selected, then click .
-
When you are notified that a Proxy Home share will be created on the Engine’s local Proxy Home source path, click .
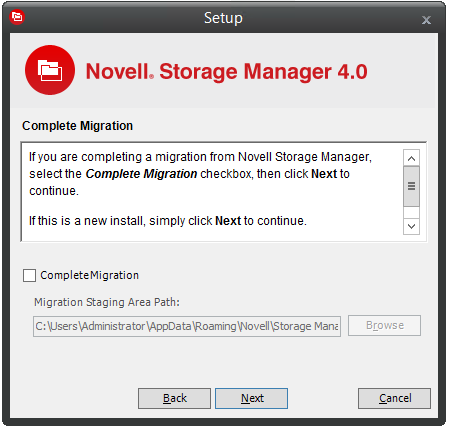
The following page appears:
-
Because this is a new installation and not a migration from an earlier version of Novell Storage Manager, click .
You are informed that Novell Storage Manager needs to initialize the NSM Engine and its subsystems.
-
Click .
-
When you are prompted, enter your password and click .
-
Proceed with Section 4.8, Authorizing the Event Monitor.